
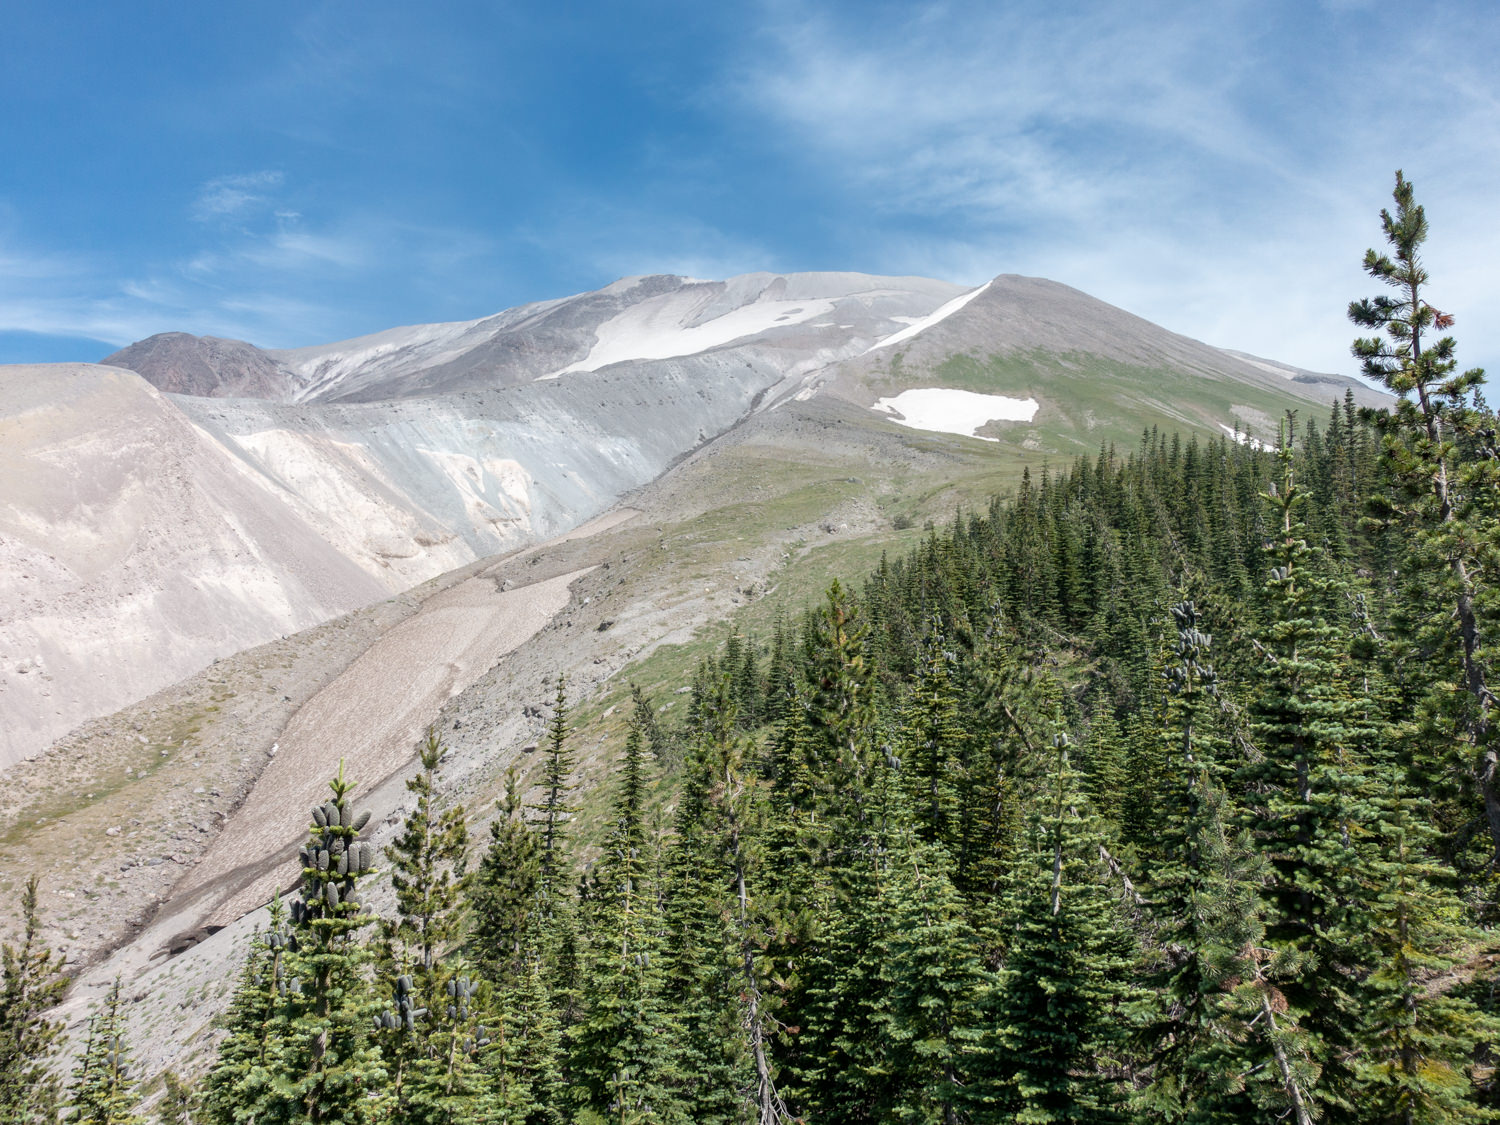
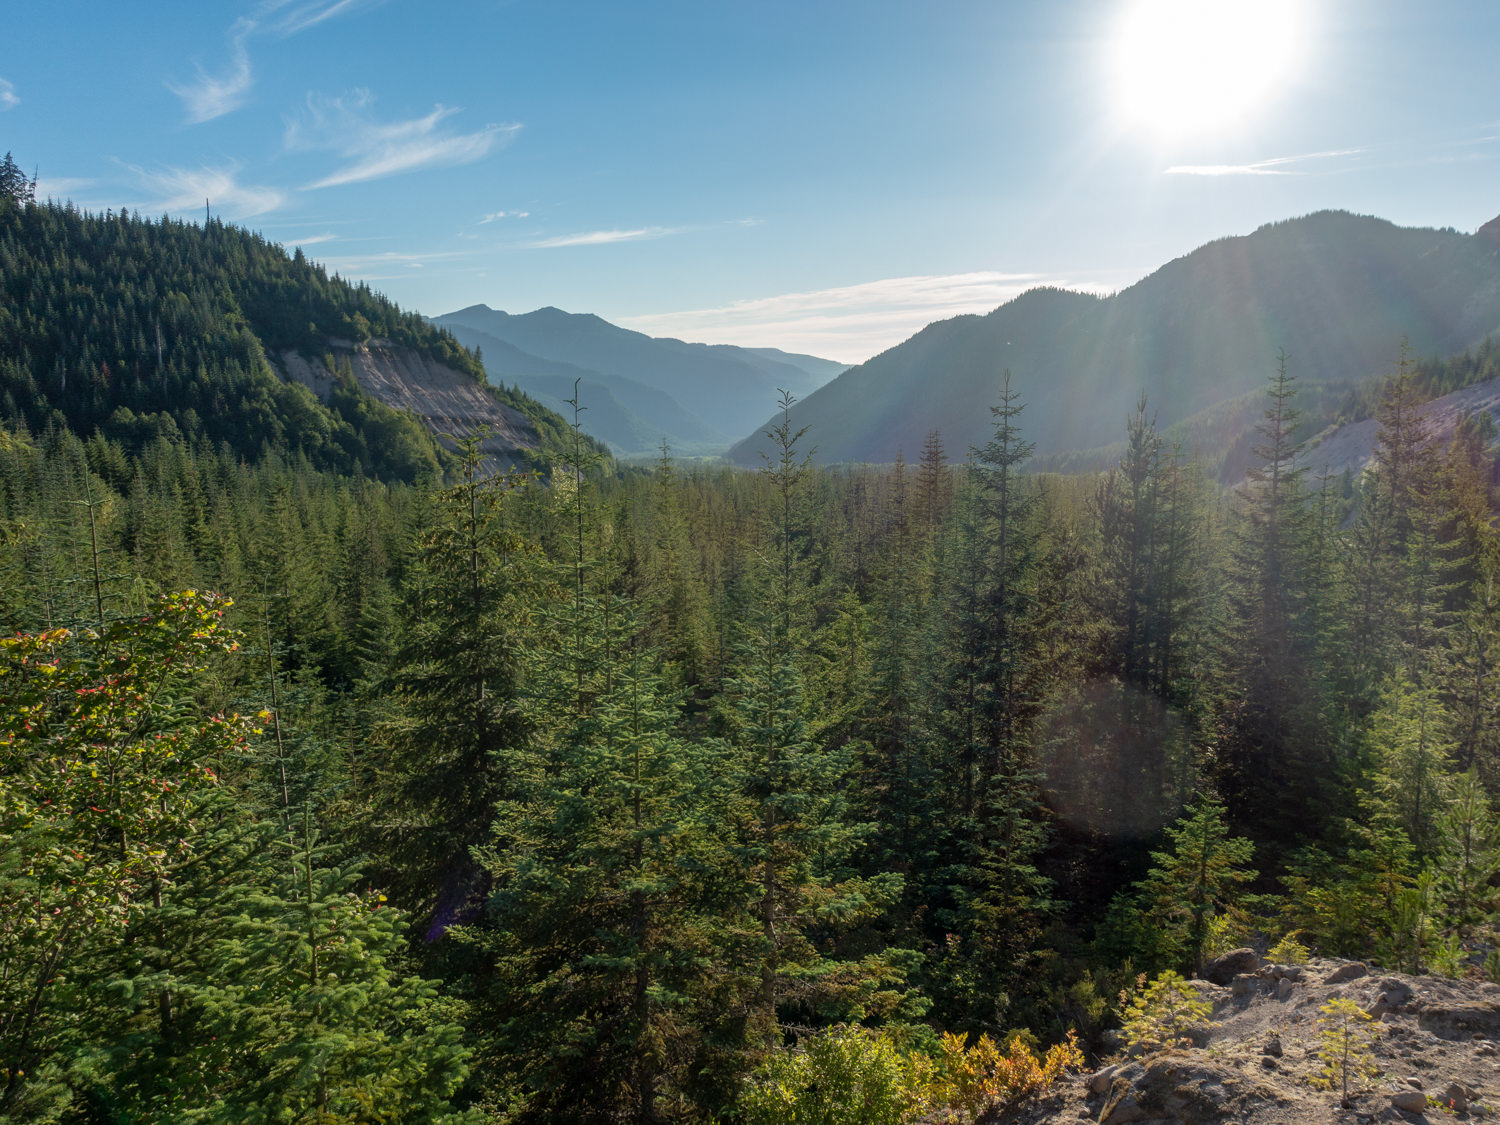
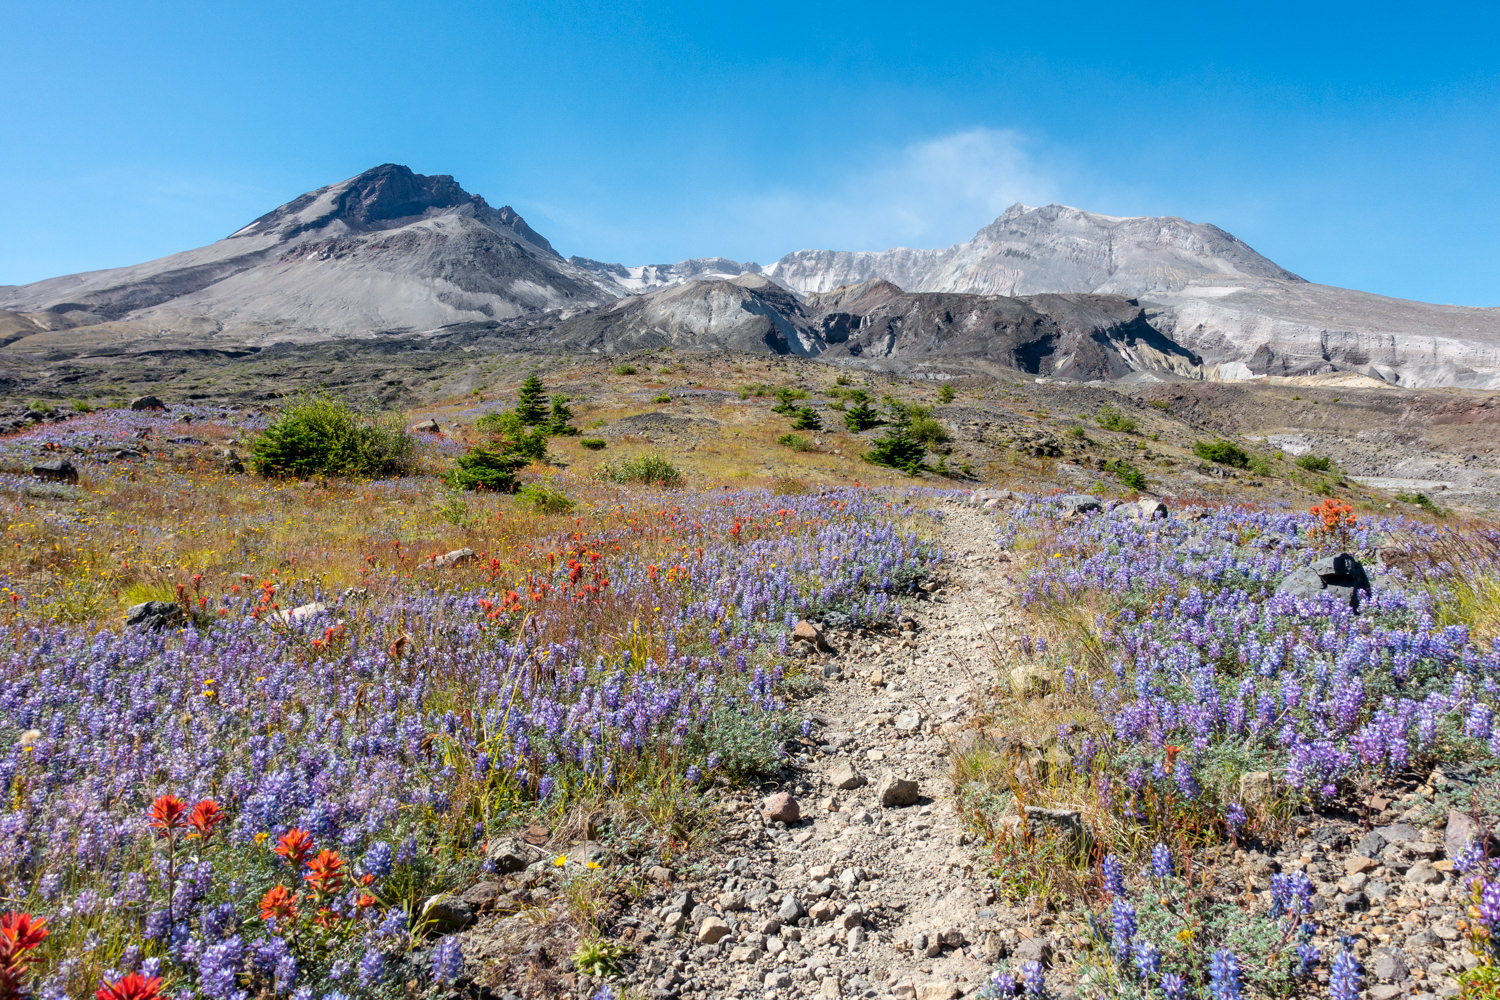
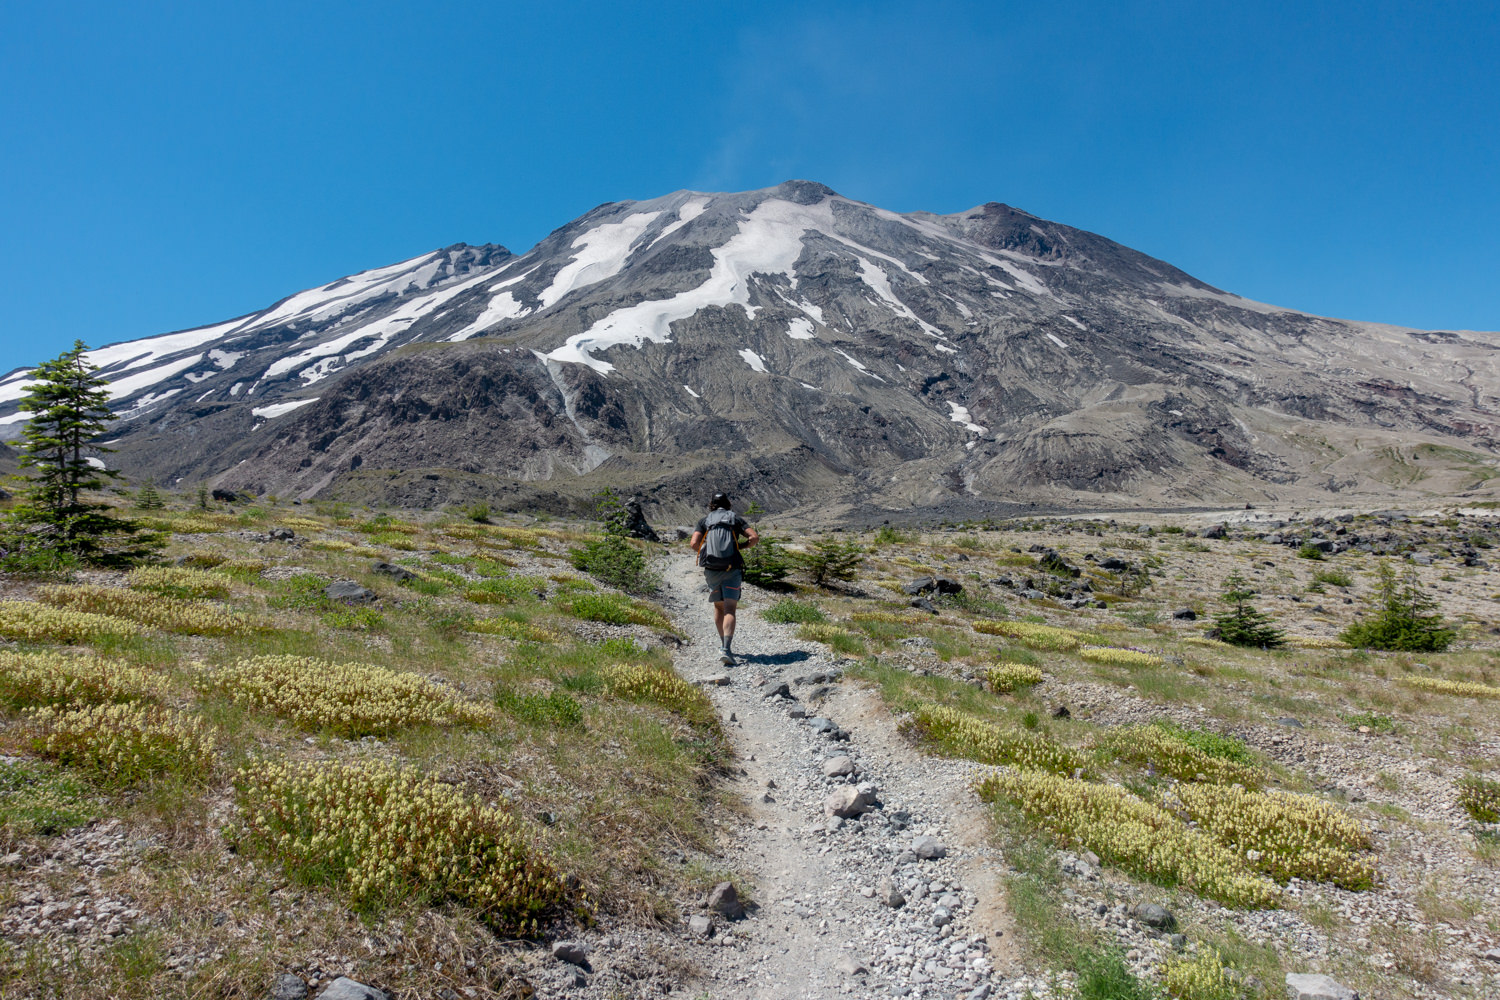
Similar to Rainer’s Wonderland Trail, Adam’s Round-the-Mountain Trail and Hood’s Timberline Trail, the Loowit Trail around Mount St. Helens is nothing short of spectacular. Like the other perimeter loops, the Loowit Trail circumnavigates St. Helens midway between its foothills and erupted summit. If you enjoy solitude, navigation challenges, eye-popping vistas, and fascinating geology, you’ll definitely want to add the Loowit Trail to your list.
That said, the Loowit does have many challenges, and should be considered an experts only route in our opinion. To complete this trail you’ll need keen navigation skills, footwear with excellent traction, and confidence in your ability to cross narrow wash out sections in steep gullies. If you have a fear of heights or any doubts about your trail skills, this likely isn’t the route for you. The Loowit is not an easy trail, but it is an awesome adventure around one of the Pacific Northwest’s most storied volcanoes.
QUICK FACTS
-
Distance: Varies, between 30 and 36, depending on trailhead
-
Days Needed: 2-4 days, depending on itinerary
-
Elevation Gain/Loss: 6,000 feet (1,828 meters)
-
Peak Elevation: 4800 feet (1,463 meters)
-
Best Travel Time: July – October
-
Permits: None, (NW Forest Parking Pass required)
-
Difficulty: Strenuous – experts only, more info below
HIGHLIGHTS
-
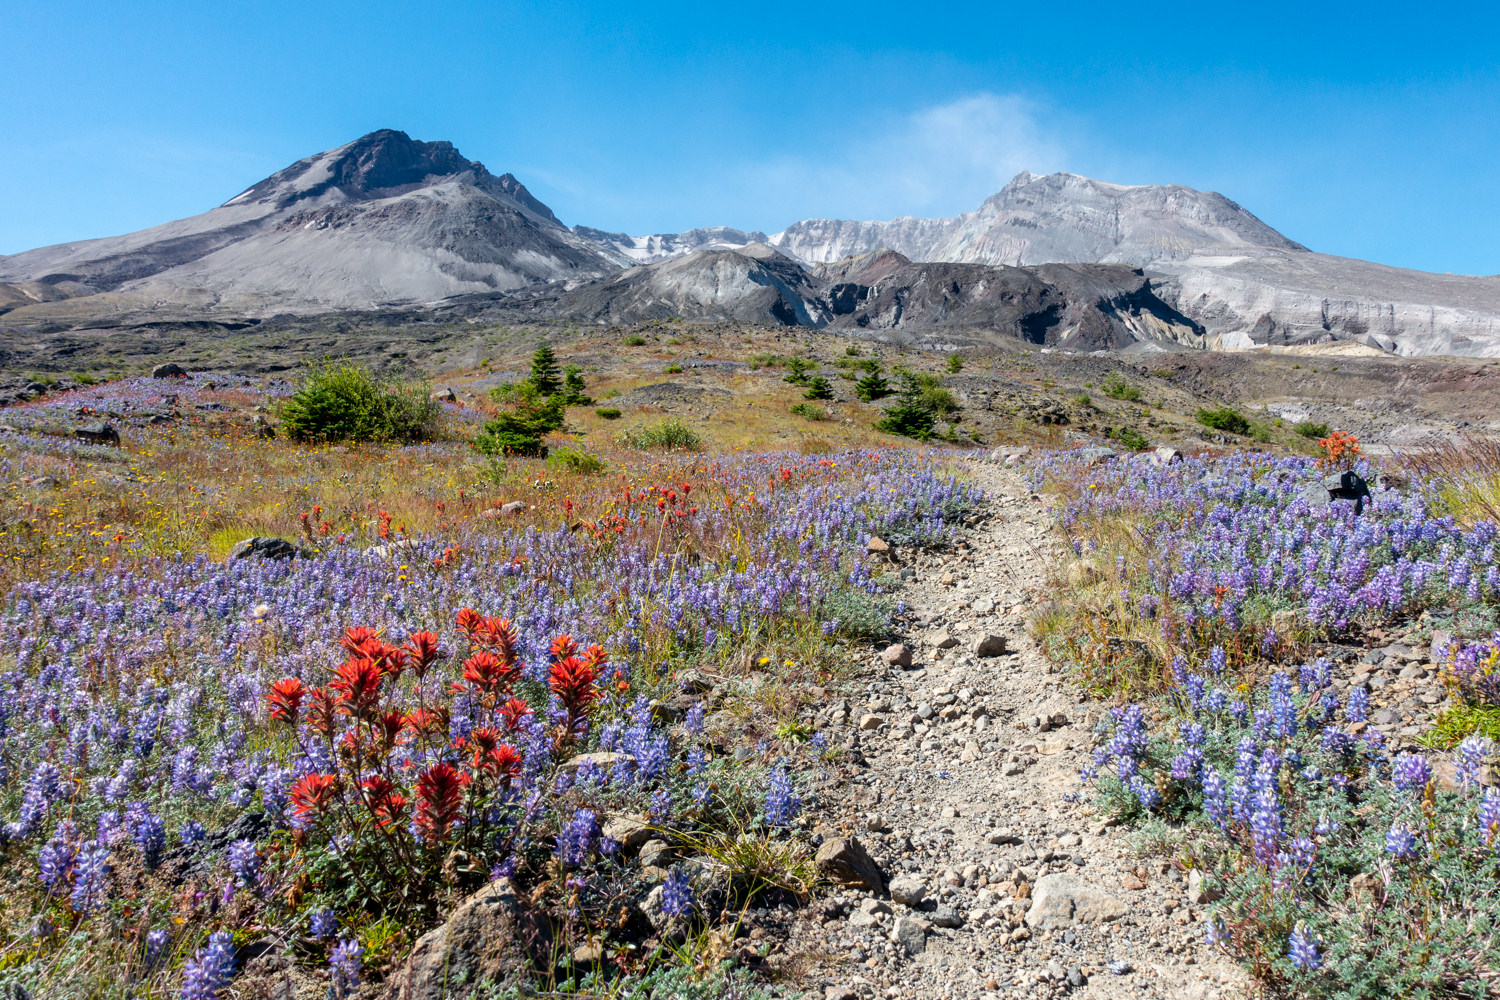
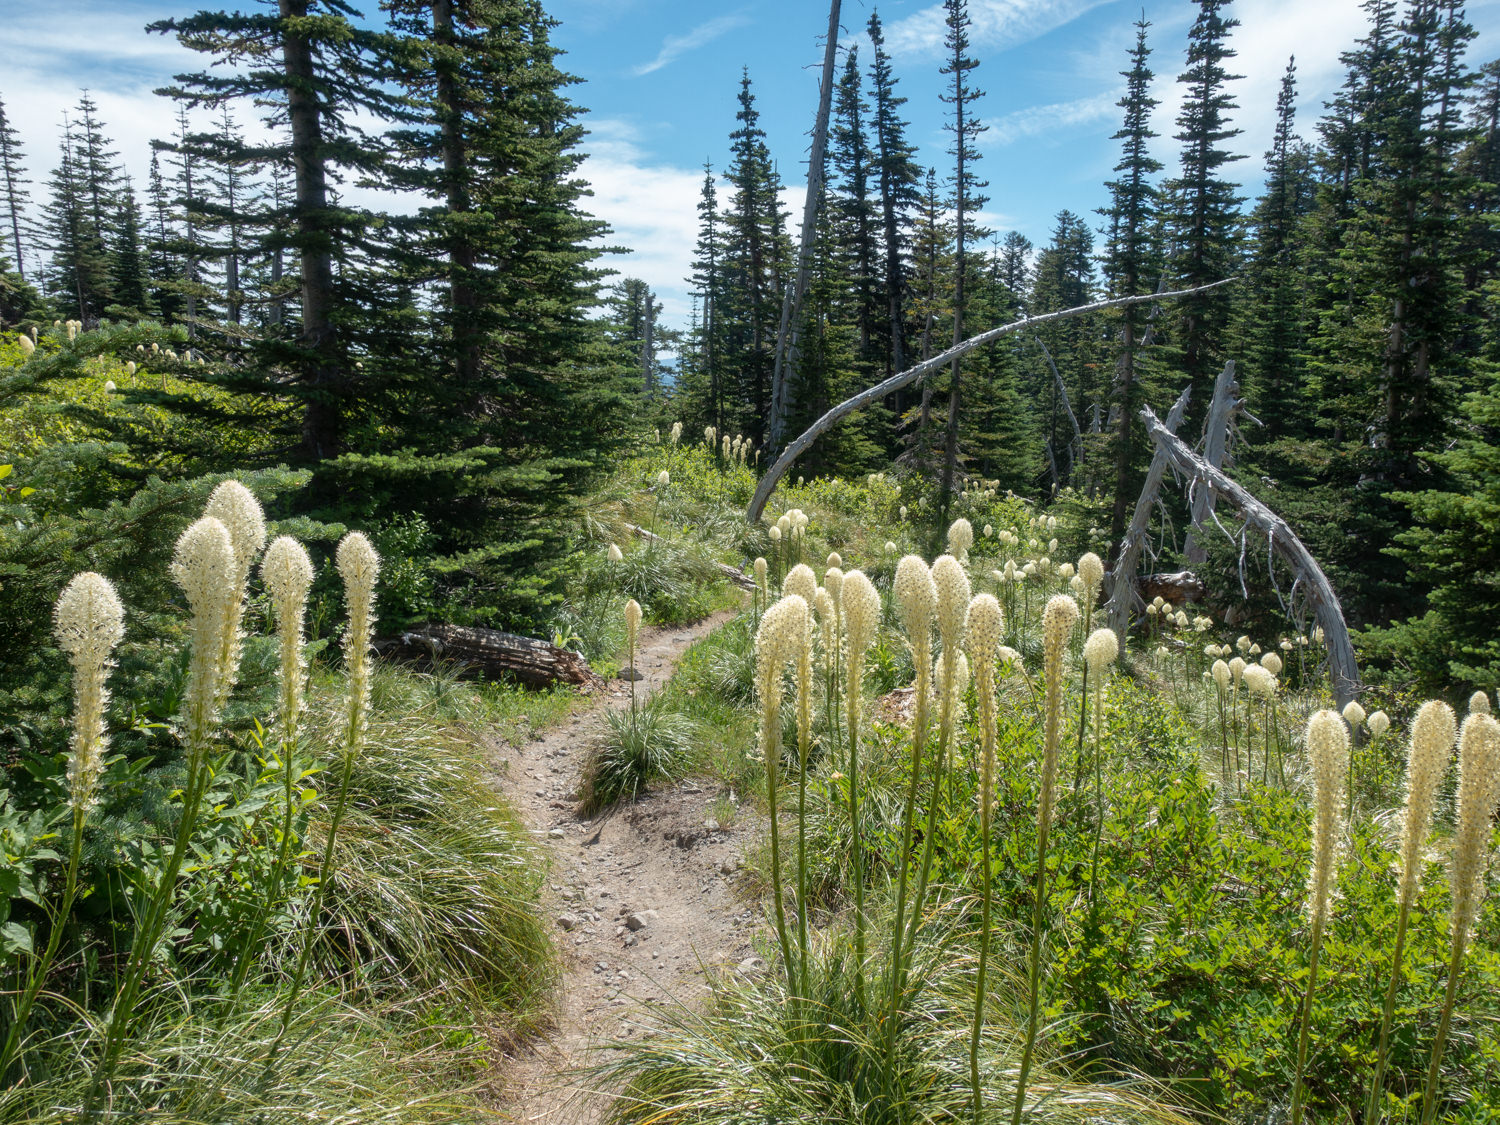
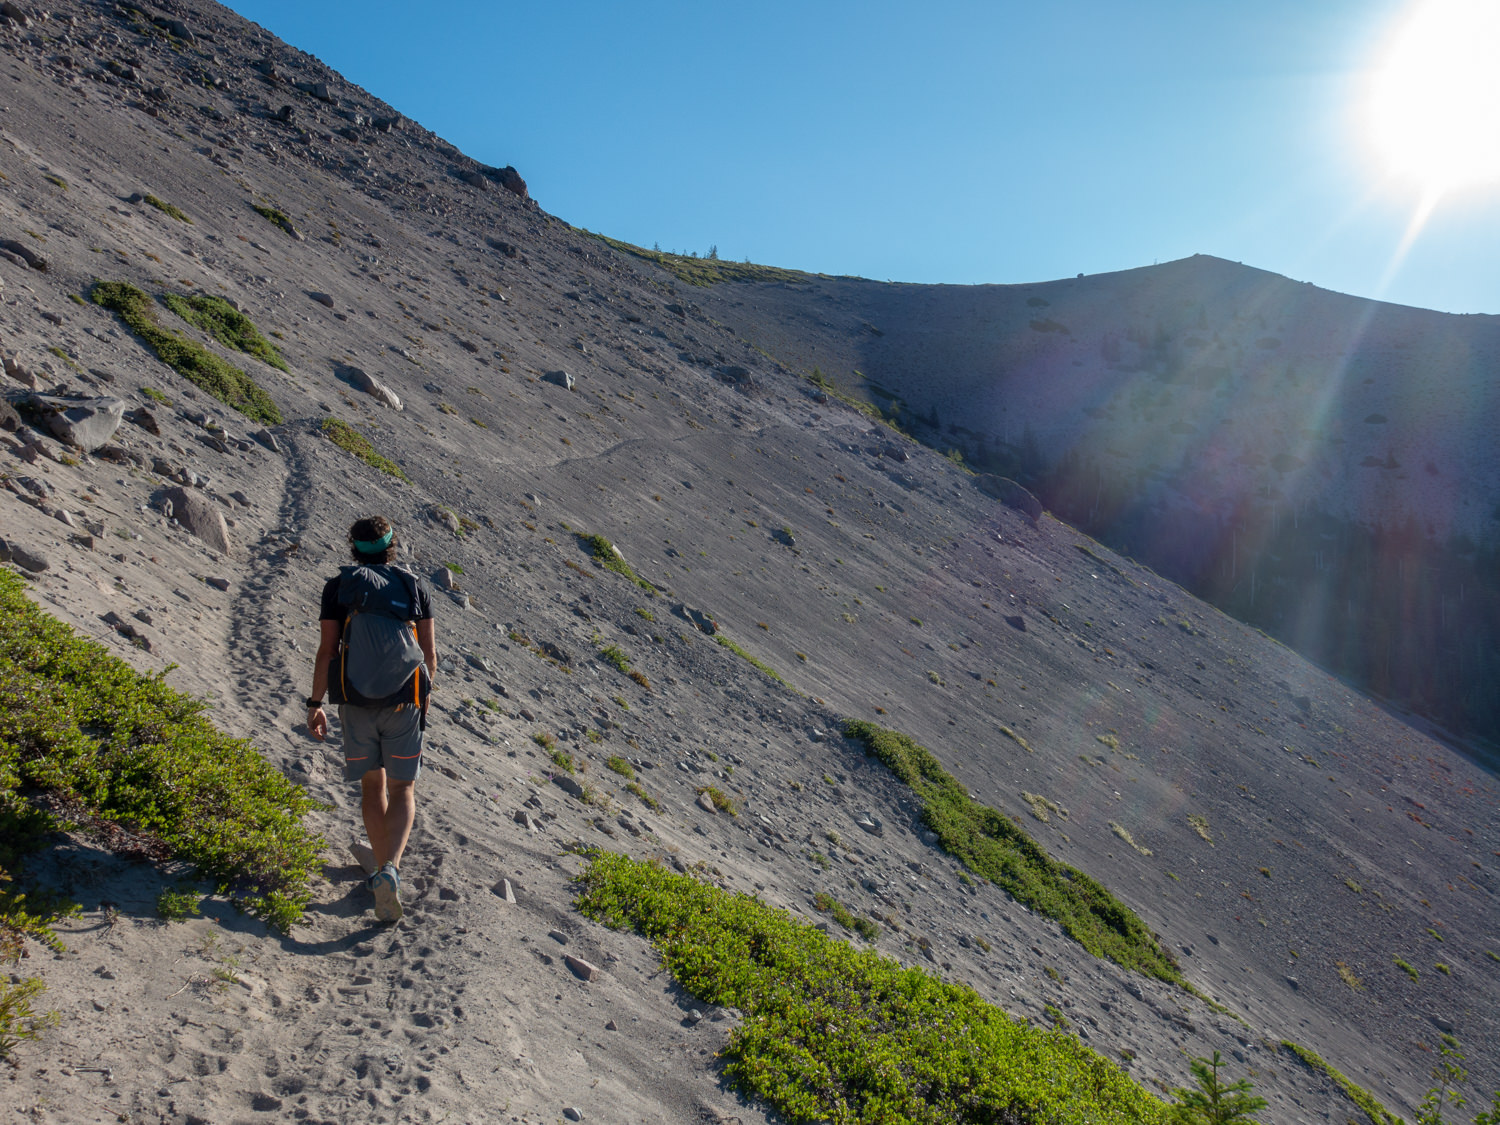
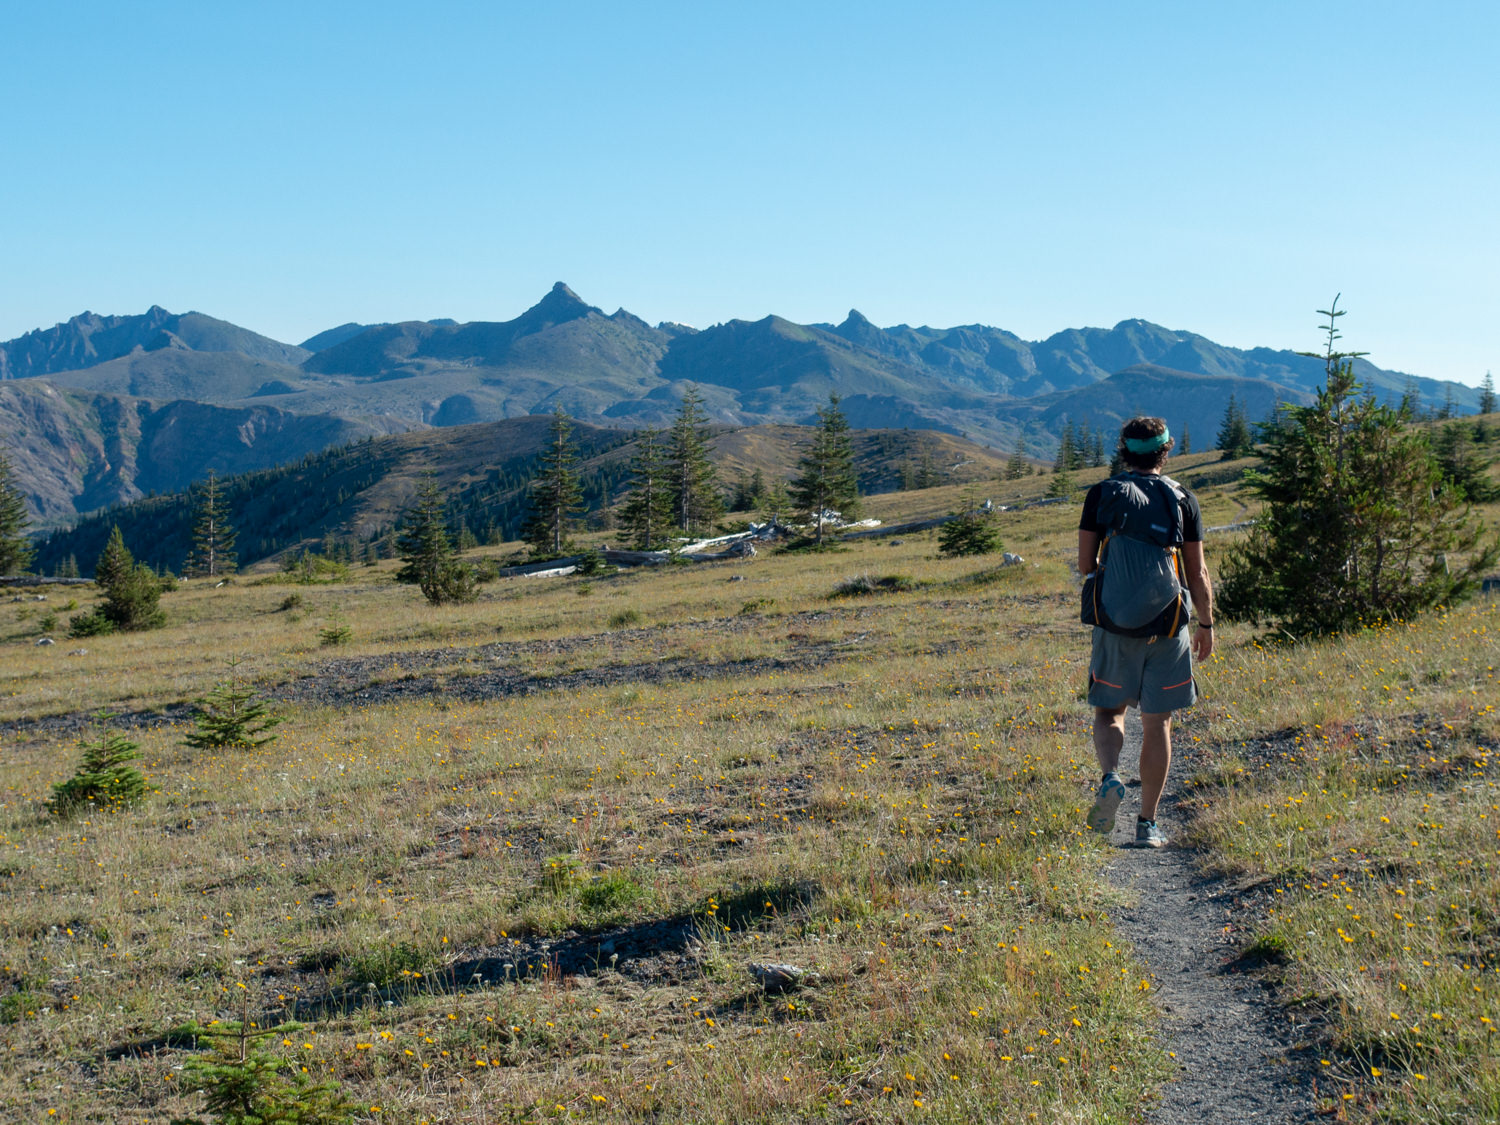
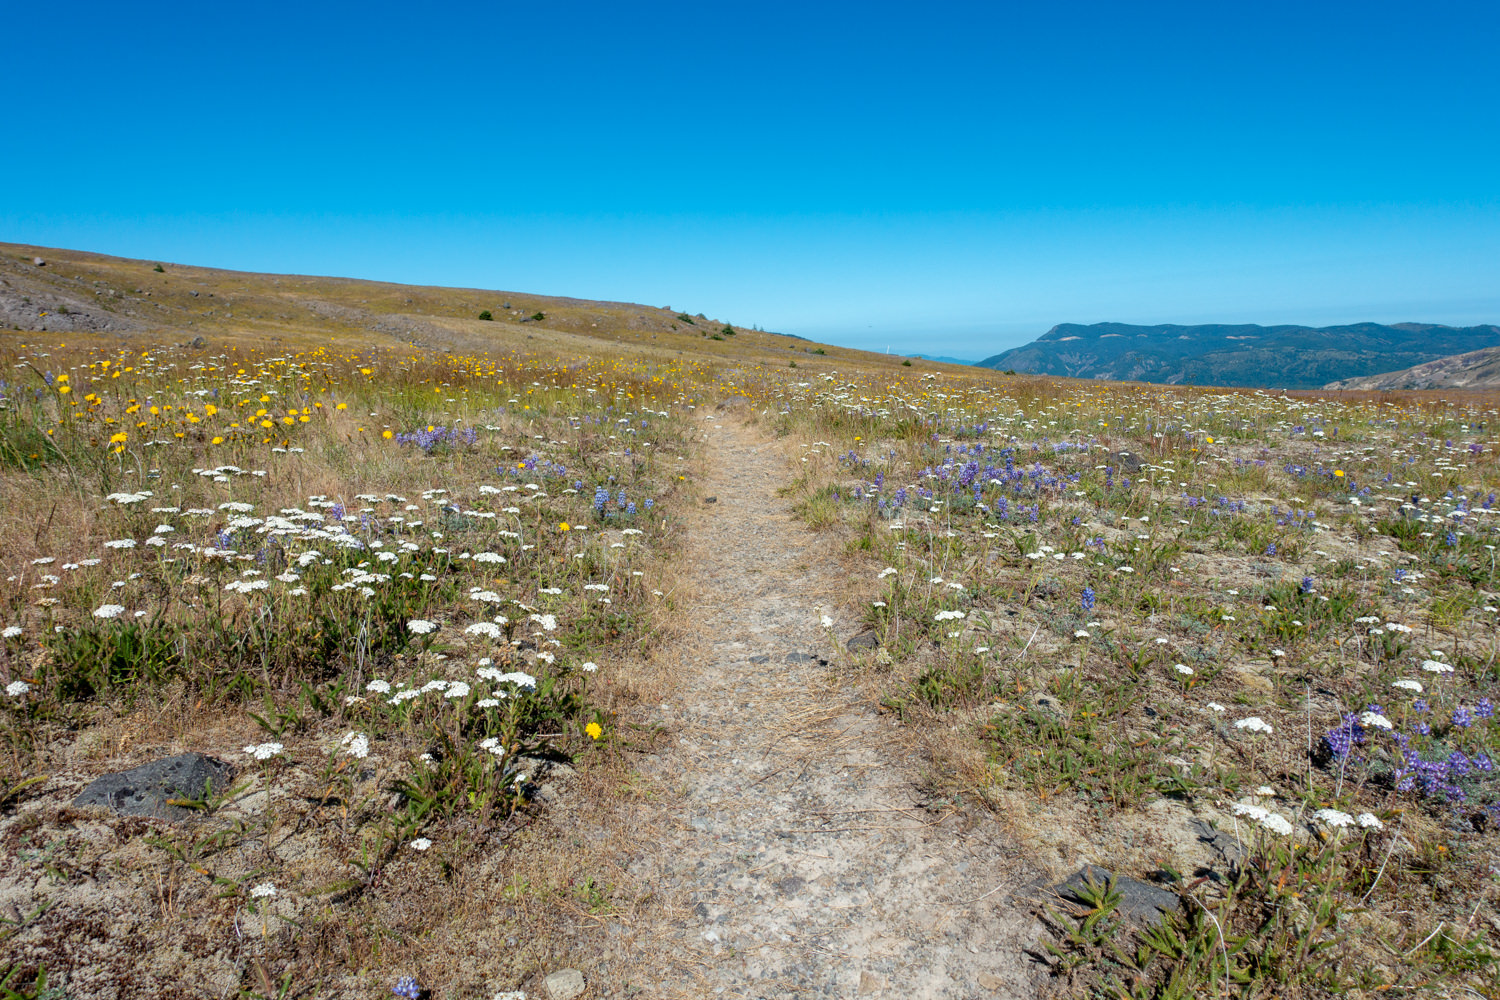
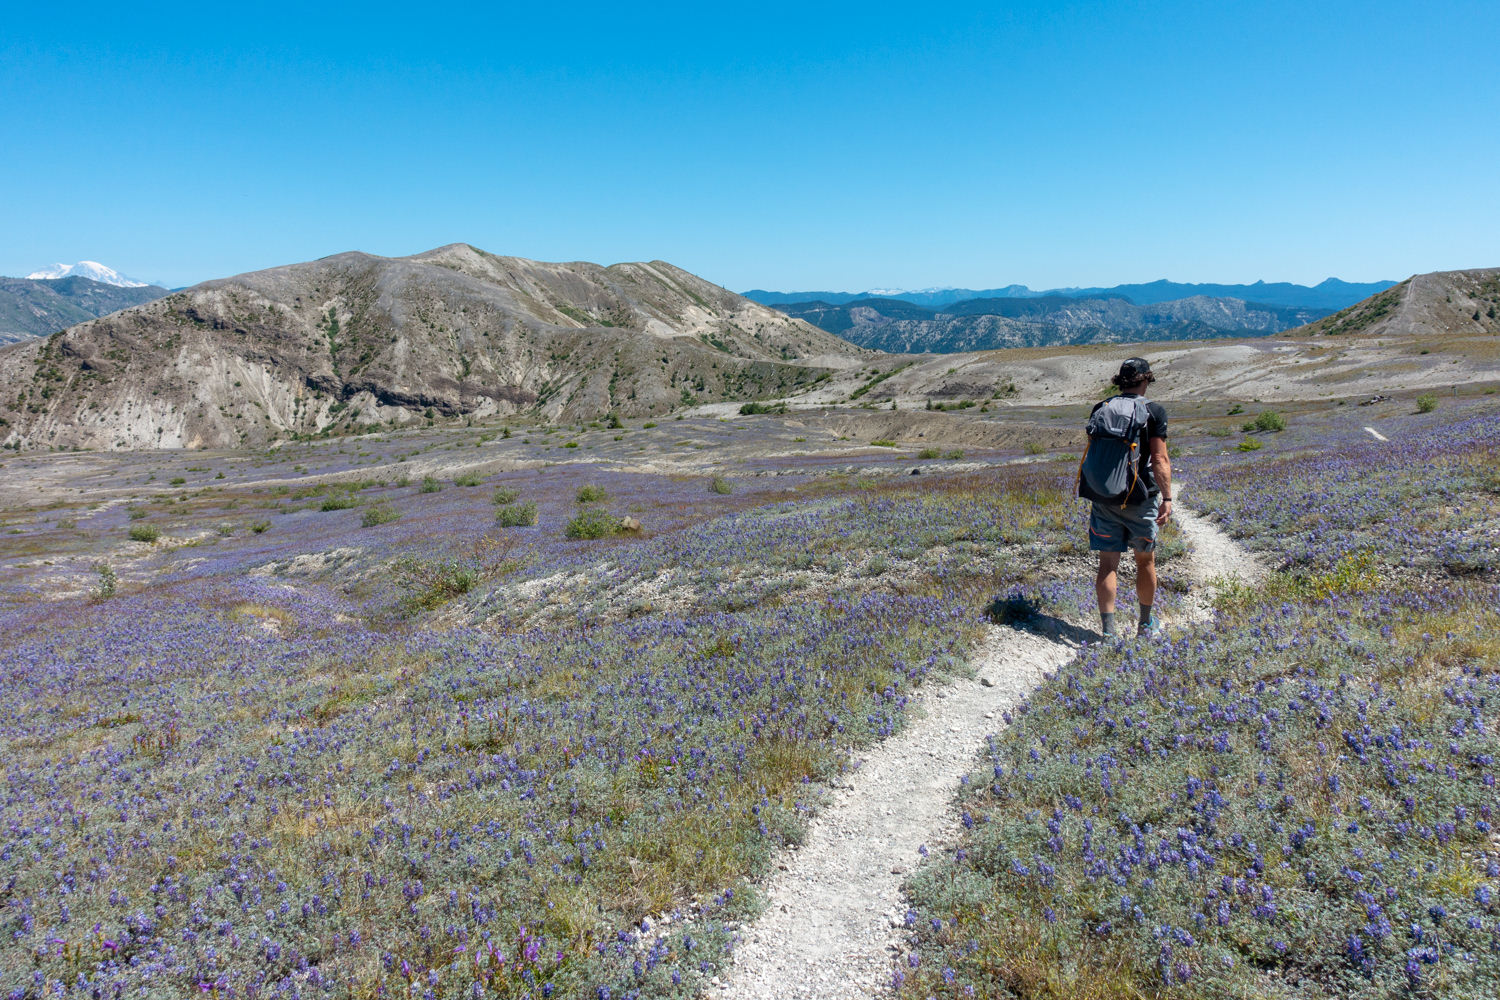
Good portion of hike is above treeline
-
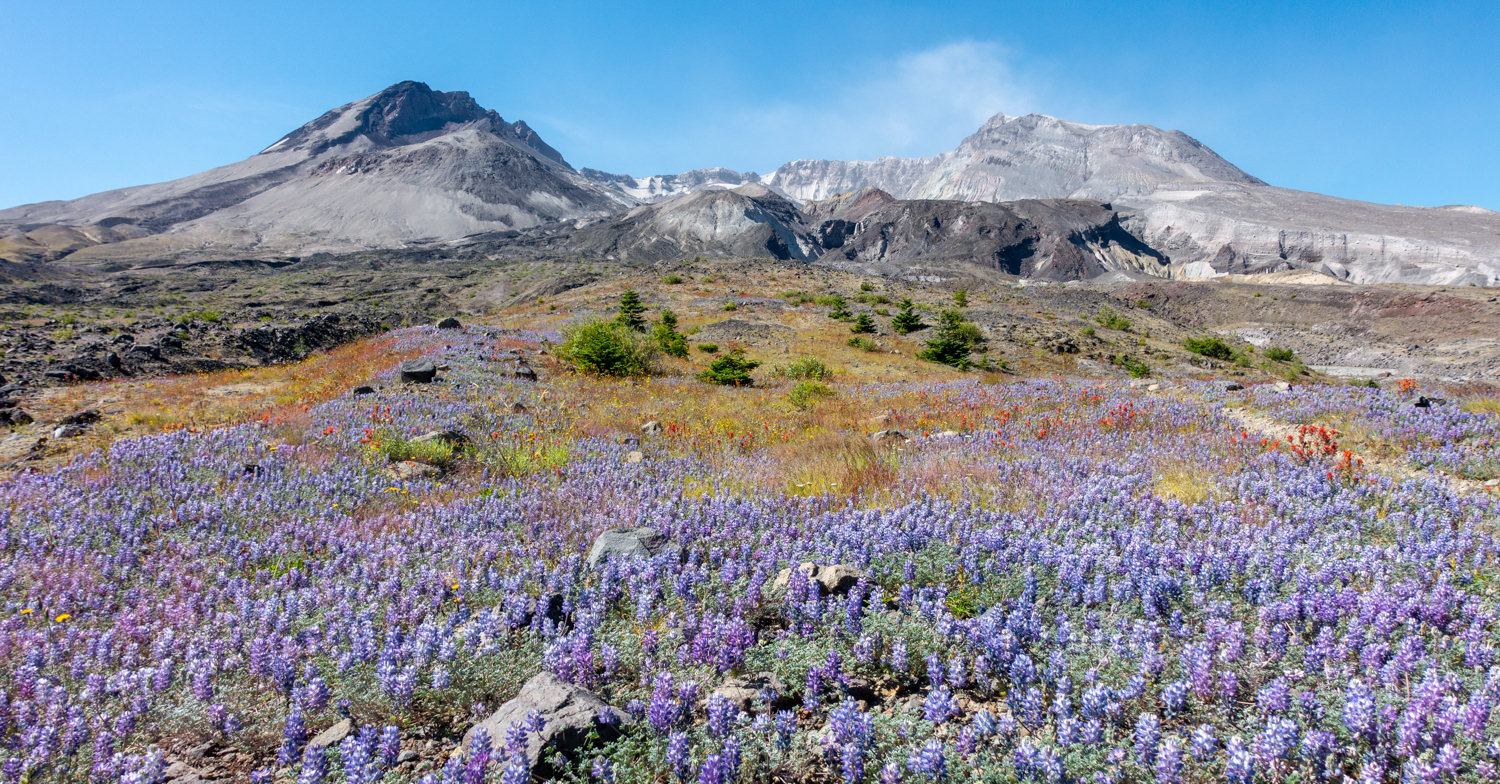
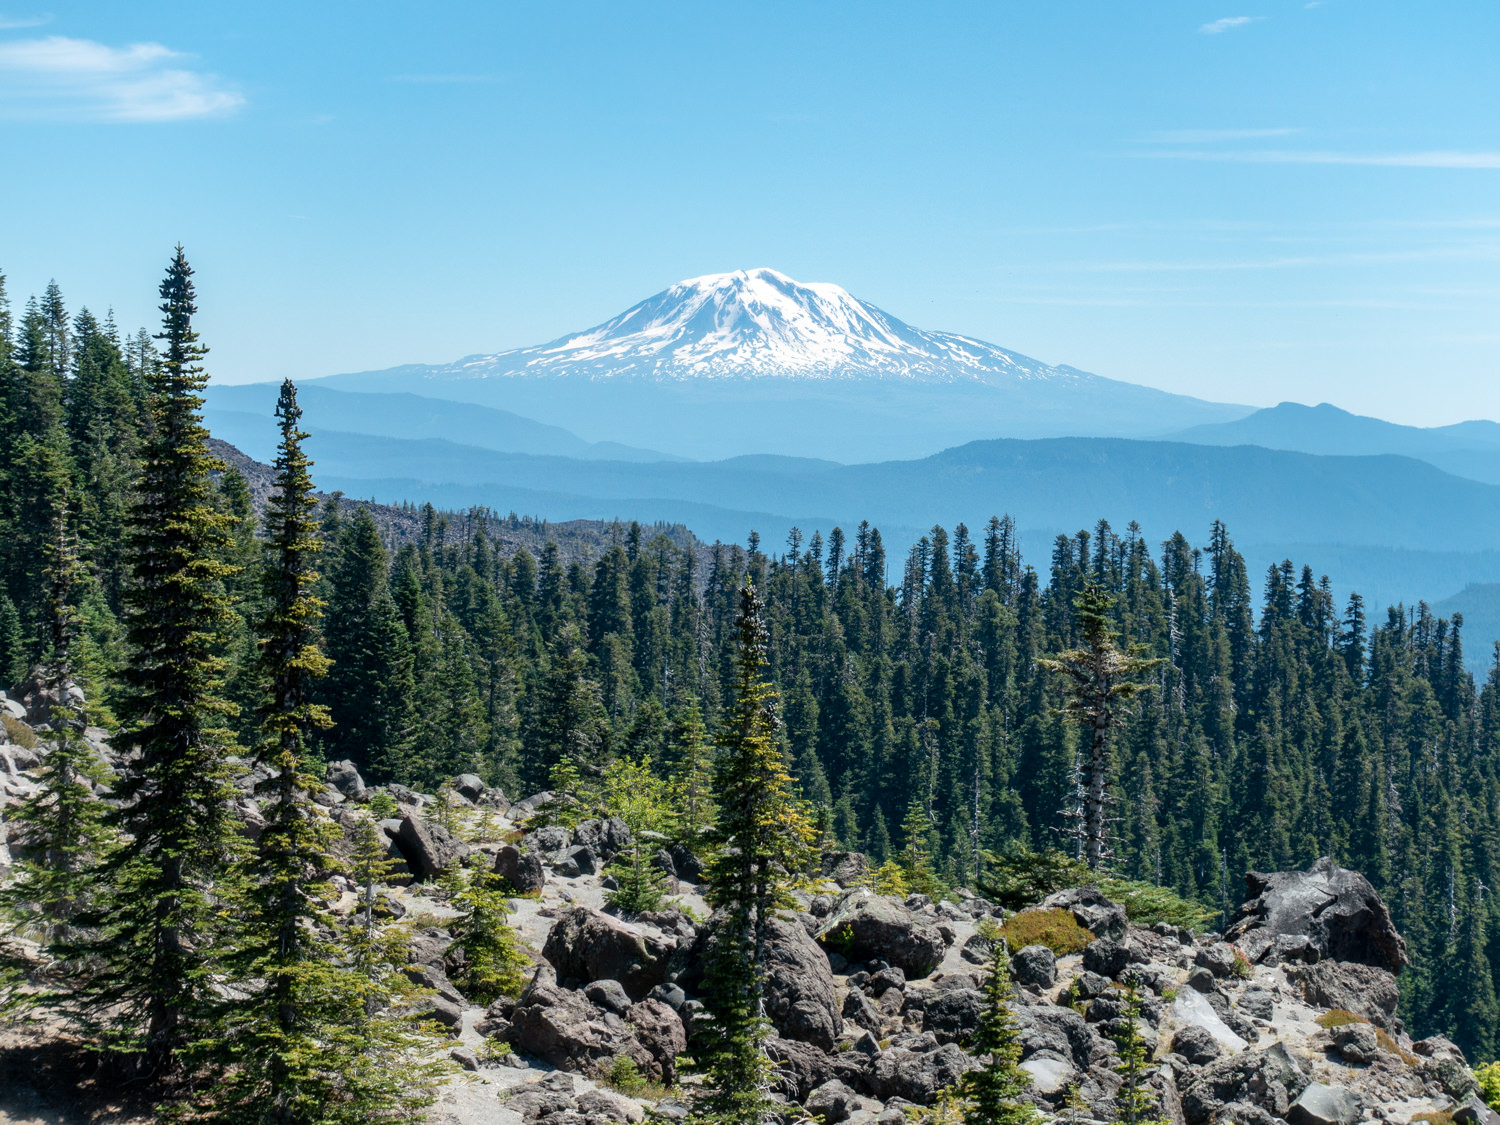
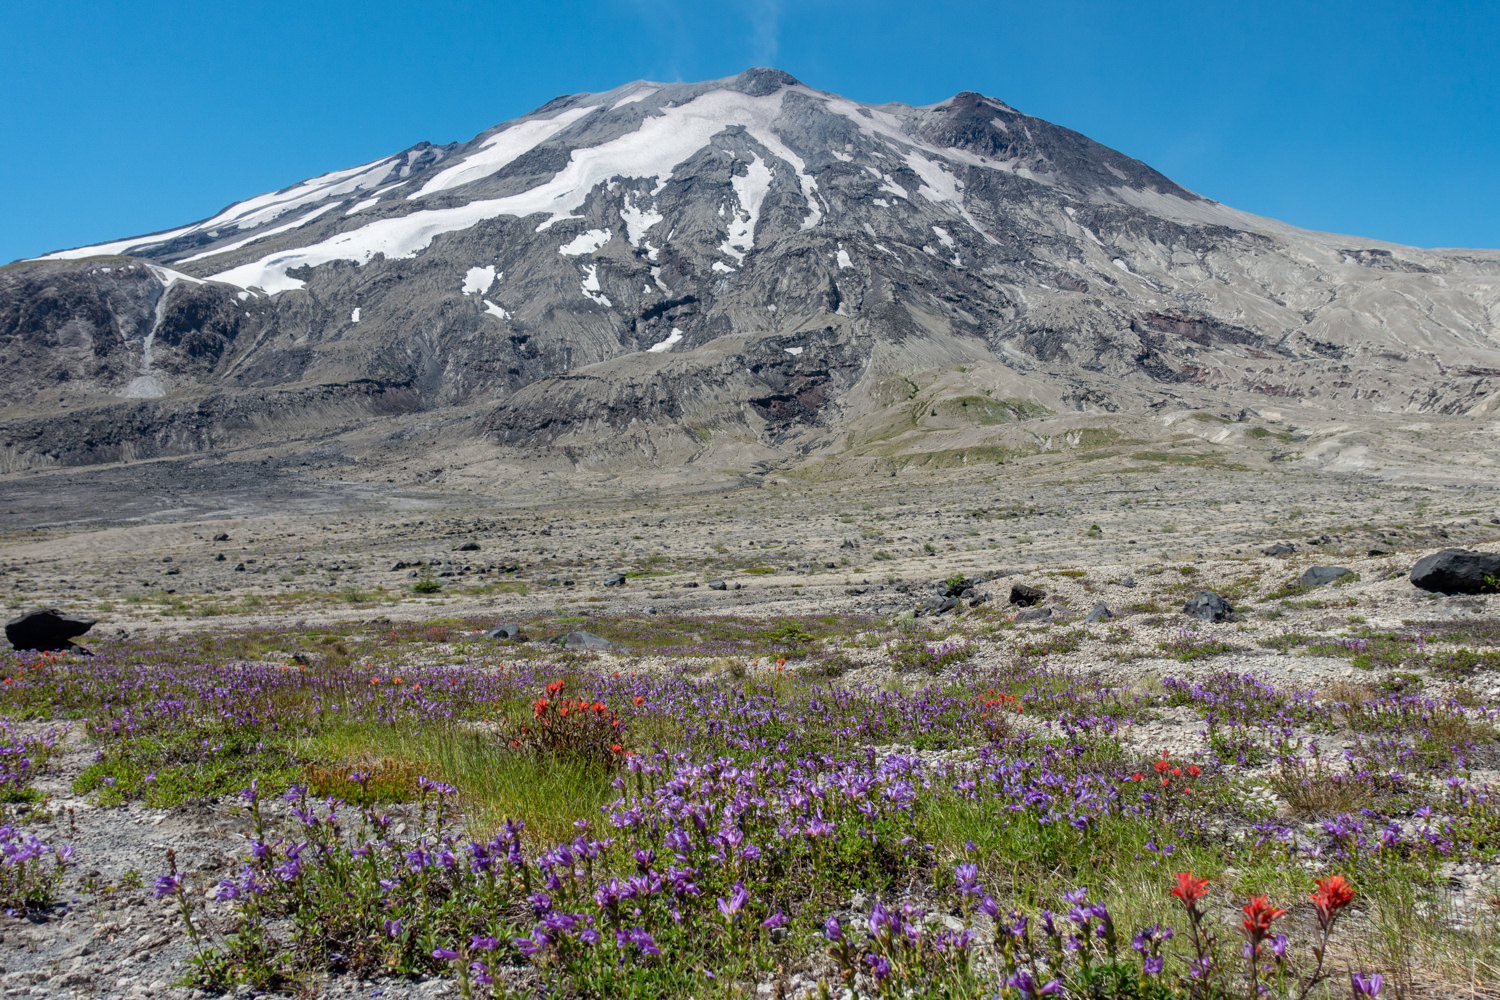
Sweeping mountain views in all directions
-
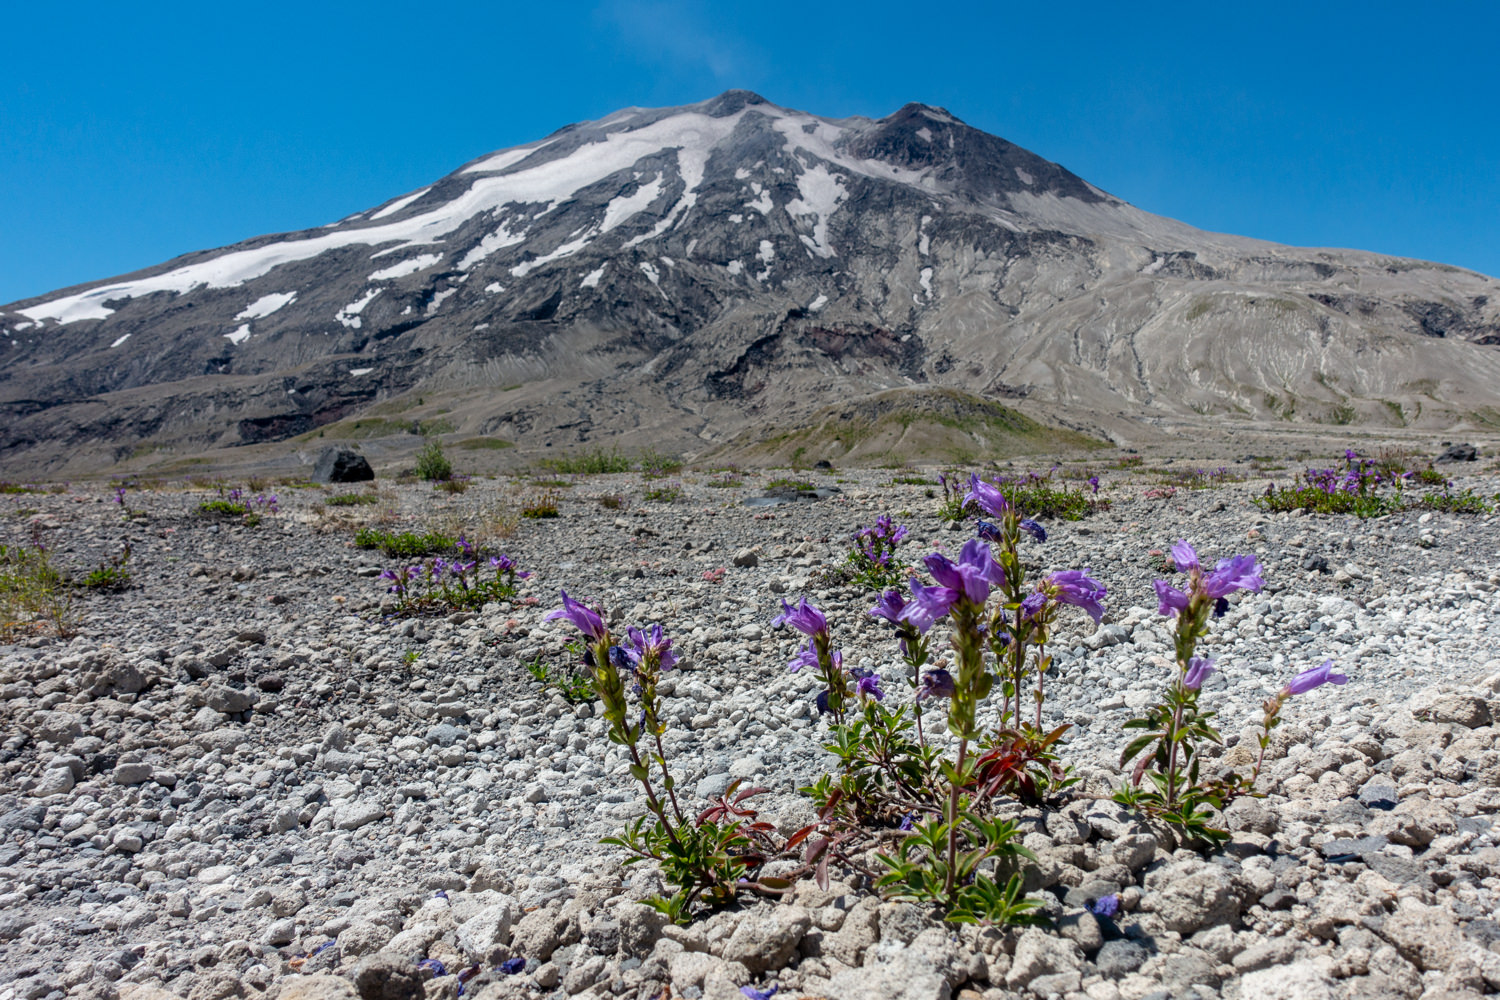
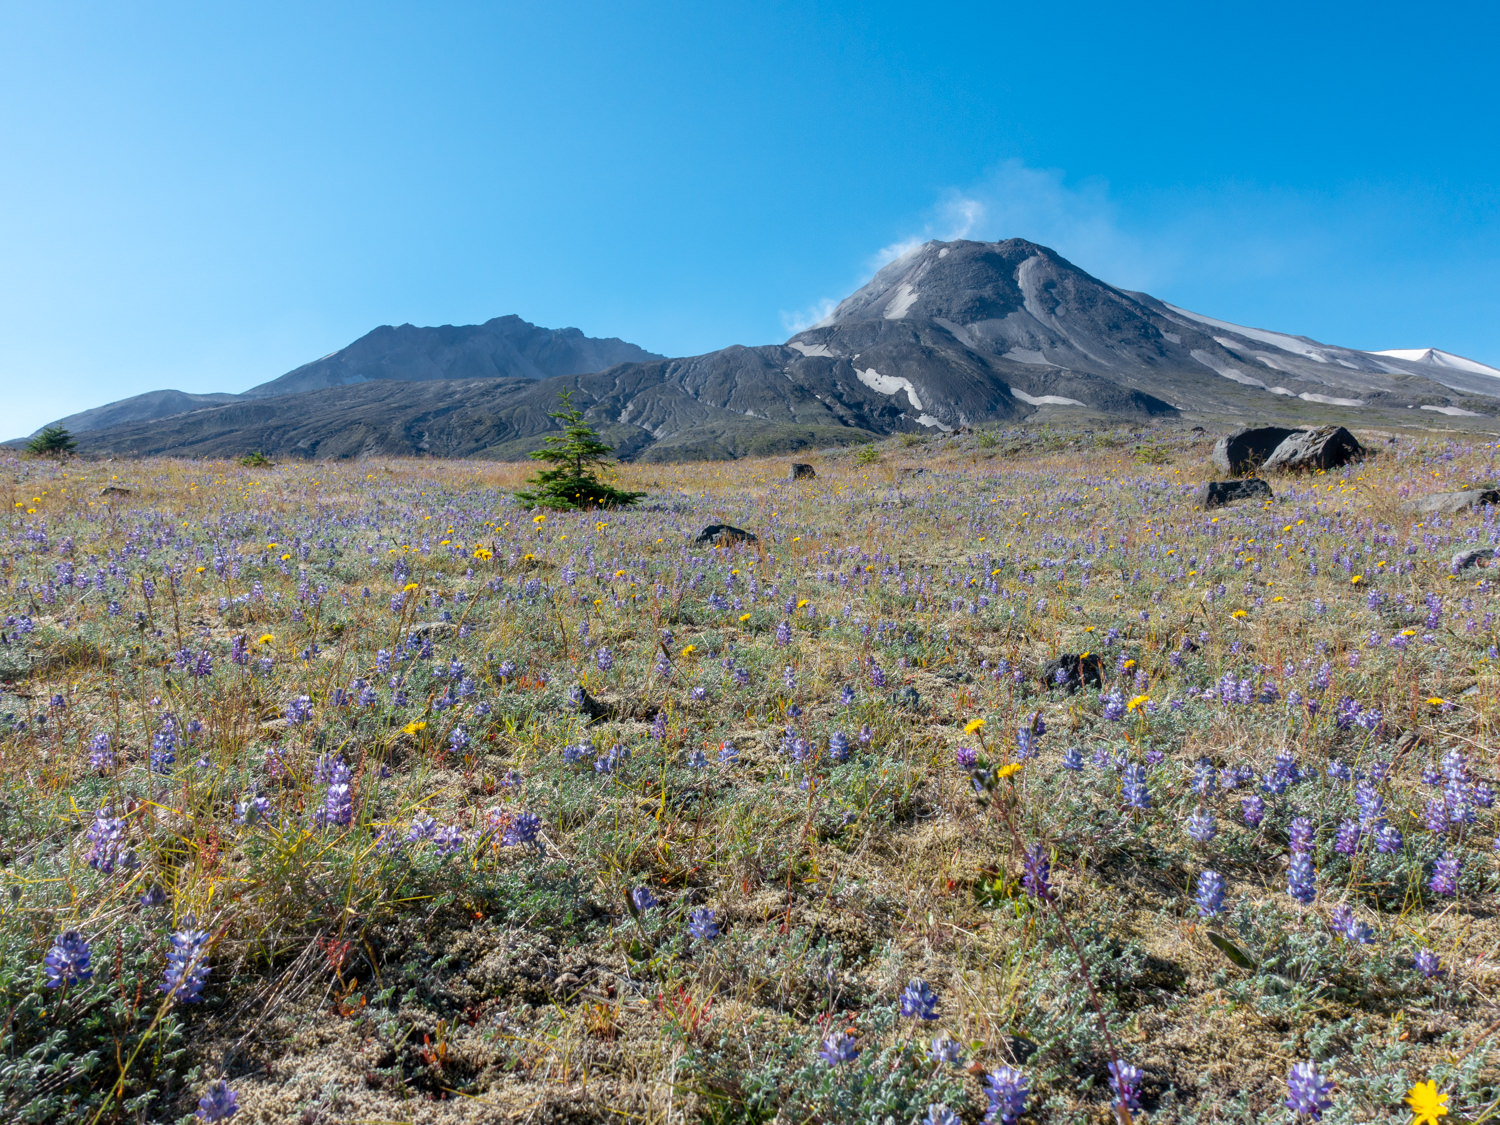
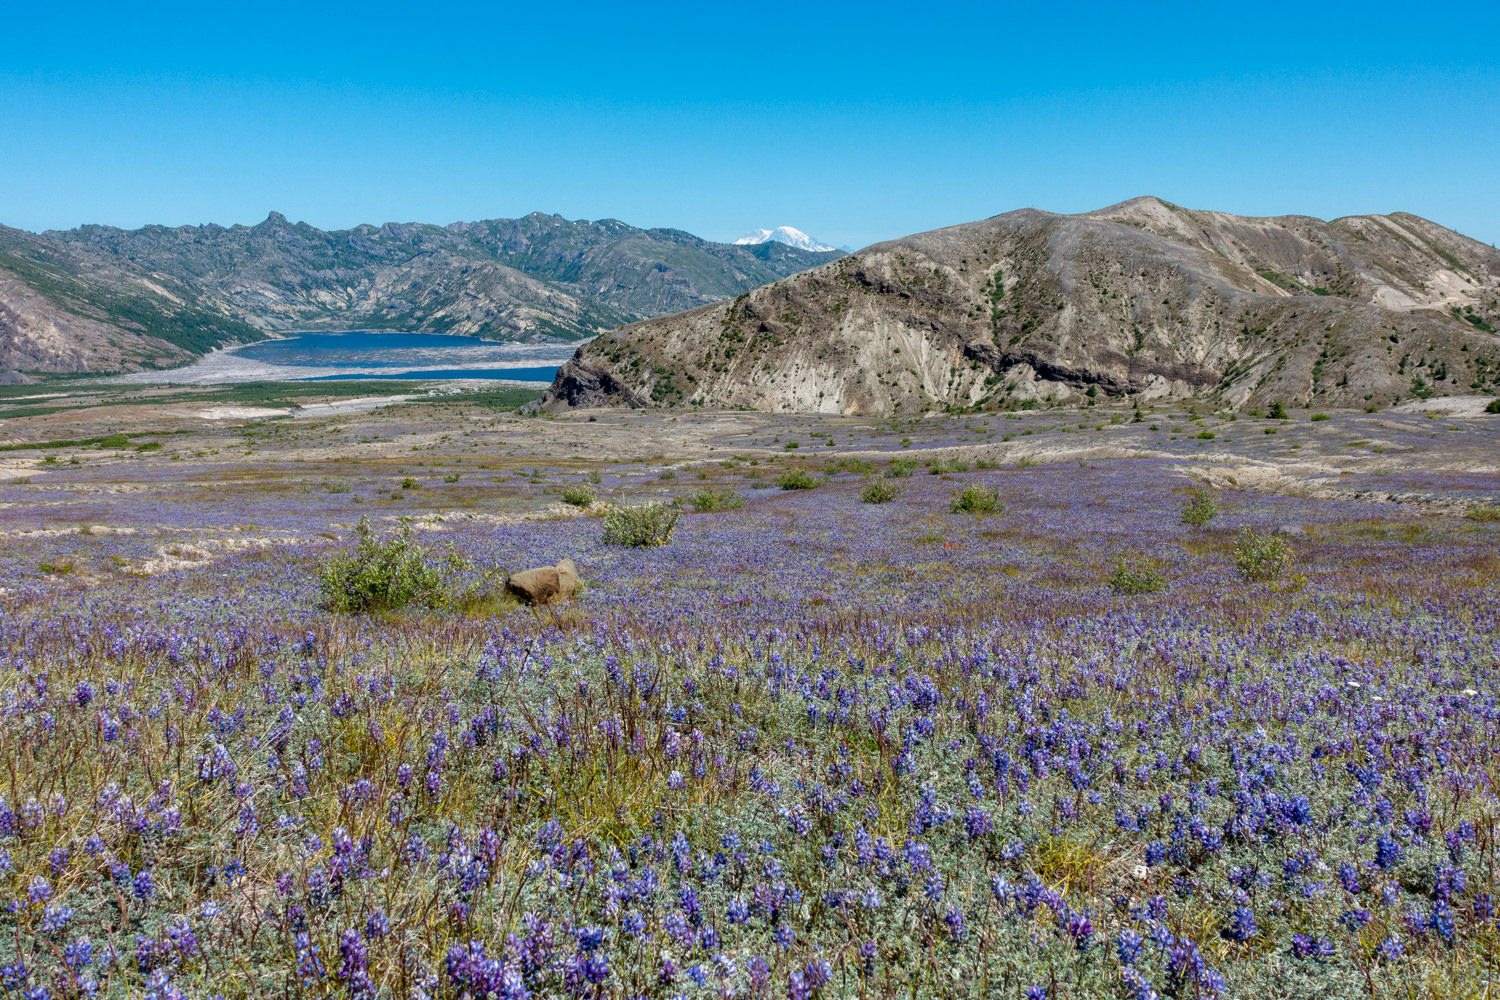
Beautiful wildflowers throughout summer
-
Relatively low volume of hikers for a PNW trail
-
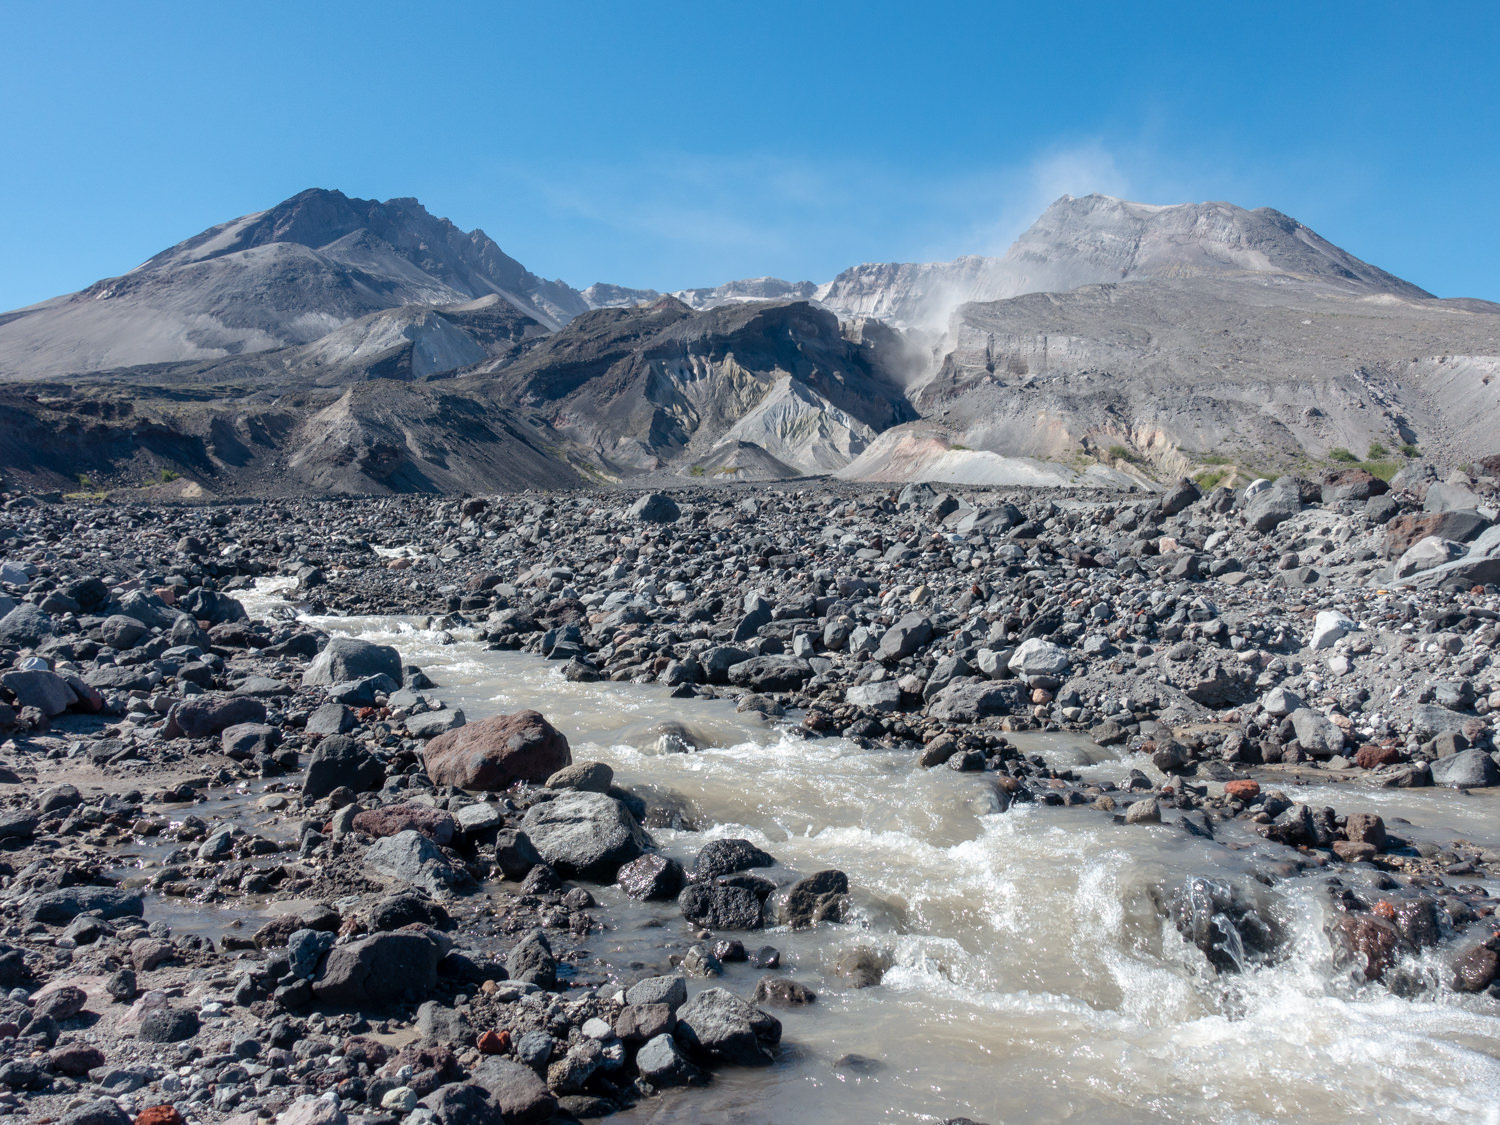
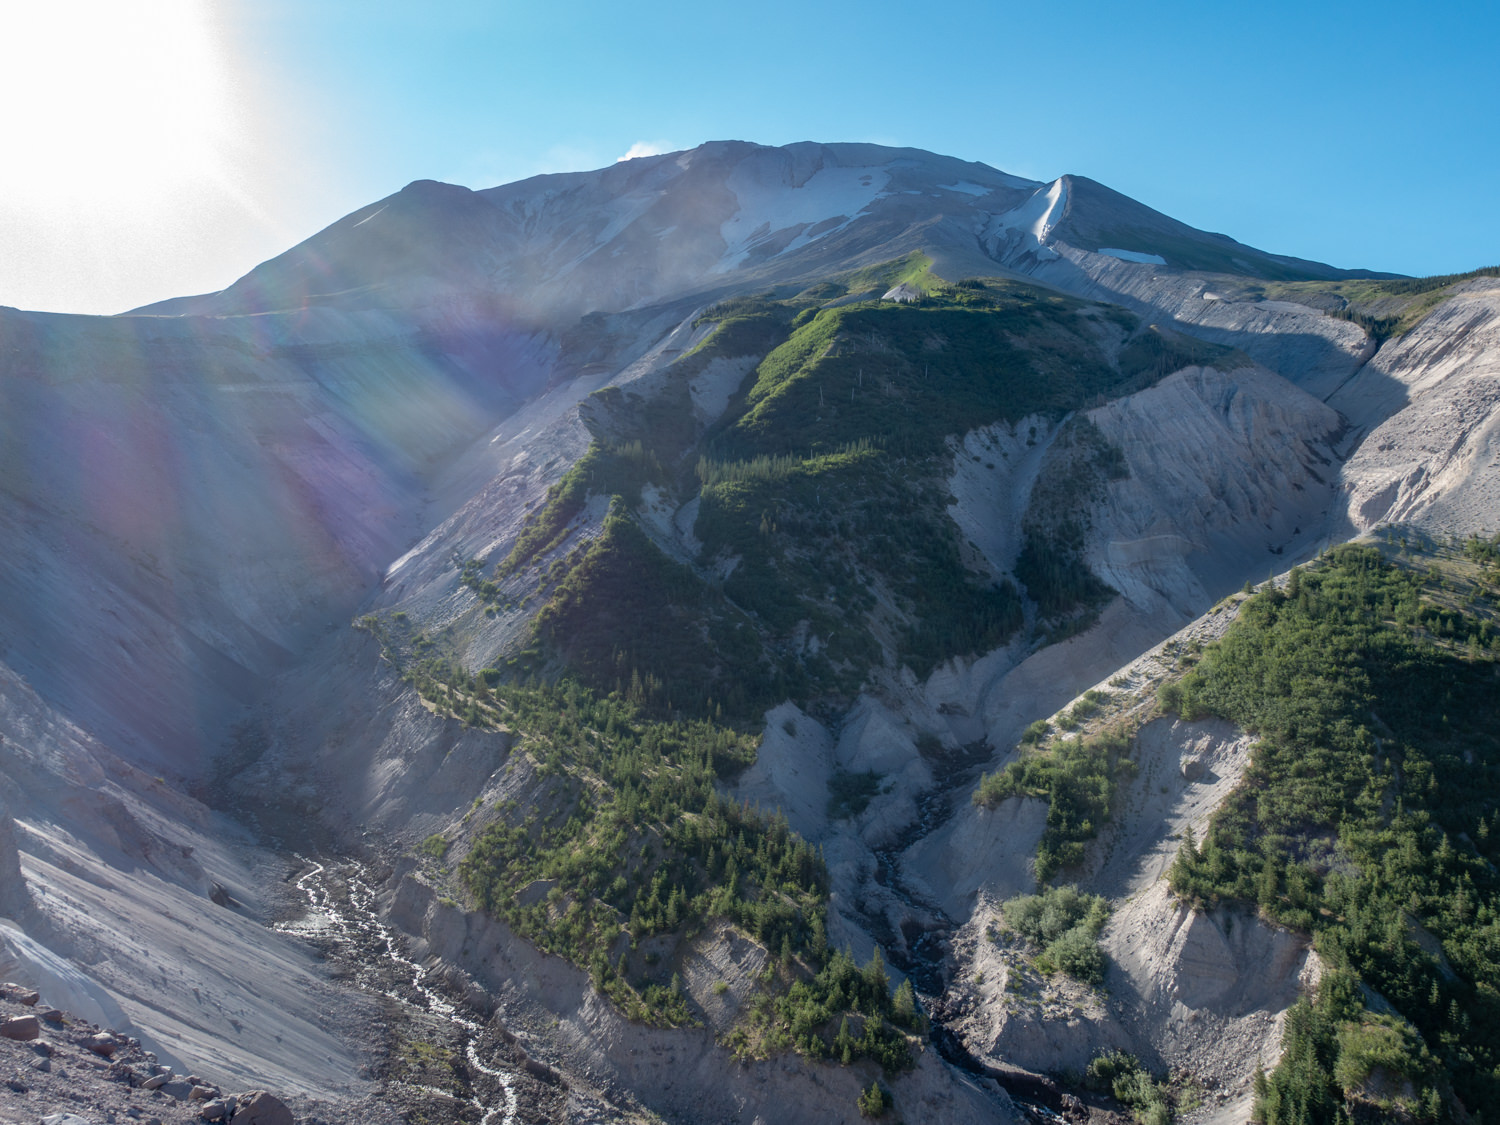
Views of the volcano’s interior and the blast zone
-
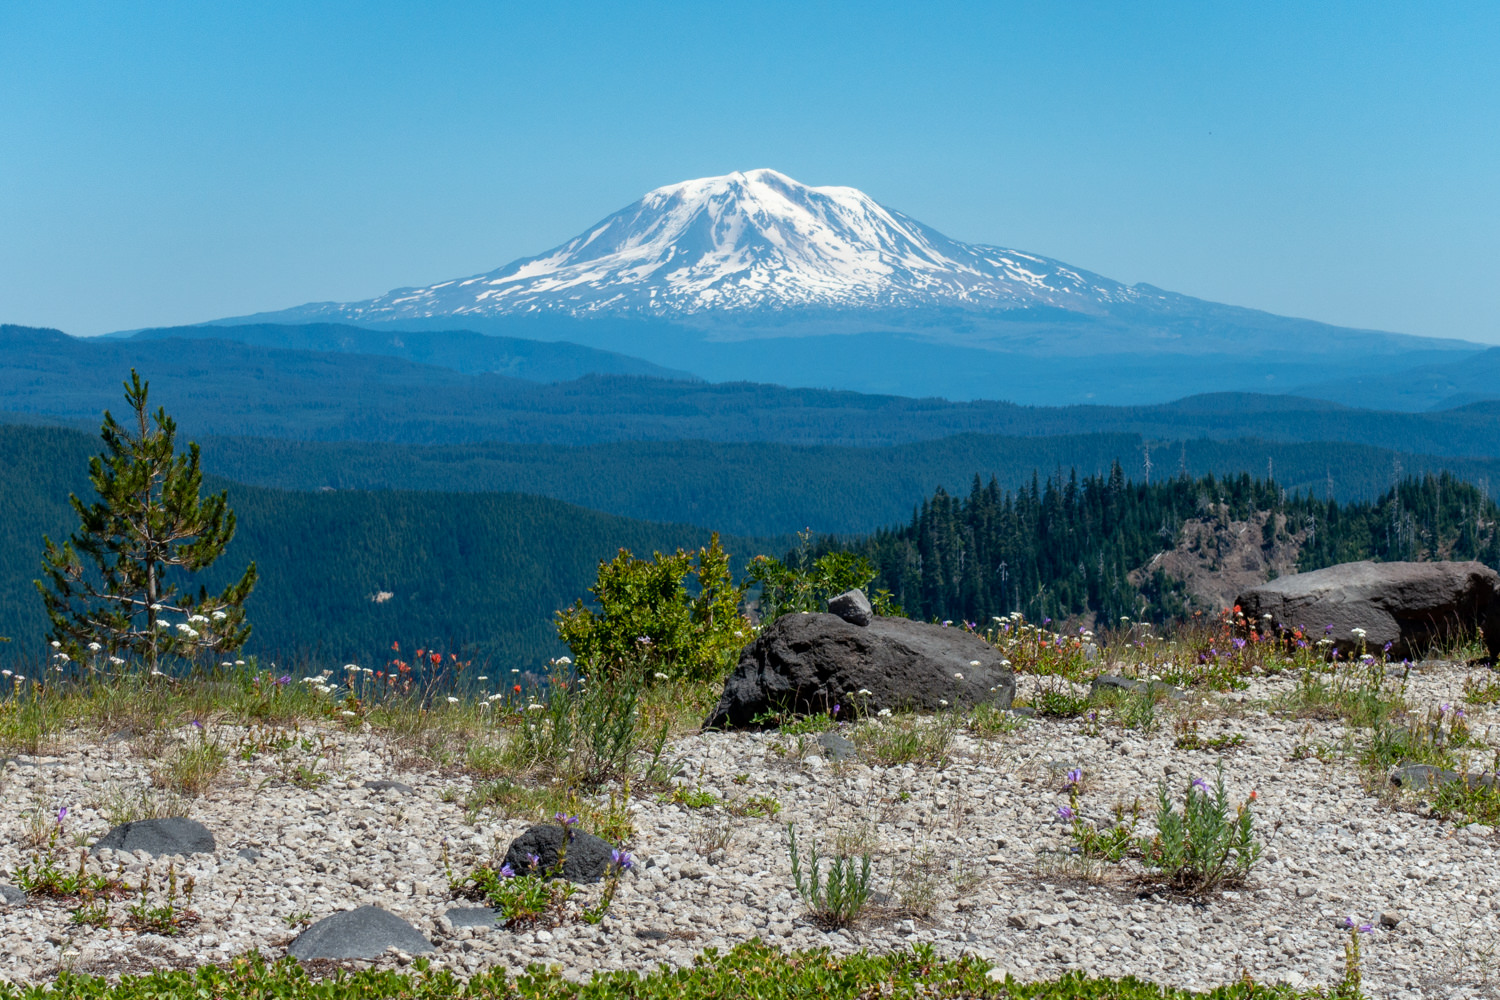
Views of Mount Rainier, Adams and Hood.
-
Wildlife sightings (elk, mountain goats, chipmunks, coyote)
-
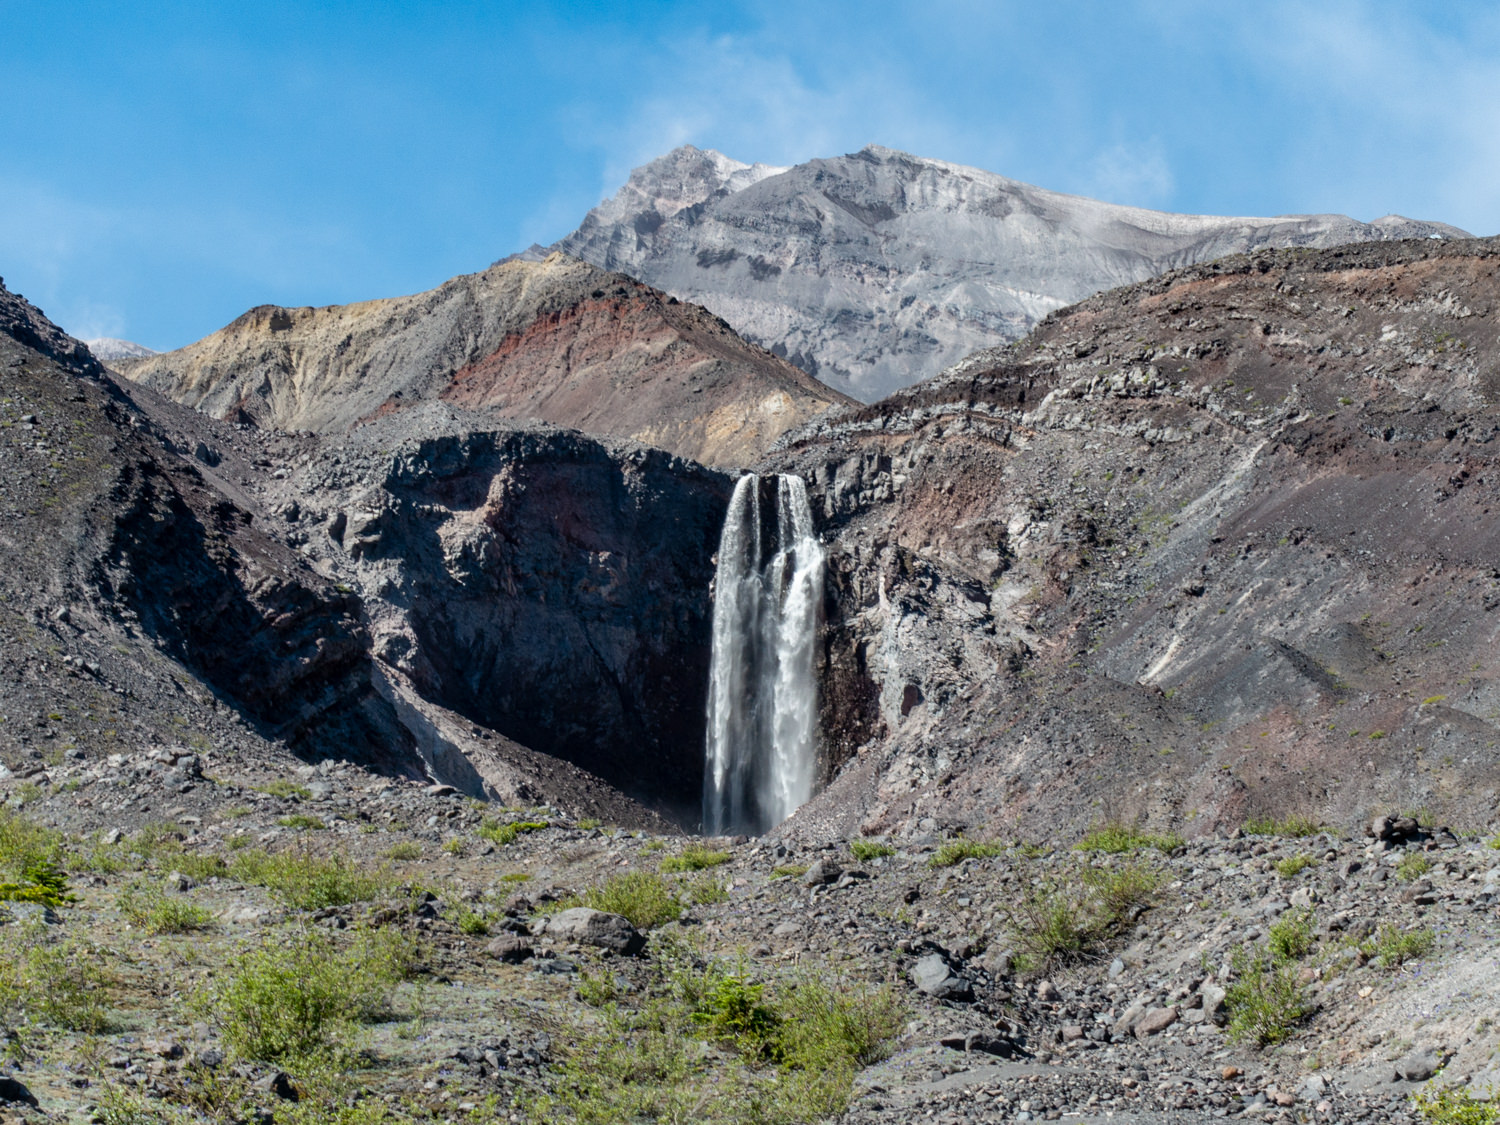
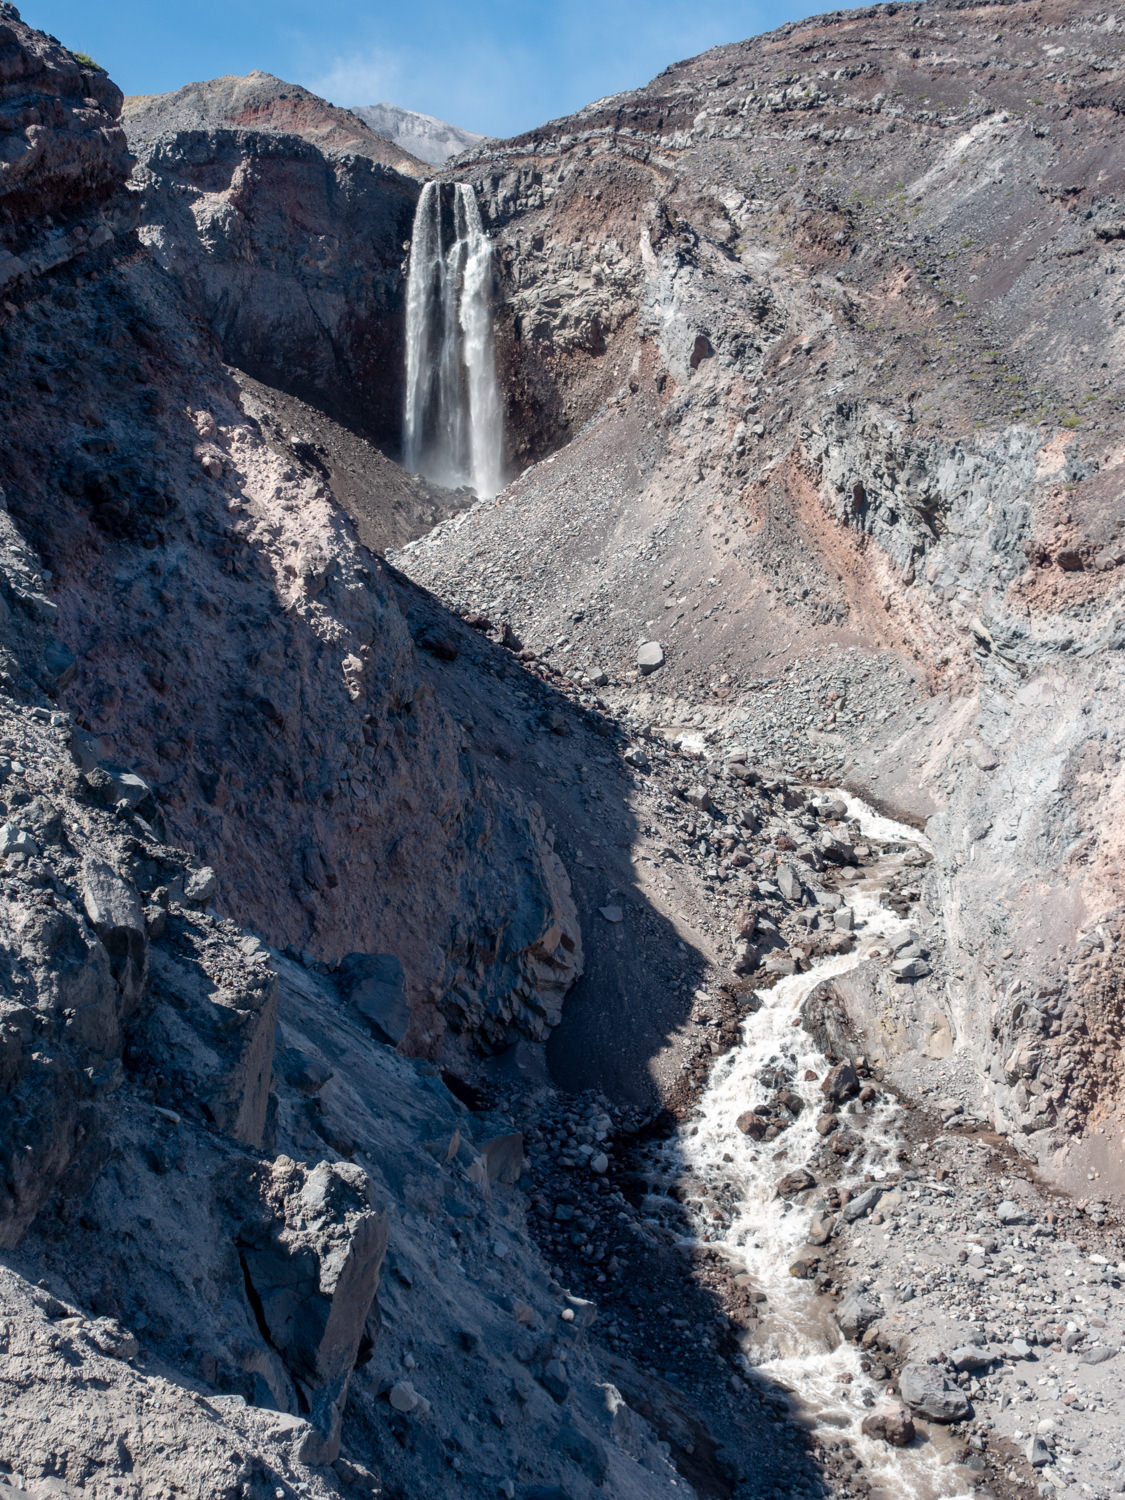
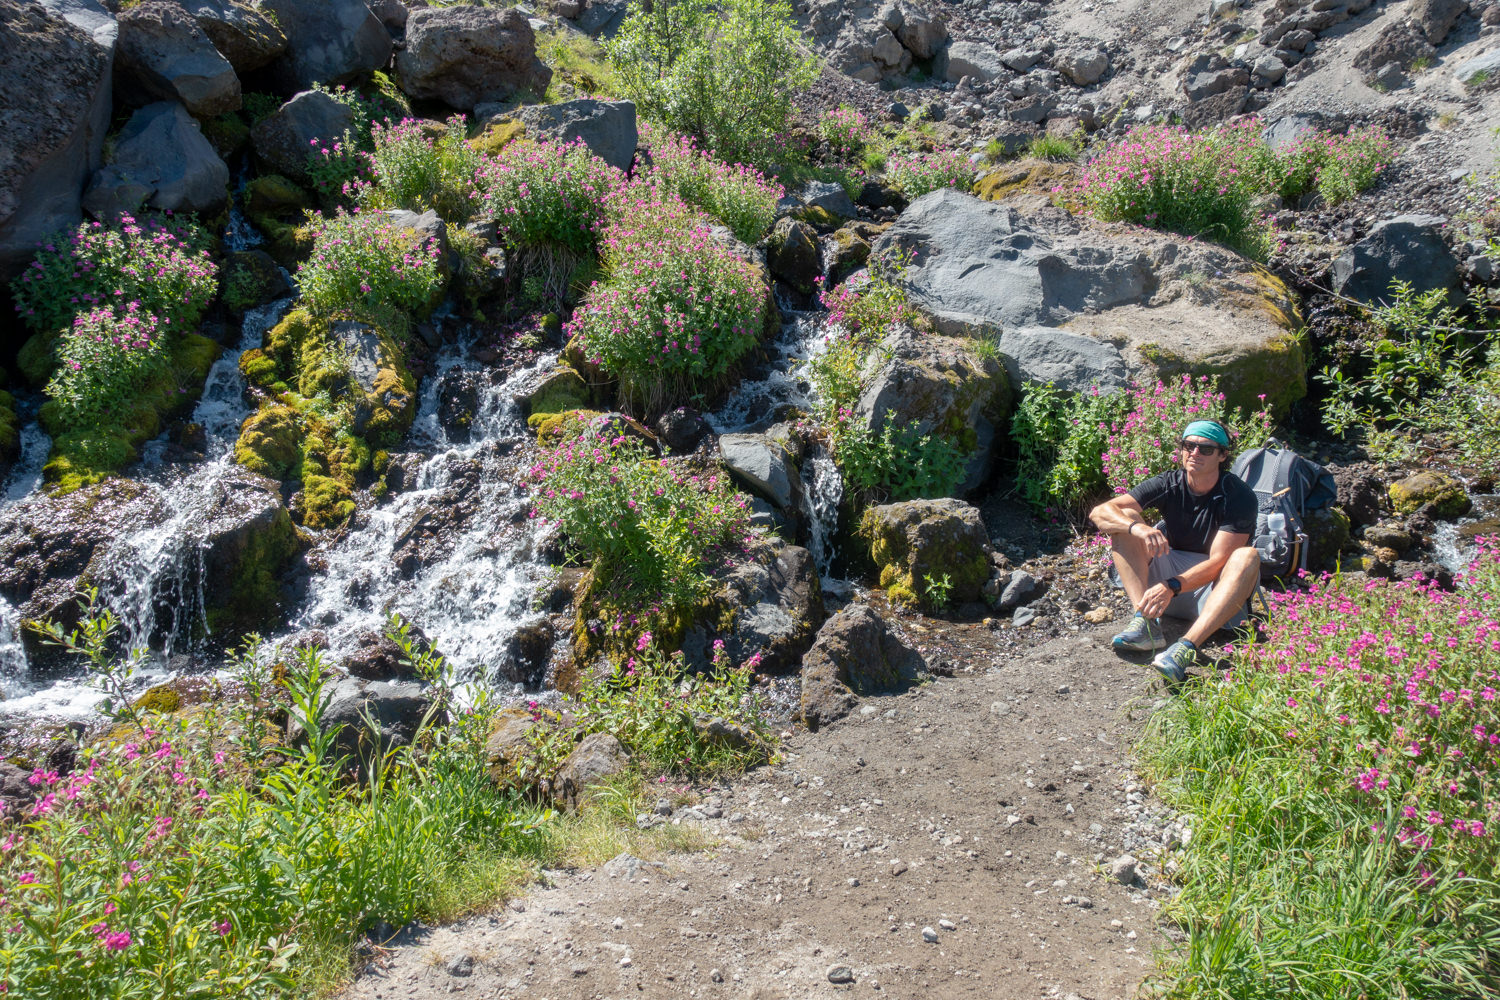
Lovely waterfalls, the highlight being Loowit Falls
LOWLIGHTS
-
Can be windy on the open flanks
-
Sun exposure – very little shade along most of the route
-
Very few reliable water sources – plan very carefully
-
Frequent trail obstacles (mud/rock slides, loose sand/scree wash outs)
-
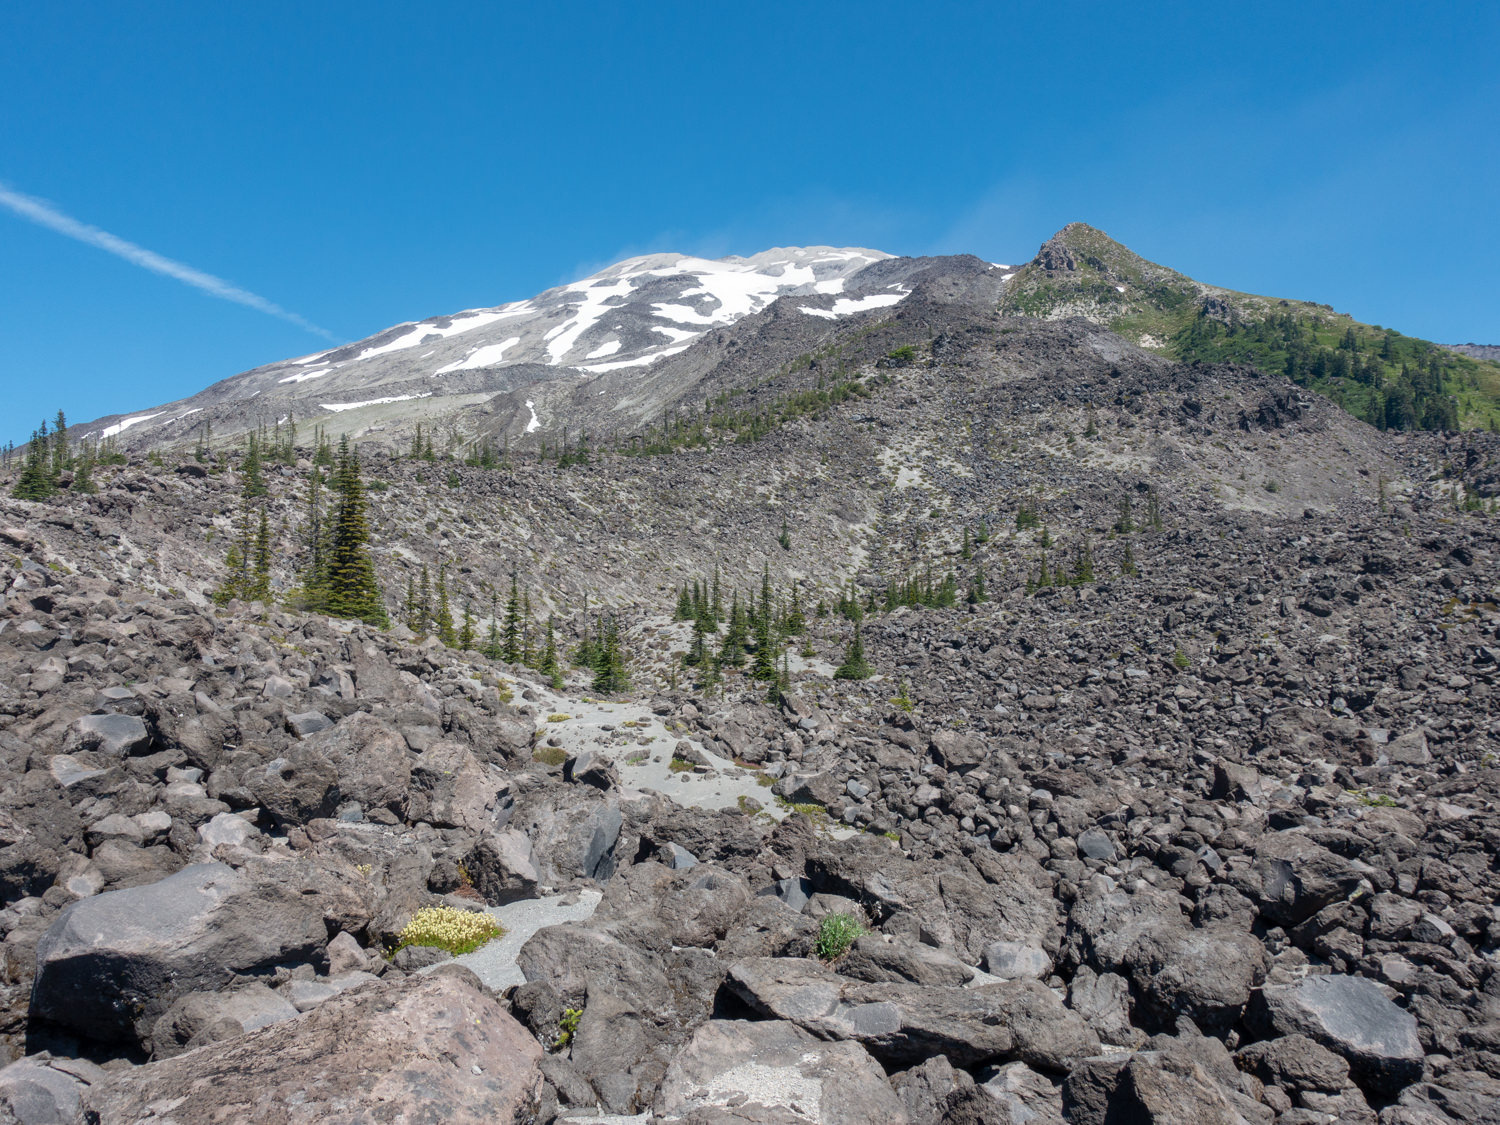
Narrow, steep trails and extensive lava boulder fields
-
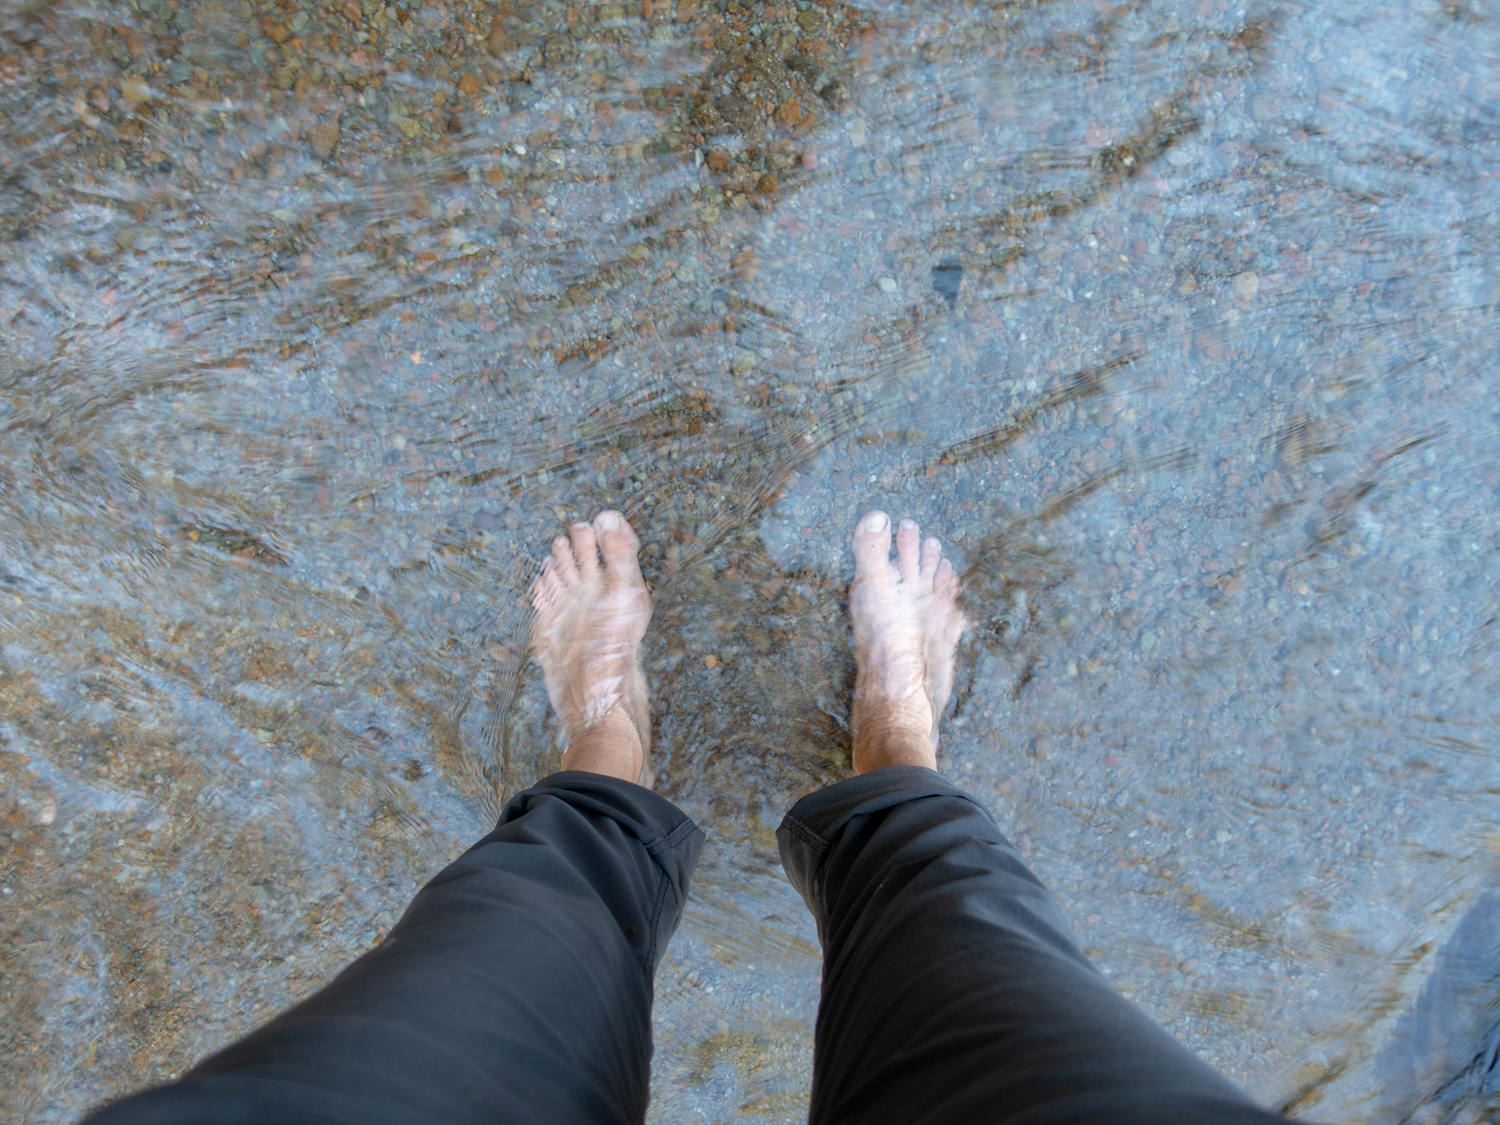
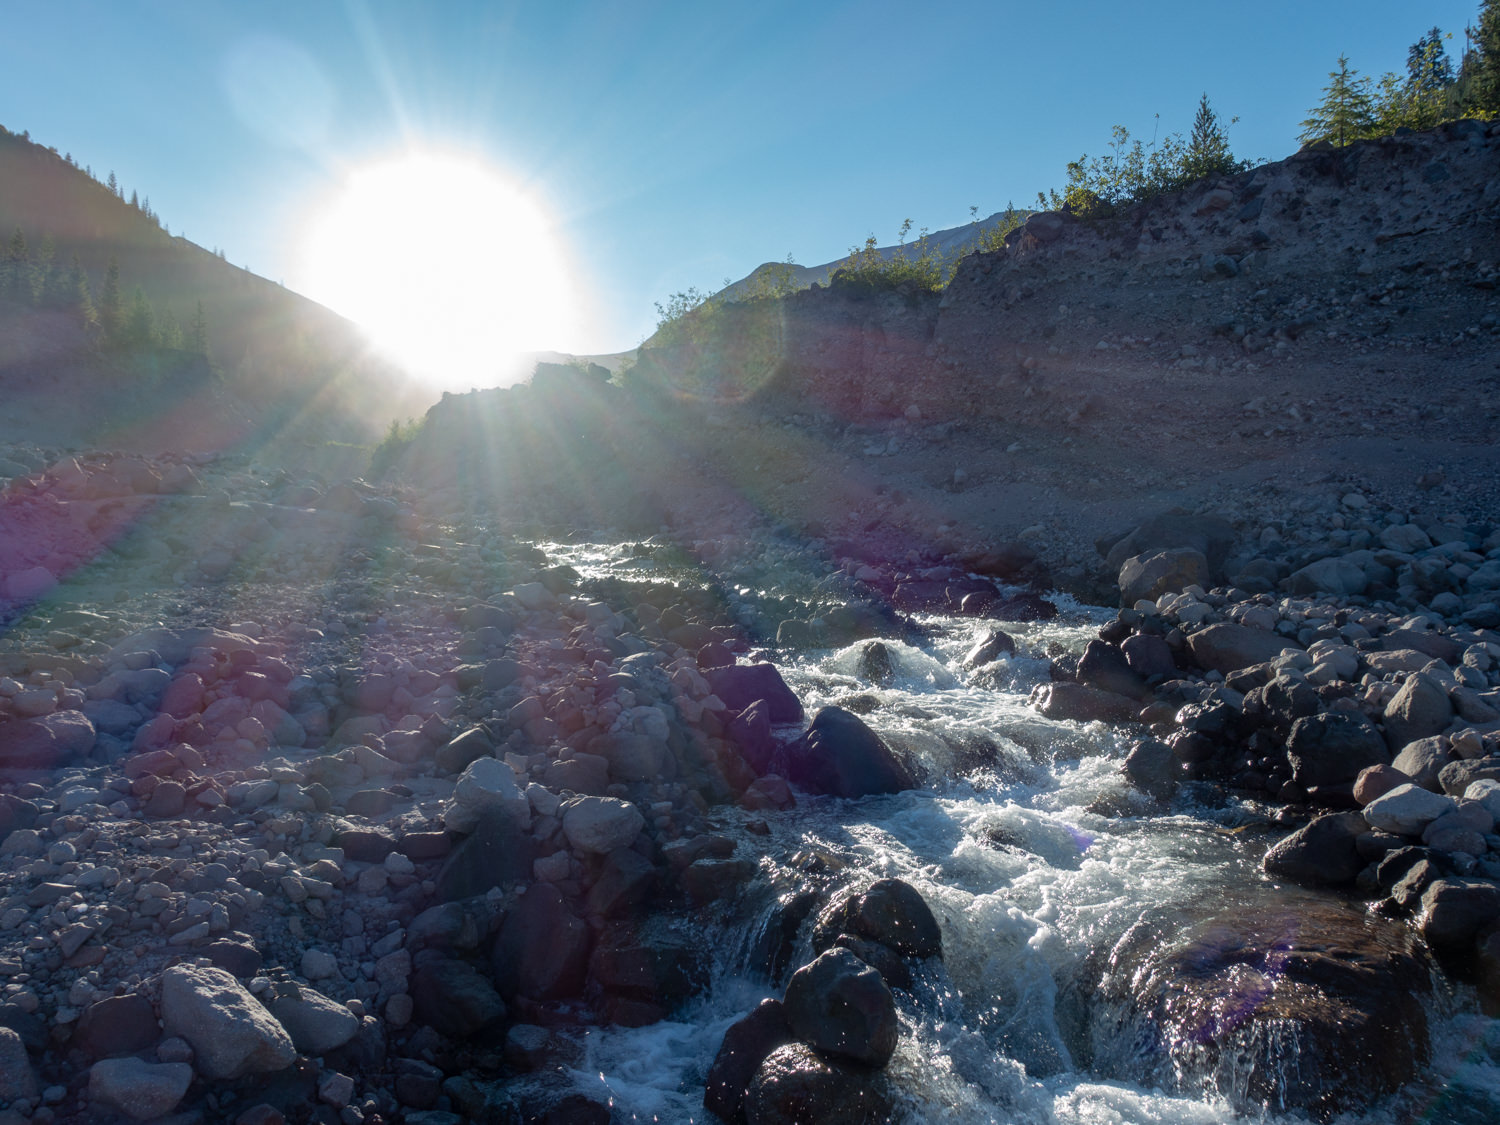
Stream crossings can be difficult
-
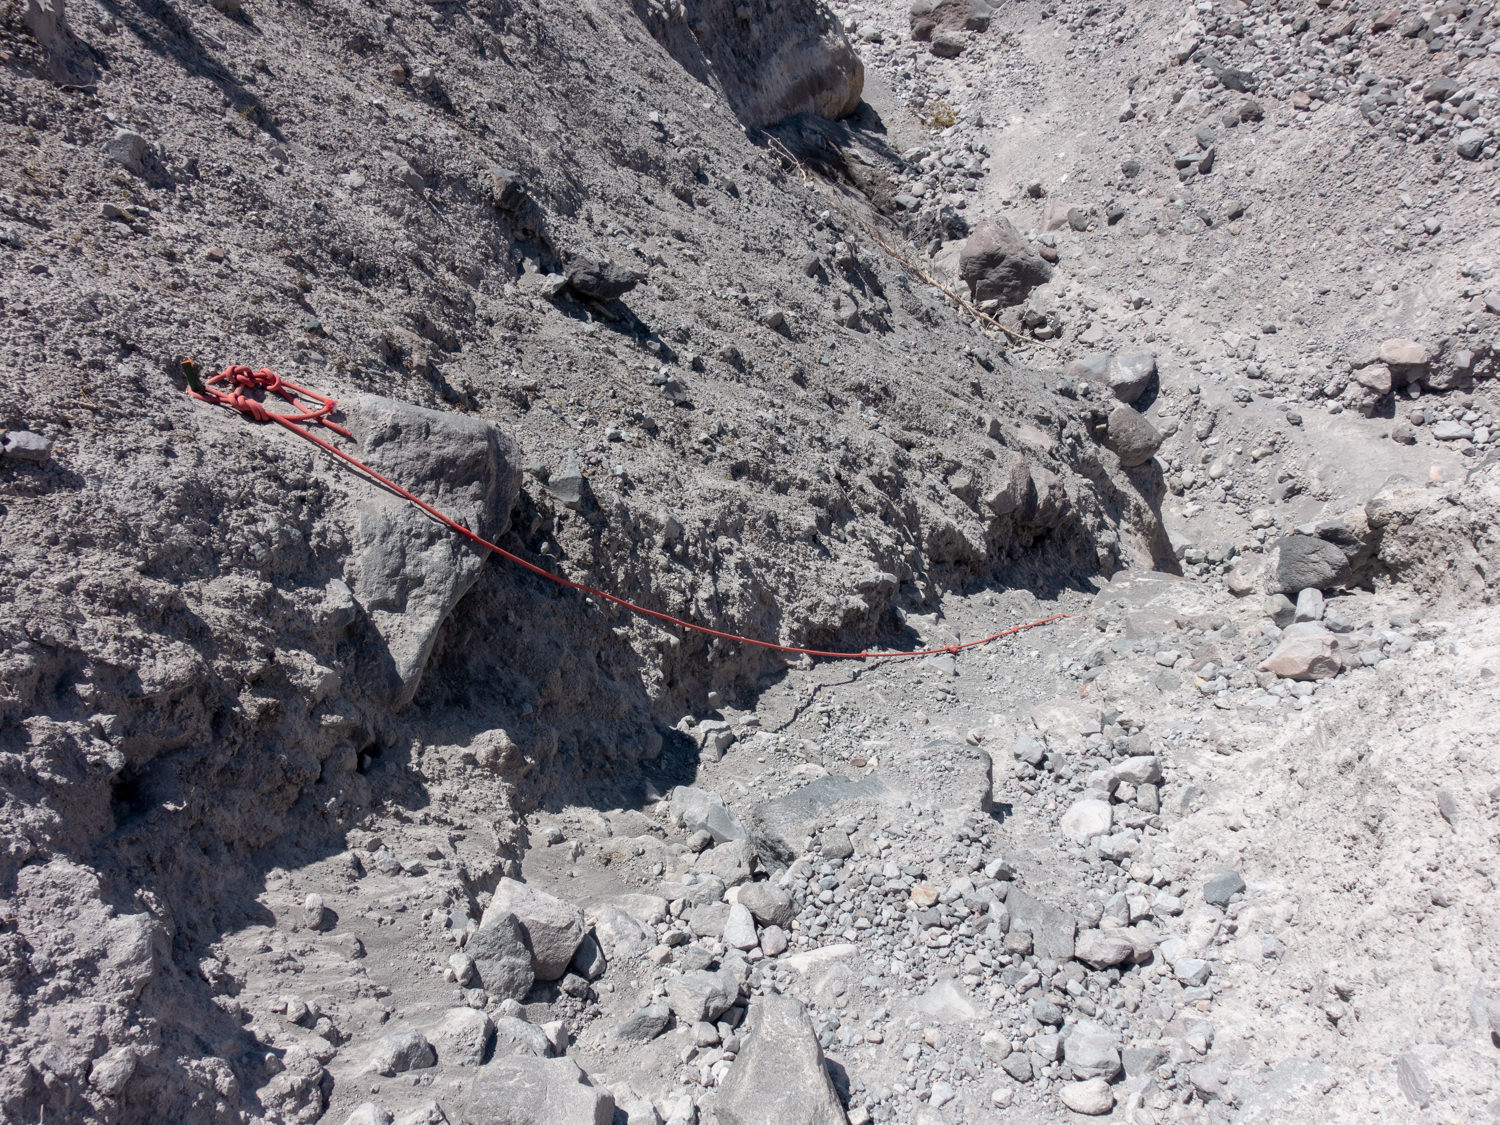
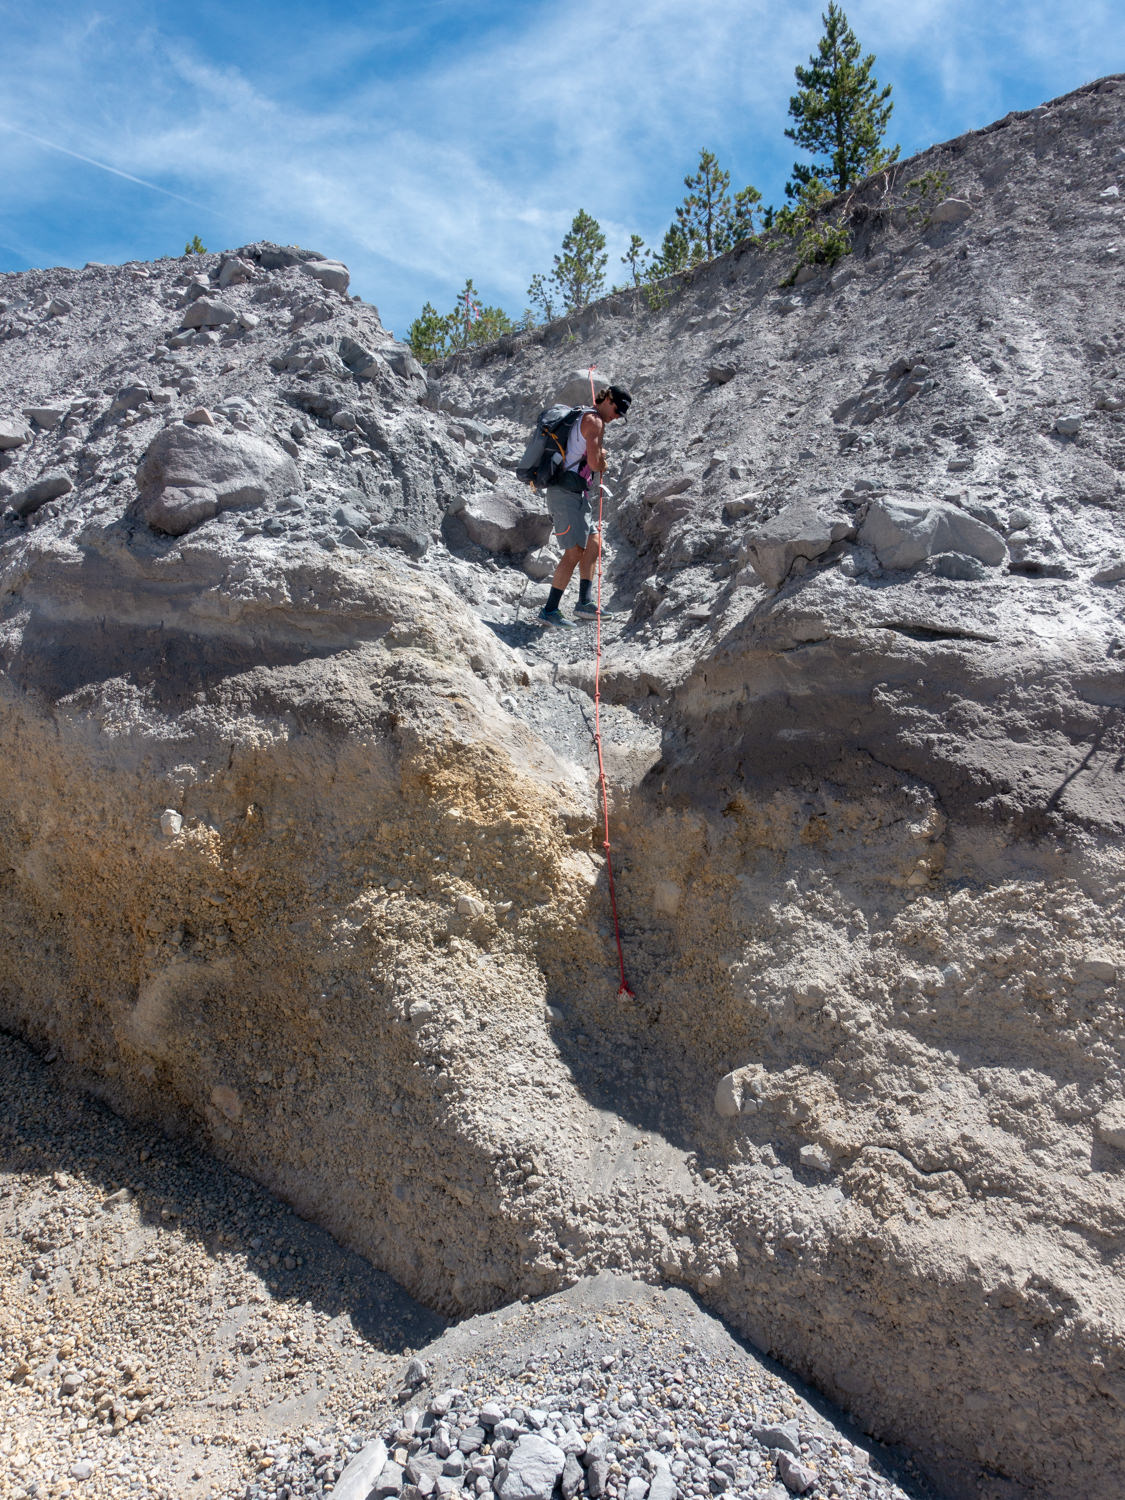
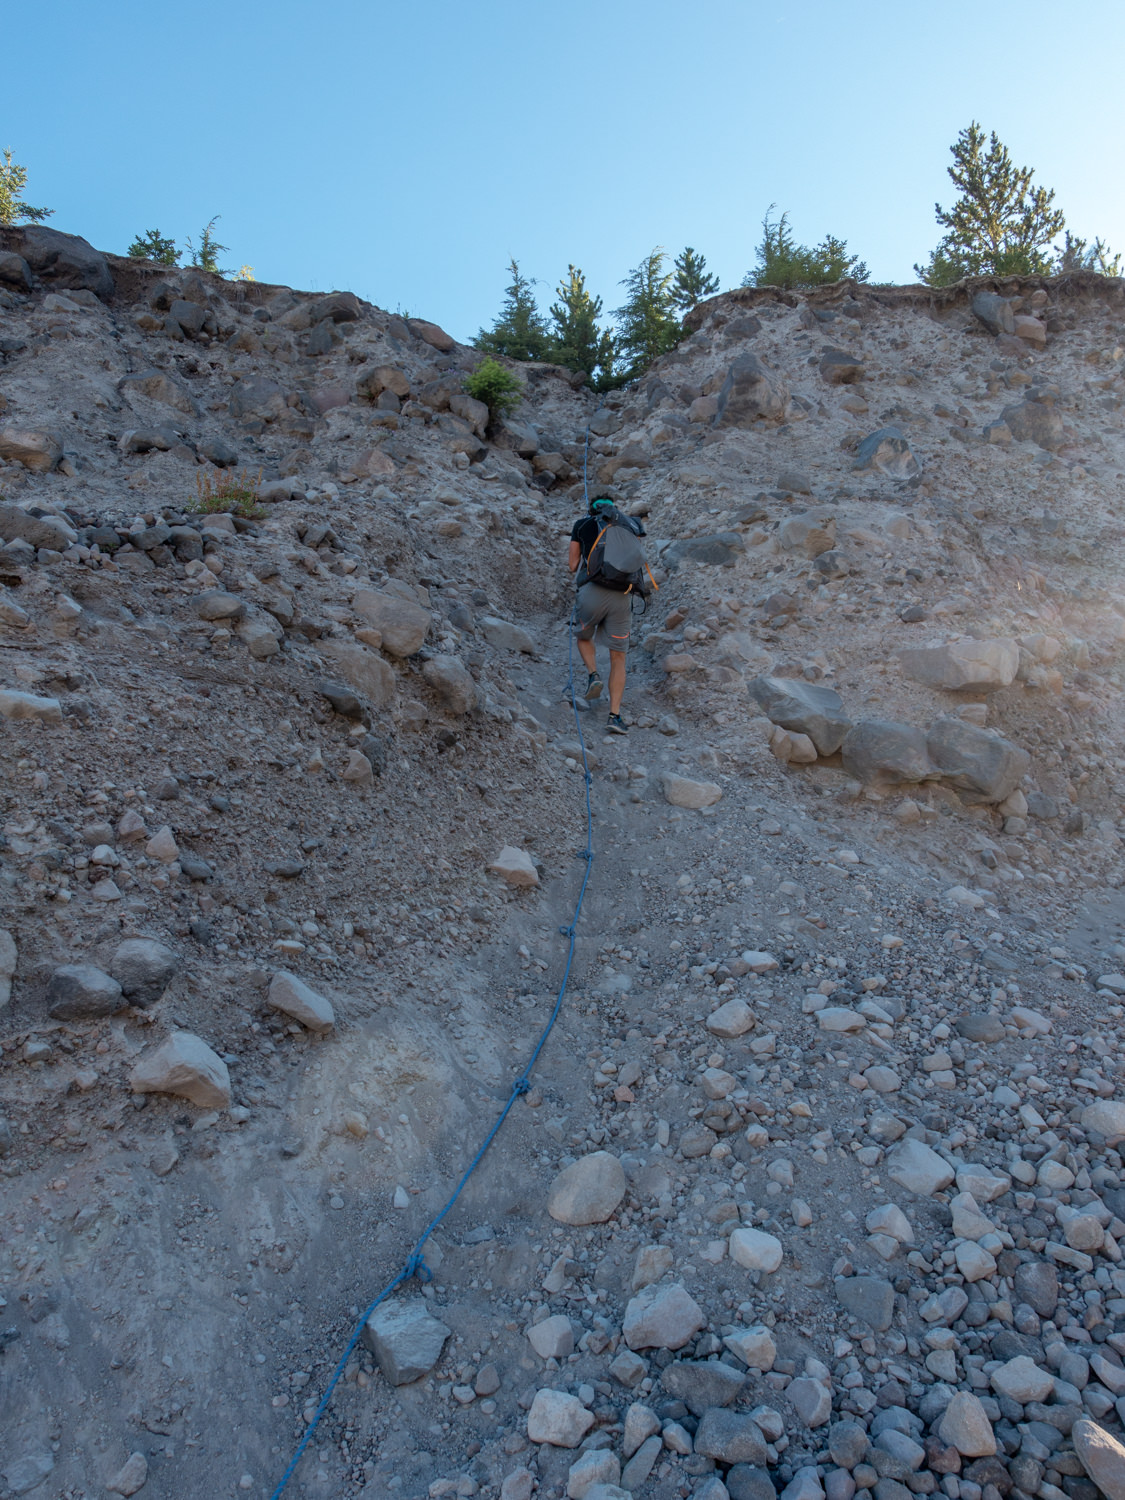
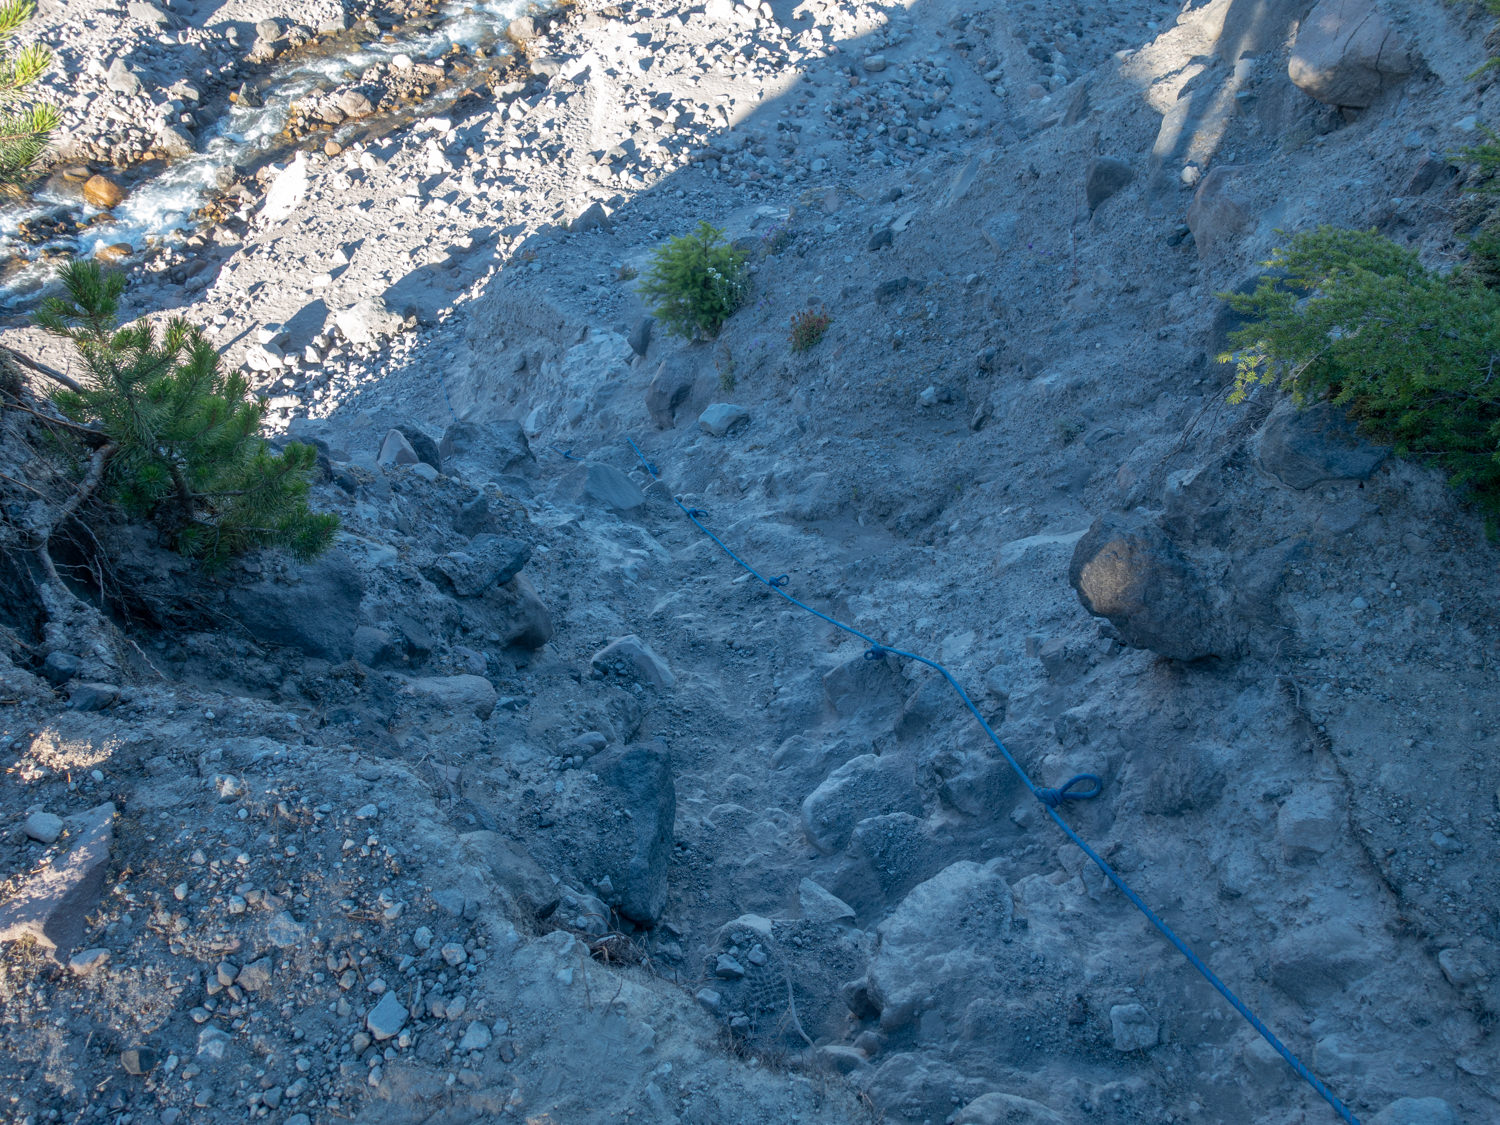
Difficult canyon/gully crossings require rope assists (in-place)
-
Lingering snow, depending on time of year
-
Unsafe for dogs
-
Constantly changing conditions
BEST TIME TO TRAVEL
In general, July through September is the best time to hike around Mount St. Helens. Snowpack is a key factor for trip planning in this area, as snow can linger into late July some years. Rain and snow can fall at any time of year here and freezing temperatures are possible, even in summer months. July and August have the lowest average rainfall and average temp highs of 82 degree for both months. In September and October the temps drop about 10 degrees each month and rain increase progressively by one to two inches.
As always, be prepared and diligent in monitoring current conditions before your hike. Weather can change quickly in this region. Before heading out, check the Mount St. Helens weather report for up-to-date conditions.
DIFFICULTY
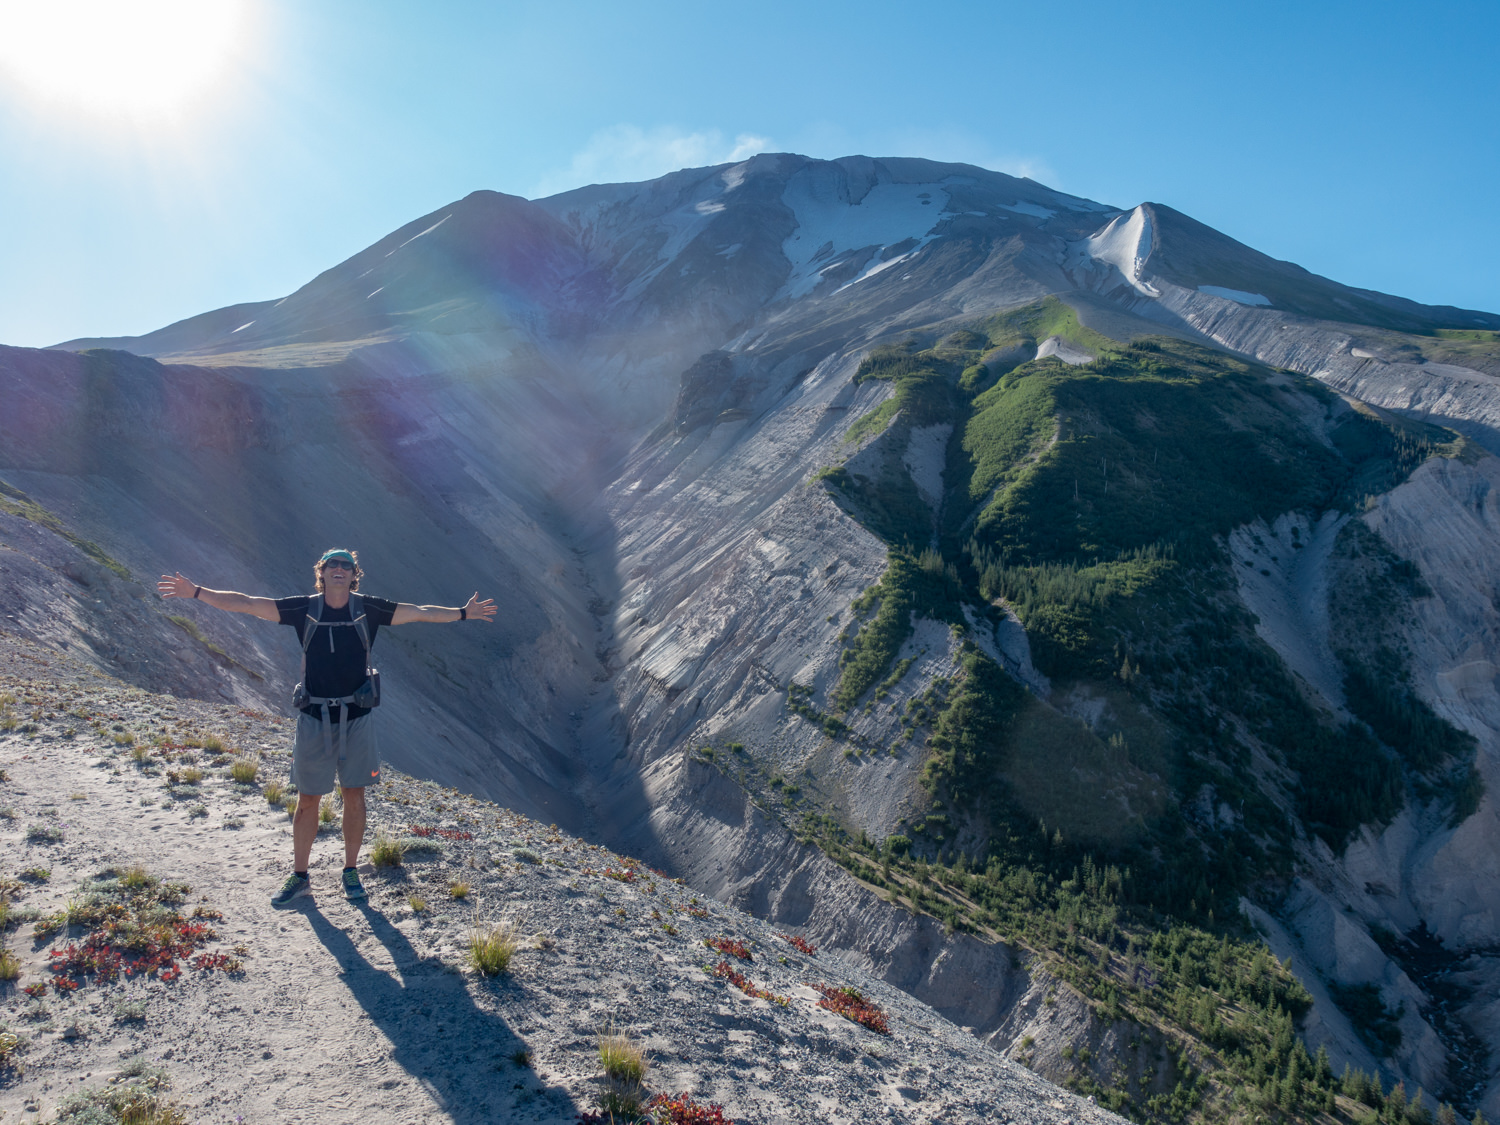
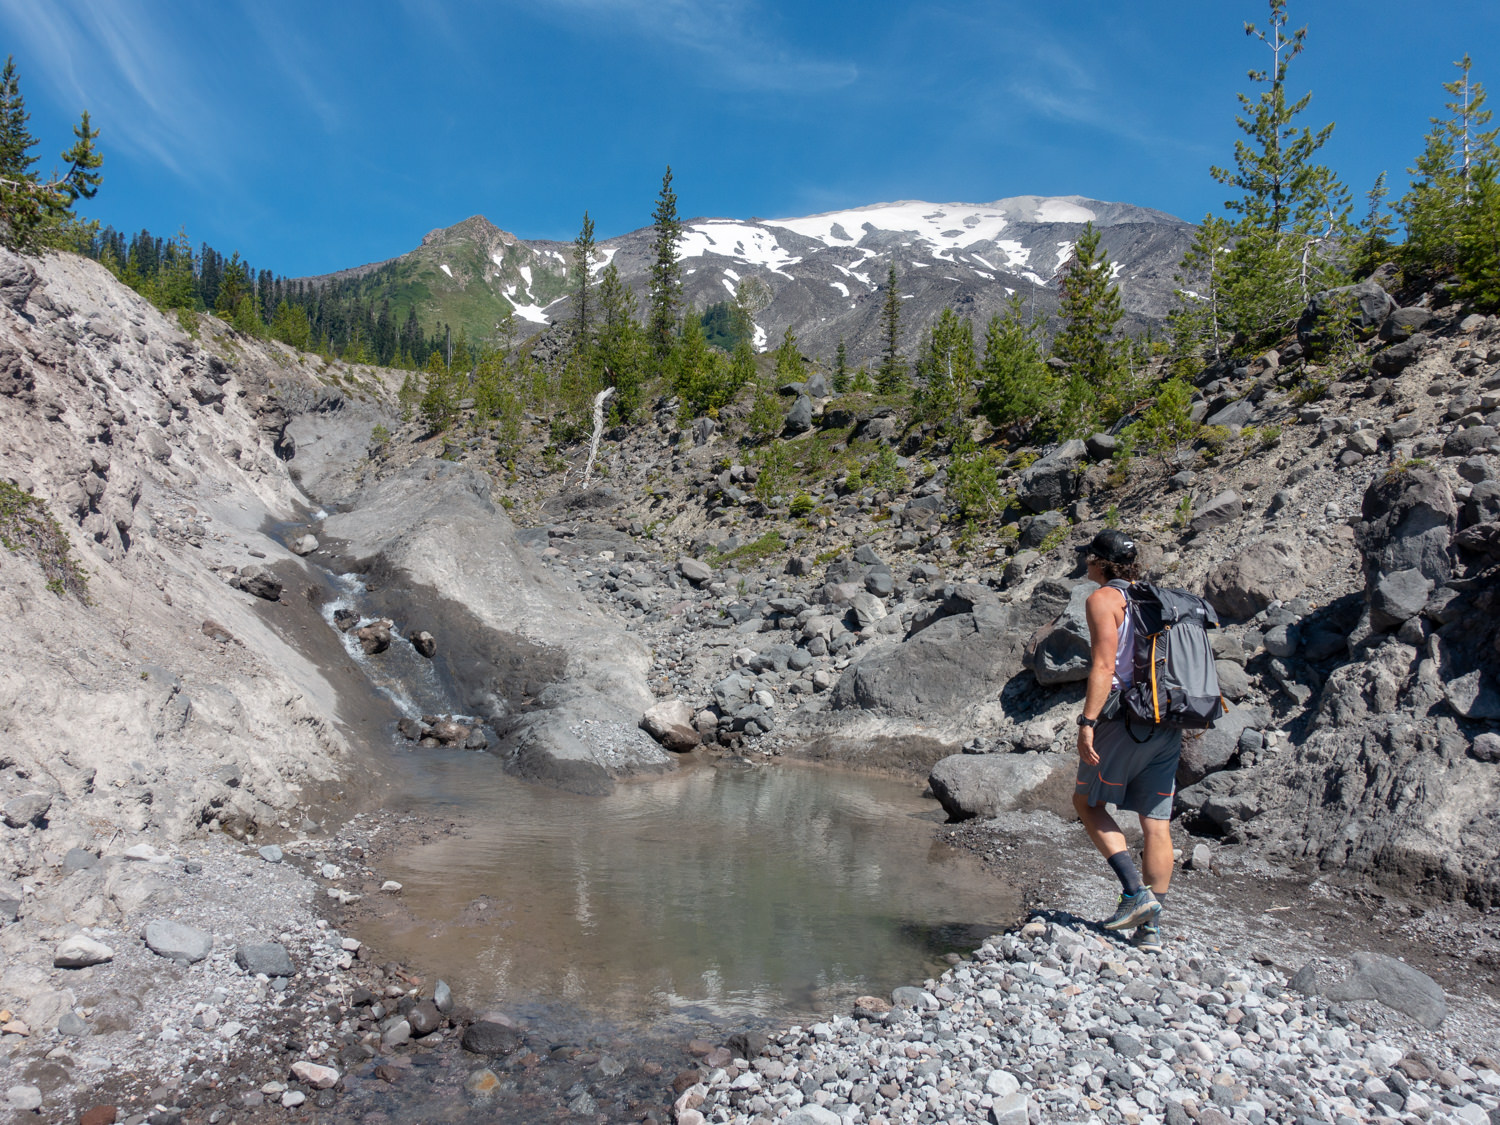
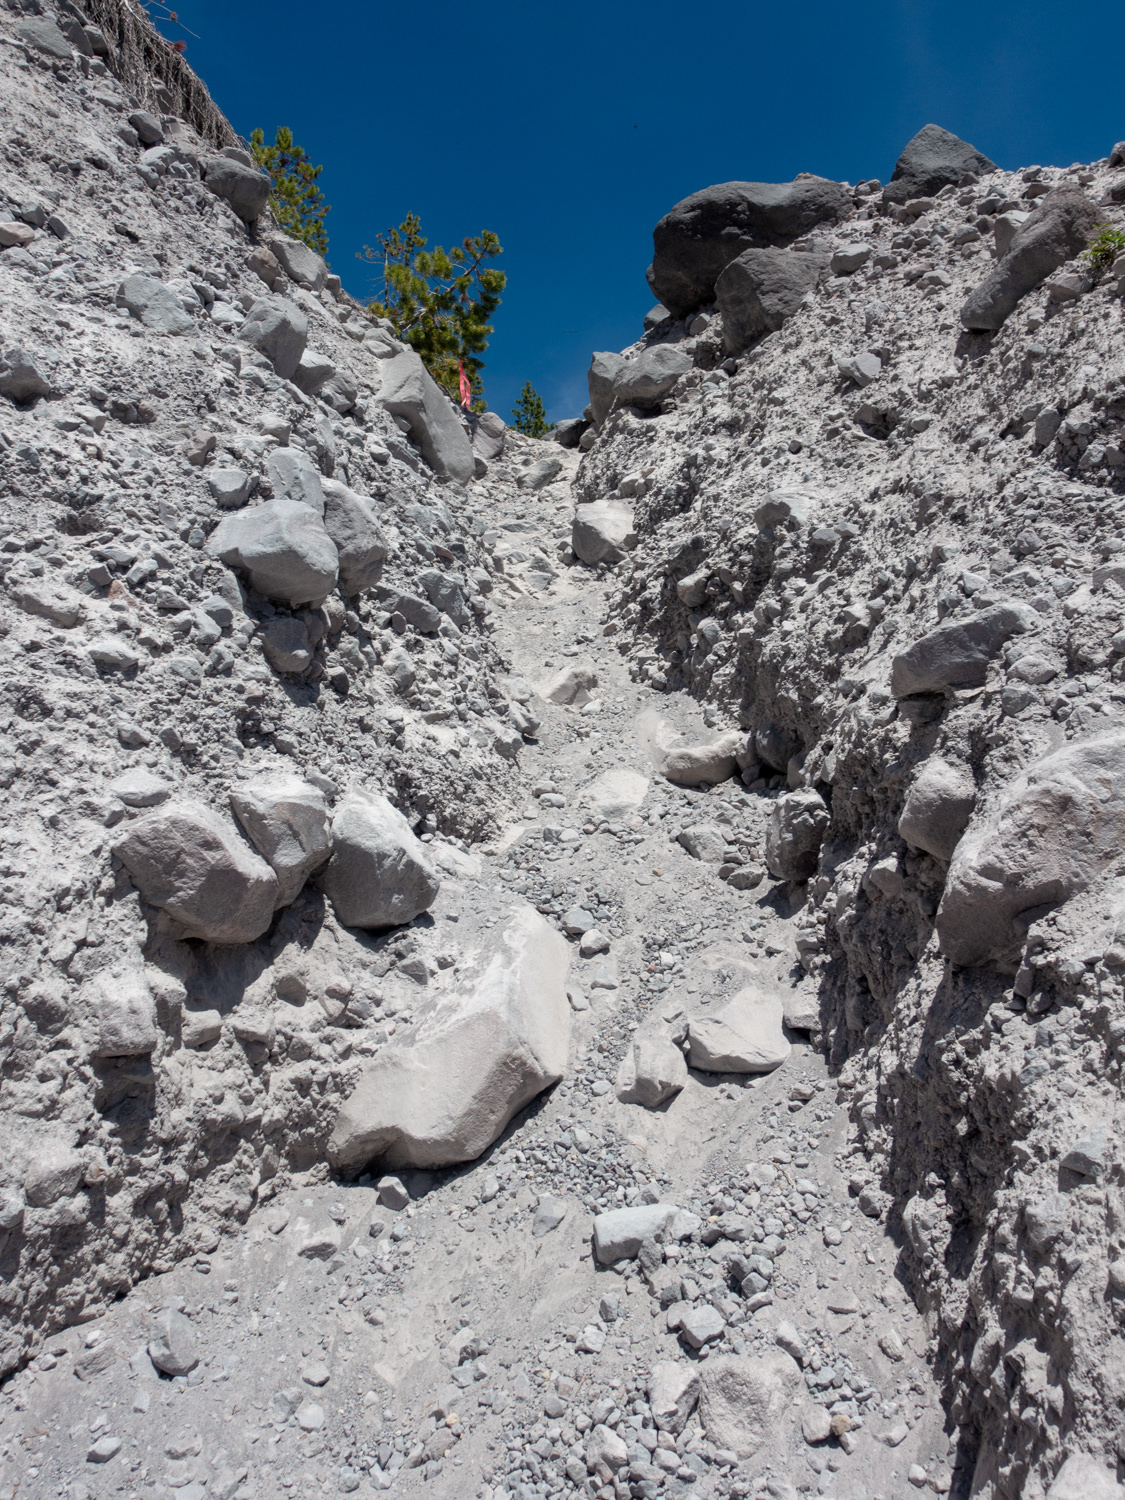
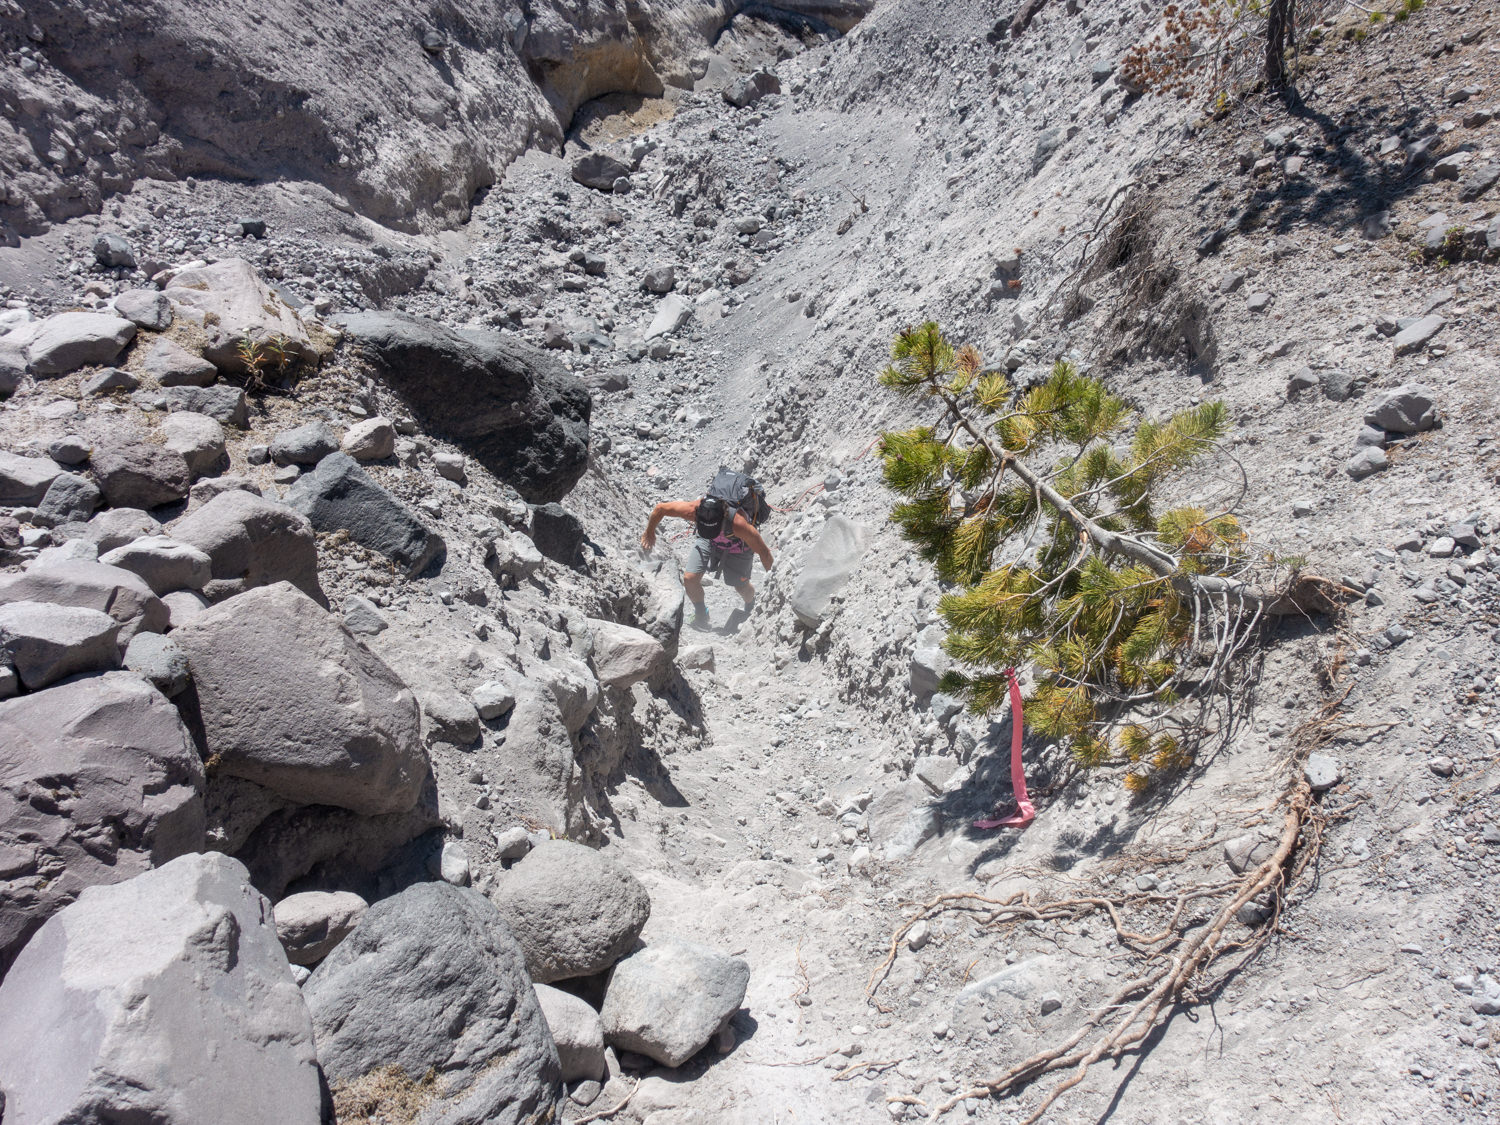
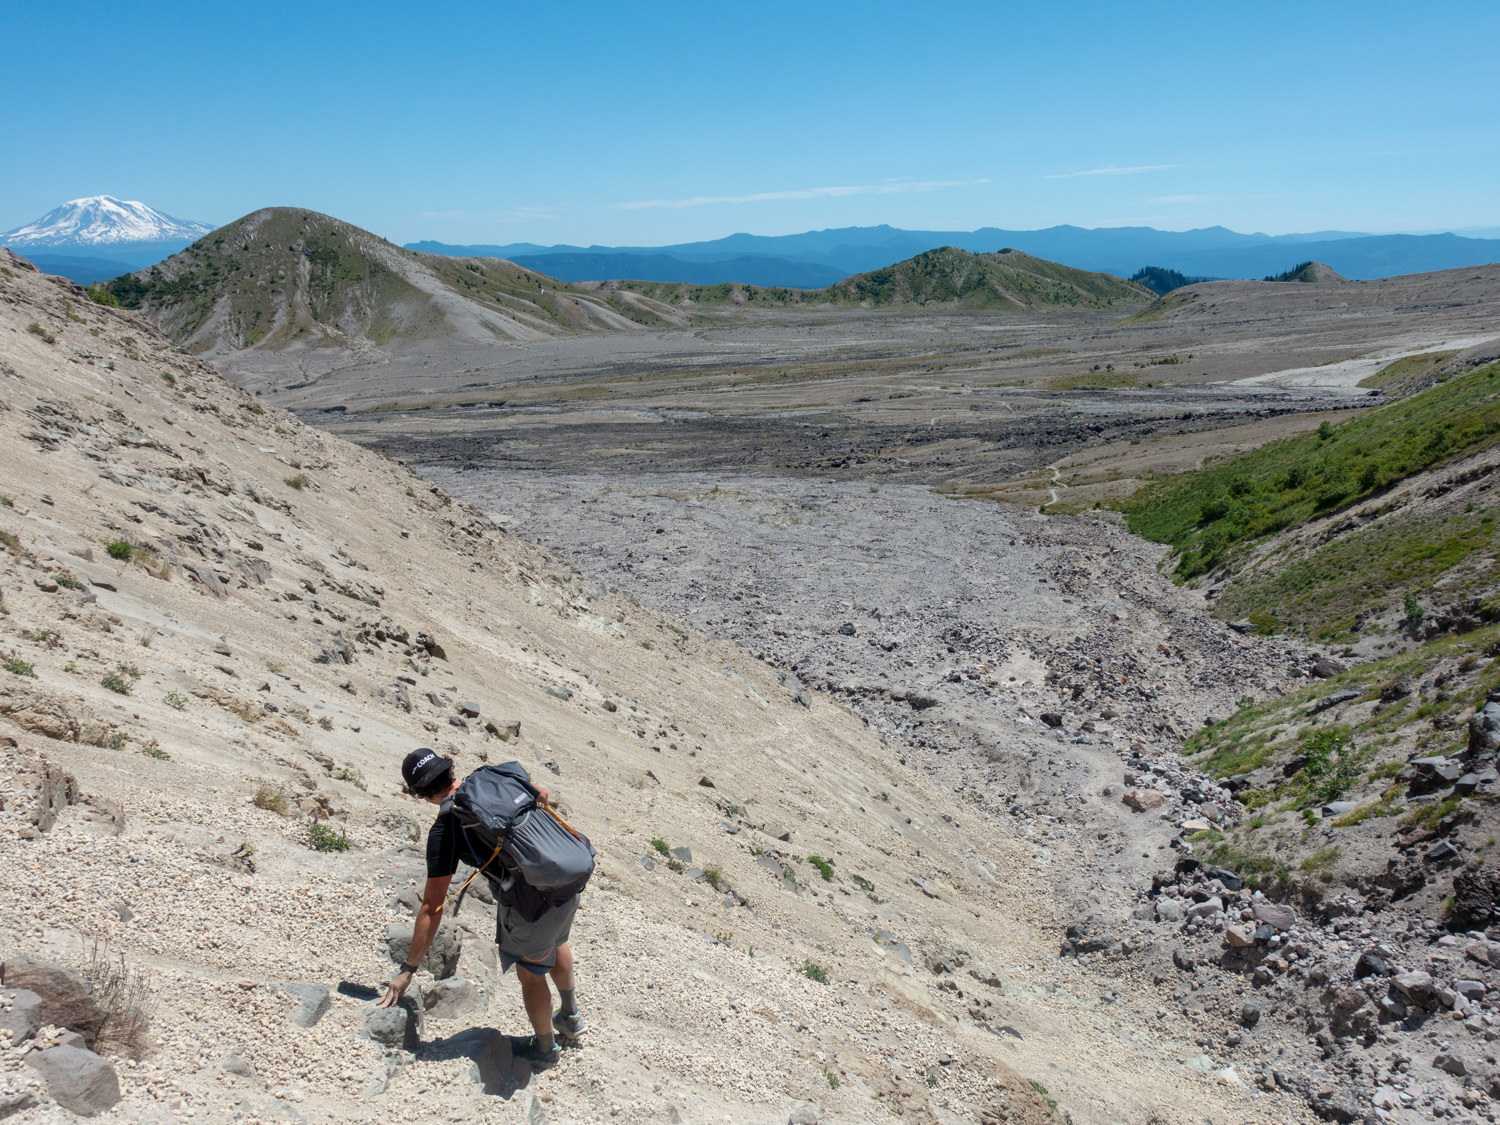
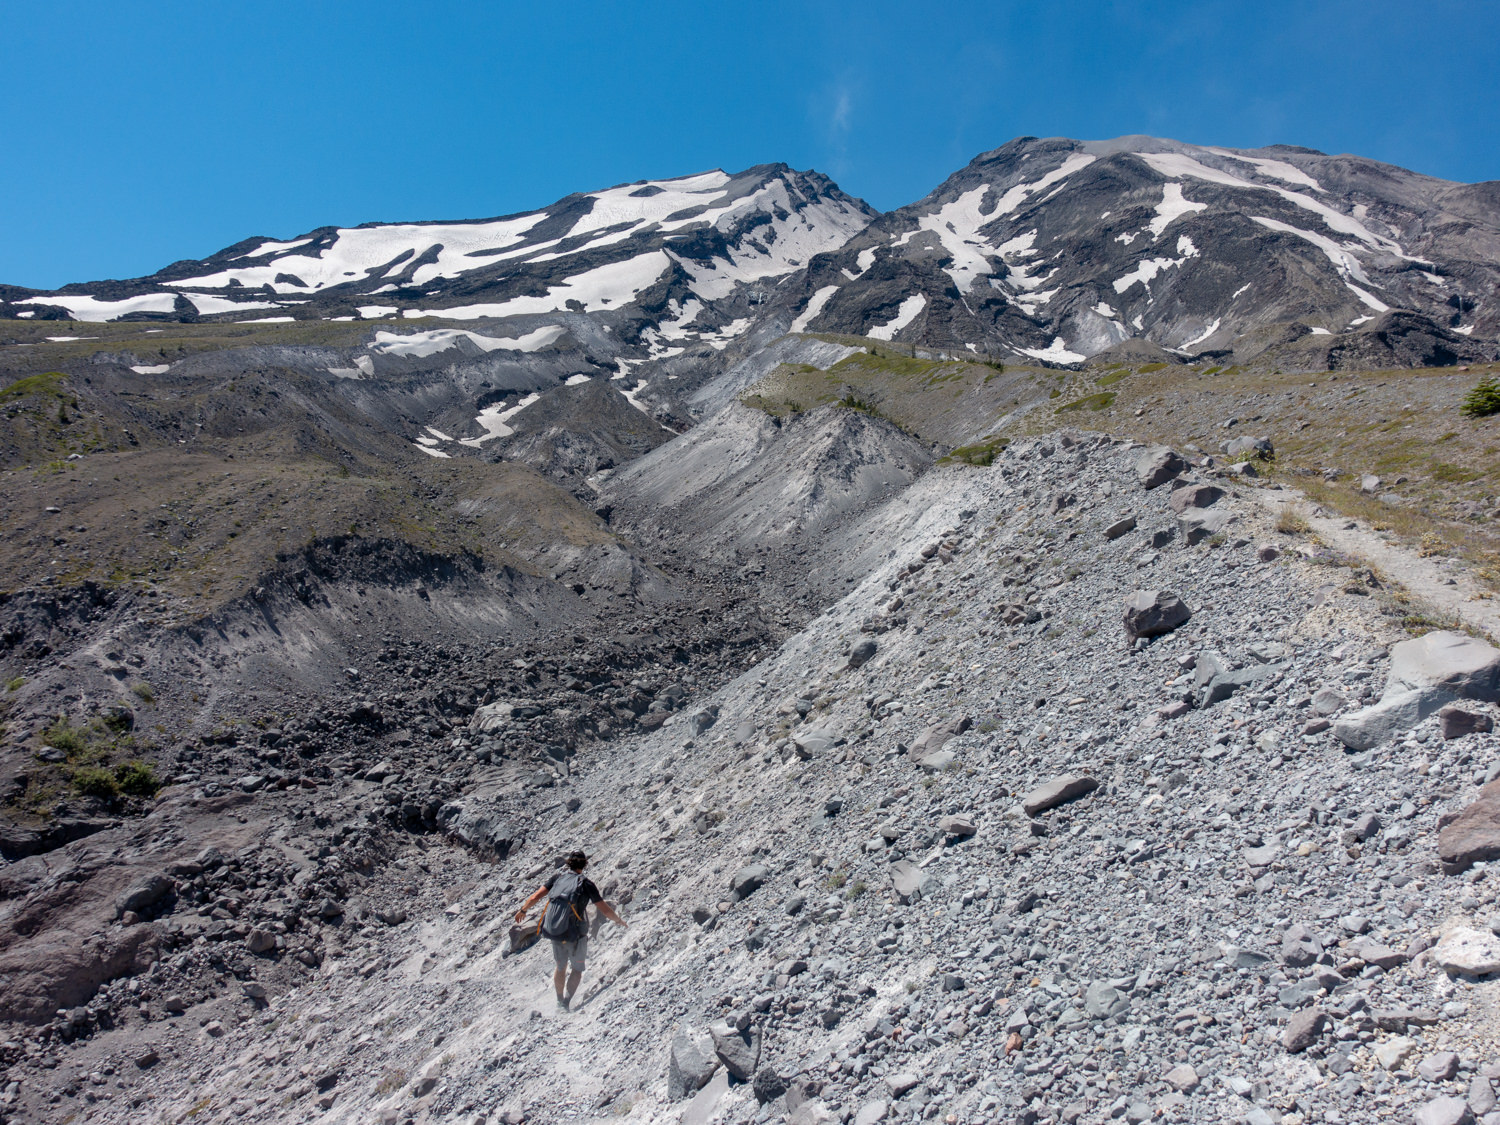
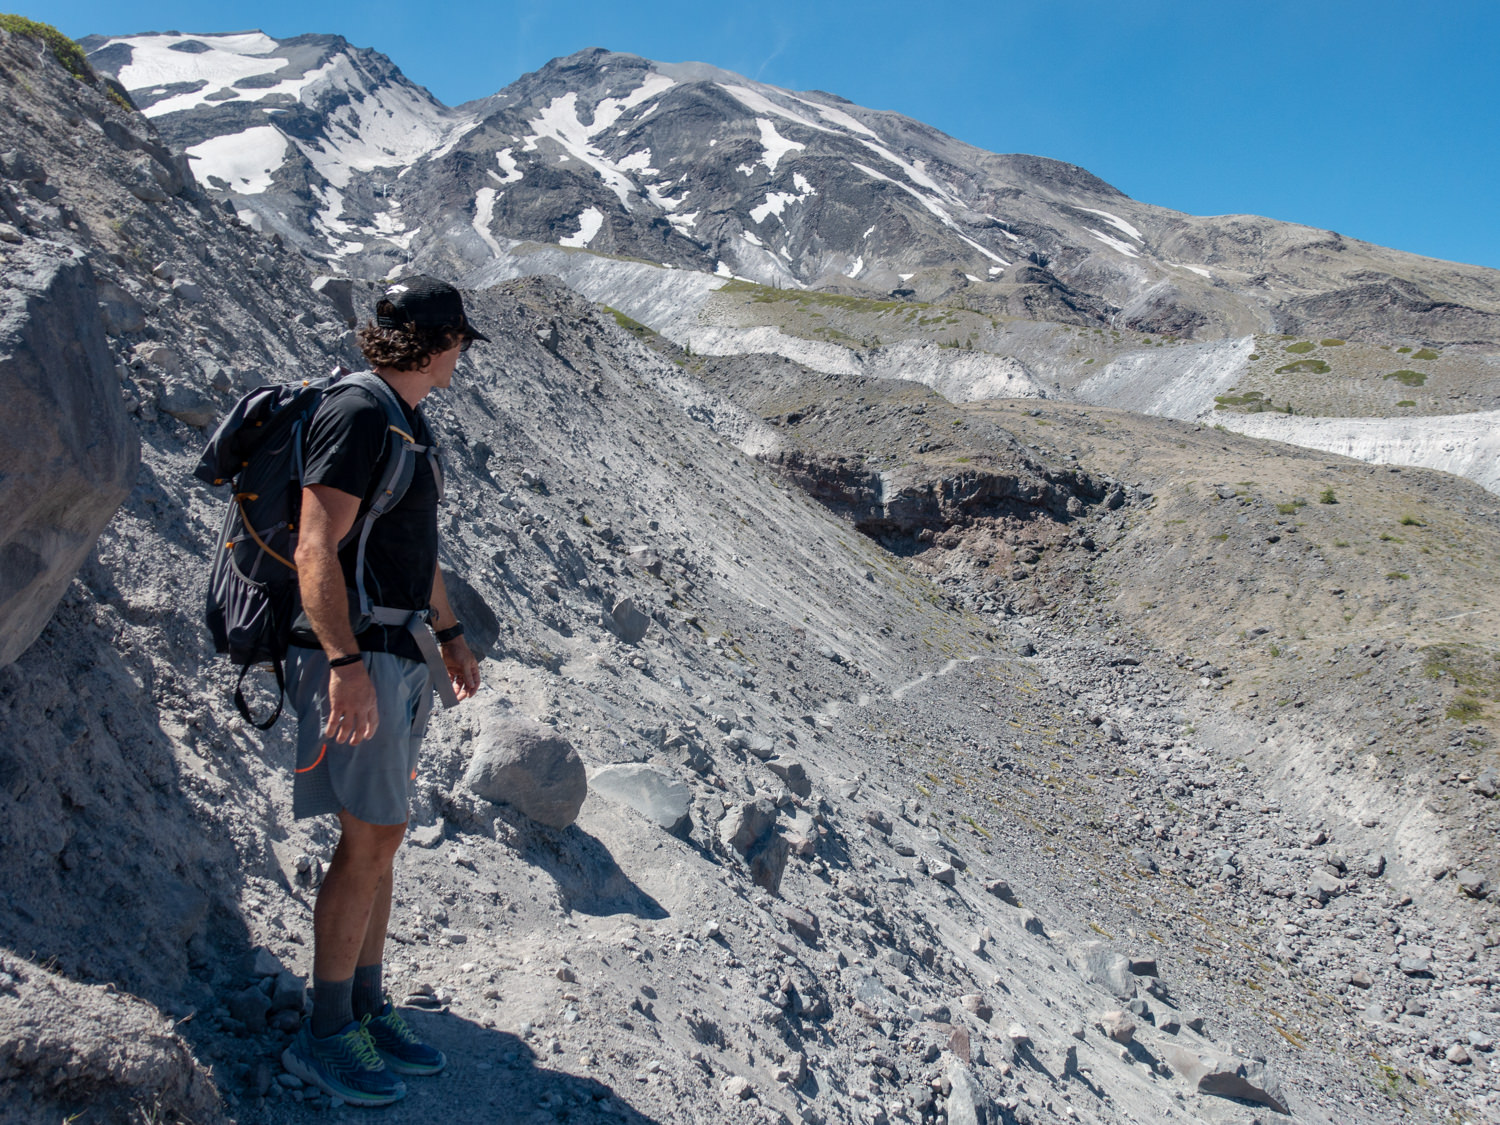
We rate this hike as very difficult (experts only) for a variety of reasons. One of the main challenges on the Loowit are the steep gullies left by debris flows that followed the eruption of Mount St. Helens. These gullies require steep scrambles along loose gravel and rock. For the confident and experienced hiker, they are navigable, but beginners and those with a fear of heights should avoid the Loowit in our opinion.
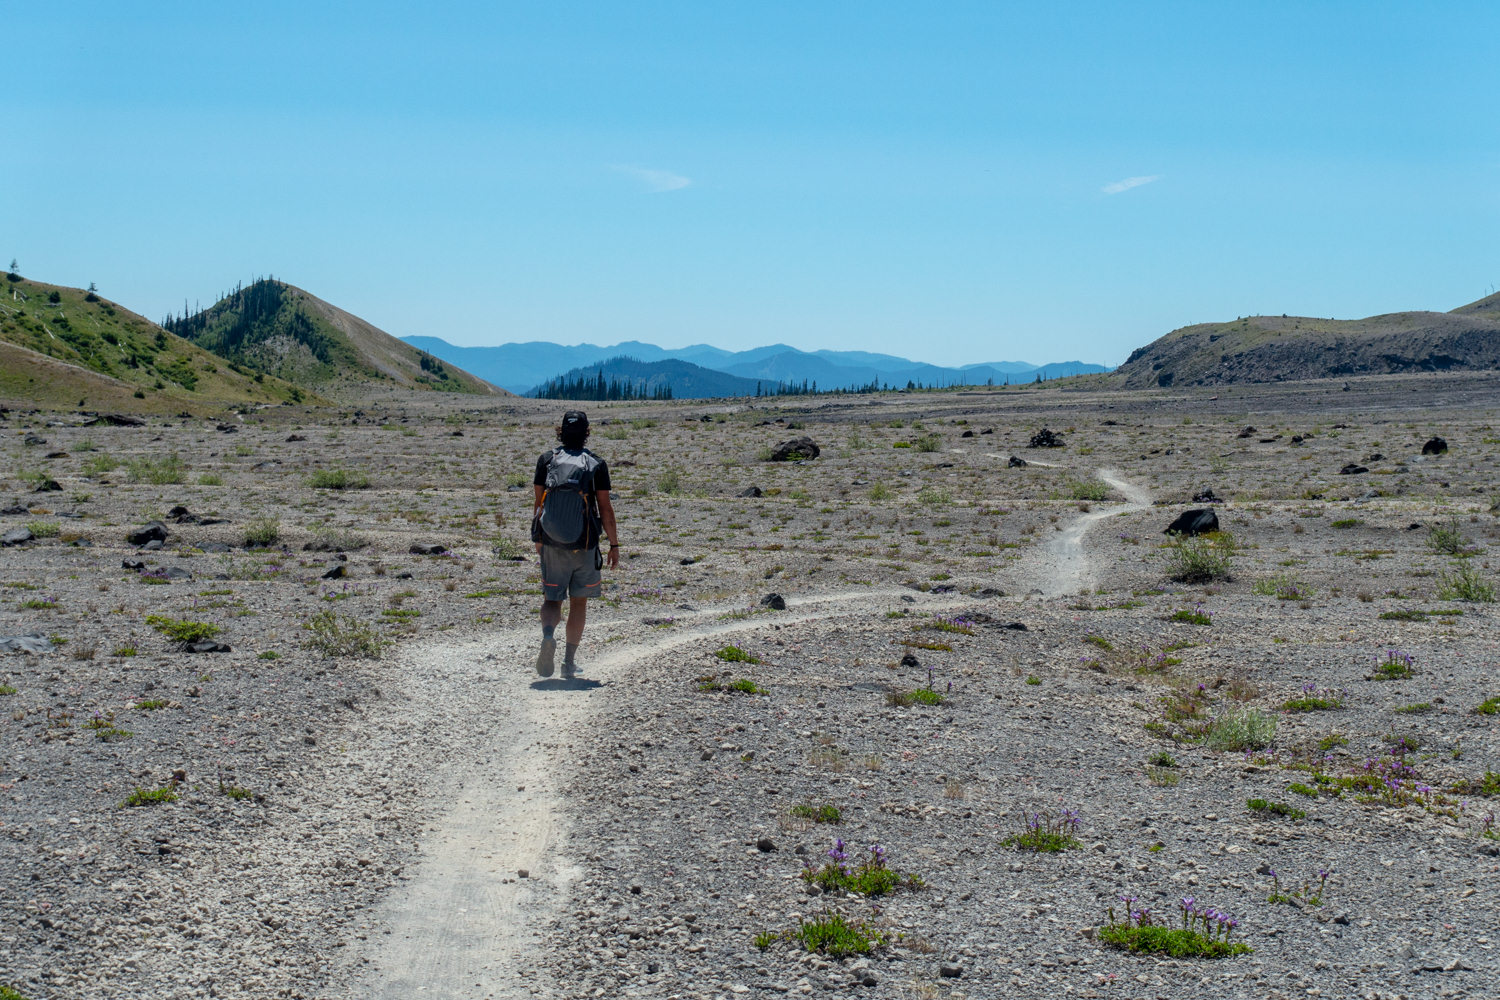
The powerful eruption debris flows pummeled the mountain’s flanks, stripping it of its forest canopy and places for hikers to take cover from the sun. Along with very little shade throughout most of the trail, there are also very few reliable water sources along the Loowit, so a well thought out water plan is essential.
Furthermore, expansive fields of large lava rock cover the mountain flanks and can make route finding quite challenging. Look for wooden posts, cairns (rock pile formations) and colorful tape to help find the trail. The Toutle River can also require skill and care to cross, especially early in the season and after rainstorms. Using trekking poles and taking time to scout the safest crossing can make river crossings easier.
Regardless of your entry trailhead, reaching the Loowit Trail will require a gradual climb. After that, the trail undulates across the slopes of the volcano, up and down gullies, and across boulder and lava fields. A few of the gully crossings are quite steep and require rope assists (placed by the Forest Service, but always a bit questionable—test them first). Loose, sliding scree and pumice is common along the Loowit, so we recommend using footwear with excellent traction.
As always, difficulty ratings depend on your experience, physical fitness, pack weight and weather conditions. Plan accordingly, train properly, know your limitations, brush up on your skills, and dial in your gear. Doing so will make for a safe and enjoyable adventure. Pre-check trail conditions before heading out.
Permits
You’ll need a NW Forest Pass to park at all trailheads. No other permits are necessary to complete the Loowit Trail.
TRAILHEADS
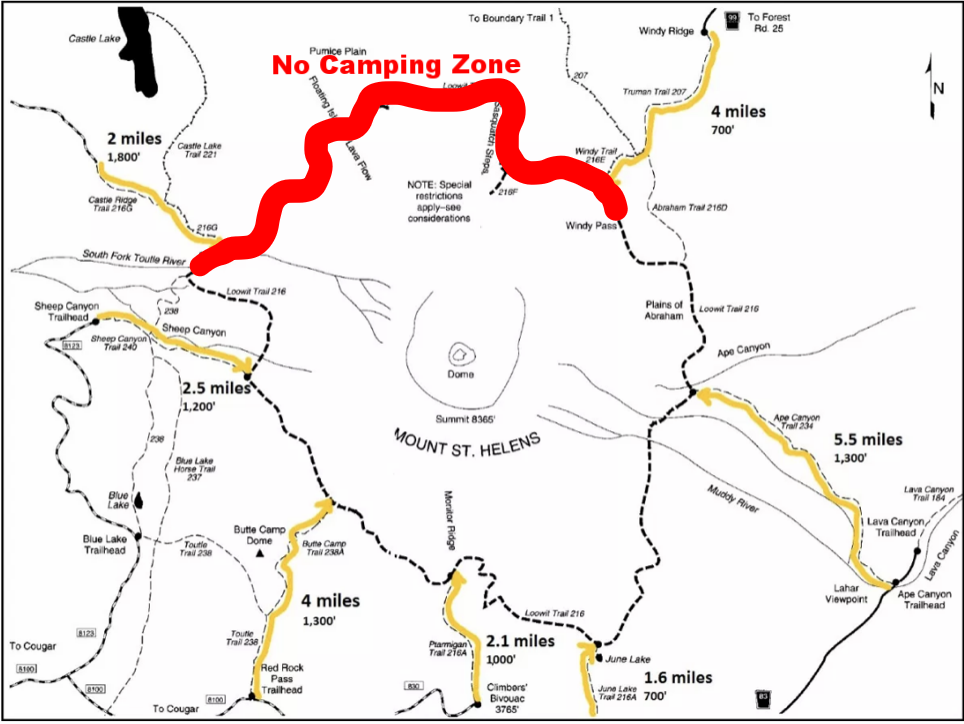
There are a few different trailheads you can access the Loowit Trail from. The west side of the mountain tends to be the most rugged with major washouts that require detours and scrambles, so it may be a good idea to plan your trip to hit that area early on in your trip. Also, camping is prohibited in the 10 mile stretch between the South Fork of the Toutle River and Windy Pass, so you’ll need to plan accordingly to cover that section in one day, camping on either side.
The most commonly used access points include:
-
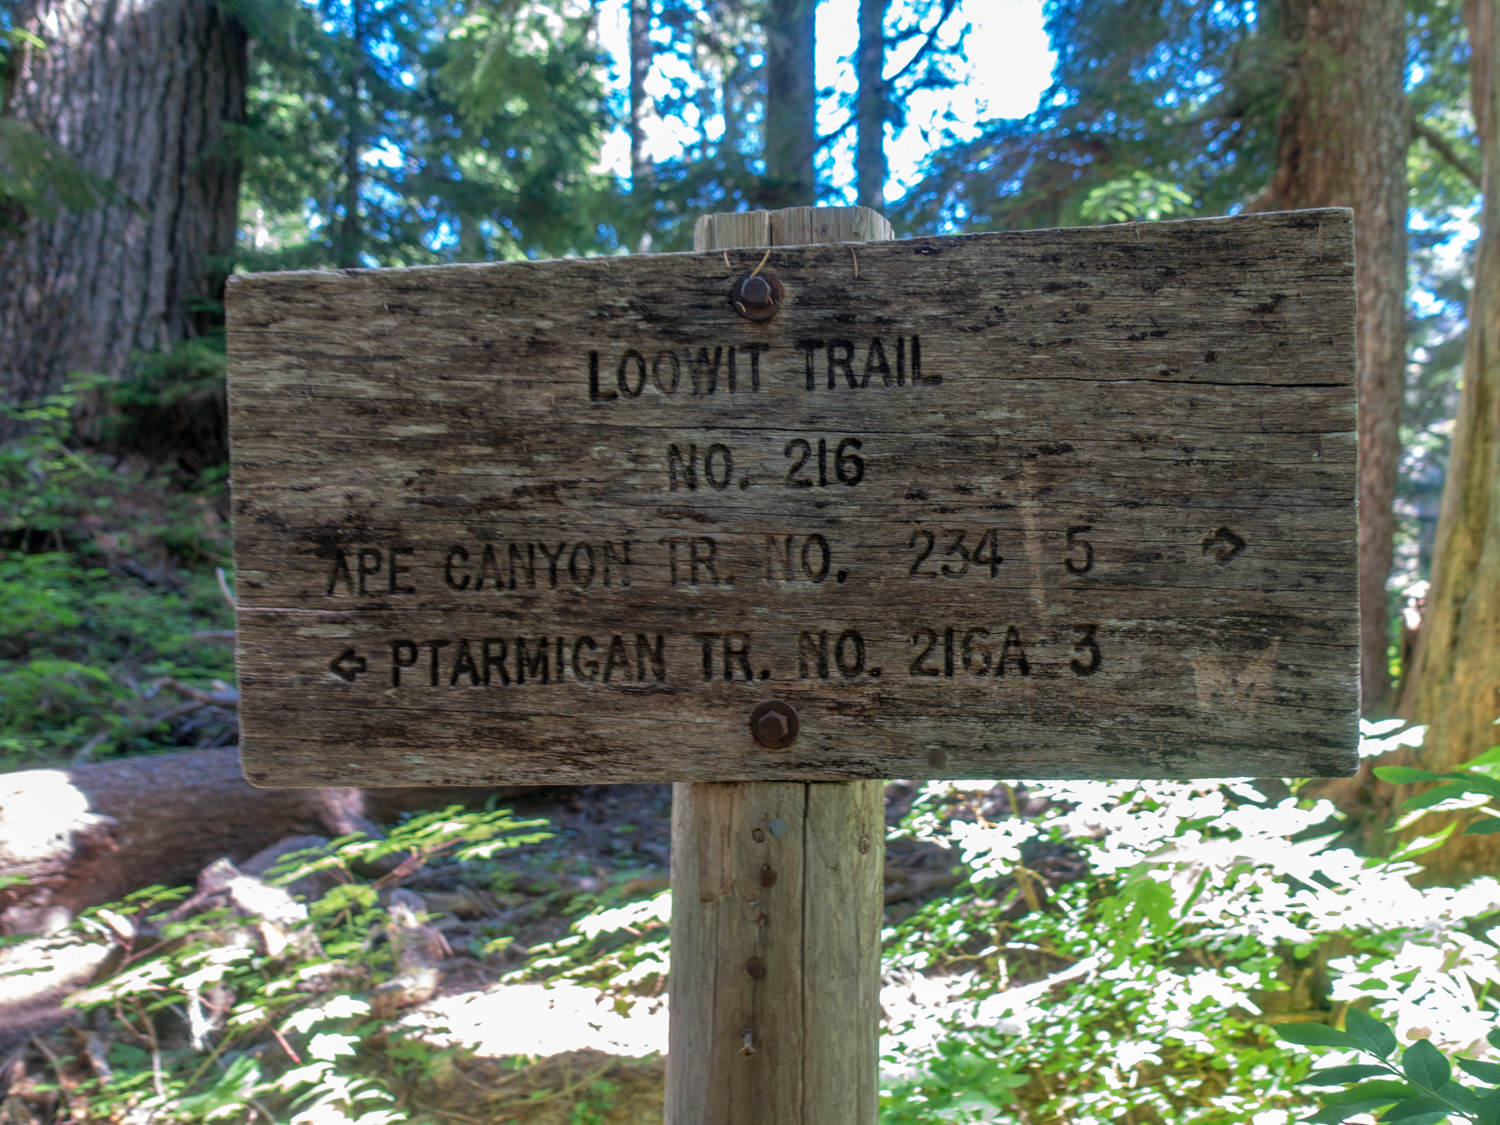
Climber’s Bivouac/Ptarmigan Trailhead – Hike 2 miles on the Ptarmigan Trail (216 A) to the junction with the Loowit (216).
-
June Lake Trailhead – Hike 1.6 miles from this small trailhead up to the junction with the Loowit.
-
Ape Canyon Trailhead – Hike 5.5 miles on the Ape Canyon Trail (234) to the junction with the Loowit.
-
Windy Ridge Trailhead – Hike 3 miles on the Truman Trail (207) to the Windy Trail (216 E) and follow that for 1 mile to the Loowit.
-
Blue Lake Trailhead – Start at the Toutle Trail (238) and hike about 3 miles to the Sheep Canyon Trail (240). Hike up the Sheep Canyon trail for about 2.5 miles to the Loowit.
-
Red Rock Pass Trailhead – Follow the Toutle Trail (238) to the Butte Camp Trail (238 A) for total of about 4 miles to reach the Loowit.
CAMPSITES
There are no designated campsites along the Loowit Trail, but you will surely see signs of previous campsites. The most important consideration when planning your itinerary is that there is no camping allowed in the 10-mile section of the trail from Windy Pass to the South Fork Toutle River. You’ll need to plan your daily mileage and campsites accordingly to pass through this section in one day.
Camping is allowed throughout the other sections of the Loowit Trail, including the south side of the South Fork Toutle River, on the east along the Plains of Abraham and other, somewhat less appealing, campsites can be found on the south side.
POSSIBLE ITINERARIES
The Loowit Trail maintains an elevation between 4,500 and 4,800 feet. Most hikers complete the Loowit Trail as a loop in 3-4 days. Faster hikers looking for a challenge can complete it in 2 days, just be careful not to bite off more than you can chew, because the miles are challenging. Those wishing to have slower days and explore the area more thoroughly may want to plan for 4-5 days.
Two Day Itinerary
TRAILHEAD:June Lake
-
Day 1 – Hike clockwise to the South Fork of the Toutle River.
-
Day 2 – Get an early start for a long day continuing clockwise back to the June Lake Trailhead.
-
Note – You could also reverse this route and start with the longer day.
Three Day Itinerary
TRAILHEAD: Windy Ridge
-
Day 1 – Hike from Windy Ridge to camp near the South Fork Toutle River.
-
Day 2 – Hike from South Fork Toutle River to June Lake.
-
Day 3– Hike from June Lake to Windy Trail #216E to Truman Trail #207 to Windy Ridge Trailhead and your car.
Four Day Itinerary
TRAILHEAD:June Lake
-
Day 1 – Hike north from the trailhead to Abraham Trail #216 D feeder trail, follow it north to Truman Trail #207 and look for a campsite.
-
Day 2 – Hike the Truman Trail #207 to Windy Trail #216E to intersection with Loowit Trail #216. Follow all the way to the south side of the South Fork Toutle River and look for a campsite.
-
Day 3 – Hike from campsite back to Loowit Trail #216 and stay on it all the way to intersection with Butte Camp Trail #238A. Camp here for the night.
-
Day 4 – Hike from Butte Camp to June Lake #216A and back to car.
Five Day Itinerary
TRAILHEAD: Windy Ridge
-
Day 1 – Hike from Windy Ridge to Castle Ridge Trail #216G, go north on Castle Ridge for ¼ to ½ half mile and look for a place to camp.
-
Day 2 – Leave packs and tent and hike to Castle Lake #221 for a day hike. Hike from Castle Lake back to Castle Ridge #216G and then back to Loowit Trail #216. Right after you cross the South Fork of the Toutle, head south on Toutle Trail #238 to the Sheep Canyon Trail #240 intersection and go east on it to find a campsite.
-
Day 3 – Head south to Blue Lake on Toutle Trail #238 and follow directions to Butte Camp from Red Rock Pass, ending the day at Butte Camp.
-
Day 4 – Hike from Butte Camp Trail #238A to June Lake. Look for a campsite near June Lake.
-
Day 5 – Hike back north from June Lake Trail on the Loowit Trail #216 to the intersection with the Abraham Trail #216D. Follow it to Truman Trail#207 and then northeast to Windy Ridge.
MAPS & GUIDEBOOKS
Below is a list of guidebooks and maps we’ve found helpful in planning our trips along the Loowit Trail.
-
100 Hikes in the South Cascades and Olympics by Ira Spring and Harvey Manning. A classic, this guide give you all the details you need to complete this trip—keeping in mind that change is a constant in this area.
-
Backpacking Washington Book – We use this excellent resource to plan many of our backpacking trips throughout Washington.
-
Mount St. Helens NVM Trail Guide Forest Service website with hiking information and resources.
-
National Geographic Trails Illustrated Map of Mount St. Helens, Mount Adams [Gifford Pinchot National Forest] Map This foldable map provides good topographical detail and is printed on water-resistant coated paper. It folds well and stuffs easily into a pack. But alas, there are no point-to-point distance measurements for the trail.
-
Green Trails Mount St. Helens #364 and #364S – This map shows the most current trail, road, and access information to Mount St. Helens, in a compact format. Featuring Mount St. Helens, Swift Reservoir, June Lake Trailhead, Marble Mountain, Ape Canyon and Lava Canyon Trailheads, use this map to navigate your way around the Loowit Trail on Mount St. Helens.
REGULATIONS
According to USFS Gifford Pinchot, the following regulations are in place for Mount St. Helens. We are not an official source on current regulations, so please consult the official website prior to your trip for frequent road closures.
-
No campfires or camping are allowed in the blast zone between Windy Pass and the South Fork of the Toutle River.
-
No shortcutting trails or switchbacks.
-
Being in an area posted as being closed for restoration, wilderness restoration, or rehabilitation is prohibited.
-
Dogs on leash are allowed but not recommended due to the difficulty of this trail.
WATER
Planning for water along the Loowit Trail will be trickier than other backpacking routes in the PNW. Water sources include small creeks and springs around the mountain, but many of the snow-melt streams will dry up by mid-summer. Furthermore, what water sources do exist may be silty, clogging up water filters quickly.
You’ll want to make sure to plan for water carefully and carry enough to get from one source to the next. And don’t forget, there is very little shade along the Loowit, and temperatures can get vey hot, so make sure to carry plenty of water. All hikers are different, but in general you should drink at least 4L of water per person per day. On very hot days you may want to drink around 6L. This may mean bringing along an extra water bladder, such as a Platy Bottle, and filling up at one of the year-round springs listed below.
We used Chlorine Dioxide pills on the Loowit due to the silty nature of some water sources and we were happy with our choice. Check out our best water filters list for more great options.
Year round dependable springs are located at the following locations:
-
1 mile from the Butte Camp/ Loowit Junction on the Butte Camp Trail
-
1/4 mile from the Loowit/ Toutle Junction on the Toutle Trail
-
1/2 mile from the Windy/ Loowit Junction flowing across the Loowit
-
Note: other sources/streams may exist, but water can be scarce in this area, especially later in the summer, so we recommend carrying a safe amount of water and using dependable sources.
BEARS & FOOD STORAGE
Bears are not a problem in this area so there are no food storage requirements. That said, you should always protect your food against rodents and small critters, which will tear through your backpack or tent without hesitation. We recommend packaging all your food and scented products in a food storage container such as an Ursack.
BUGS
Mosquitoes are present along this route in early summer but level off later in the season as sitting water dissipates. Hiking later in the season is often bug-free. Use a combination of permethrin on your clothing and bring a small bottle of DEET for exposed skin to provide full protection.
BACKPACKING GEAR
We prefer lightweight backpacking because it’s more comfortable and it allows us to cover more ground with less effort. For recommendations on our favorite lightweight backpacking equipment, check out the CleverHiker Gear Guide and Top Picks page.
What To Pack
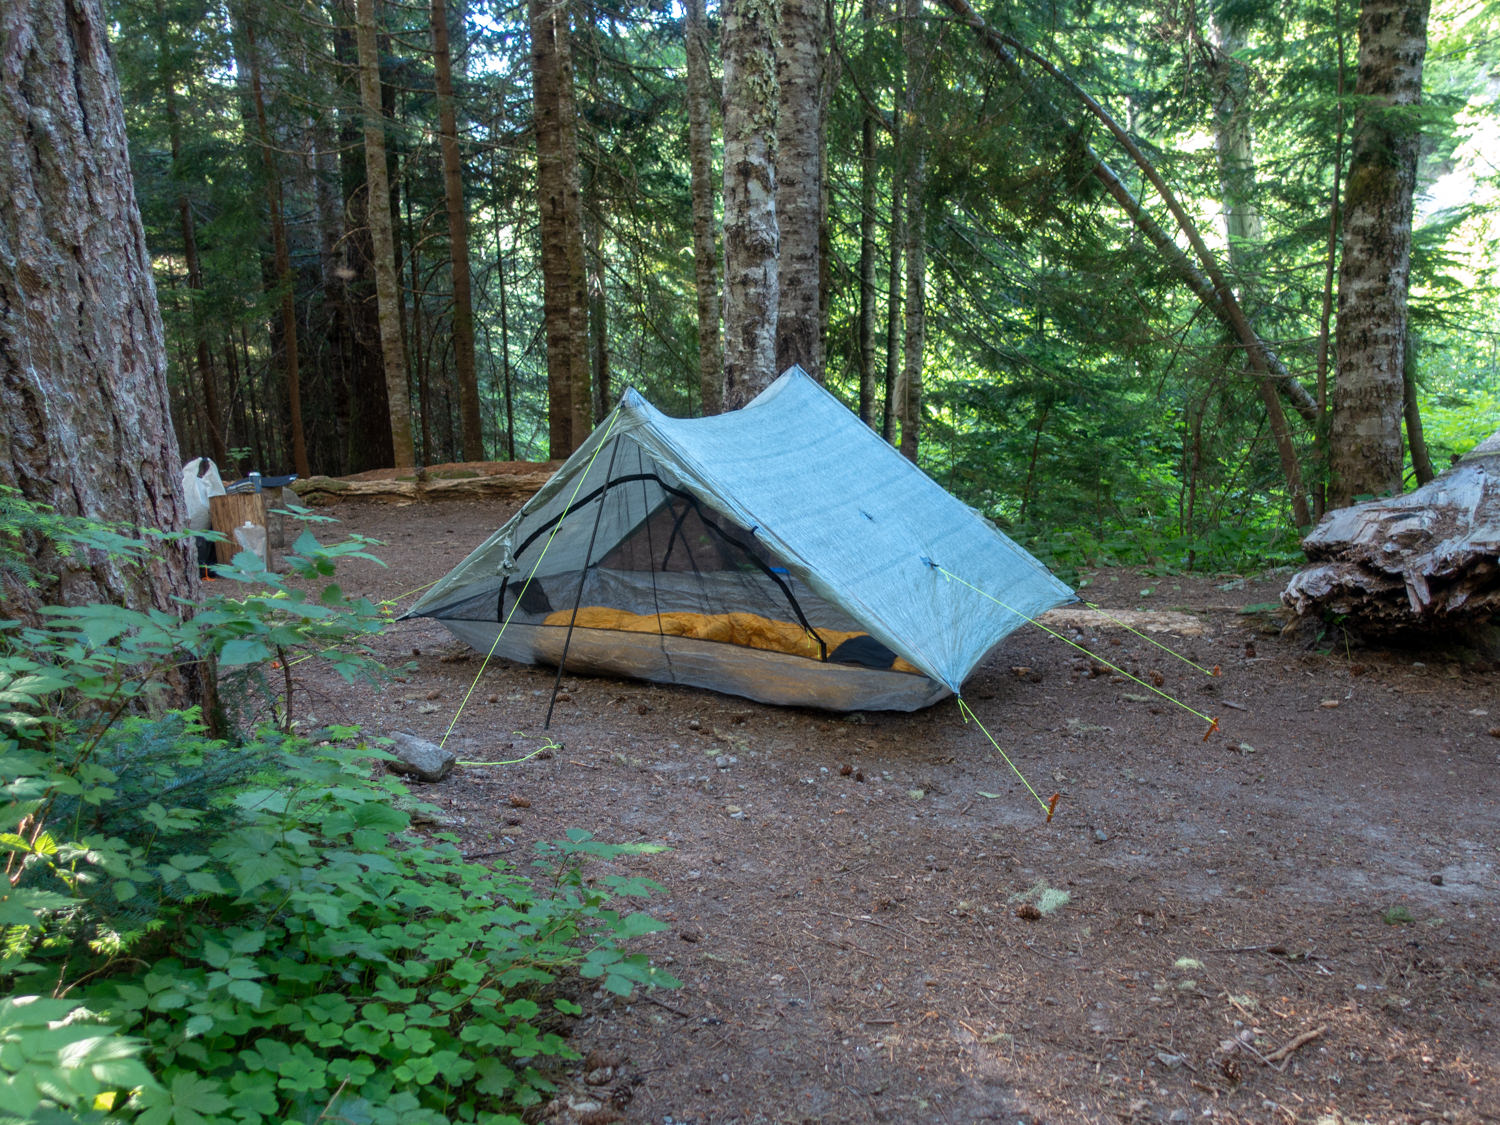
TENT: We used the Zpacks Duplex tent on this trip to keep our weight to a minimum. The Duplex is one of the top picks on our best lightweight backpacking tents list.
BACKPACK: We used the HMG Southwest 2400 and Gossamer Gear Gorilla backpacks on this trek. They’re both lightweight, convenient, comfortable, and make our list of the best lightweight backpacking packs.
SLEEPING BAG: We used the Enlightened Equipment Revelation 10° and Western Mountaineering UltraLite on this trip. They’re both lightweight, incredibly warm, and makes our list of the best backpacking sleeping bags.
SLEEPING PAD: We used the Therm-a-Rest NeoAir XLite sleeping pad on this trip. It’s light, comfortable, warm, and make our list of the best backpacking sleeping pads.
COOKING SYSTEM: We used the BRS Stove along with our Snow Peak Mini Solo Cookset and Snow Peak Folding Spoon on this trek, all of which make our top picks gear list and best lightweight stove list.
WATER PURIFIER: We used Potable Aqua as our main purification method on this trip to avoid clogging a water filter with silty sources. Chlorine Dioxide pills take a bit of time to work, but they don’t require any pumping or squeezing which is nice. Check out our best water purifiers list for our other top recommendations.
SHOES OR BOOTS: We wore theSaucony Peregrine 7’s on this trail and they were excellent. If you prefer boots, make sure they’re lightweight and break them in really well before your trip. Here’s why we prefer hiking in trail running shoes: 5 Reasons to Ditch Your Hiking Boots. Also, here’s our top picks for the best backpacking footwear.
HEADLAMP: A small headlamp like the Petzl Actik is an affordable, bright, and lightweight option.
FOOD: When backpacking the Loowit Trail you’ll have to carry all your food. Check out our Best Lightweight Backpacking Food Guide and our Best Freeze Dried Backpacking Meals for some of our go-to recommendations.
FOOD STORAGE: For this trip, we brought an Ursack to keep the critters out of our food. There are no food storage requirements for this area, but you should always store your food properly in the backcountry.
CLOTHING:
Here are some of our favorite hiking/backpacking clothing items from our Top Gear list.
-
1 Rain jacket shell – Marmot Pre-Cip / Rab Kinetic Plus
-
1 Pair of rain pants – Mountain Hardwear Stretch Ozonic
-
1 Down jacket – Patagonia Micro Puff Hoody
-
1 Fleece jacket – Extra warmth under your down jacket that will be warmer when damp and better to hike in.
-
1 Pair hiking pants – (we love PrAna Zion Stretch) or running tights
-
1 Pair hiking shorts – Nike dri fit running shorts
-
1-2 Hiking t-shirts – Nike dri fit t-shirts
-
1 Long-sleeve shirt – Nike dri fit quarter zip
-
1-3 Pair underwear – ExOfficio boxer briefs or or ExOfficio women’s briefs
-
2-3 Pair socks (add thin sock liners if using boots) – Balega running socks for warm weather & SmartWool mountaineer socks for snow.
-
1 Pair long john bottoms – long john top optional for nighttime use.
-
1 Warm hat
-
1 Sun hat
-
1 Pair gloves or mittens
MAP &COMPASS:We hiked with the National Geographic Trails Illustrated Map of Mount St. Helens, Mount Adams Map and found it to be an excellent resource. In addition, we always hike with a compass and a downloaded GPS app on our phone, like Gaia GPS.
FIRST AID KIT: Always bring a small personalized first aid kit. We use the Ultralight .7 Kit and add extras, like painkillers and personal medications.
SUN PROTECTION: Sunglasses (polarized recommended), sunscreen, and spf lip balm are an absolute must on any backcountry trip, especially this one.
POCKET KNIFE: We brought along a small Swiss Army Knife, which came in handy here and there.
OTHER ITEMS:
-
SMALL TOWEL: Nano pack towel is great.
-
CASH and ID
-
PERMITS
-
PERSONAL TOILETRIES
-
HAND SANITIZER: Always apply after using a bathroom and before eating.
-
WET WIPES: These can be useful for cleaning up after hiking.
-
INSECT REPELLANT: At higher elevations insects weren’t a problem for us at all. For lower elevations, a 1oz bottle of DEET will do the trick.
-
CAMERA: The Sony RX100 is our go-to camera for lightweight backpacking.
Loowit Trail Photo Gallery
More Information
We hope this guide helps you plan a fantastic backpacking trip along the Loowit Trail. As always, please leave a comment below if you have any recommendations, questions, or suggestions. And if you found this guide helpful, click the little like button below to give us a digital high five!
For more popular CleverHiker content, check out the following links:
Some of the links on this page are affiliate links, which means we may receive a small commission if purchases are made through those links. This adds no cost to our readers and helps us keep our site up and running. Our reputation is our most important asset, which is why we only provide completely honest and unbiased recommendations.