
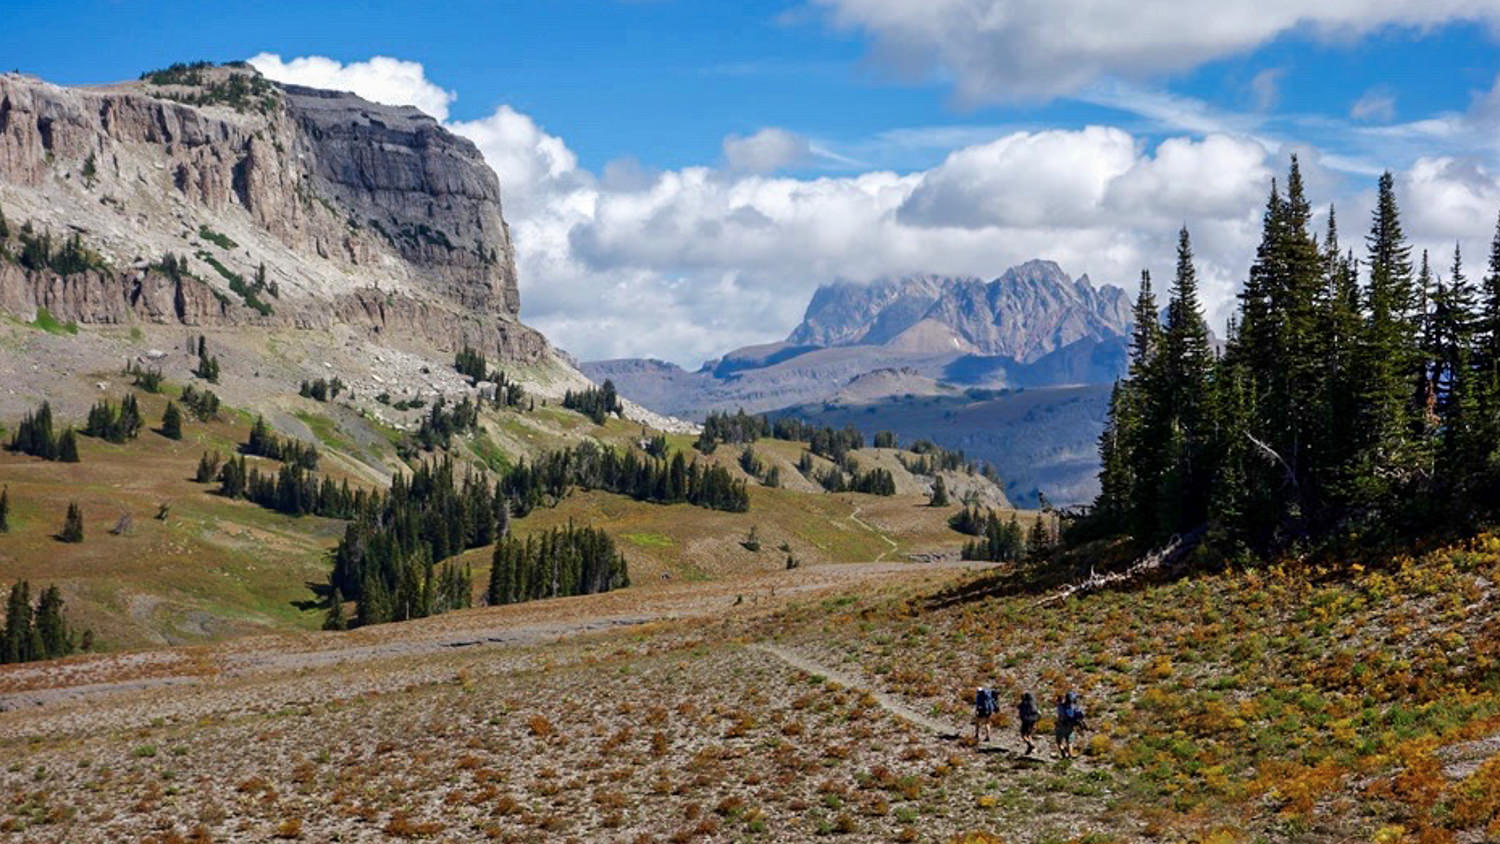
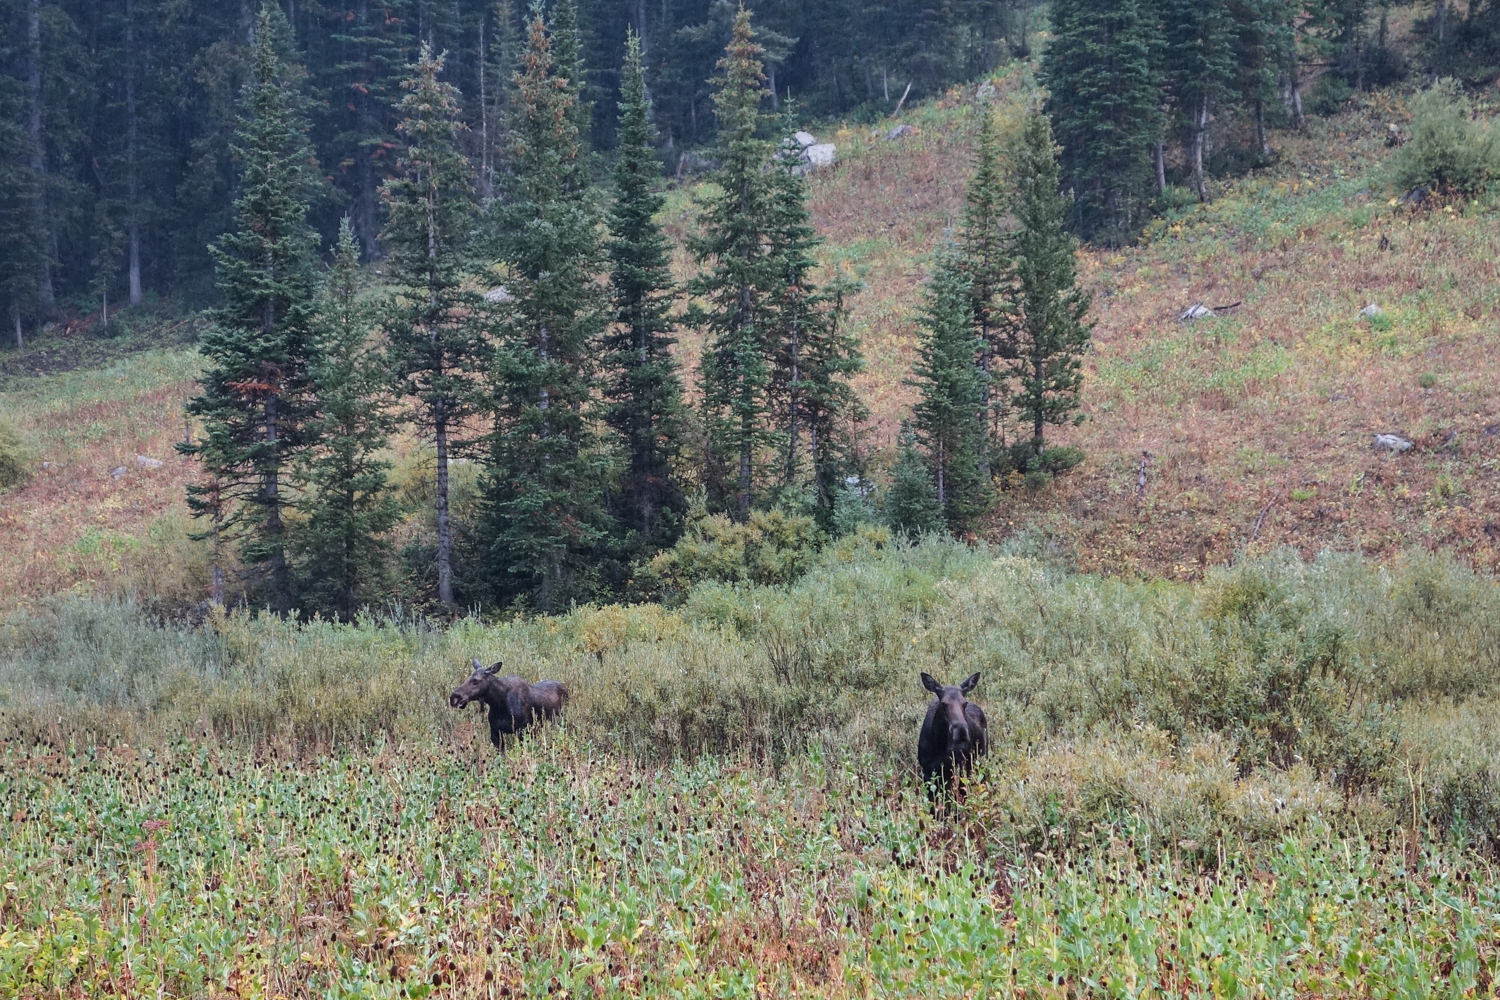
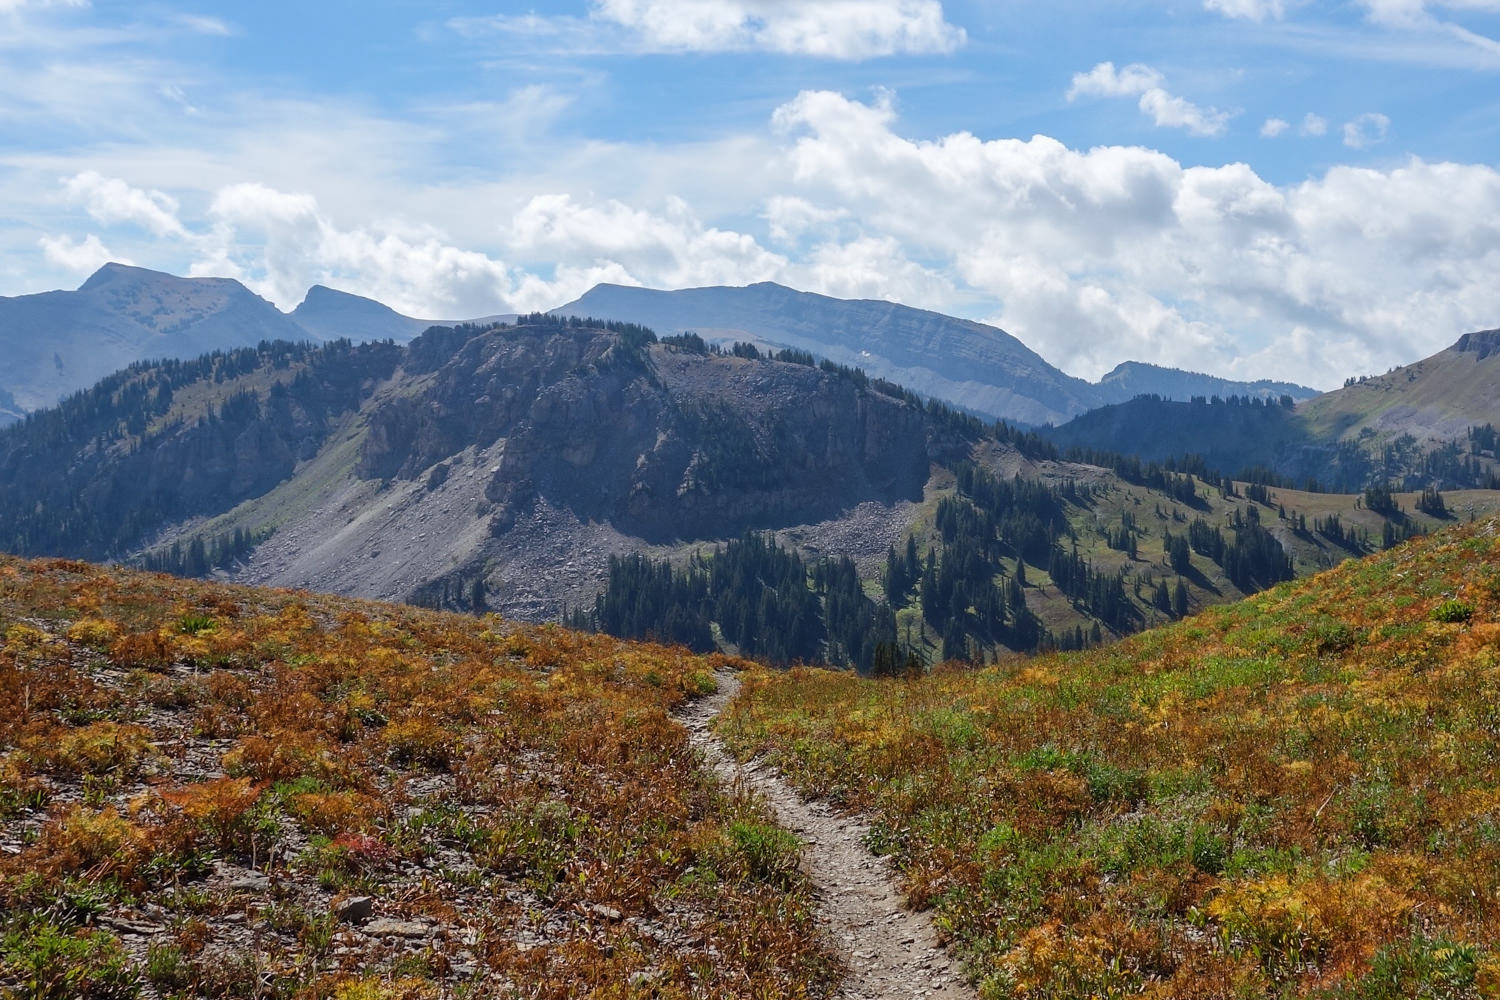
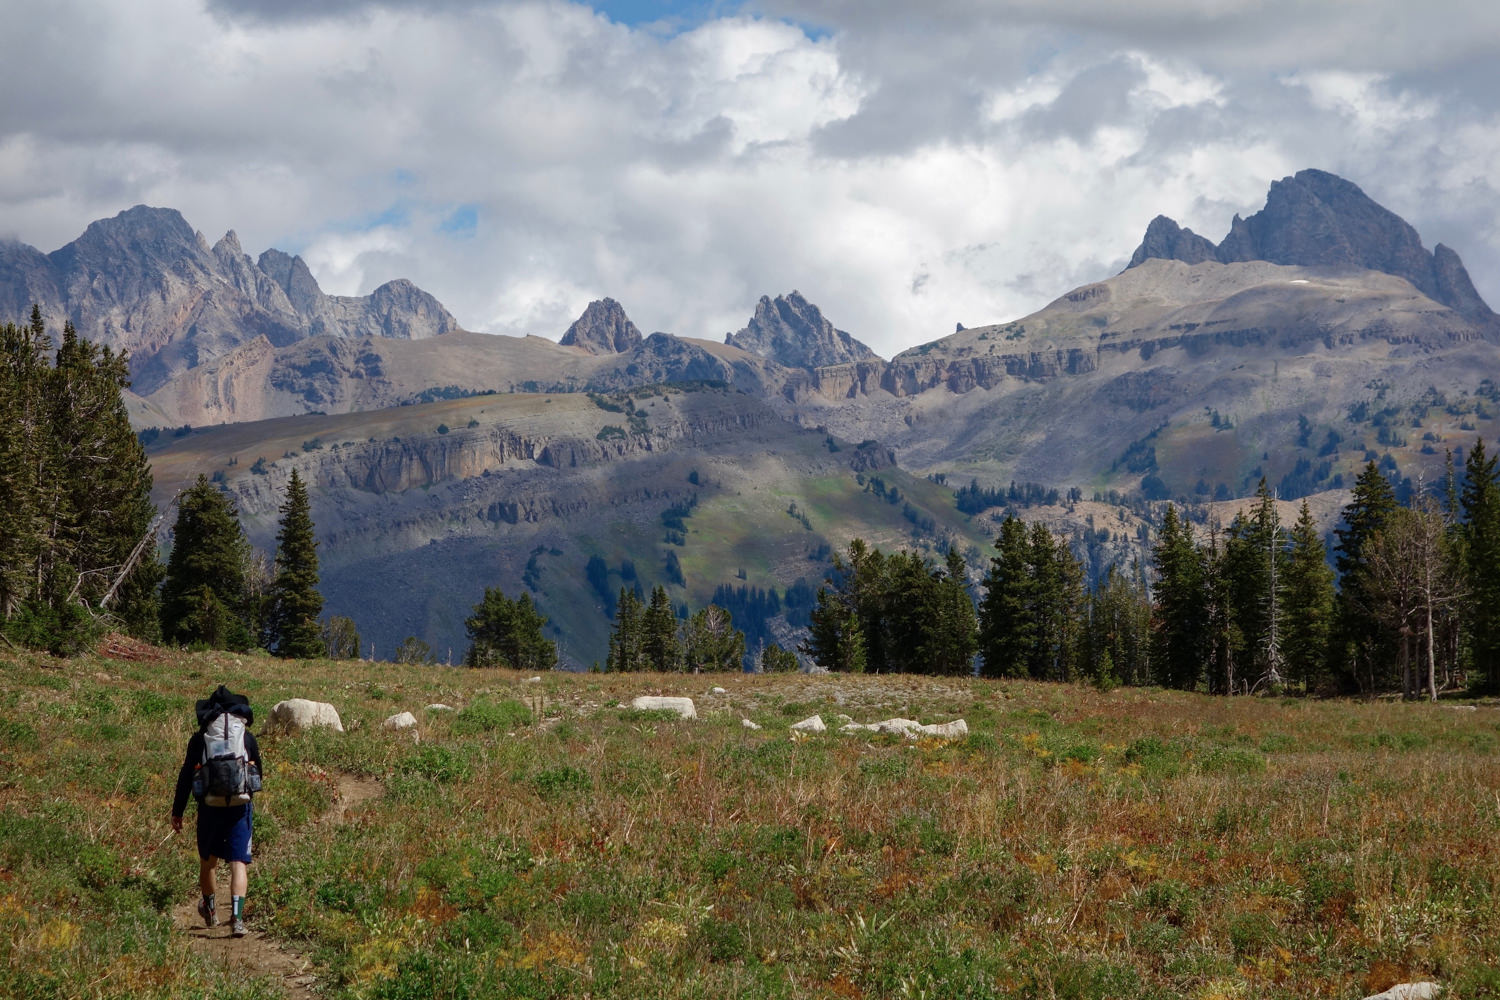
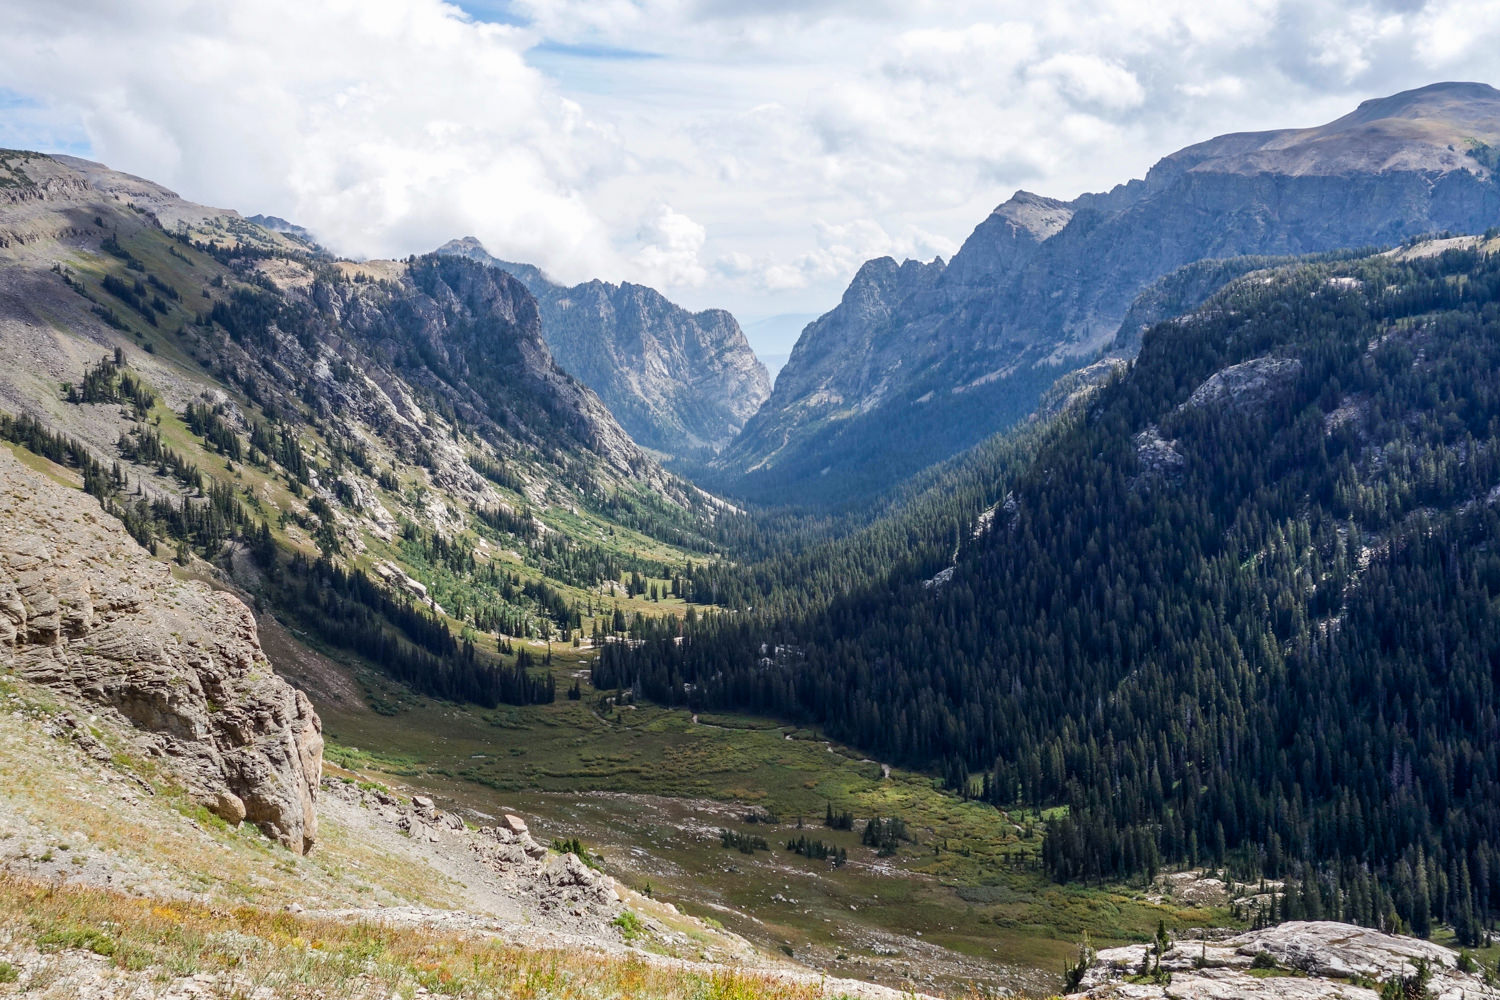
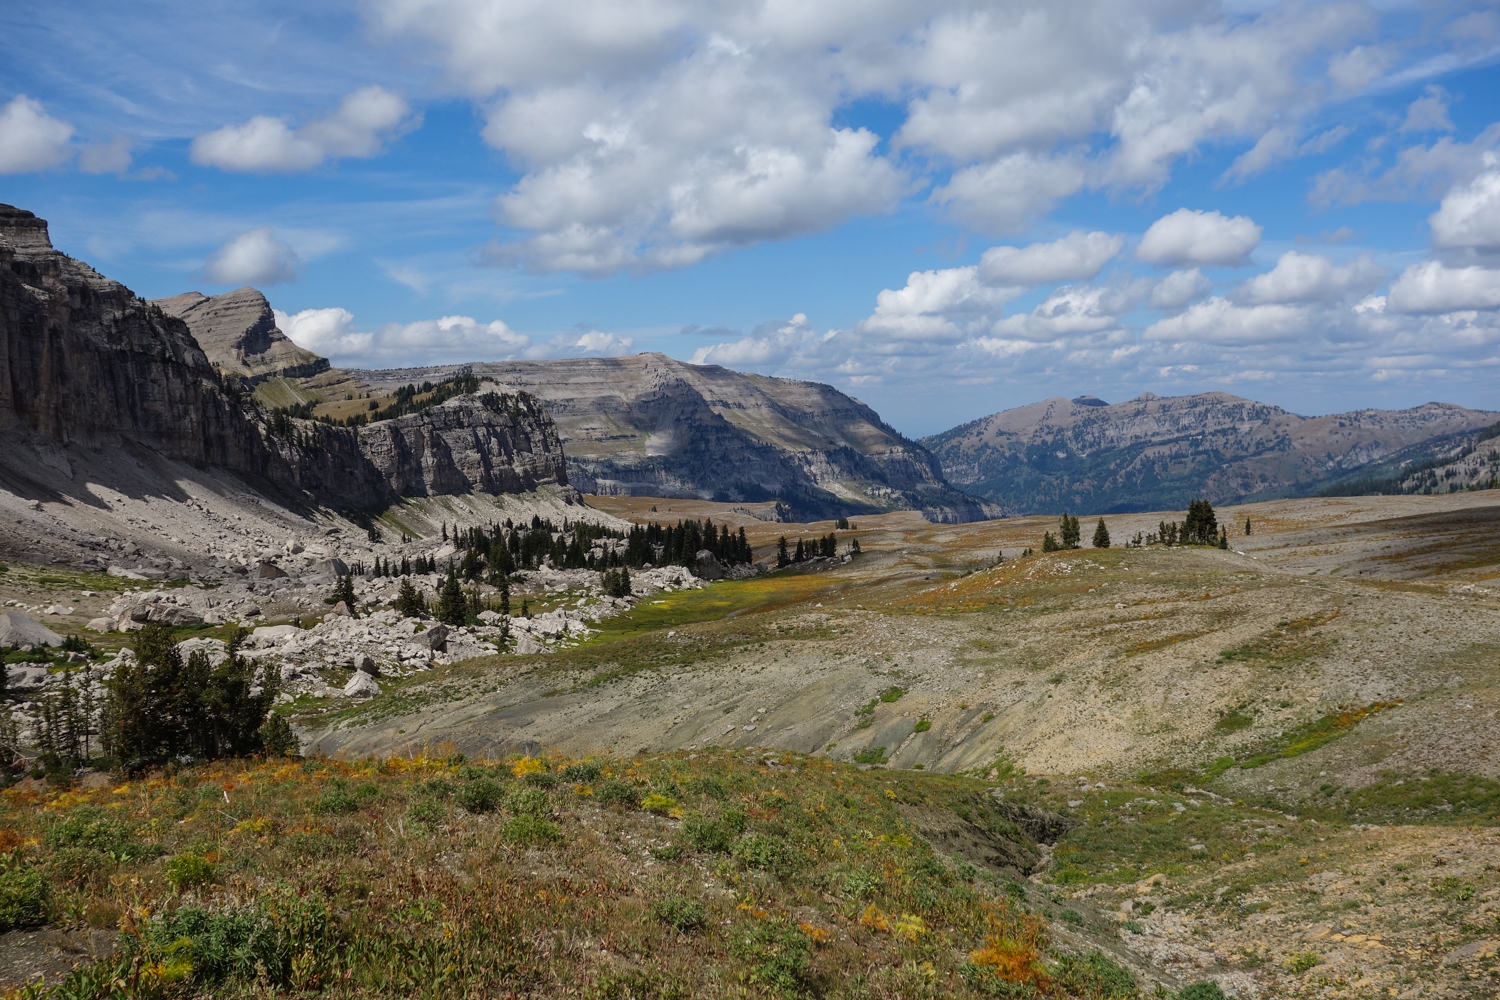
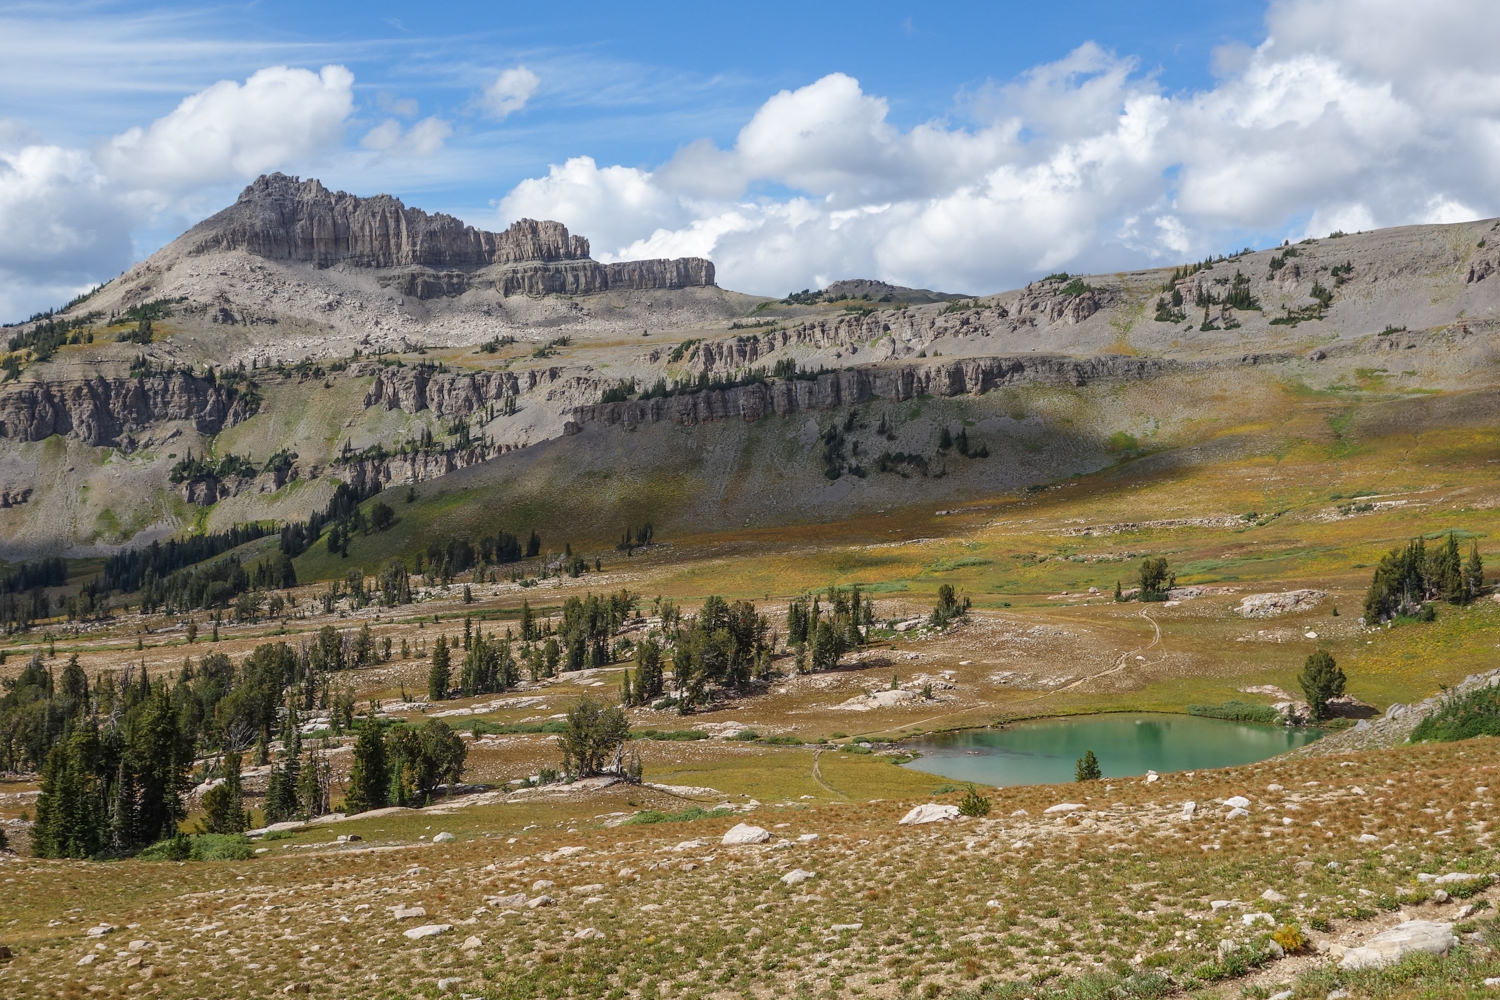
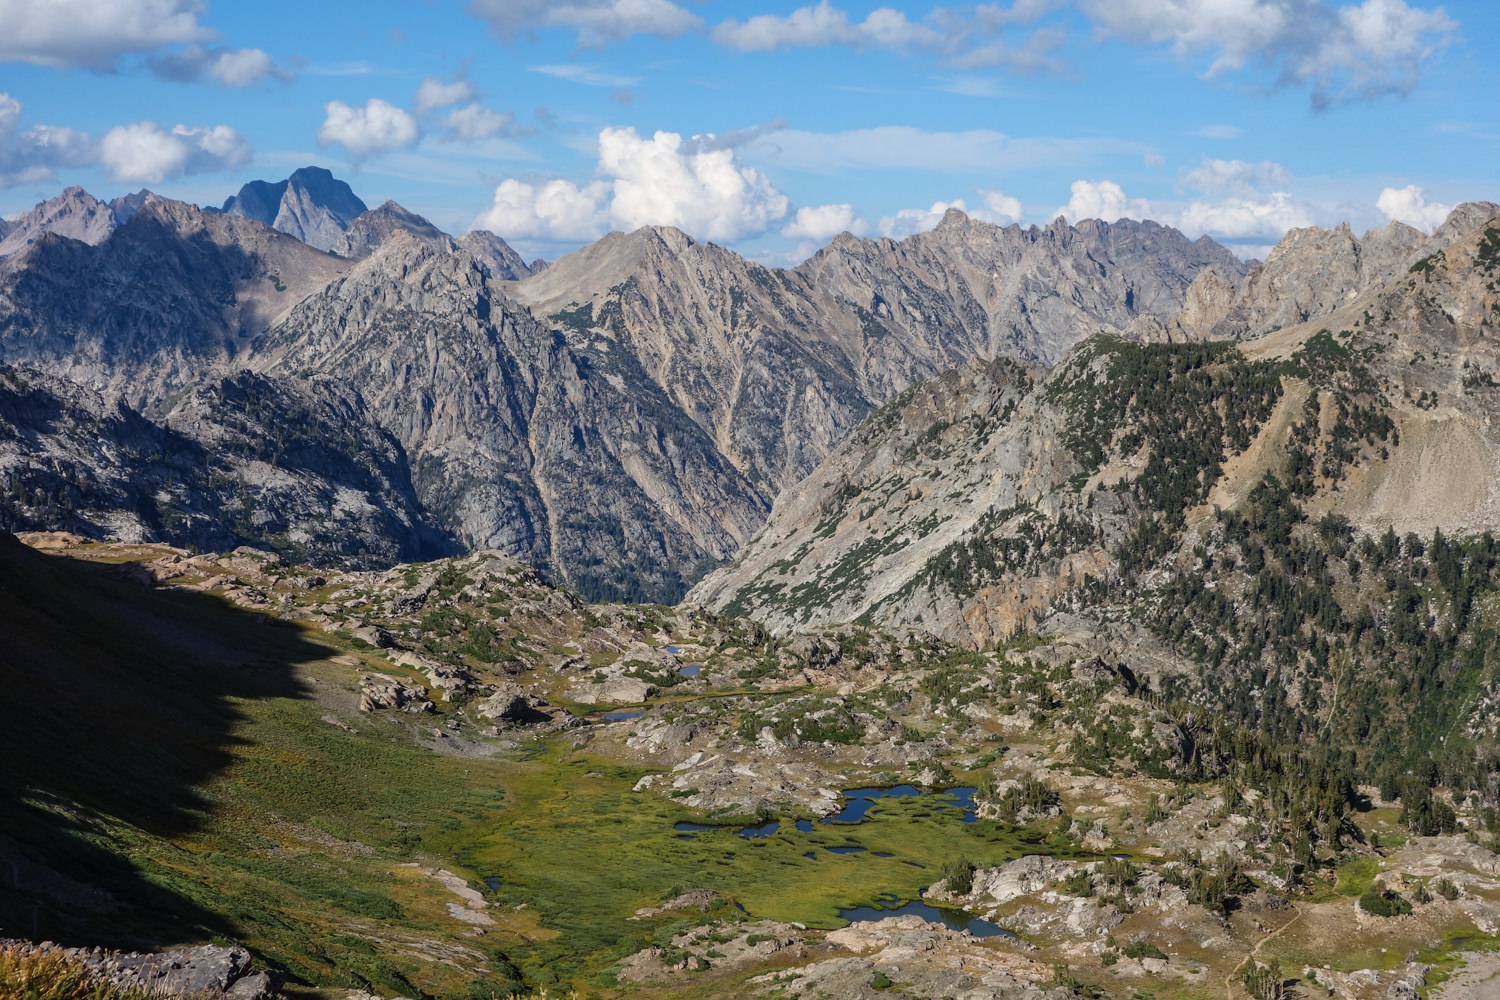
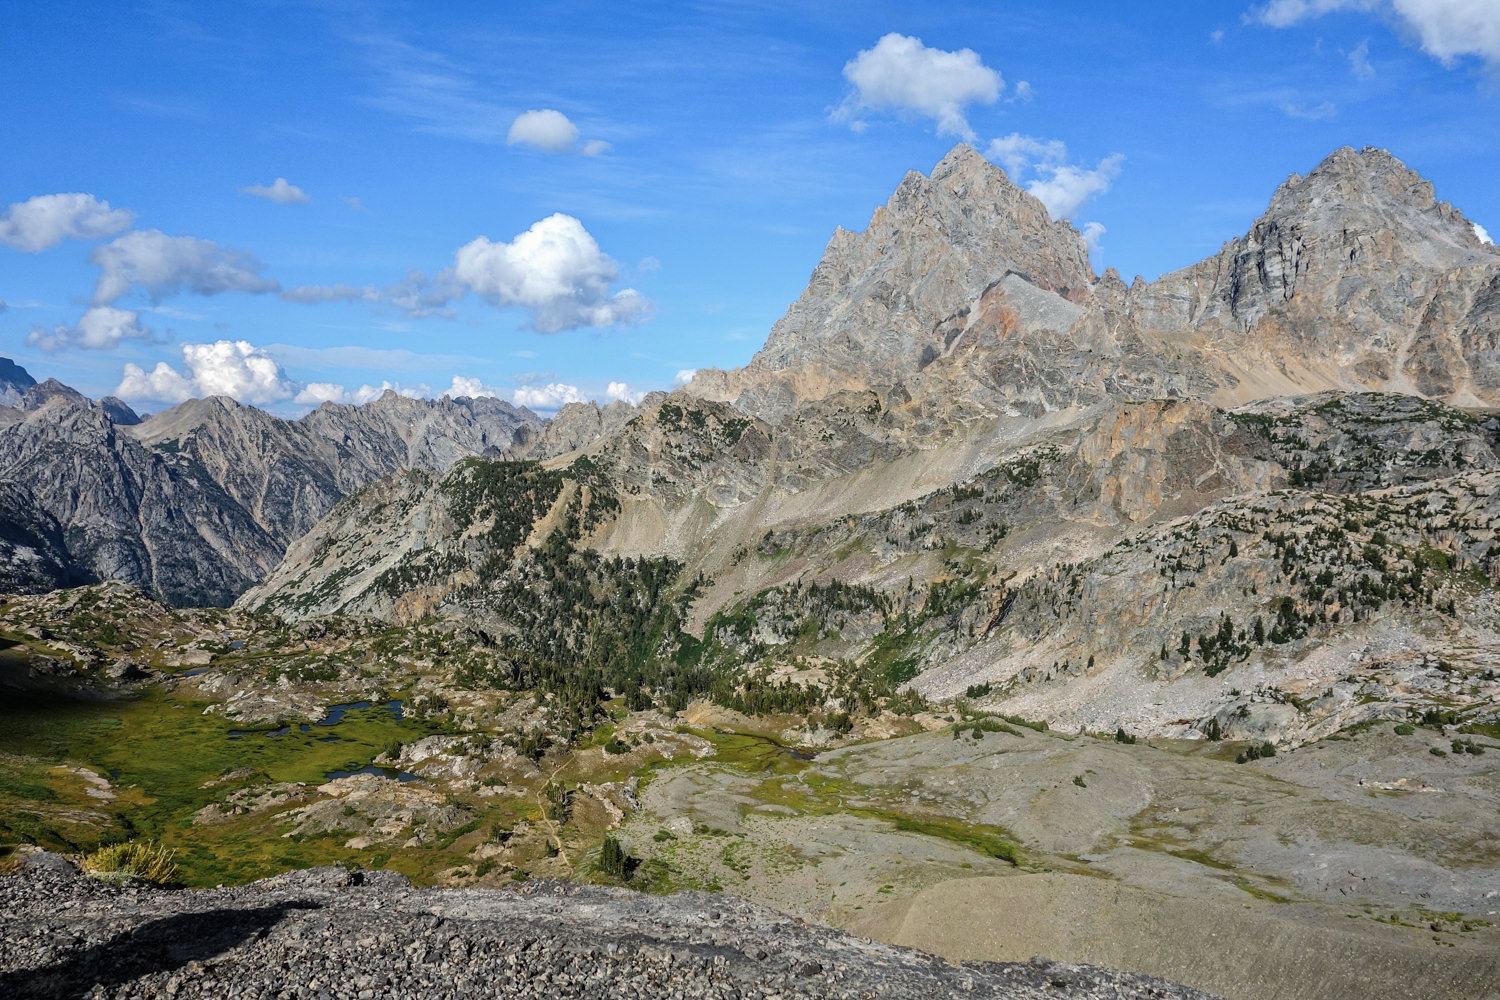
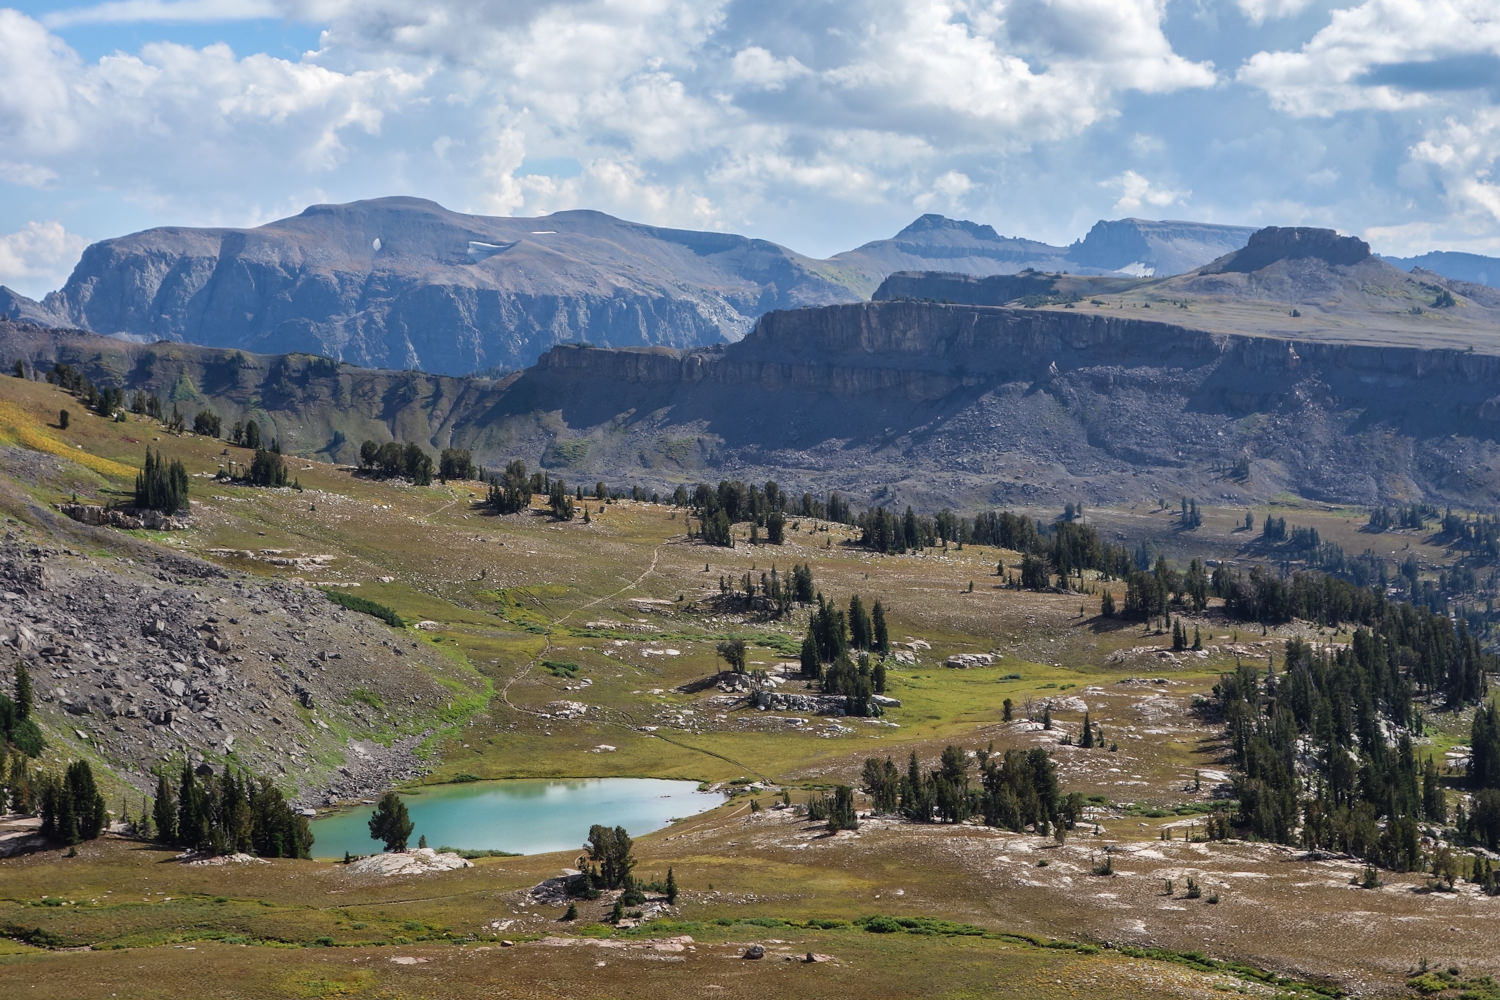
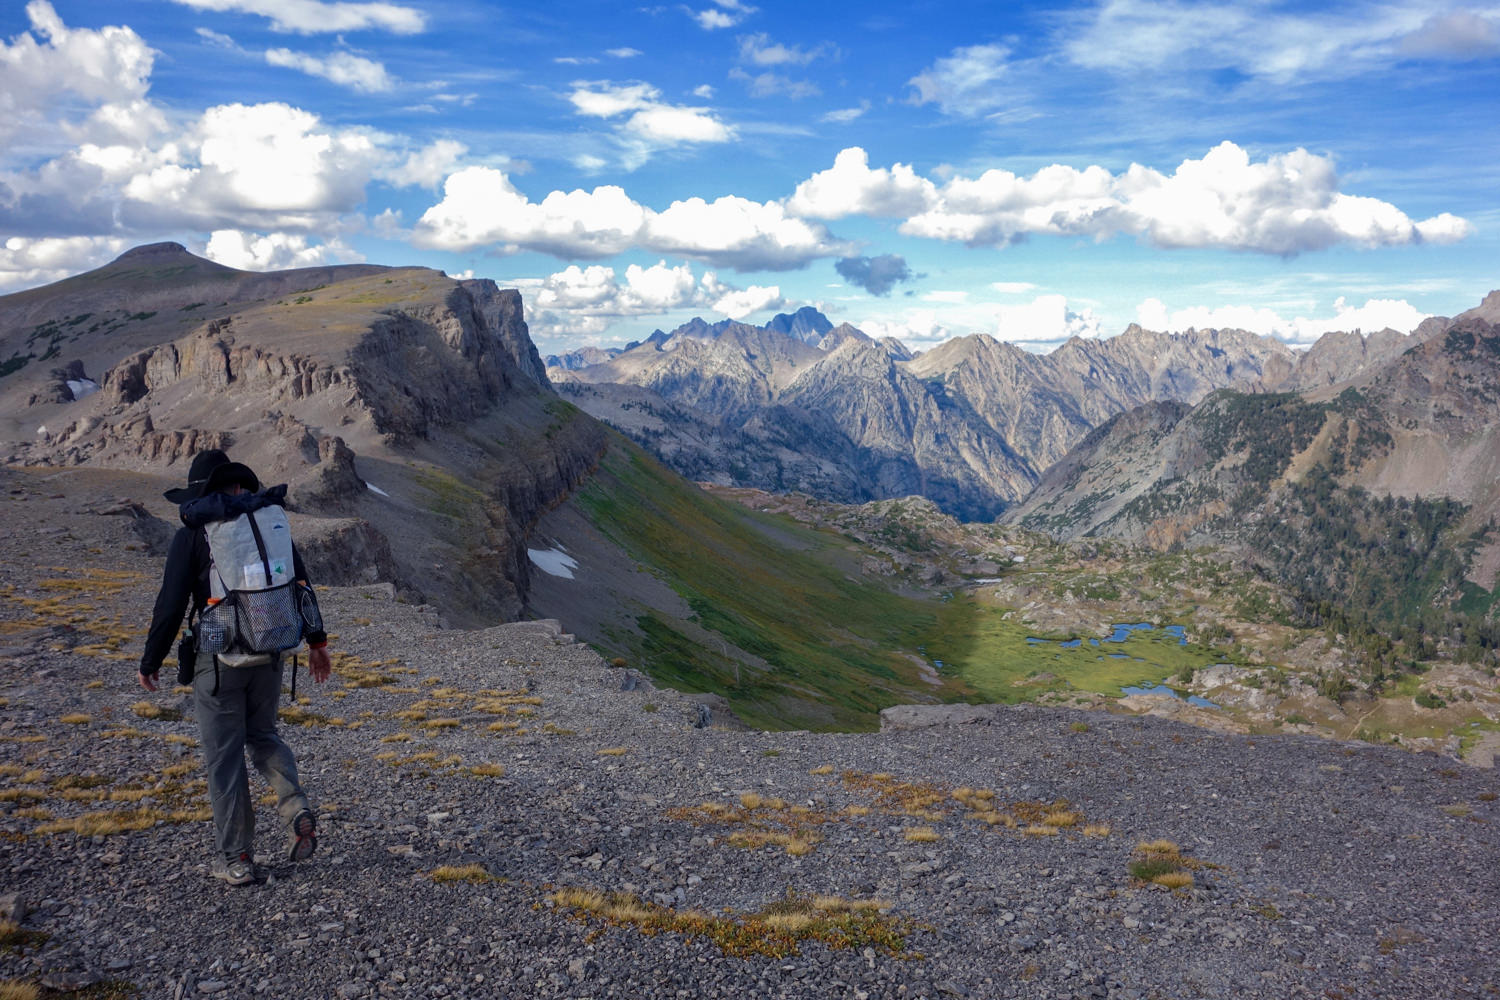
The Grand Teton Mountains are home to moose, deer, elk, bighorn sheep, black and grizzly bears, mountain lions, wolves, and many other species. But they also showcase one of the nation’s most scenic hiking routes: the Teton Crest Trail. This high route trail traverses ridges offering spectacular wide-angle views of towering granite peaks, glacier-carved canyons, crystalline lakes and wildflower-pocked meadows of penstemon, lupine, paintbrush, monkshood and western coneflower.
With mileage varying from 35 to 45 miles, depending on your route, the serpentine trail cuts through the Jedadiah Wilderness Area, two national forests – Bridger Teton and Caribou-Targhee-as well as Grand Teton National Park, rarely dropping below 8,000 feet. Along the way, you’ll touch at least three ecological zones and circumnavigate a classic glacier with well-defined terminal and lateral moraines, crevasses, and a proglacial lake. For ambitious backpackers, using some creative side trails, the route can be extended to 75 miles.
Quick Facts
- Distance: 63 km (40 miles)
- Days Needed: 3-5 days
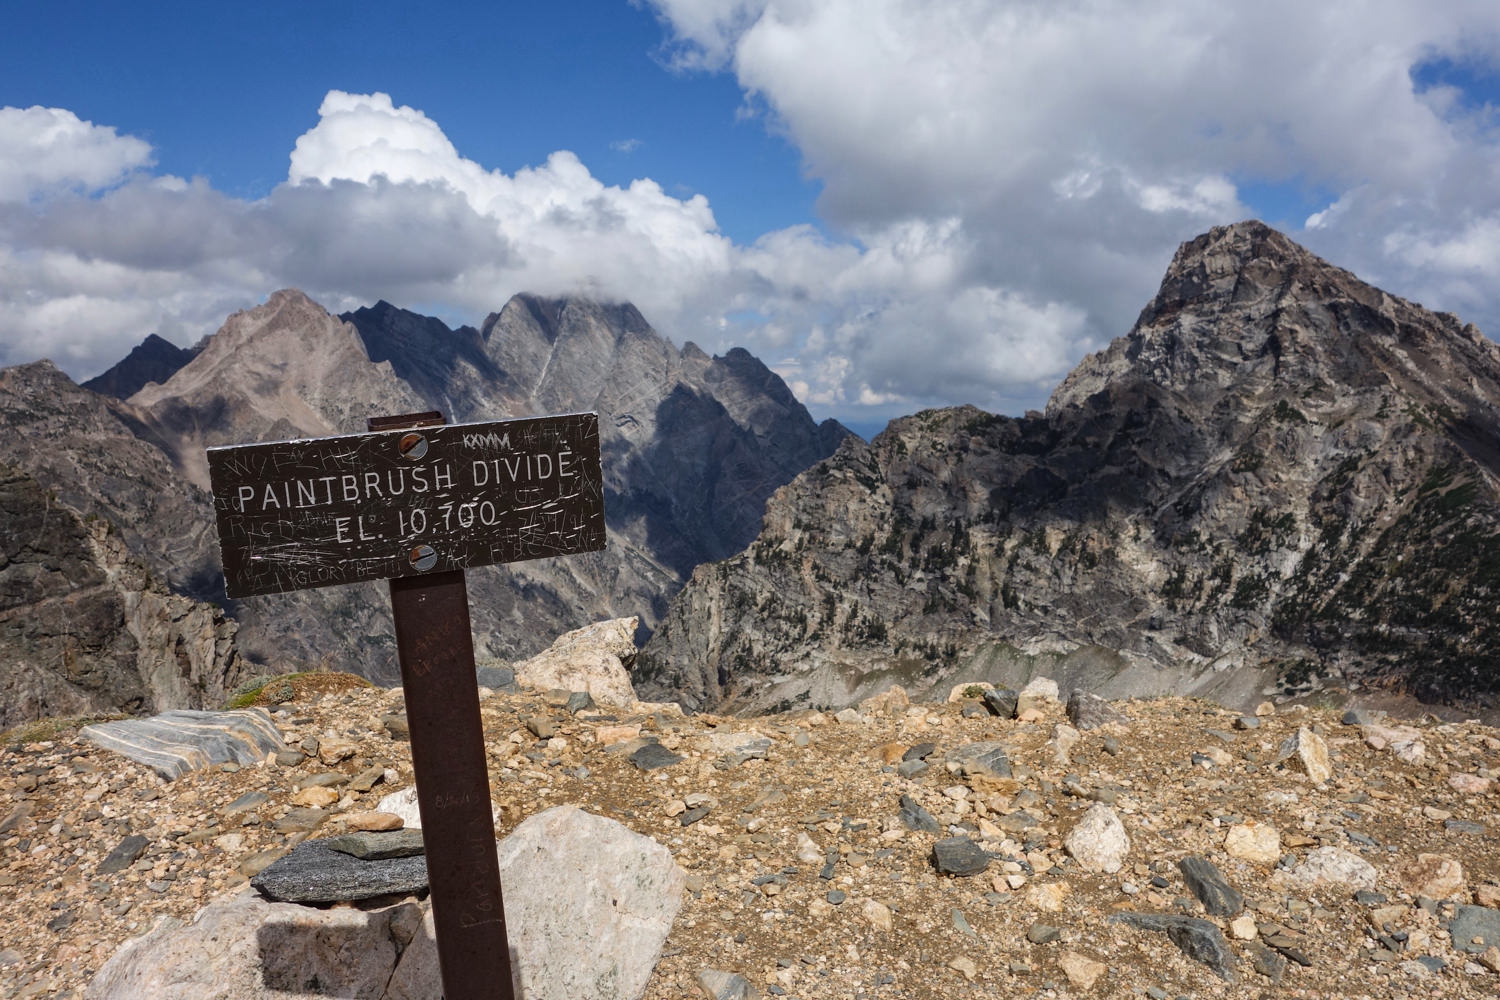
- Peak Elevation: 10,695 feet
- Elevation Gain/Loss: 8,061’ ascent and 7,576’ descent, (average grade is 8%, max grade at 34%)
- Best Travel Time: July through early September
- Permits: Required (see below)
- Difficulty: Moderate-Difficult
Highlights
- Stunning vistas from the multitude of ridgelines and passes
- Beautiful sunrises and sunsets from most campsites
- Gorgeous high alpine scenery
- Relative solitude, but expect to see a lot of other backpackers
- Challenging side trips (Hunt Mountain, Static Peak, Upper Cascade Canyon)
- Opportunity for moose and bear sightings, if you’re quiet and lucky
- Excellent hiking temperatures
Lowlights
- Competitive permit process
- Susceptible to quickly changing weather
- Seasonal bugs and snow
- Campfires prohibited
- Some years, mostly wet ones, the flies are vicious
- Many streams dry up by late August, making water sources more limited (depending on snowmelt and rainfall earlier in the year)
- A few spots require stream fording (particularly South Fork Teton Creek)
- You’ll hike 31 miles before you gain the highest elevation on the crest trail, but that also means a fast and furious descent to the trail terminus over the last 8 miles
- You may need to carry and know how to use an ice axe and microspikes to traverse several passes until late July
- Parking at trailheads can be challenging. Inquire at the backcountry office for your best options that day.
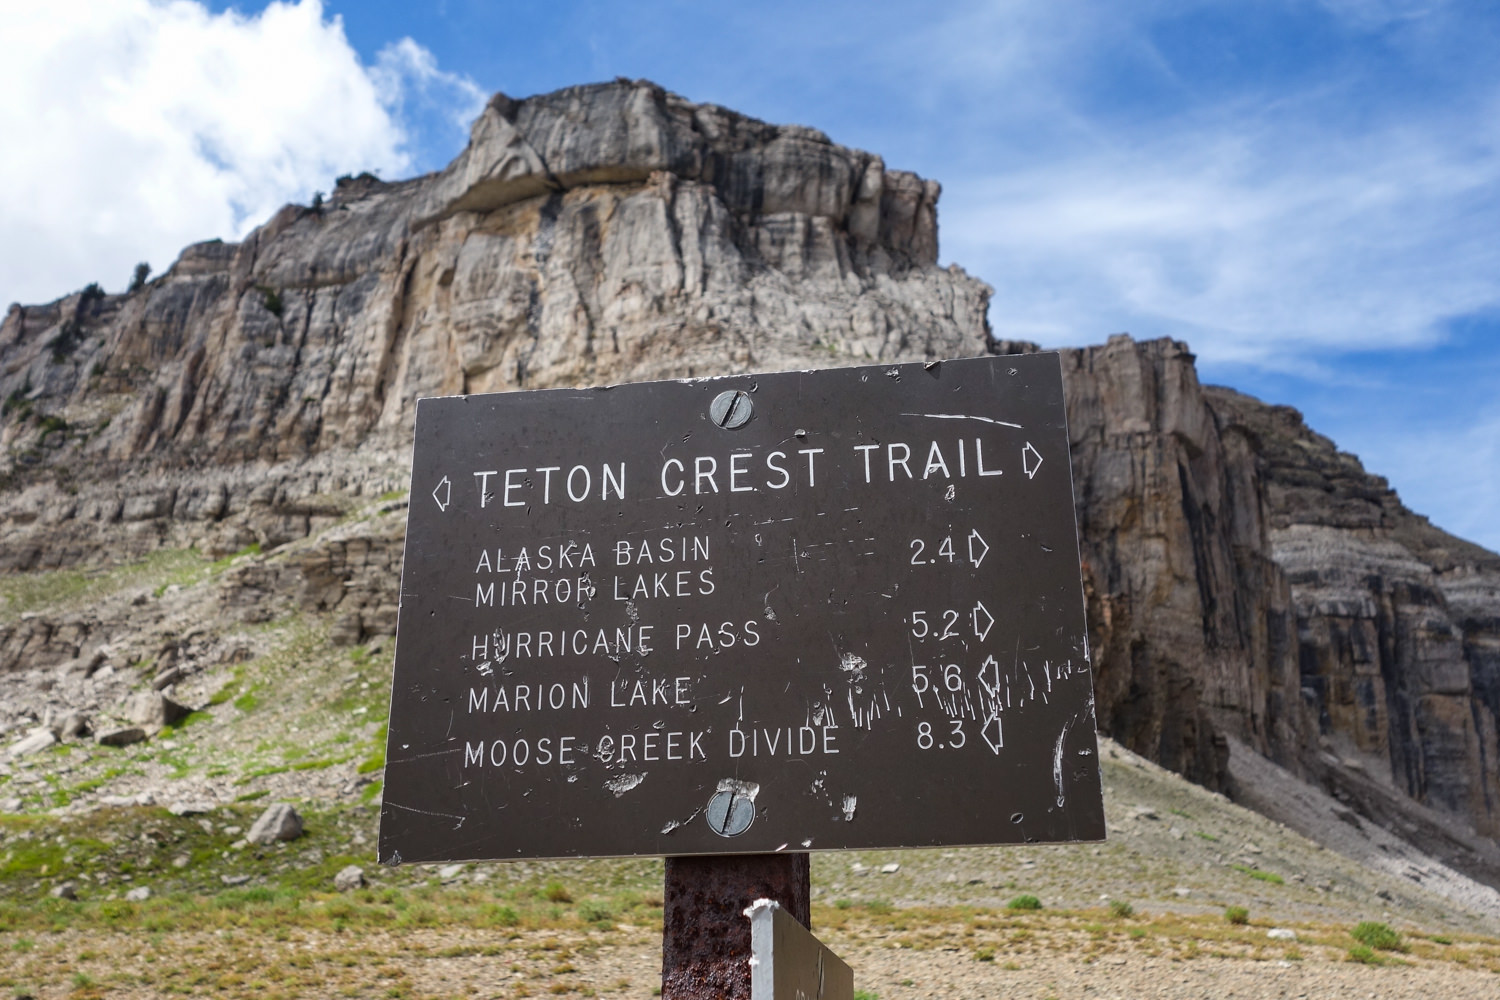
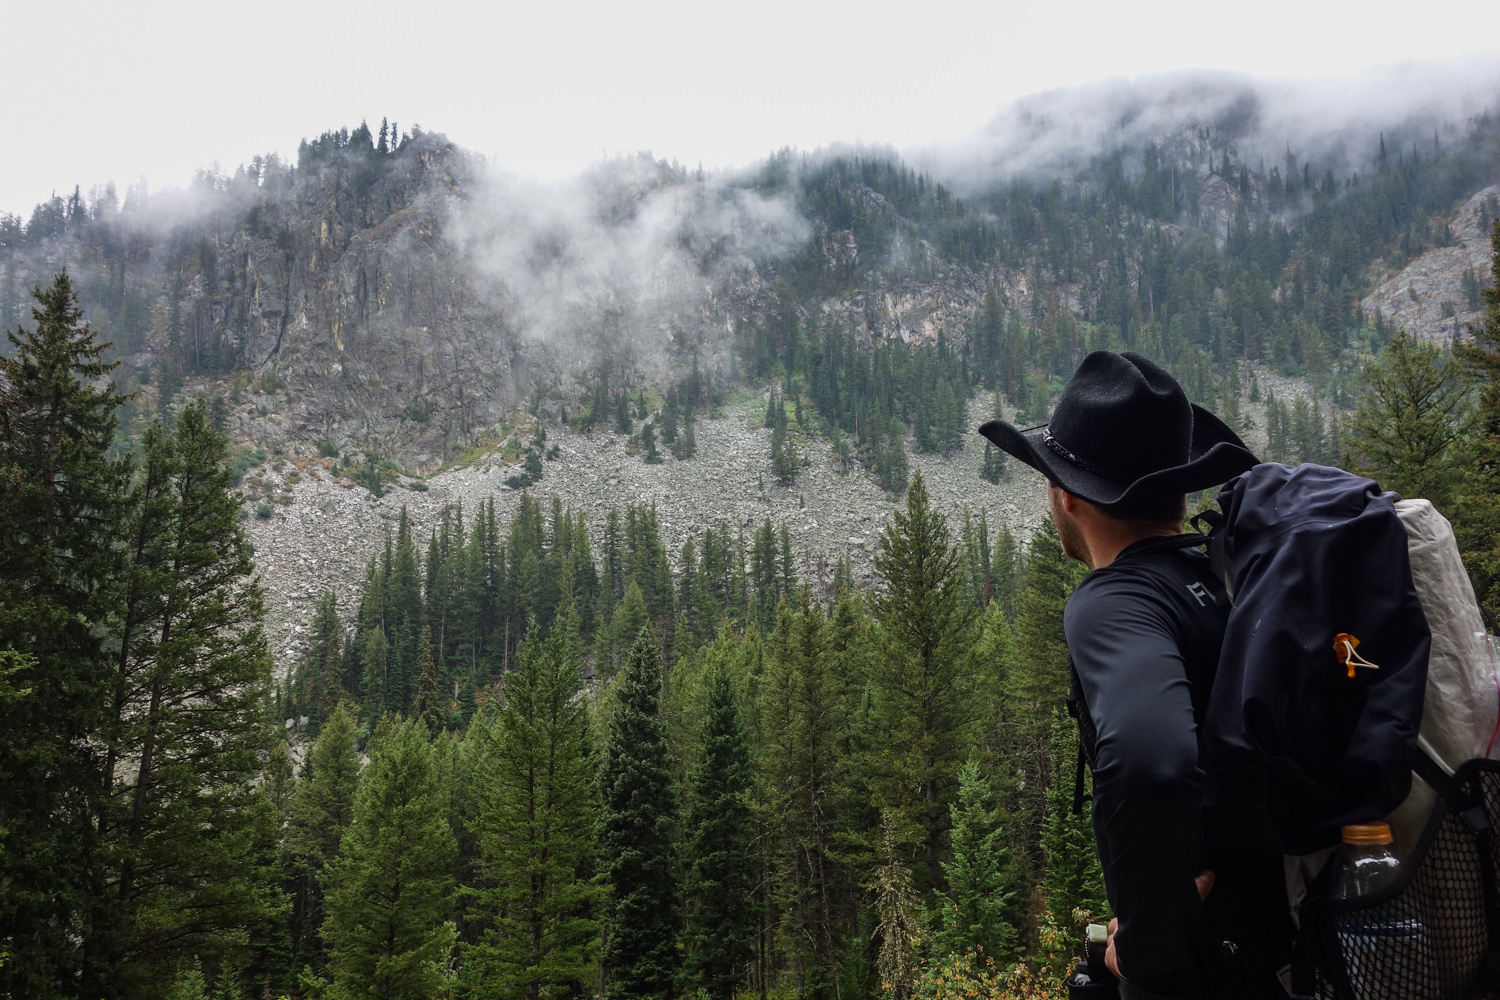
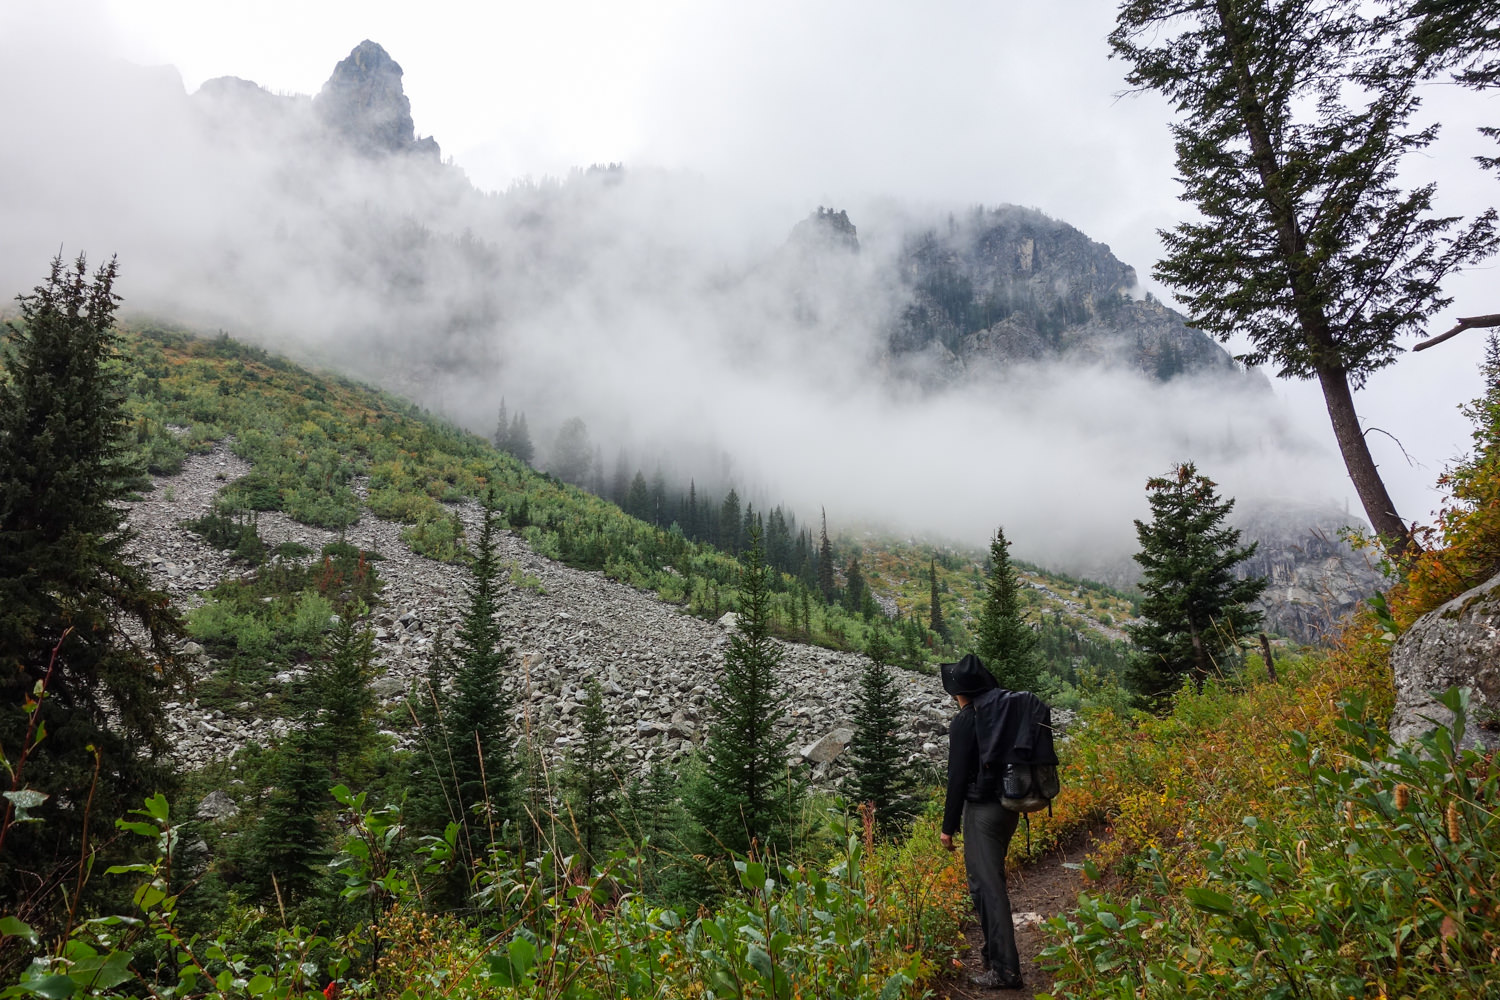
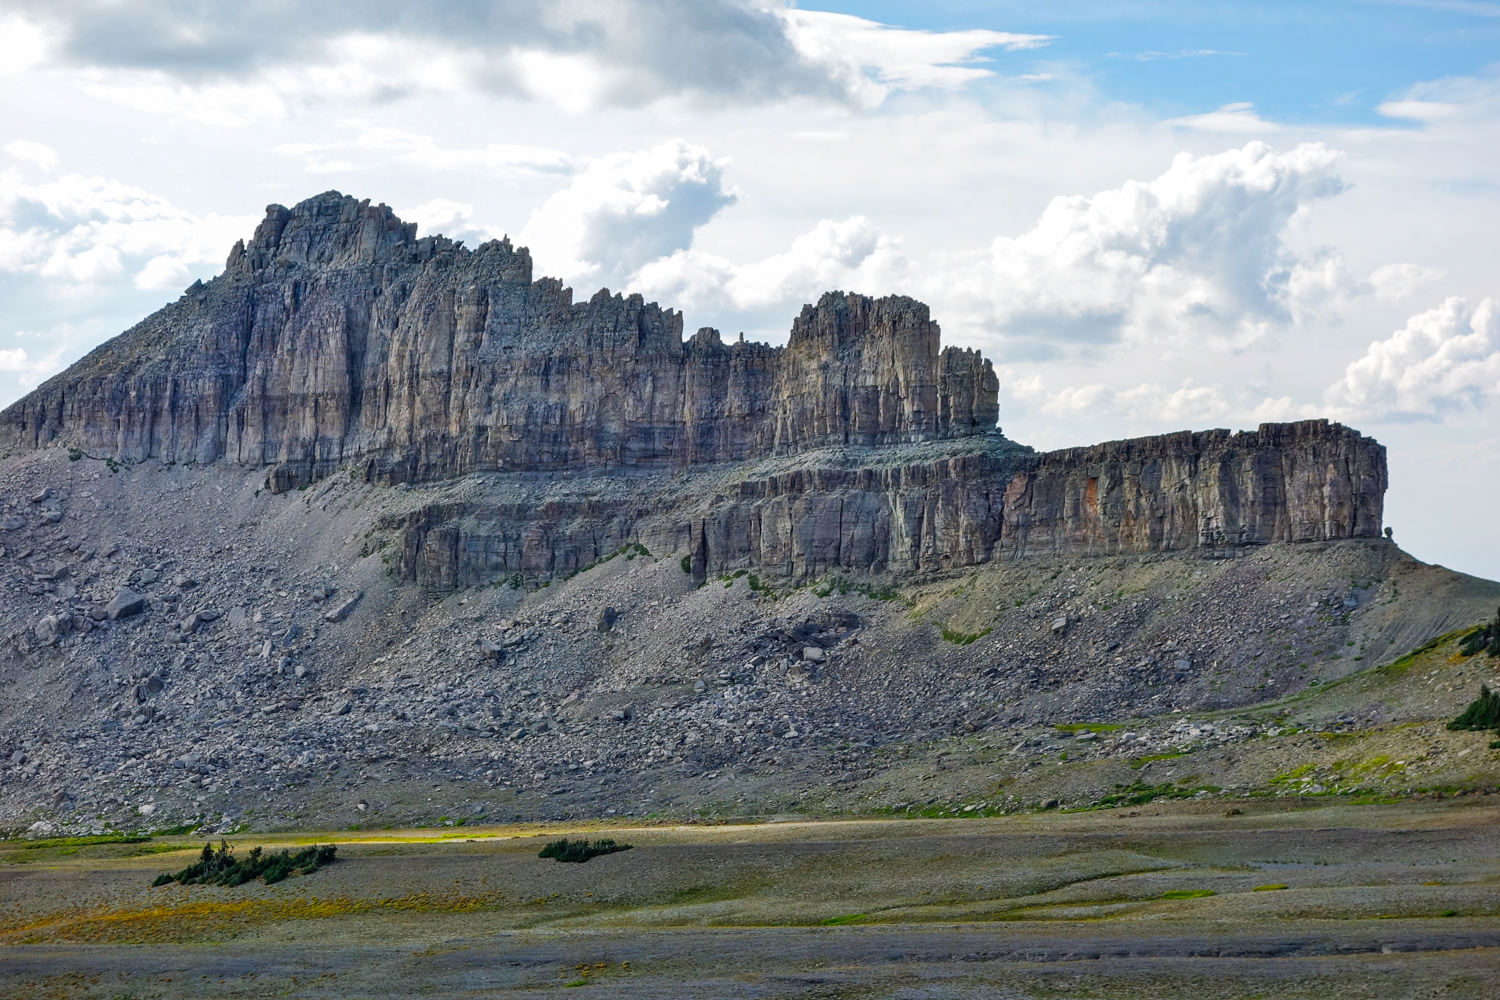
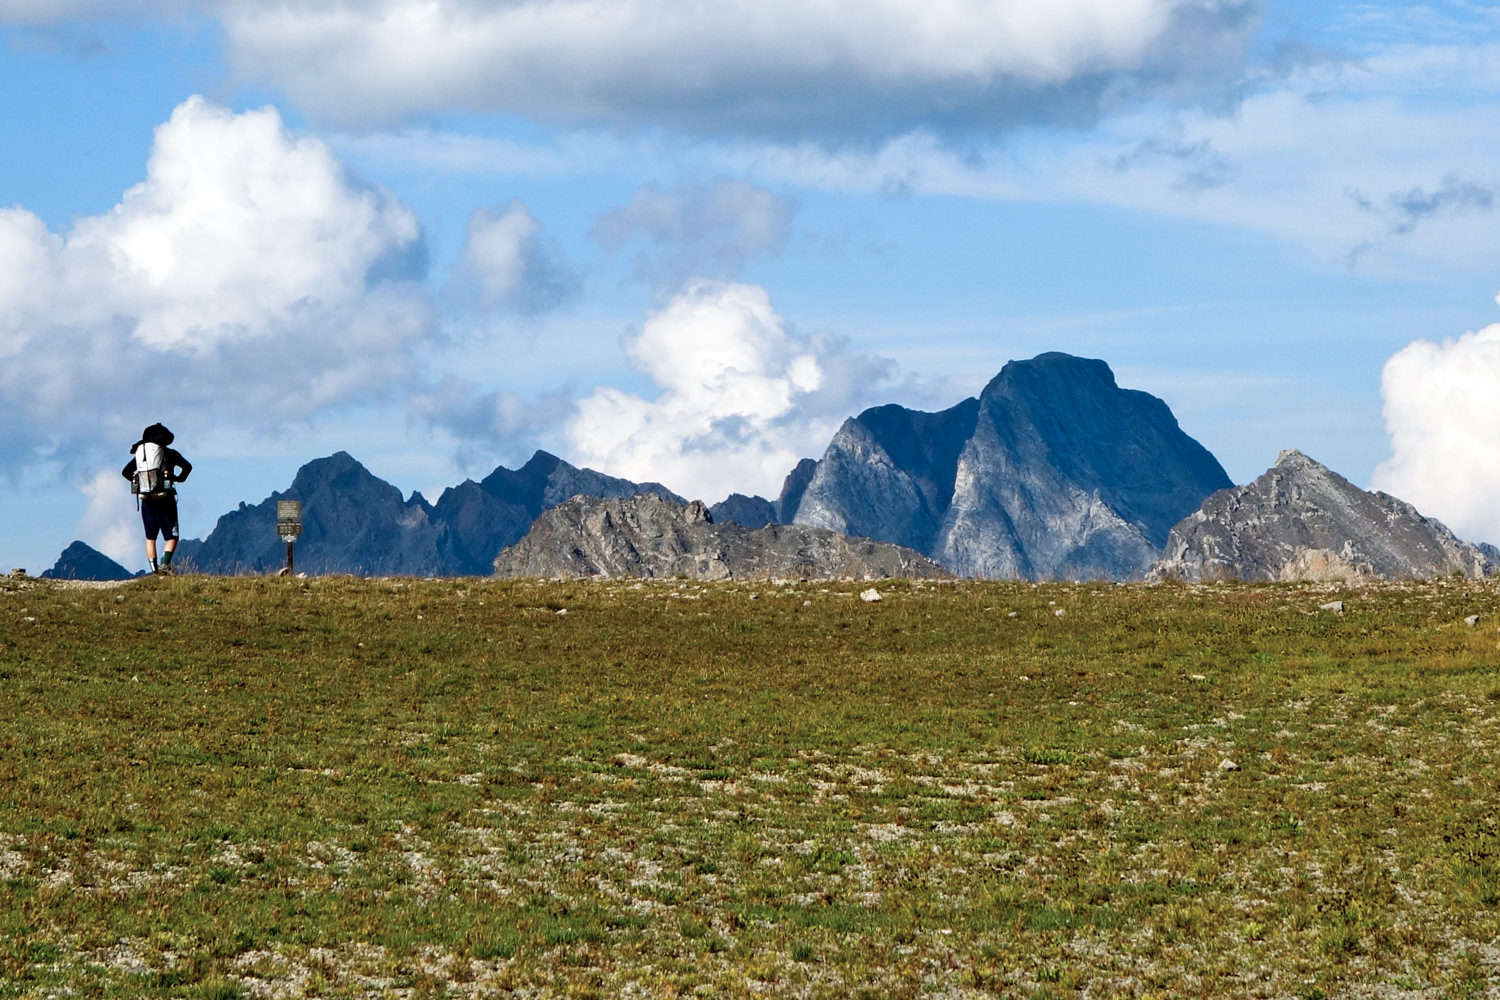
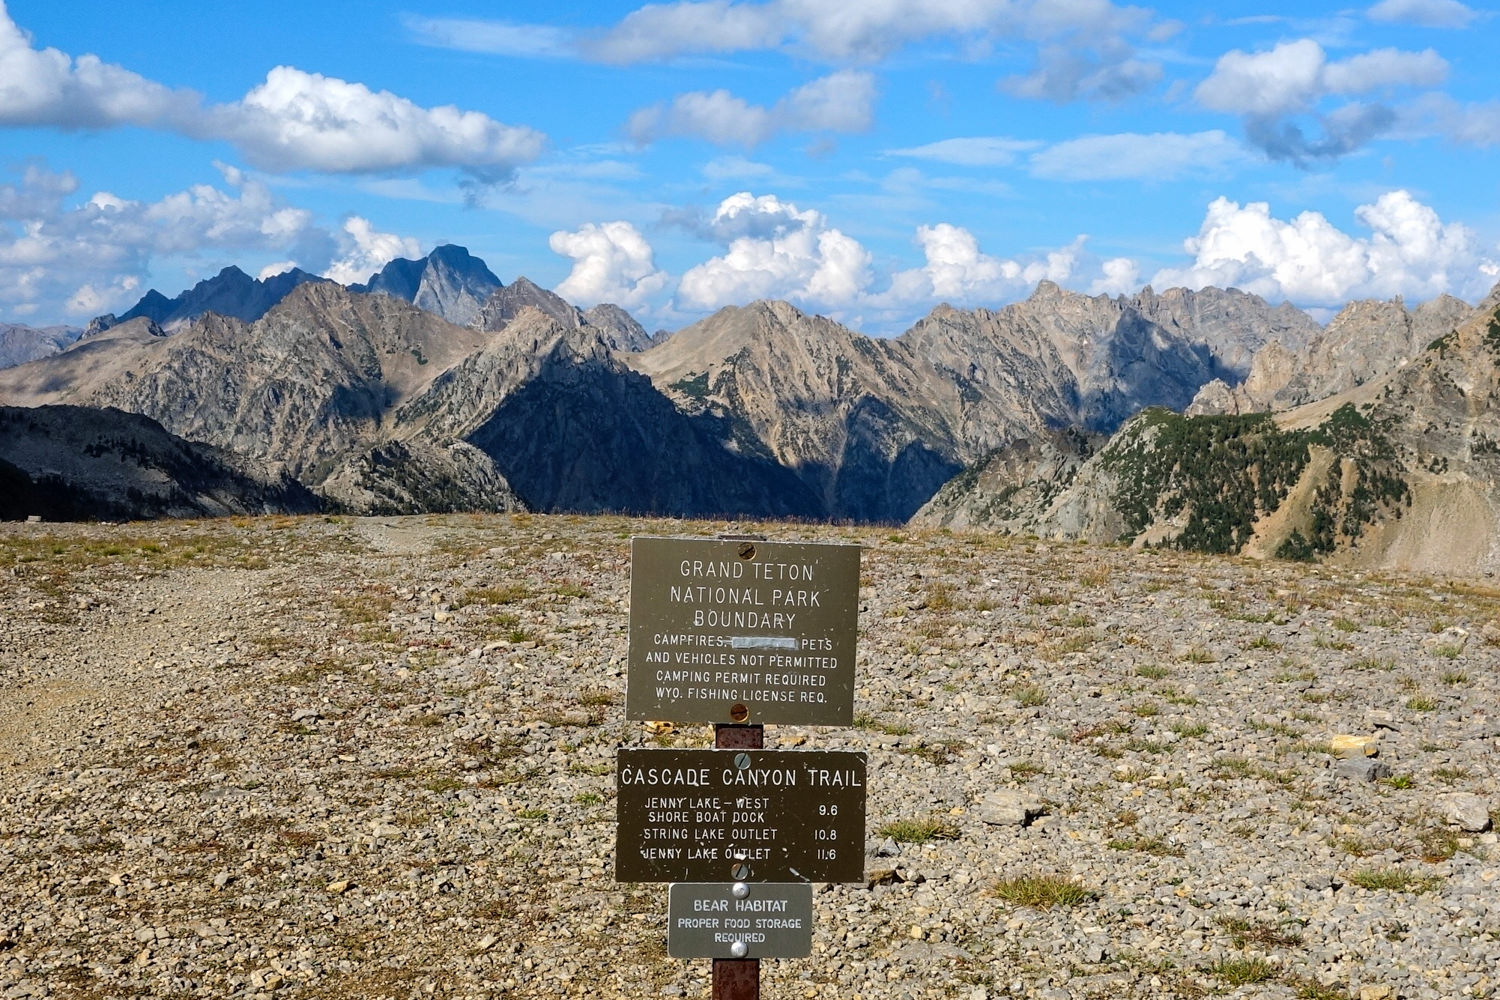
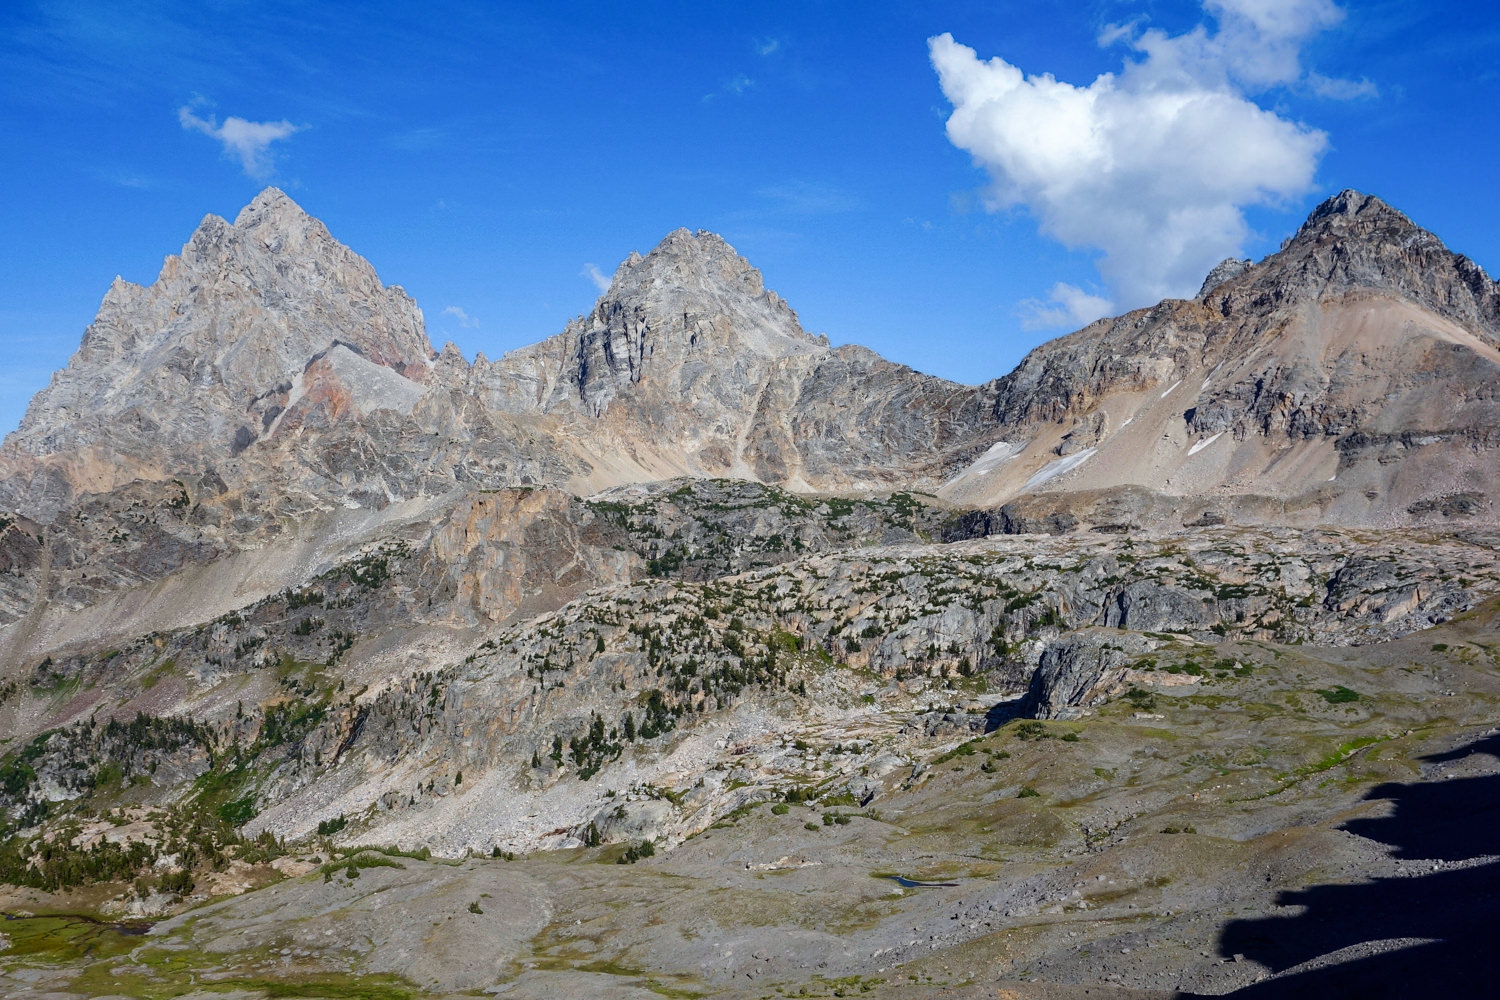
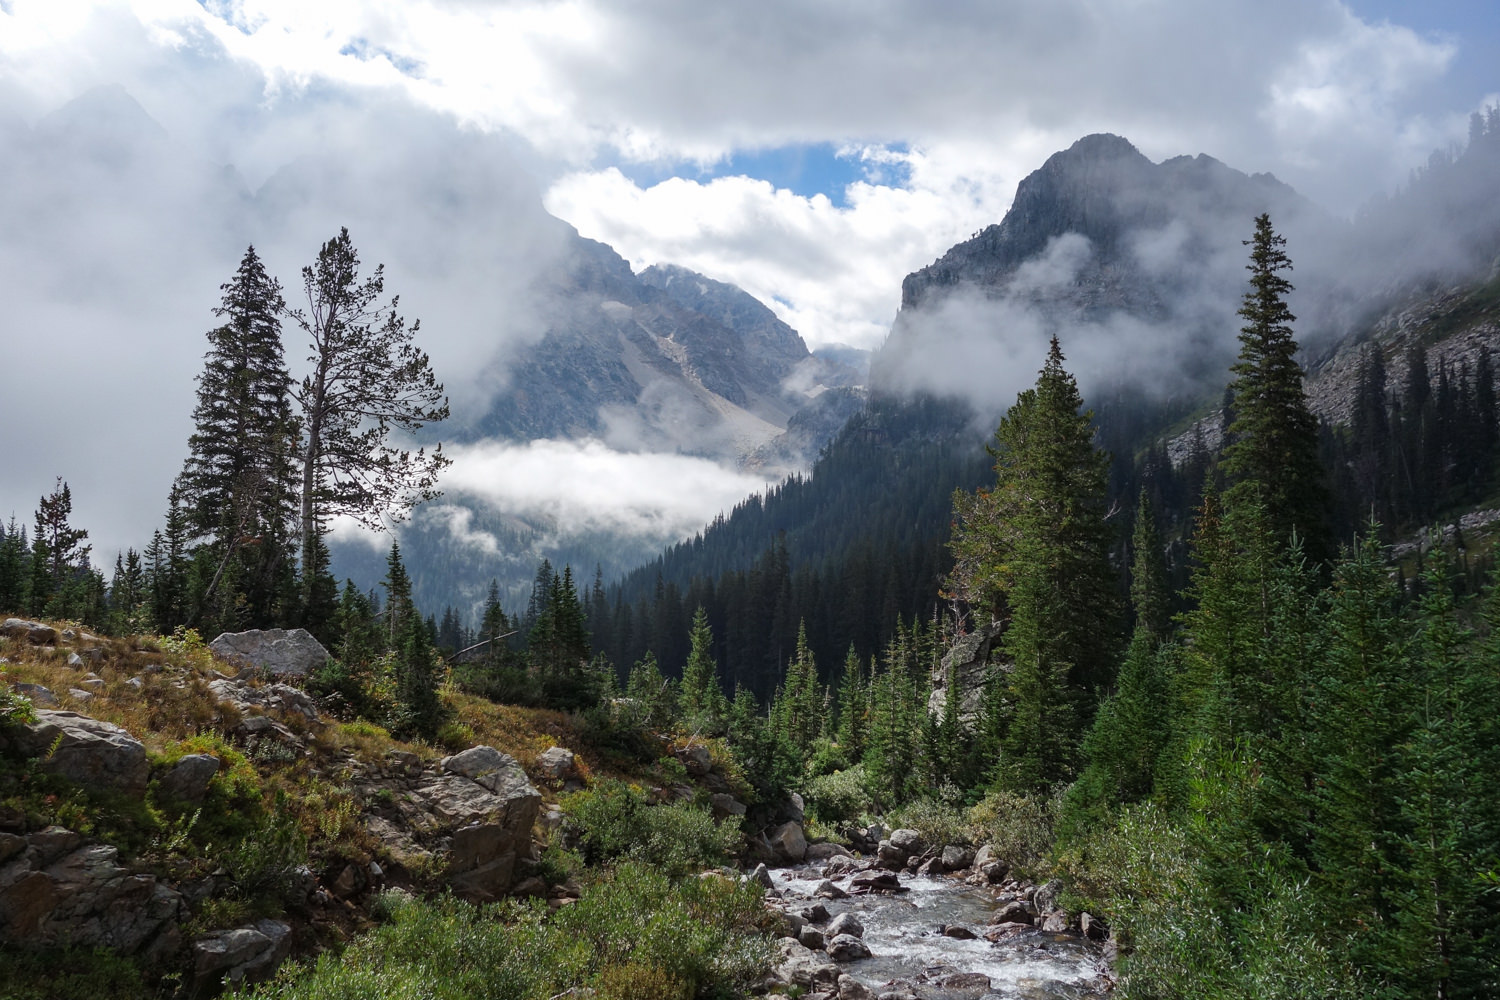
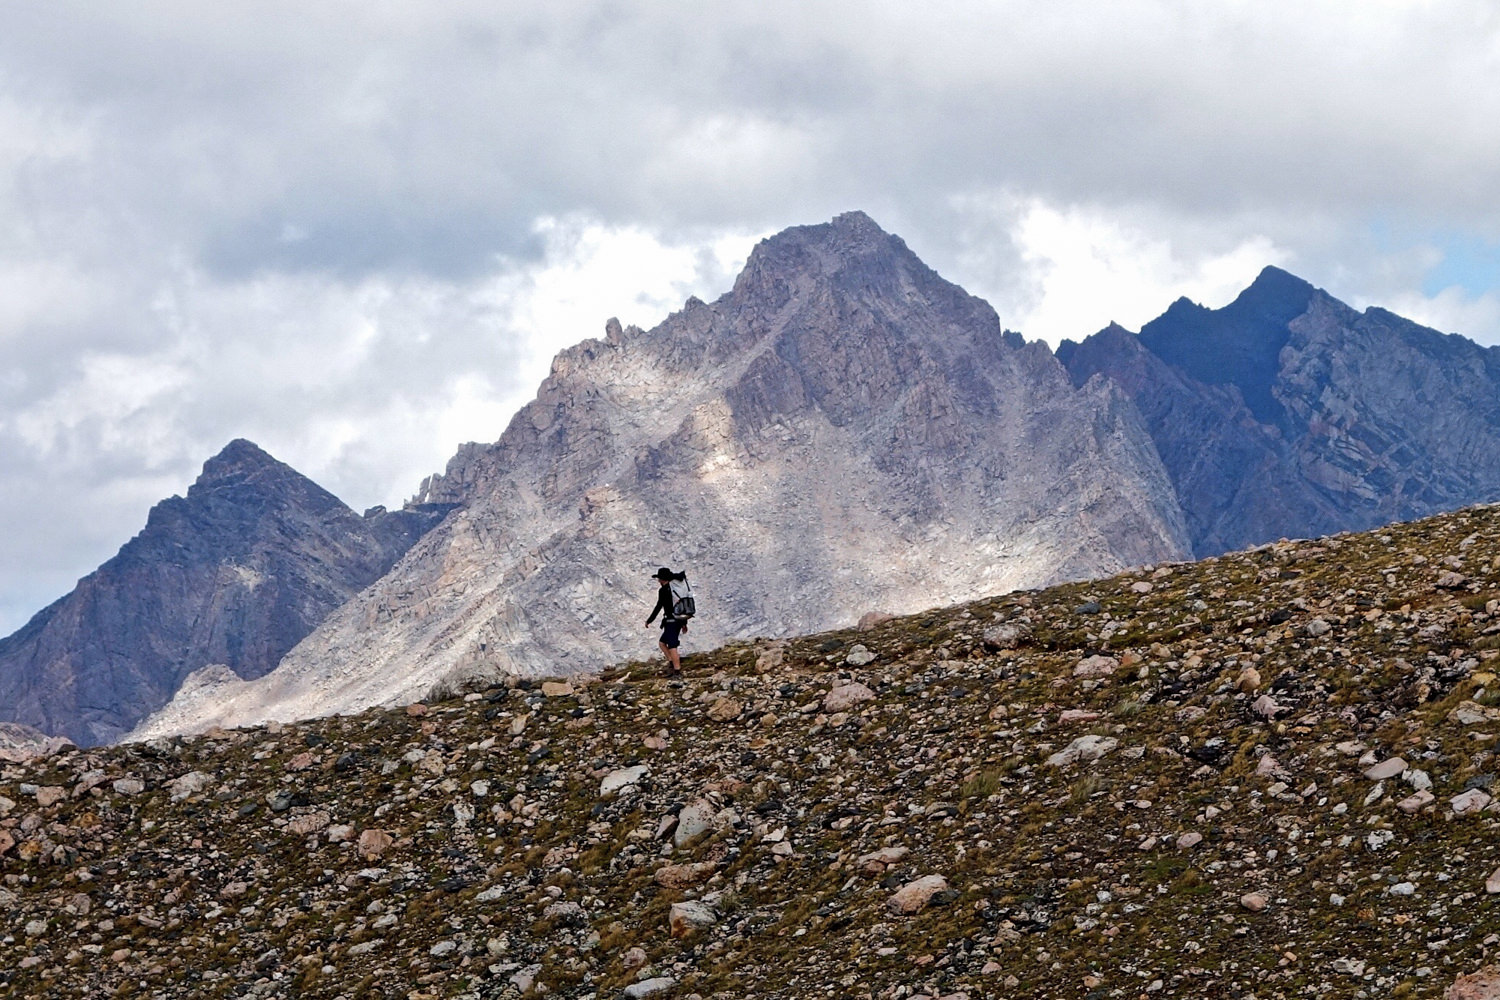
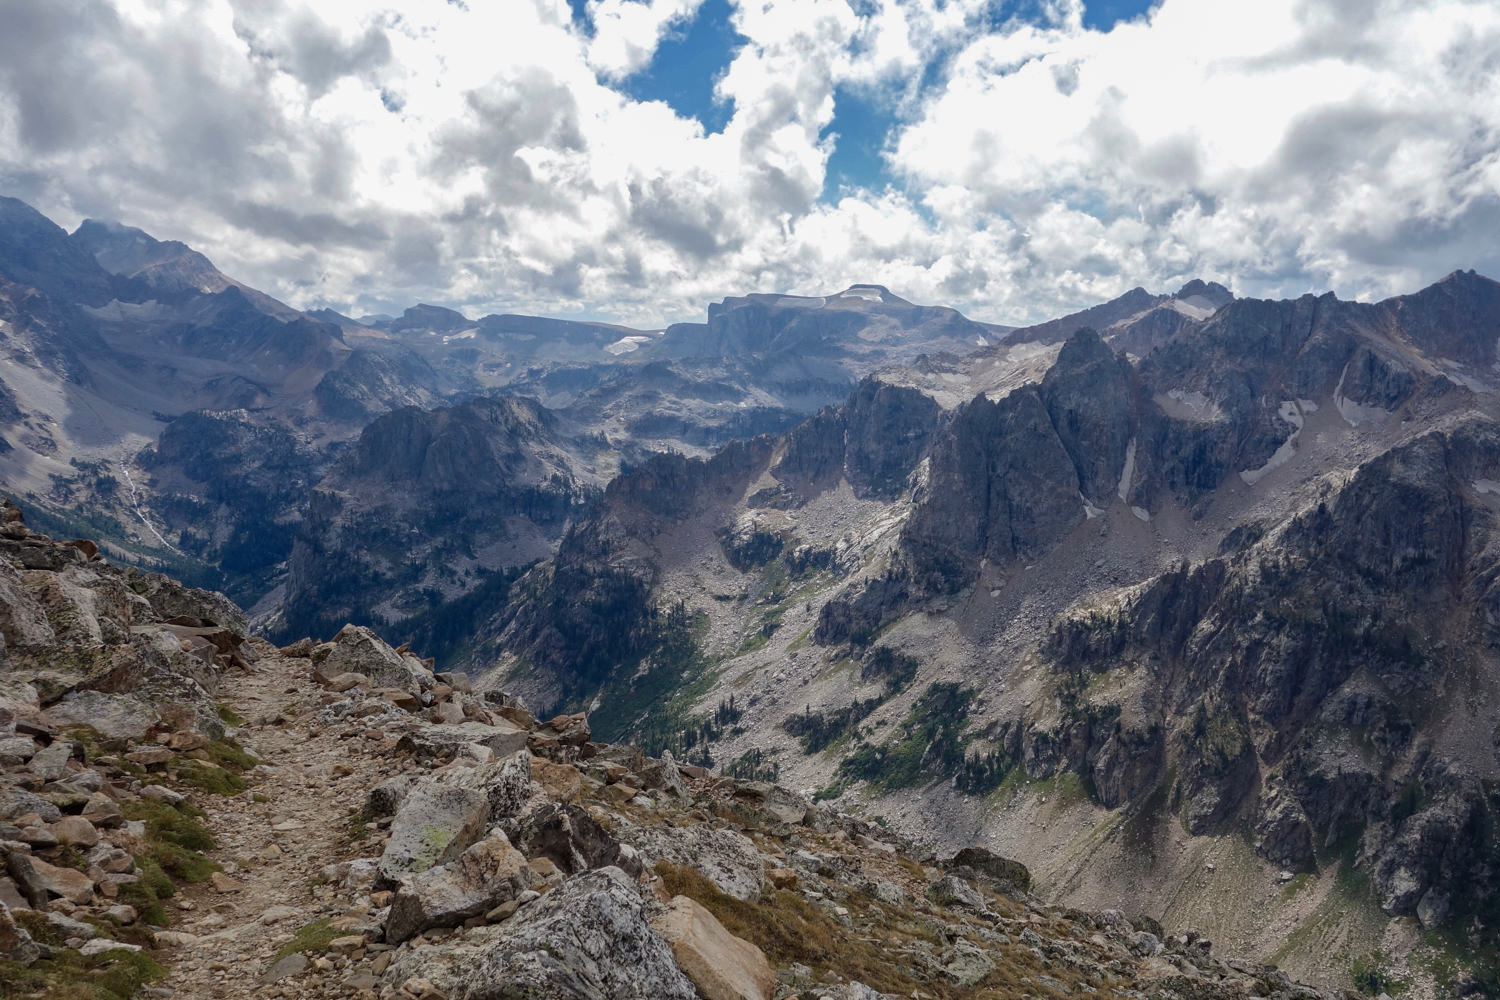
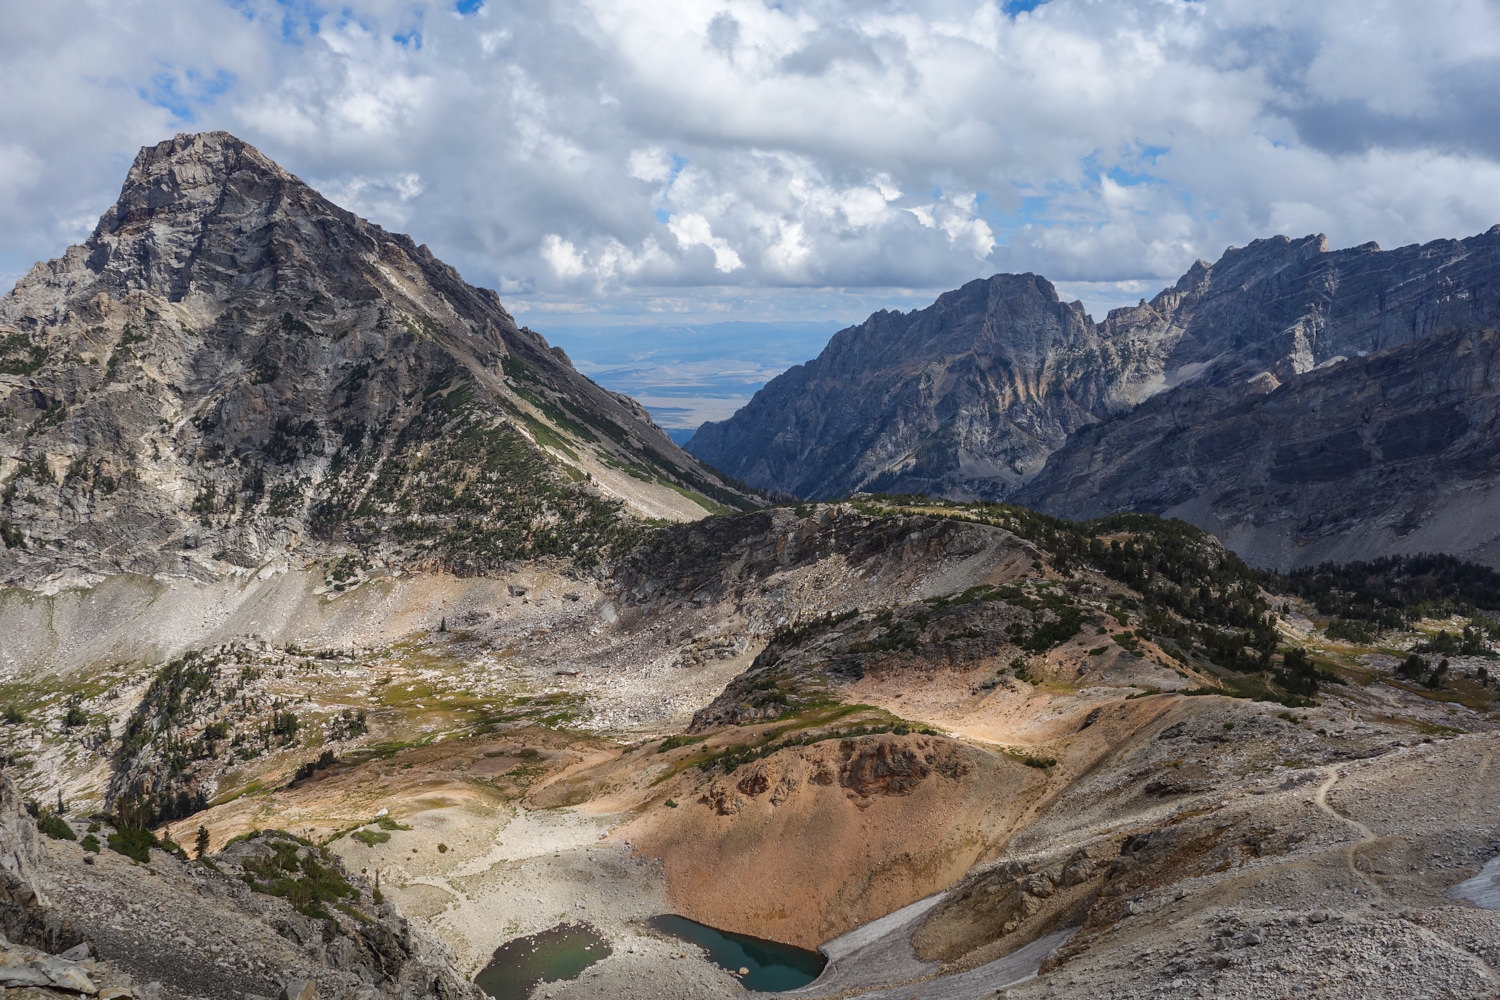
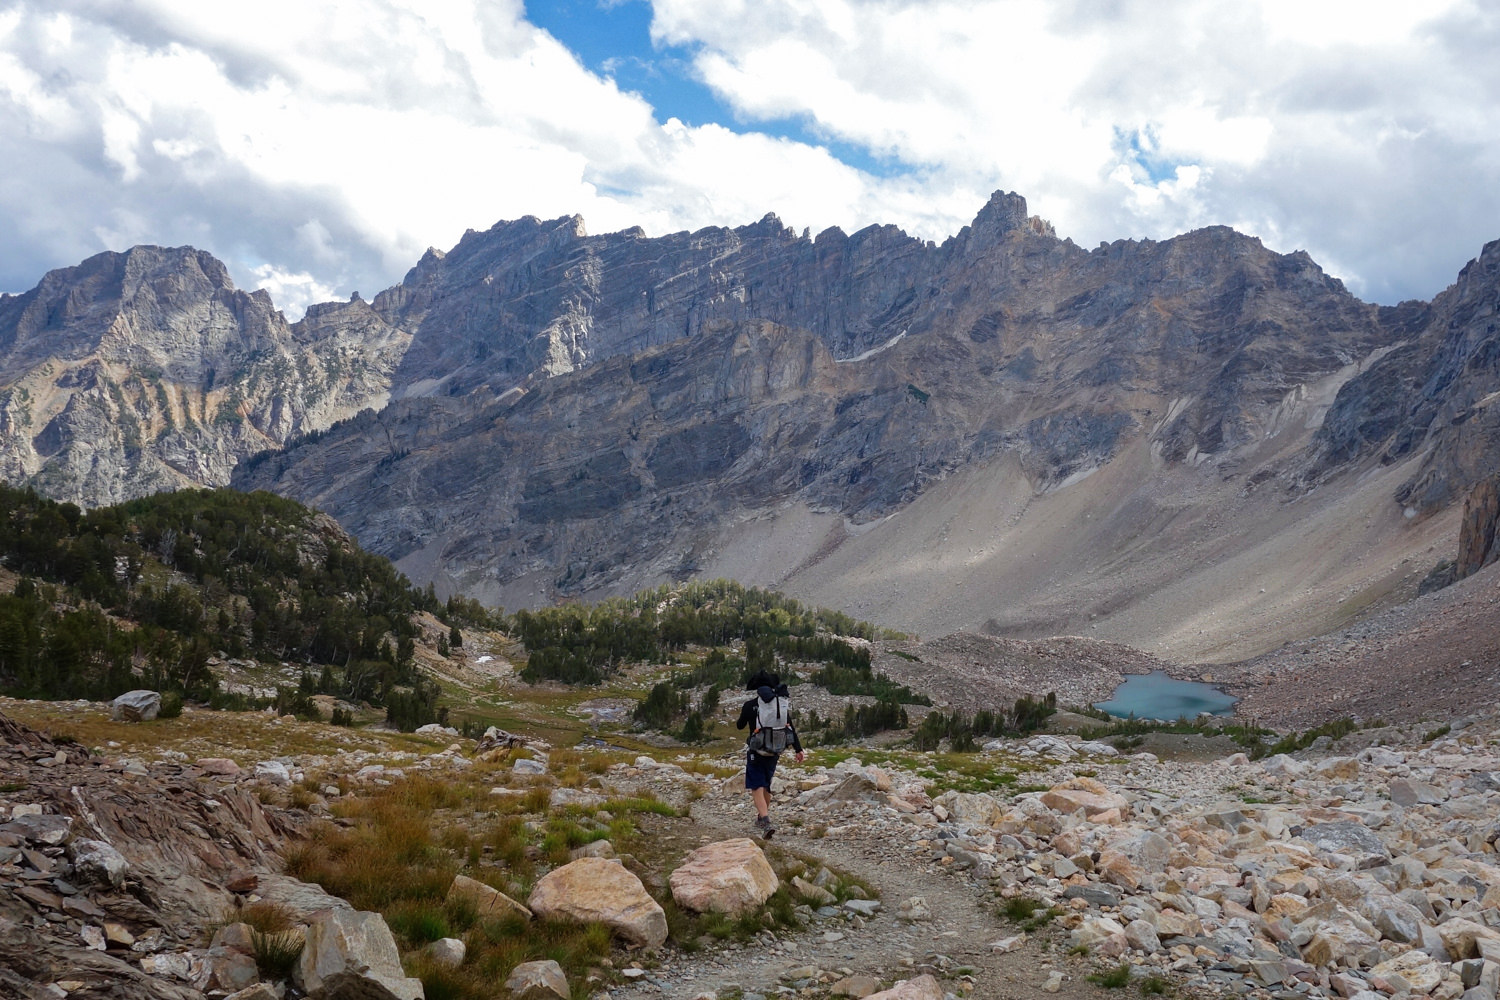
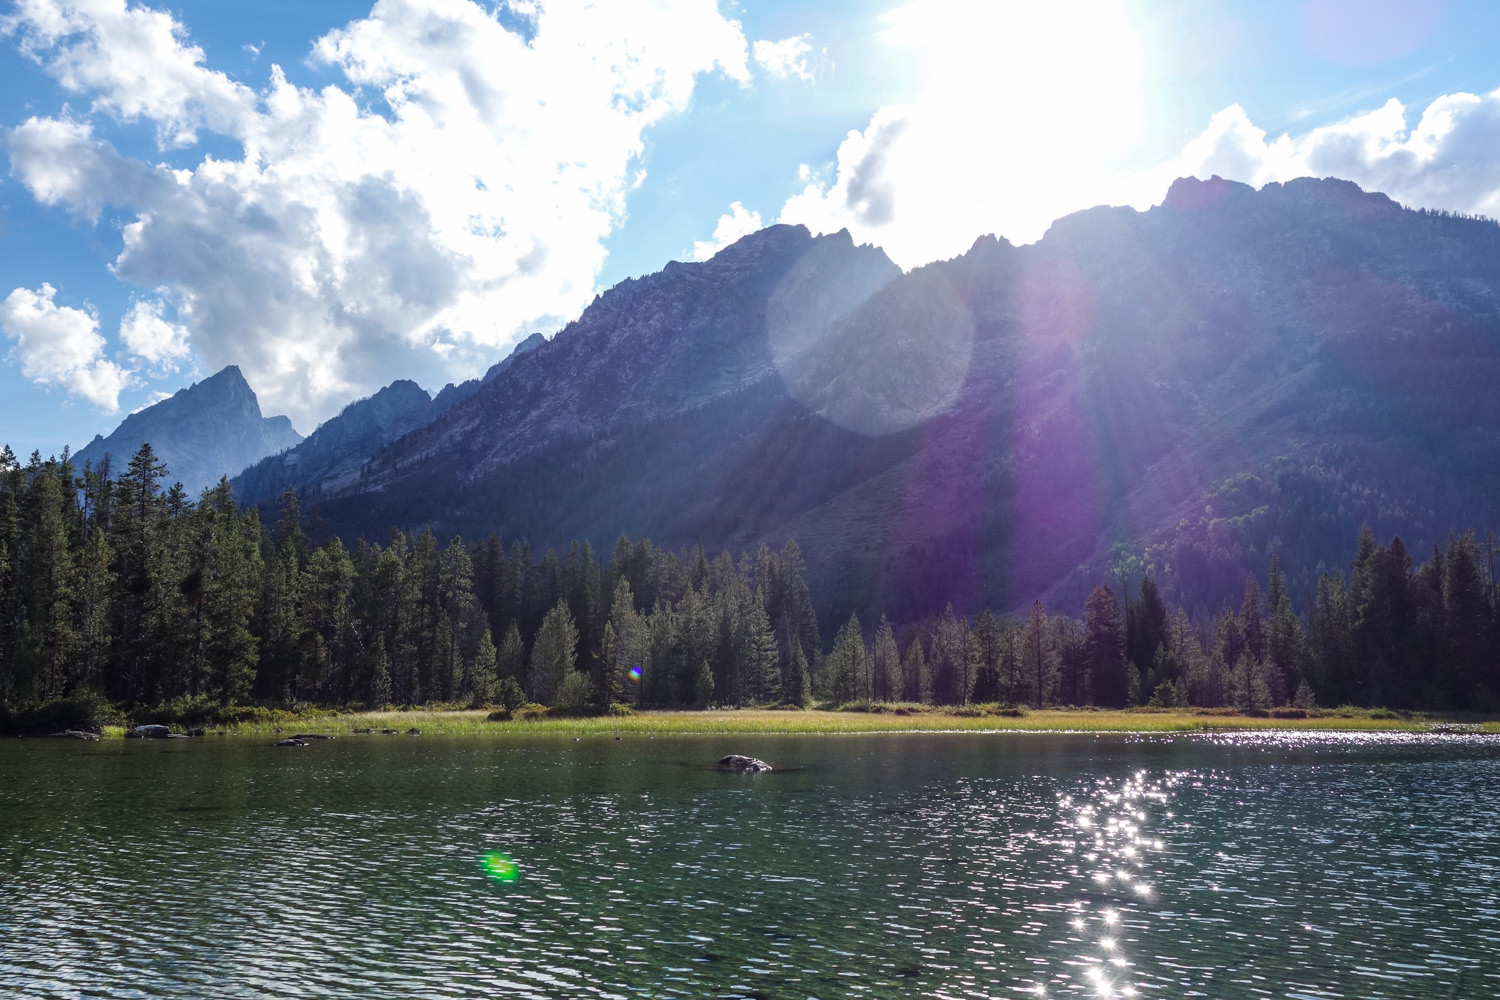
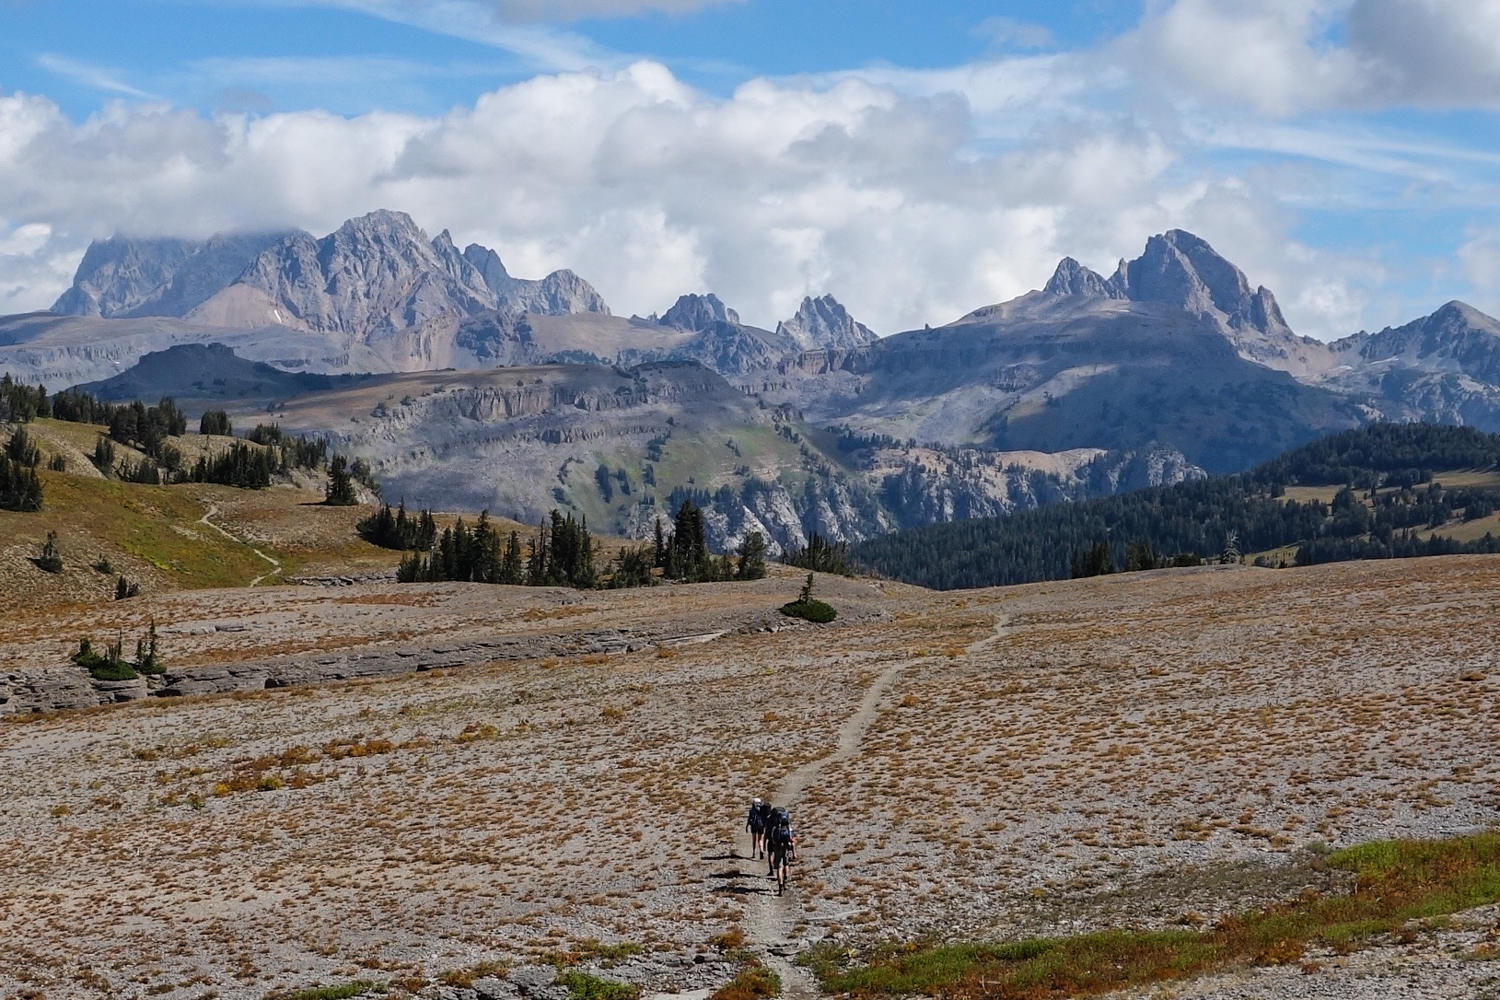
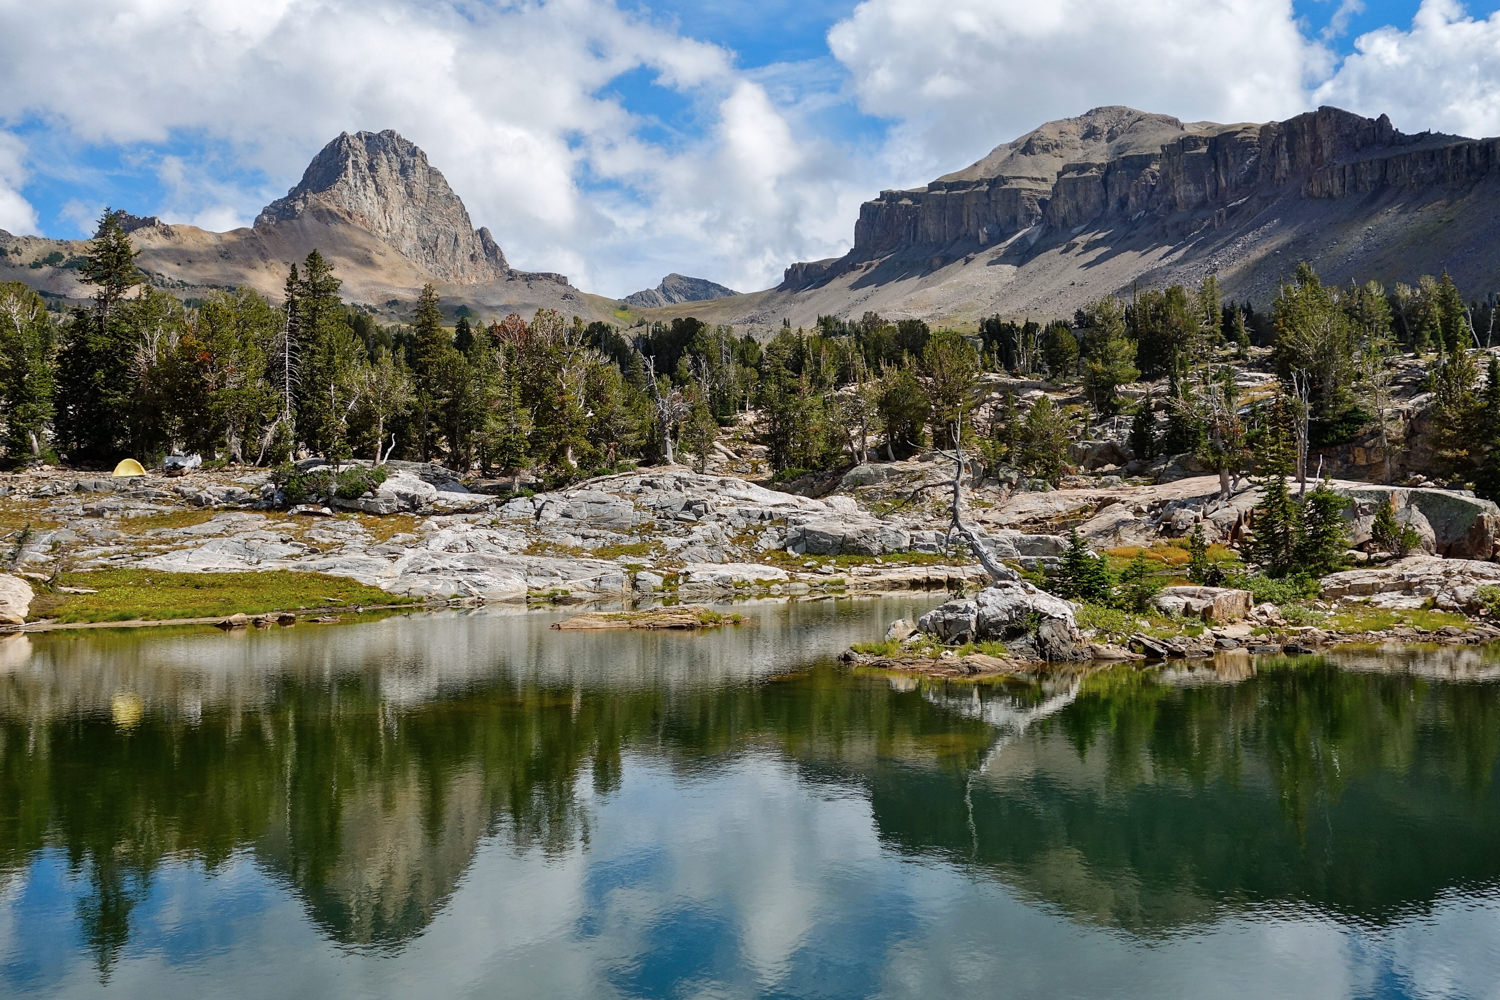
Photo Gallery

Best Time to Travel
In general, July through September is the best time to hike the Teton Crest Trail, but in some years you may still be able to safely hike as late as early October. Snowpack is a key factor for trip planning in this area as snow can linger on passes until late in the year. Rain and snow can fall at any time of year here and freezing temperatures are possible as well. During the summer months temperatures can reach into the 80s during the day and drop down into the 30s at night.
As always, be prepared and diligent in monitoring current conditions as weather can change quickly in the mountains. Before heading out, check the National Weather Service for up-to-date conditions.
While snow conditions vary from year to year, snow usually melts on trail elevations below 6,700 feet by mid-June. At higher elevations up to 10,000 feet, depending on the year, the snow progressively melts, bearing ground by the third week in July. To safely traverse Paintbrush, Static Peak and Moose Basin Divides, and Hurricane, Mt. Meek and Fox Creek passes, you may need an ice axe (and the knowhow to use it) as late as August. Microspikes help with traction too on steep snowfields. Always check in with the Grand Teton National Park Service for snow levels and condition of the passes.
Difficulty
- Total Distance: 63 km (39 miles)
- Total Elevation Gain/Loss: 8,061’ ascent and -7,576’ descent, average grade 8%, max 34%.
- Overall Difficulty: Moderate – Difficult
This hike is moderate to difficult due to two significant ascents and descents. As always, difficulty ratings depend on your experience, physical fitness, pack weight, and weather conditions. Although not a technically demanding hike, it requires careful planning around campsites and water resources. Like any backpacking trip, you should plan accordingly, train properly, know your limitations, brush up on your skills, and dial in your gear. Doing so will make for a safe and enjoyable adventure.
Permits
Backcountry permits are required for all overnight trips in Grand Teton National Park. To obtain a permit, apply in advance, starting the first (non-holiday) Wednesday in January. Submit your permit request at Recreation.gov where you can view backcountry campsites availability in real-time and apply for reservations. Groups of one to six people may apply for any of the camping zones along the way, while groups of seven to twelve people must camp in designated group campsites. Zones are marked with a sign on each end and hikers with a valid permit are free to choose where they wish to camp once arriving at the zone. Permits are $20 (non-refundable) plus $7 per person per night.
If you’d rather take a chance on a walk-in permit, your chances are fair. The park service reserves up to one-third of each camping zone (see maps) for advance reservations but the remaining two-thirds are available for walk-in permits on a first-come, first-served basis one day before the start of a backcountry trip. This is great for those who like to fly by the seat of their pants, but remember, no walk-in permits are available for same day starts and during peak backcountry season (July and August), this trail is very popular. We recommend having a backup plan if you choose the walk-in option.
Trailhead Options
The Teton Crest Trail traverses Grand Teton National Park from Wyoming Highway 22, also called the Teton Pass Highway, to String Lake via Paintbrush Canyon. The trail is accessible from many trailheads, but if you want do the it in full, start at the Phillips Pass Trailhead and end at the Leigh Lake Trailhead on String Lake. If this is the option you choose, parking is possible at a couple of turnouts halfway up Teton Pass, just west of Wilson.
Another very popular option is to begin the trail by taking the Teton Village Aerial Tram to Rendezvous Pass at 10,450 feet, which saves five miles and a 2,500-foot ascent.
Other popular options for accessing the Teton Crest Trail include beginning at the Granite Canyon, Coal Creek, or Moose Creek trailheads.
Getting to Trailheads
In order to complete the Teton Crest Trail you’ll need to find a shuttle service, drive two cars and shuttle yourself, or hitchhike (which requires the least advance planning but can be an unreliable option and a personal preference based on your comfort level).
Campsites
There are 11 campsites along the Teton Crest Trail. Once you have your permit and you’re on the trail, all individual sites are first-come, first-serve within each zone for parties of six or fewer people. For more information on backcountry campsites, visit the NPS site. Group campsites may only be used by permit-designated groups (more than six people) specifically assigned to them, and marked with signage.
Below are the campsites:
- Cascade Canyon, North Fork
- Cascade Canyon, South Fork
- Death Canyon
- Garnet Canyon
- Granite & Open Canyon
- Holly Lake
- Lower Paintbrush
- Marion Lake
- Phelps Lake
- Upper Paintbrush
- Surprise Lake
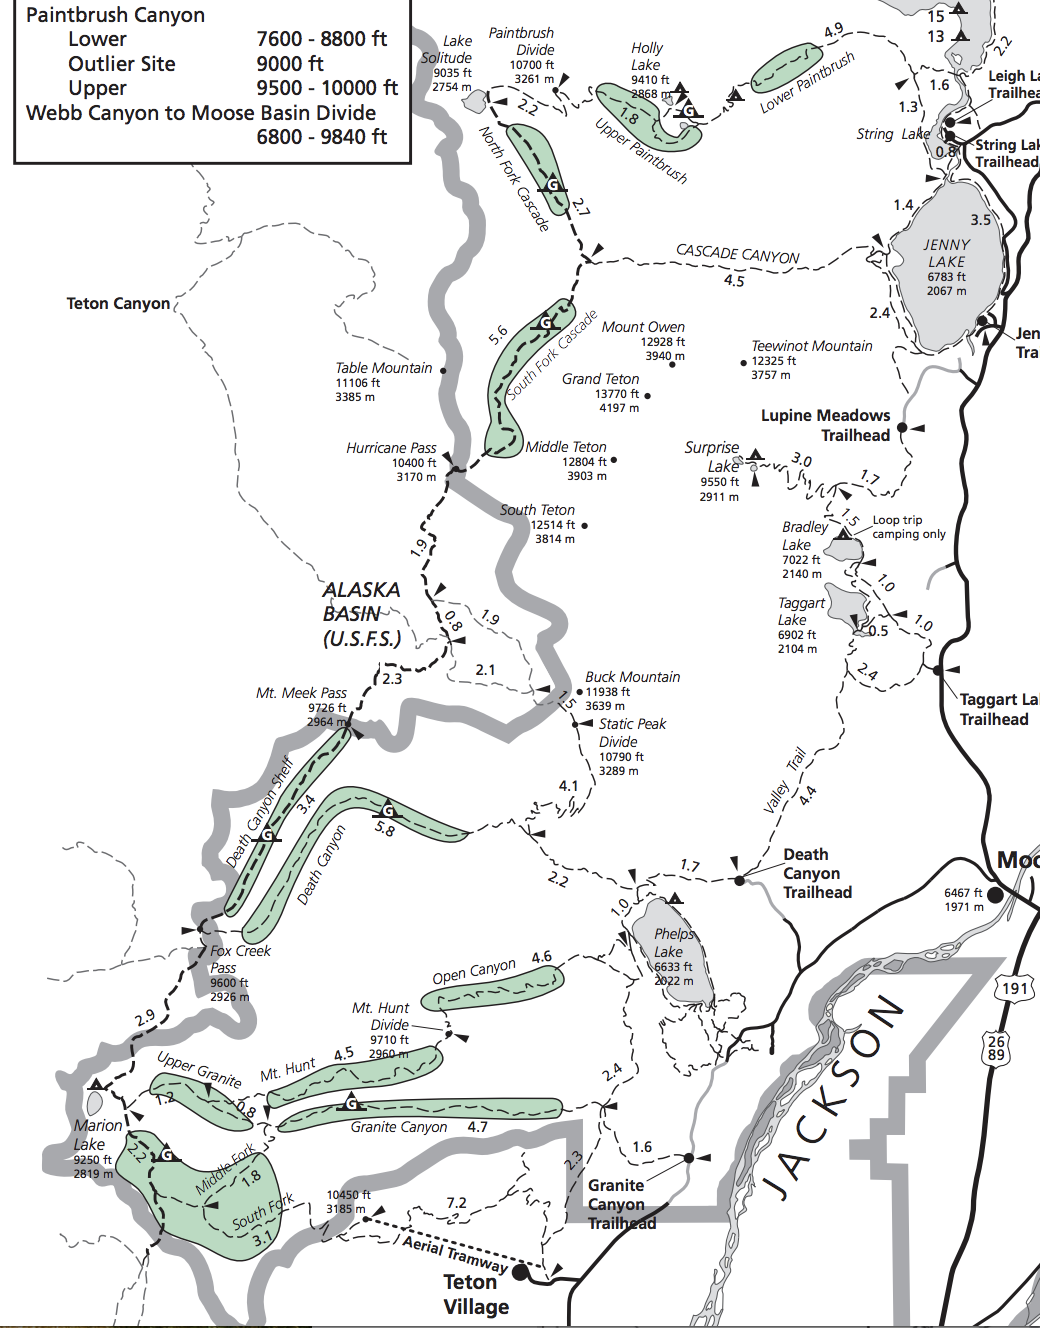
Below is a map provided by Teton National Park showing mileage, campsites, and the general route elevation of the Teton Crest Trail.
Possible Itineraries
Most people complete the Teton Crest Trail in 4-6 days. Below are a few sample itineraries. For more information on mileage between campsites, please refer to the Teton National Park website.
Three Night Option
- Starting Trailhead: Tram Trail
- Camp 1 – Death Canyon Shelf (pick your own campsite)
- Camp 2 – South Fork (designated campsites)
- Camp 3 – Holly Lake
Four Night Option
- Starting Trailhead: Granite Canyon
- Camp 1 – Granite Canyon/Upper Granite
- Camp 2 – Fox Creek
- Camp 3 – Alaska Basin
- Camp 4 – Holly Lake
Five Night Option
This trip itinerary allows for extra time to explore the area and take side trips to Static Peak and The Wall.
- Starting Trailhead: Phillips
- Camp 1 – Moose Lake (not included in the reservation system)
- Camp 2 – Death Canyon Shelf (pick your own campsite)
- Camp 3 – Alaska Basin
- Camp 4 – South Fork Cascade Canyon Zone
- Camp 5 – Holly Lake
Maps & Guidebooks
The Grand Teton Crest Trail follows a well-defined and established route. During peak season when the trail is well-traveled the risk of getting lost is pretty low. Still, you should always carry a map since it provides additional useful information, as well as routes to side trips easily accessed off the main trail.
- Hiking Grand Teton National Park by Bill Schneider (Falcon Press) lists 35 trails in the Teton’s, but more critically, provides solid information on the Teton Crest Trail. You’ll find detailed a map of the trail and valuable information about elevations and key landmarks.
- National Geographic Grand Teton National Park Trail Map offers excellent detail of the entire park, but also of the Teton Crest Trail.
- NPS.gov is an excellent resource. The reservation system is straightforward and easy to use and the site has an interactive map of the area.
- Teton Crest Trail by Necas Pereira is an exhaustive self-published guide to the Teton Crest Trail. It’s hard to find and expensive but it’s a prize if you can find it and have the budget.
Water
Water is plentiful along this trail and easily accessible from small streams until late August when some sources begin to dry up. Water is always available from the lakes. Typically, you’ll walk two hours between water sources. At high elevations, you’ll want to drink as much water as you can to stay hydrated and avoid feeling the elevation much more acutely.
Carry enough water to get from one source to the next and use a lightweight water purification system. By September when water levels are lower, you’ll want a pre-filter (e.g. a bandana or pantyhose) for getting debris out of your water before treating it.
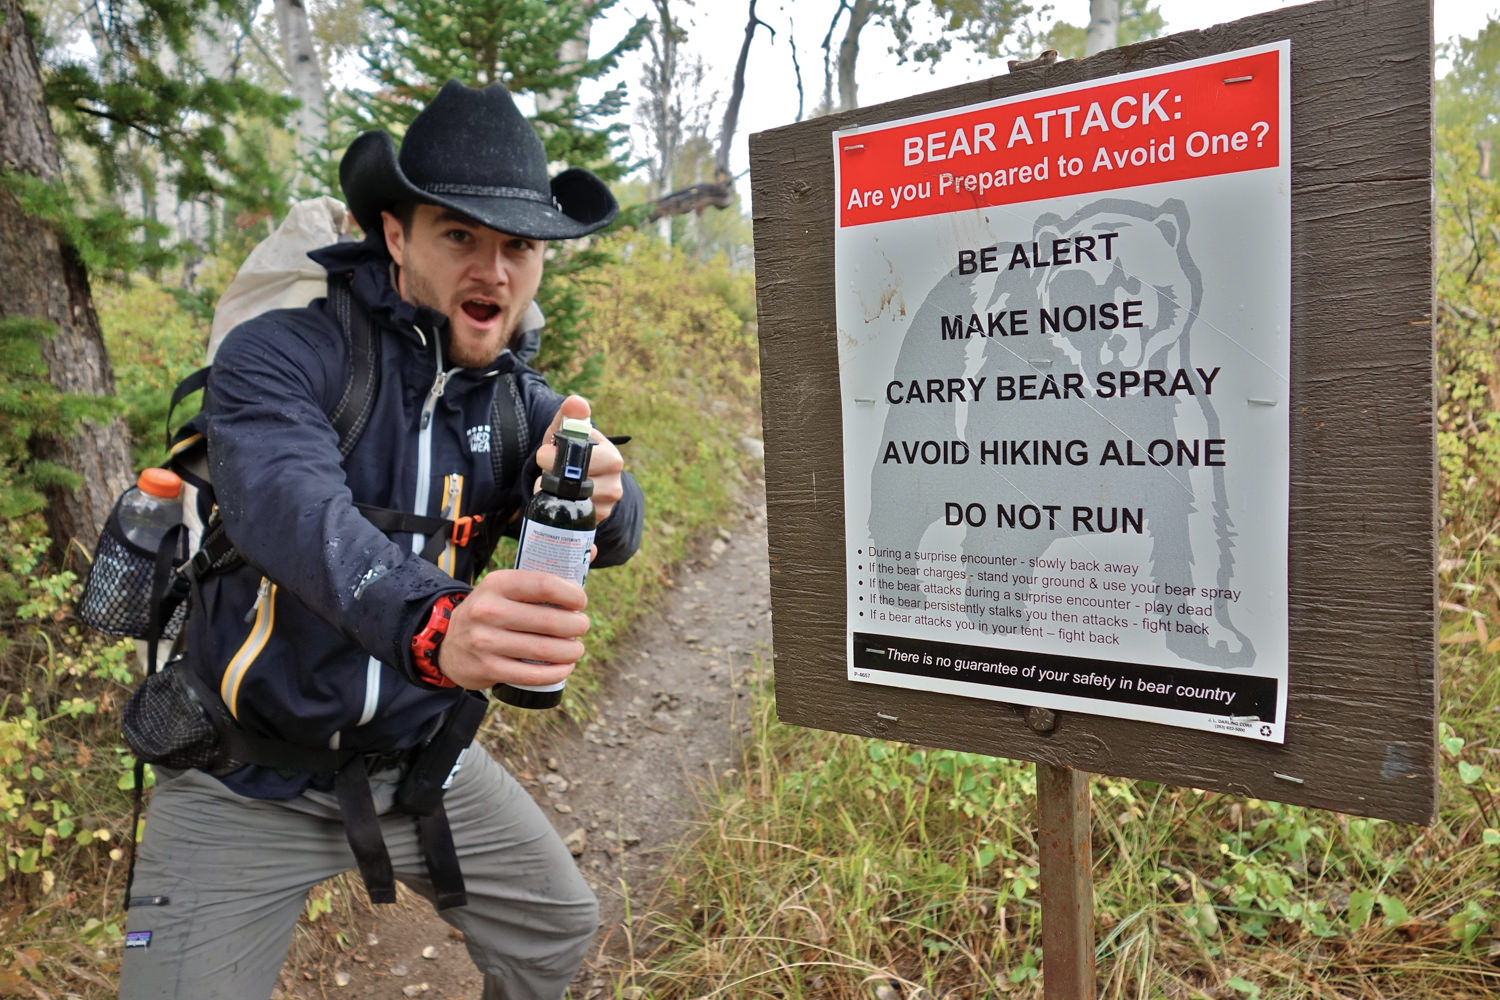
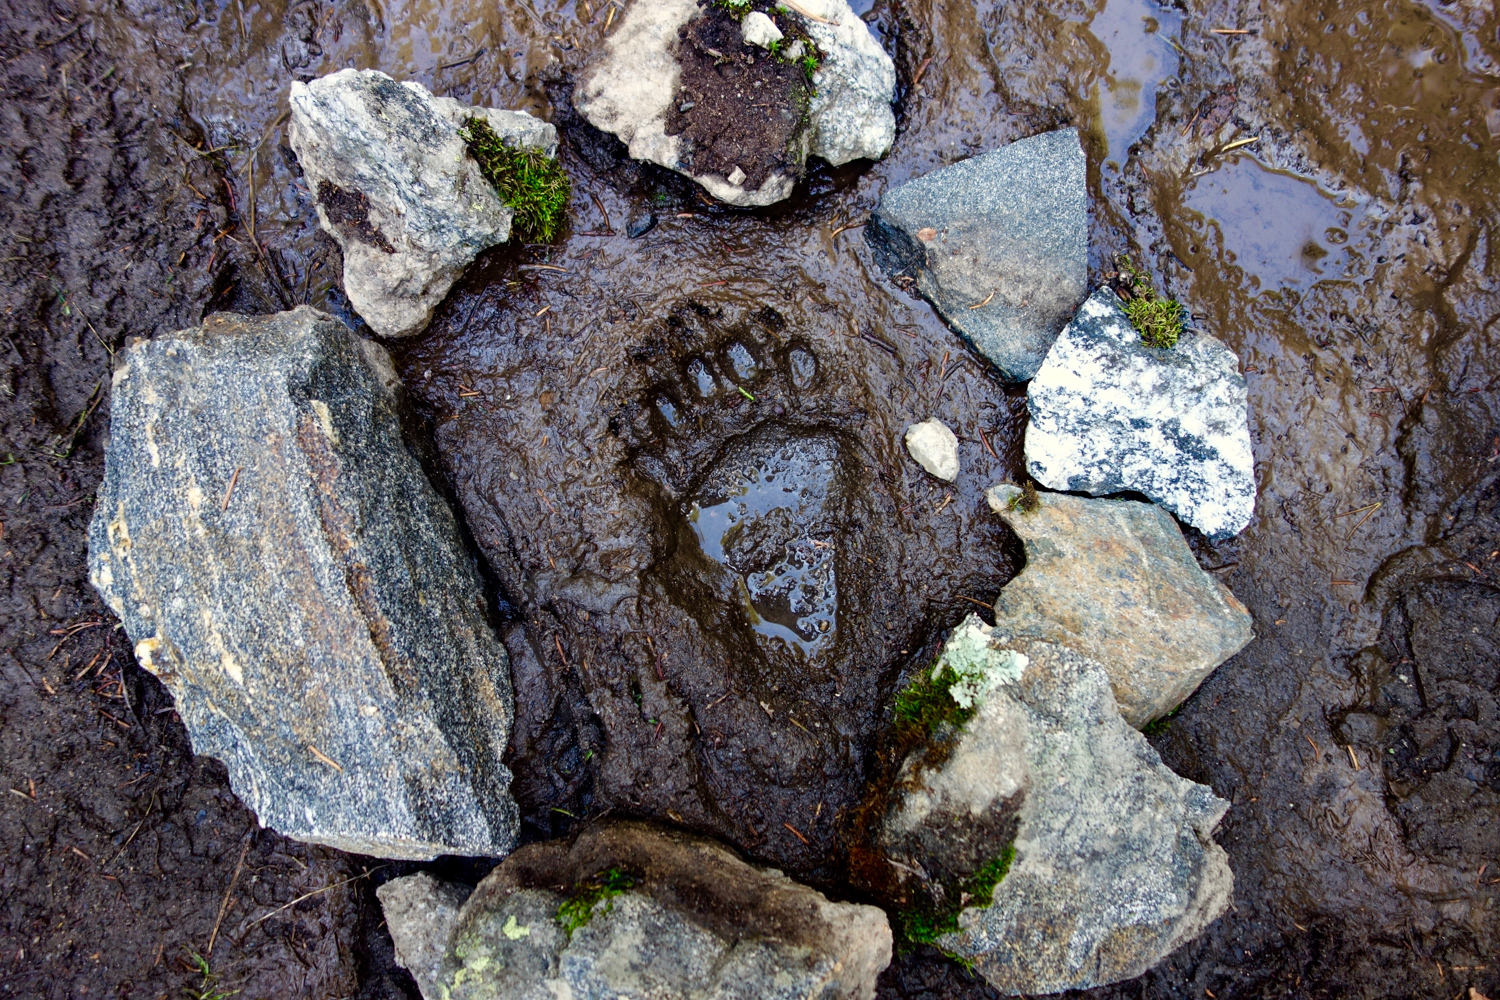
Bears & Food Storage
Teton National Park, including the Teton Crest Trail, is home to a healthy grizzly and black bear population. You’ll want to make sure each member in your party has bear spray stored in an easily accessible spot like your backpack strap. We also recommend practicing how to use it (with safety cap on) so you will be better-prepared in the unlikely event that you’d need to use it. Just remember, you cannot bring bear spray on an airplane.
Anyone camping below 10,000 feet will need to carry an approved bear canister and store all food, garbage and toiletries – any item with an odor that may attract bears – inside them. You can borrow a canisters at any permit-issuing stations for free with a backcountry permit. For a list of all approved portable bear resistant food canisters please visit the Interagency Grizzly Bear Committee website. Food storage stations (a large bear box for your small bear can) are available at some campsite sites. All of these precautions are both for your safety as well as that of the bear. Many animals are euthanized each year because of avoidable interactions with improperly stored food.
Bugs
The big annoyance in the Tetons, especially near meadows, basins and waterways, are big green flies. People not otherwise bothered by insect bites will often welt up from this insect’s painful bite. Mosquitoes are seasonally present along the lower elevation sections and near lakes near the Teton Crest Trail. September usually offers a reprieve from bugs after temperatures dip consistently below freezing. Use a combination of permethrin on your clothing and a small amount of DEET for full protection.

Backpacking Gear
We test gear for a living. For extensive recommendations on our favorite lightweight backpacking equipment, check out the CleverHiker Gear Guide and Top Picks pages, or take a look at what we brought on this trip.
What to Pack
TENT: We used the Big Agnes Copper Spur HV UL2 on this trip for its lightweight livability and convenience. This tent is one of our all-time favorites and makes our list of the best lightweight backpacking tents.
BACKPACK: We used the HMG Southwest 40 and the Gossamer Gear Mariposa 60 backpacks on this trek. Both are lightweight, convenient, comfortable, and make our list of the best lightweight backpacking packs.
SLEEPING BAG: We used the Enlightened Equipment Revelation quilt and REI Magma sleeping bag on this trek for nighttime temperatures around freezing. Both are warm, and make our list of the best backpacking sleeping bags.
SLEEPING PAD: We used the Therm-a-Rest NeoAir XLite NXT and Sea to Summit UltraLight Insulated sleeping pads on this trip. Both are light, comfortable, warm, and make our list of the best backpacking sleeping pads.
COOKING SYSTEM: We used the BRS Stove and Snow Peak Mini Solo Cookset on this hike, which make our lists of best lightweight stoves and best backpacking cookware.
WATER PURIFIER: We used the Katadyn SteriPEN Ultra as our main purification method on this trip. It’s lightweight, works fast, and doesn’t require any pumping, squeezing or chemicals. Check out our best water purifiers list for our other top recommendations.
FOOTWEAR: We wore Saucony Peregrine trail runners (men’s / women’s) and they were excellent. If you prefer boots, make sure they’re lightweight and break them in really well before your trip, but if you’re open to considering trail runners, check out our article on 5 Reasons to Ditch Your Hiking Boots.
BEAR SPRAY: Grand Teton National Park is home to a healthy grizzly and black bear population. We recommend hiking with bear spray and knowing how to use it properly.
HEADLAMP: A small headlamp like the Petzl Actik Core is a bright and lightweight option.
FOOD: When backpacking the Teton Crest Trail you’ll have to carry all your food and use an approved bear canister. Be sure to choose calorically dense foods that won’t take up too much space. If you need suggestions, take a look at our Backpacking Food Guide for some of our go-to meals and snacks.
CLOTHING: Here are some of our favorite backpacking clothing items:
- 1 rain jacket shell
- 1 pair rain pants
- 1 down jacket
- 1 fleece jacket
- 1 pair hiking pants (men / women), or tights
- 1 pair hiking shorts (men / women)
- 1-2 hiking t-shirts – Nike dri fit t-shirts
- 1 long-sleeve shirt – Nike dri fit half zip
- 1-3 pair underwear – ExOfficio boxer briefs or ExOfficio women’s briefs
- 2-3 pair socks (add thin sock liners if using boots)
- 1 pair long johns
- 1 warm hat
- 1 sun hat
- 1 pair gloves / mittens
MAP & COMPASS: The Grand Teton Crest Trail follows a well-defined and established route, and during peak season when the trail is heavily used, the risk of getting lost is pretty low. Still, you should always carry a topographical map for route finding, water sources, mileage, and possible side trips. For good map options, read Maps & Guidebooks section above. We always hike with a quality compass, though the trails were easy to follow and we didn’t end up needing it on this trip.
FIRST AID KIT: Always bring a small personalized first aid kit. We like the Adventure Medical Kit Ultralight .7 Kit and often add extras, like painkillers and personal medications.
SUN PROTECTION: Polarized sunglasses, sunscreen, and SPF lip balm are an absolute must on every backpacking trip.
POCKET KNIFE: We brought along a small Swiss Army Knife, which come in handy on occassion.
ICE AXE: You may need to carry an ice axe to safely traverse some divides and passes until around the third week of July. Check in with the Grand Teton National Park Service snow levels and condition of the passes and make sure you know how to use an ice axe.
OTHER ITEMS:
- Small towel
- Cash & ID
- Permits
- Personal toiletries
- Hand sanitizer
- Insect repellent
- Camera – the Sony RX100 is our go-to camera for lightweight backpacking
More Information
We hope this guide helps you plan a fun adventure along the Teton Crest Trail. For more popular CleverHiker content, check out our comprehensive gear guides and outdoor skills videos: