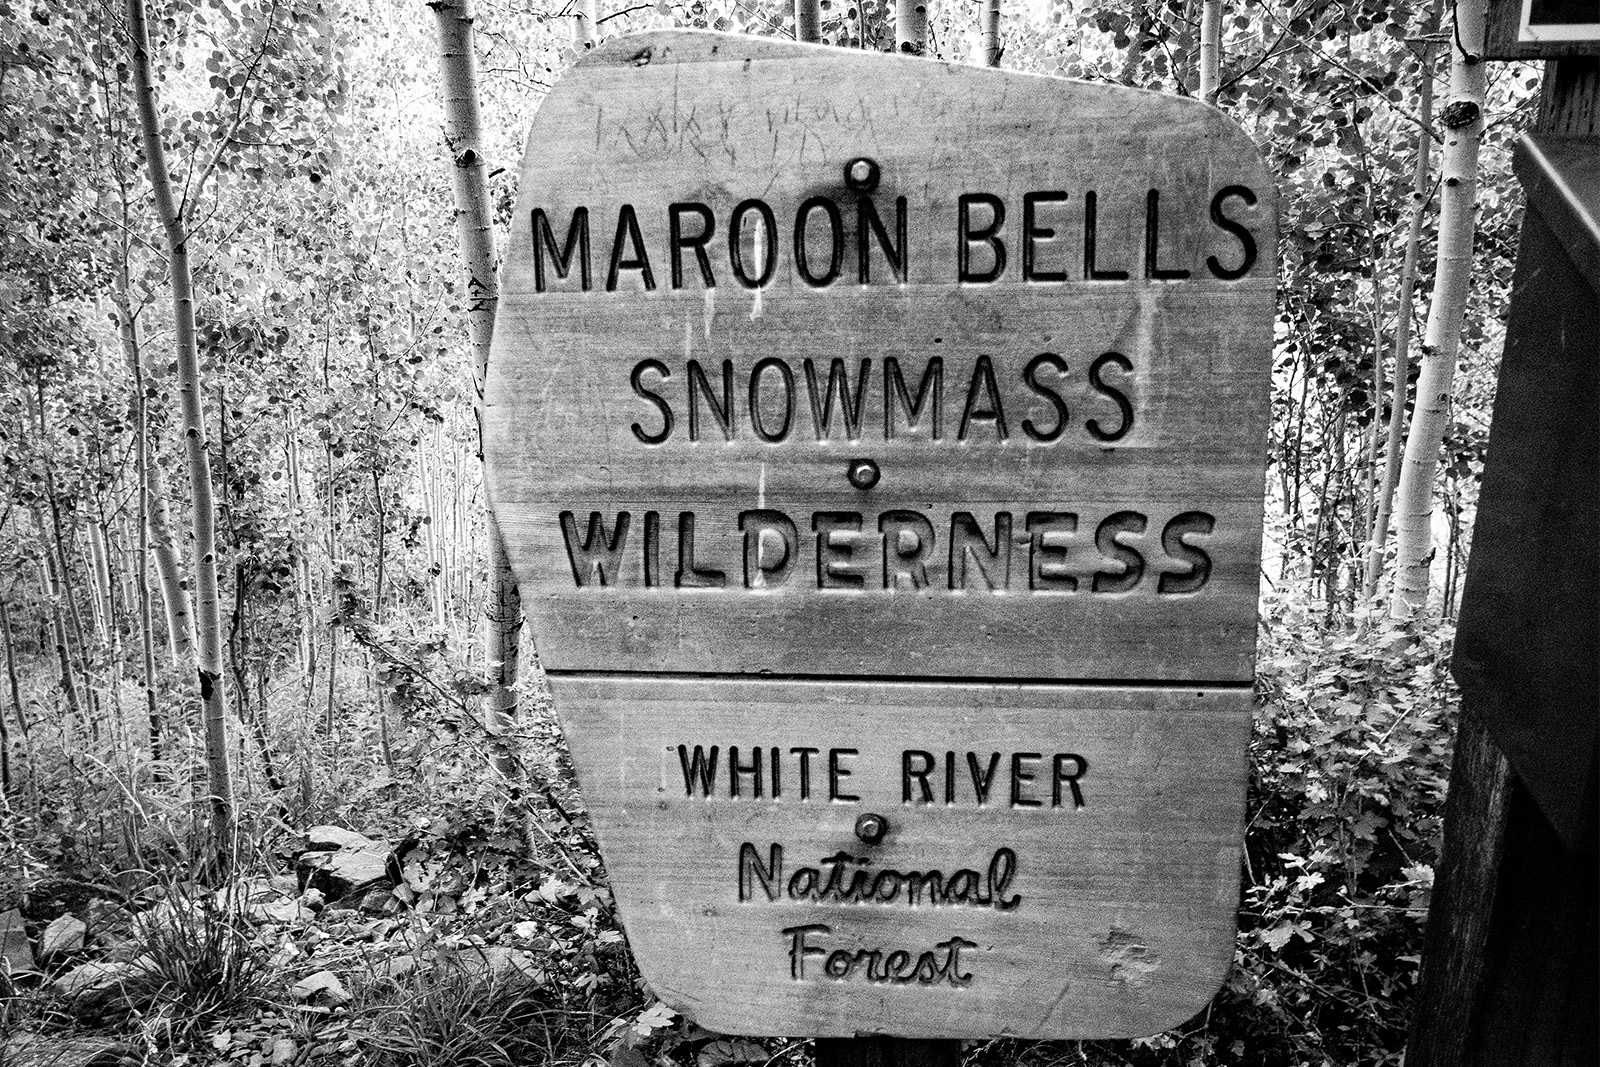
This trip guide takes you around four of Colorado’s most iconic peaks, the Maroon Bells, which are the heart and soul of the Four Pass Loop.
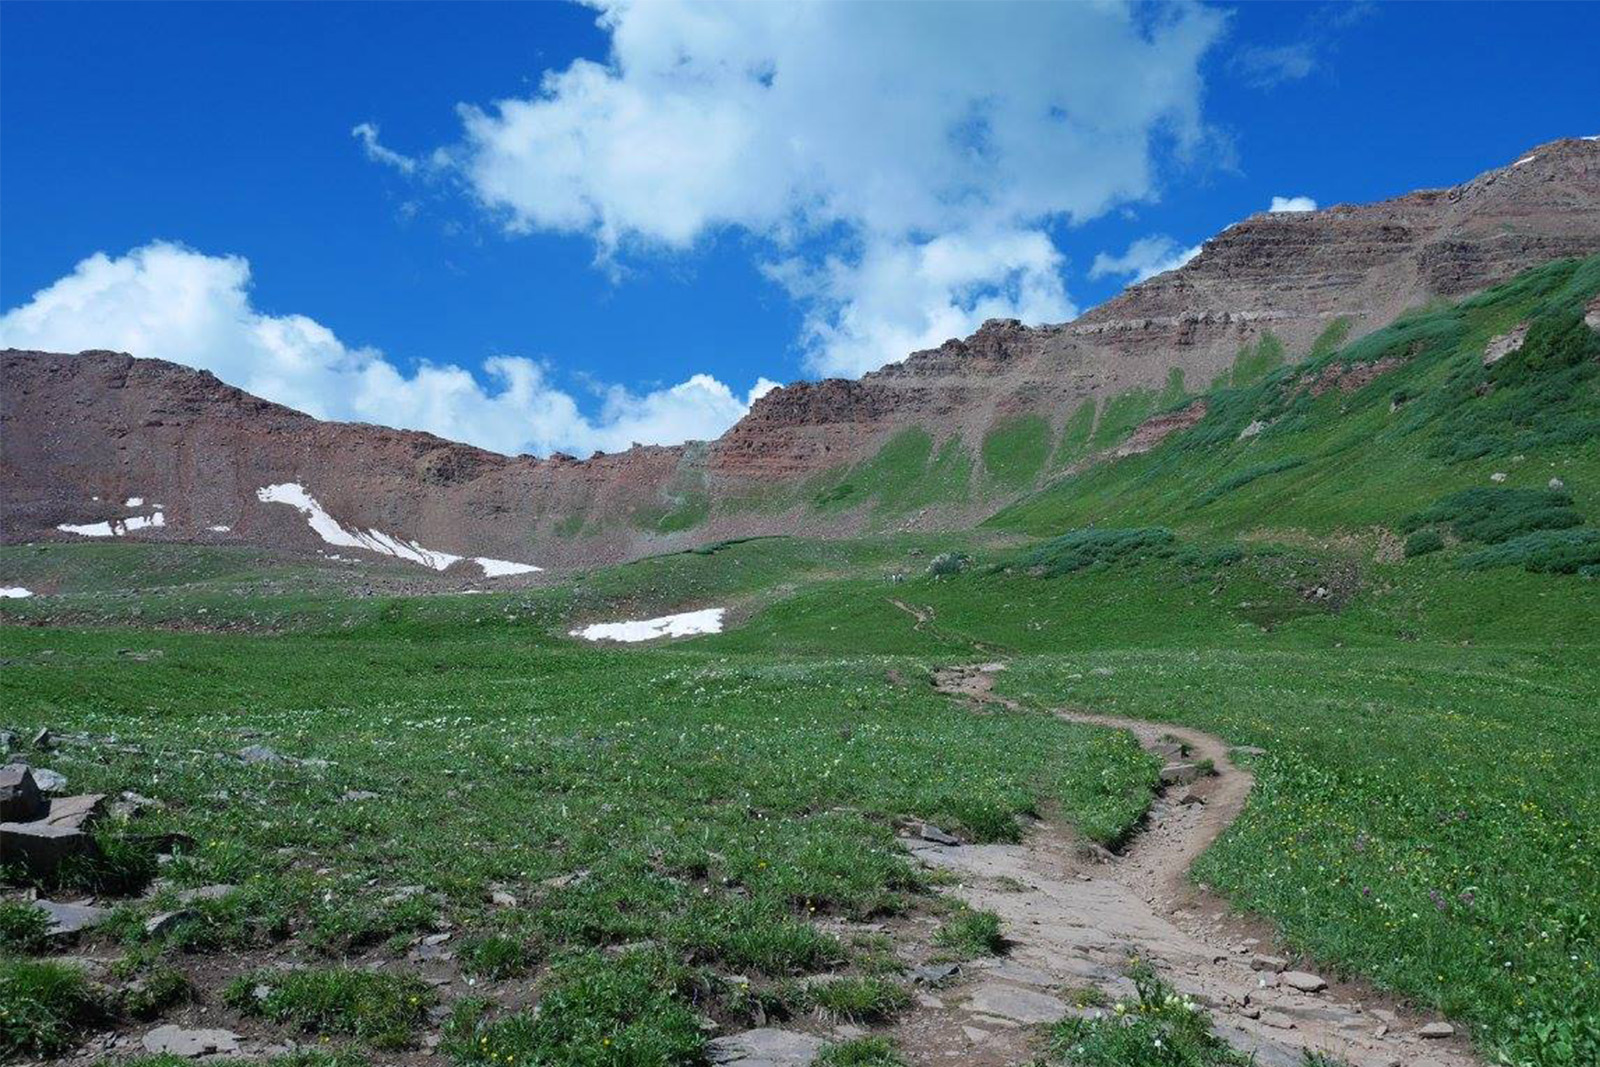
Over the course of 26 miles, the loop climbs over four 12,000-foot passes while circling two of the most classic 14ers. Throughout the trip, views abound with opportunities to spot Snowmass Mountain and Pyramid Peak as well as countless other 13,000 and 12,000-foot peaks in the area. With relatively well-graded trails, plenty of camping, and a well-established route, this loop offers a ton of payoff for your work. It is well worth the effort to visit at least once.
Quick Facts
- Distance: 26.5 miles from Maroon Lake Trailhead
- Days Needed: 1-4 days
- Peak Elevation: Buckskin Pass- 12,494 feet
- Low Elevation: Maroon Lake Trailhead- 9,600 feet
- Elevation Gain/Loss (Approximate): 8,600 feet
- Best Time to Hike: July-September
- Permits: Yes
- Difficulty: Difficult
Highlights
- Incredible alpine views over Buckskin, Trail Rider, Frigid Air, and West Maroon passes
- Loop hike makes logistics easy for overnight trips
- Well-graded trails
- Access Snowmass, the Maroon Bells, and Pyramid Peak 14ers (for experienced climbers)
- Many side trips and add-on options
Lowlights
- Incredibly busy on the West Maroon Trail
- High altitude may be difficult for those coming from sea level
- Monsoon thunderstorms can pose a hazard in July and August
- IGBC-approved bear-resistant containers are required
- Permits are required for parking and overnight trips
Best Time to Hike
Due to the high altitude nature of this loop, the best time to hike is July, August, and September. More experienced hikers may be able to get away with late June trips, particularly in low snow years. However, snow in the Colorado Rockies tends to stick around until the beginning of July, particularly on the north faces of passes where cornices have formed over the winter. Given the central location of this hike and its proximity to several 14,000-foot peaks, snow will likely stick around a bit longer here compared to other areas of Colorado.
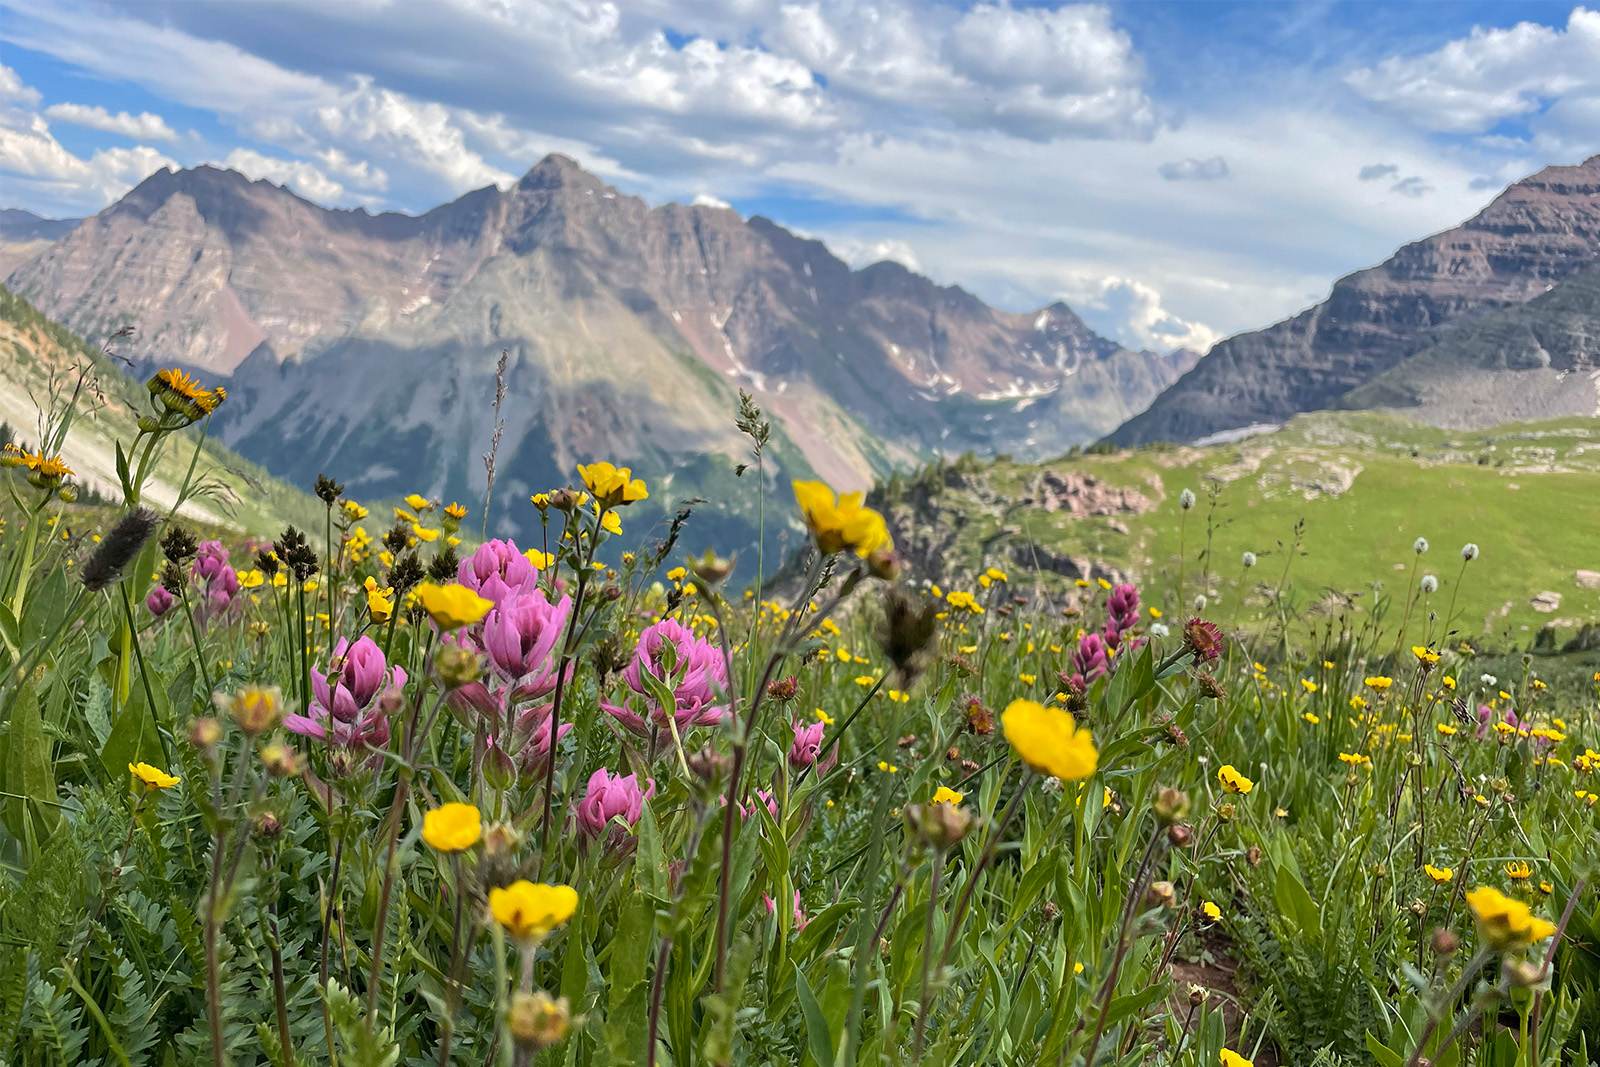
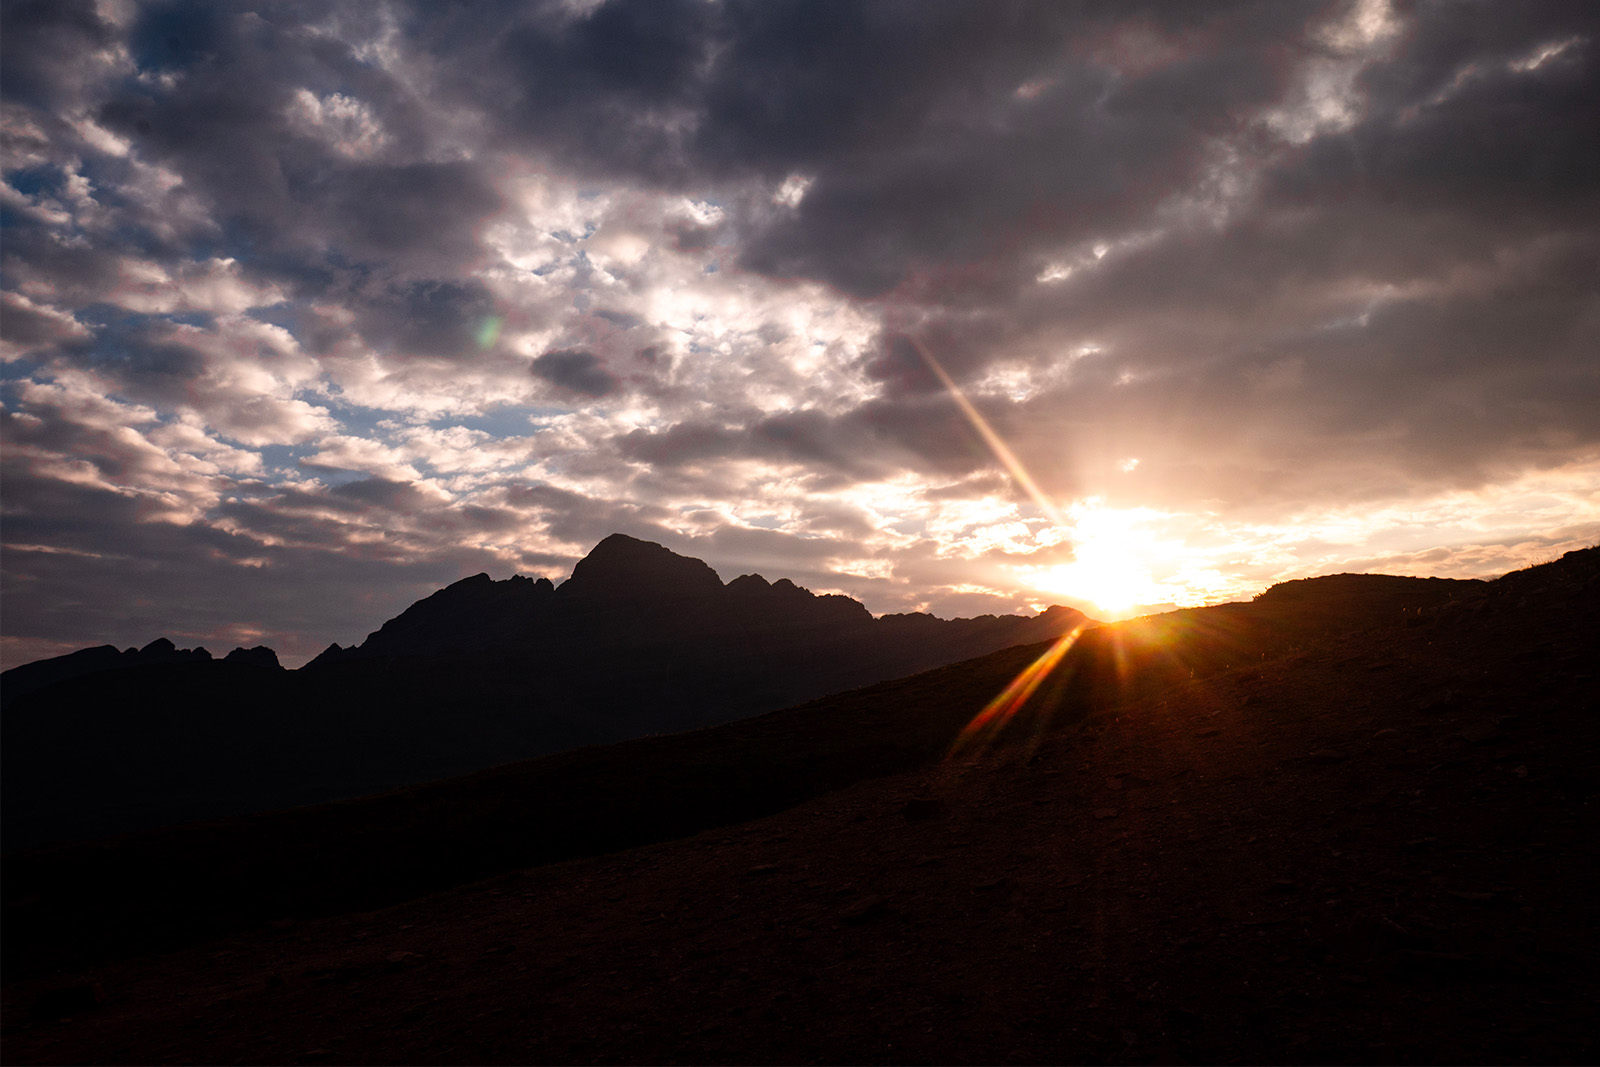
July can be a wonderful time to backpack in the mountains. It’s when many wildflowers begin to bloom, water sources are plentiful, and the air temperature feels like summer. Hikers should beware that isolated monsoon thunderstorms roll through most afternoons in July. It’s a good idea to plan your days and campsites to avoid being on the passes in the afternoons. The rule of thumb is to head down to treeline by noon, though it’s always best to monitor the skies. Monsoon thunderstorms are less common in August, and the flowers are usually peaking by this time.
By September, the alpine is ablaze with the classic golden yellow, and the tundra turns orange and red. While still hot in the afternoon, temperatures begin to cool off, particularly at night. The risk of snow increases throughout the month, and water sources begin to acquire a film of ice at night. This also translates to fewer bugs and beautiful, golden aspens near the Maroon Lake trailhead.
By October, plan for snow. It is common to get anything from a light dusting to feet at a time, so we don’t recommend planning trips after October 1st unless you’ve got a clear weather window and are prepared for snow and frigid temperatures.
Difficulty of Trail
The Four Pass Loop is well-maintained and marked, making it a great choice for hikers of any level looking for a beautiful trip. That said, the altitude, in particular, can be challenging for those not yet acclimated.
TERRAIN
The majority of the trails are packed dirt with some sturdy rocks throughout. The West Maroon trail between the Maroon Lake Trailhead and Maroon Lake can feel especially tiring to hike on the return journey to the car after completing the Loop.
The bigger issue with the trail tread tends to be erosion due to high traffic. Many steep sections, particularly below the passes, have braiding or ruts from water runoff. As much of the trail traverses alpine tundra, it is best to try to follow the official trail and avoid walking on the grasses. They take a long time to grow and can suffer immensely from foot traffic.
GRADIENT
Like much of the western US, the trails making up the Four Pass Loop are built with switchbacks to make the climb more gradual. The overall rate of elevation gain is about 330 feet per mile, which is fairly easy going. Of course, some sections, particularly close to the passes, can be much steeper.
Buckskin Pass, in particular, can be a brutal climb, with 800 feet of gain per mile on the east side. The entire route is considered a class one walk-up: there is no scrambling or need to use hands to reach the passes. The trail is walkable at all times.
ELEVATION
By far the most daunting and challenging aspect of this hike is the high altitude. All four passes top out at over 12,400 feet above sea level.
Of course, once you gain all that vert to the pass, you drop quite a bit to get to the next approach. For those coming from sea level, the chances of altitude sickness bogging you down is pretty high. Taking a few days to acclimate in Denver or Aspen before hiking is a good idea.
Even locals who have not completed multiple high-altitude hikes should plan to take it slow and watch for signs of altitude sickness. Drinking lots of water and taking things slowly can go a long way in preventing symptoms. Choosing campsites at the low points between the passes can also make a big difference.
PERMITS & Restrictions
This area is no secret, so the Maroon Bells-Snowmass Wilderness requires permits to protect this stunning landscape. Read this Need to Know section for details on overnight permits, fire restrictions, pets, camping, waste management, and group sizes.
Hikers snatch up permits quickly. Either try to reserve a permit as soon as they become available if you don’t have flexibility or watch for cancellations during June, July, August, and September.
PERMITS
Those looking to book a permit can find all of the information and make their reservation through the official website, but here’s the abbreviated version:
On February 15, hikers may make reservations for June and July trips.
August and September permits are available starting June 15 for that year. Each person is only allowed to book two permits per year for up to seven days each. Several different camping zones overlap with the Four Pass Loop.
Be sure to check which zone you are planning to camp in each night before booking your reservation. Current fees are $10 per person per night plus a $6 non-refundable reservation fee.
BATHROOM PLAN
Ah, yes. Pooping in the wilderness can be mighty satisfying experience. However, you are far from the only person pooping in these woods. For that reason, we recommend using a wag bag and packing out your waste.
BEAR-PROOF YOUR SMELLY STUFF
This loop is in black-bear country, and as you may know, a fed bear is a dead bear. Food, trash, and scented items should be stored in an IGBC-approved bear cannister or Ursack. We prefer to use an Ursack because it’s lightweight, works great, and isn’t bulky.
Getting There
TRAILHEADS
The Four Pass Loop is located between Aspen and Crested Butte, Colorado. Most hikers opt to start at the Maroon Lake Trailhead, which is located about 12 miles south of Aspen up Maroon Creek Road. You need parking or shuttle reservations to access this trailhead from May through October, even if you are just planning to day hike.
Some hikers choose to start from the West Maroon Trailhead, which is located about 14 miles north of Crested Butte over Schofield Pass. You can reach this trailhead in your own vehicle by a rough, unpaved road which includes a single-lane section along the edge of a cliff. We recommend a 4WD or high clearance vehicle. Or, you can book a private shuttle from Crested Butte to the West Maroon trailhead through a company, such as Dolly’s Mountain Shuttle.
Both Crested Butte and Aspen are several hours from Denver by car, but the scenic drive is well worth the effort. For those who decide to end their hike early or hike the Aspen to Crested Butte route, it takes several hours to drive from Aspen to Crested Butte and vice versa.
PARKING
Importantly, backpacking permits do not include parking at the Maroon Lake Trailhead. The trailhead has limited parking spaces available for those who purchase a parking pass in advance through this site ($10 per vehicle for up to three days). Importantly, hikers with parking reservations must arrive at the trailhead before 8:00 a.m. or after 5:00 p.m. From 8:00 a.m. to 5:00 p.m., the road to Maroon Lake Trailhead is closed to personal vehicles and only accessible by a shuttle bus.
The most common way to access the Maroon Lake Trailhead is taking a shuttle from the Maroon Bells Welcome Center at Aspen Highlands Ski Area to the Maroon Lake Trailhead. The shuttle runs from mid-May to November and costs $16 for adults (2025 prices). You can reserve your shuttle online through Maroon Bells Shuttle Reservations.
You should buy your parking pass or shuttle reservation well in advance. Both sell out for peak season trips – when we recommend hiking the Four Pass Loop.
Planning Your Itinerary
There are many websites, Facebook groups, and online forums dedicated to planning a trip on the Four Pass Loop. The official website provides more information about required gear and permits. When planning a hike, we use a phone GPS app, such as GAIA GPS, to track mileage, look up water sources, and find campsites.
Though some avid trail runners and hikers complete the loop in a single day, most opt to split the trip into 2-4 days to fully soak up the scenery. You can hike the loop clockwise or counterclockwise – depending on when you want to tackle the most difficult climbs.
Many backpackers prefer hiking Four Pass Loop clockwise for more gradual ascents and better views at the end of the hike. Hiking clockwise makes sense for backpackers are not as fit, not as fast, or not as acclimated to high-altitude hikes. However, we prefer hiking the loop counterclockwise to tackle the toughest climb (Buckskin pass) first. For the fit backpacker, hiking counterclockwise also means summiting all of the passes early in the morning to avoid afternoon thunderstorms.
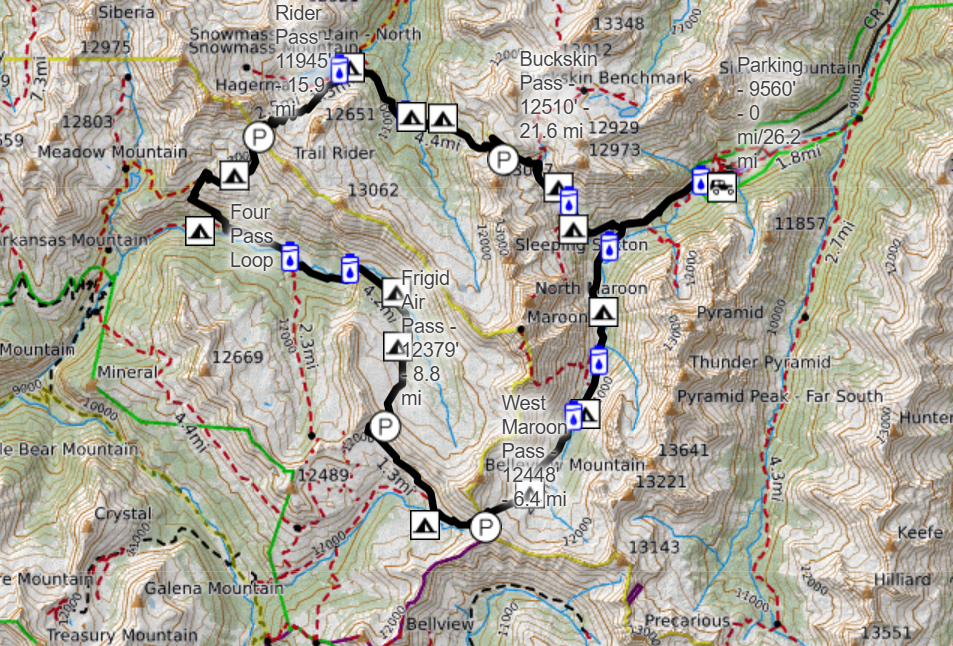
The sample itinerary below outlines a counterclockwise loop through the four passes.
MAPS & RESOURCES
- Overnight Permits (required): Recreation.gov
- Outdoor Trails Maps: Maroon Bells-Snowmass Wilderness
- National Geographic Maps: Maroon Bells, Redstone, Marble Map
- Skyview Maps: Aspen, Crested Butte, Maroon Bells
- FarOut App: Four Pass Loop
- CO Trex: Colorado Trail Explorer (GPS app and browser version available). Great for planning, downloading offline maps, marking camping and water.
- Caltopo GPS: Route
Day 1: Maroon Lake Trailhead to Snowmass Lake via Buckskin Pass
On day one, start off from the Maroon Lake Trailhead and follow the main trail to Crater Lake. A side trail will branch off to the right to ascend Buckskin Pass. Make sure to use a GPS because there are many social trails and a few trail junctions along the way.
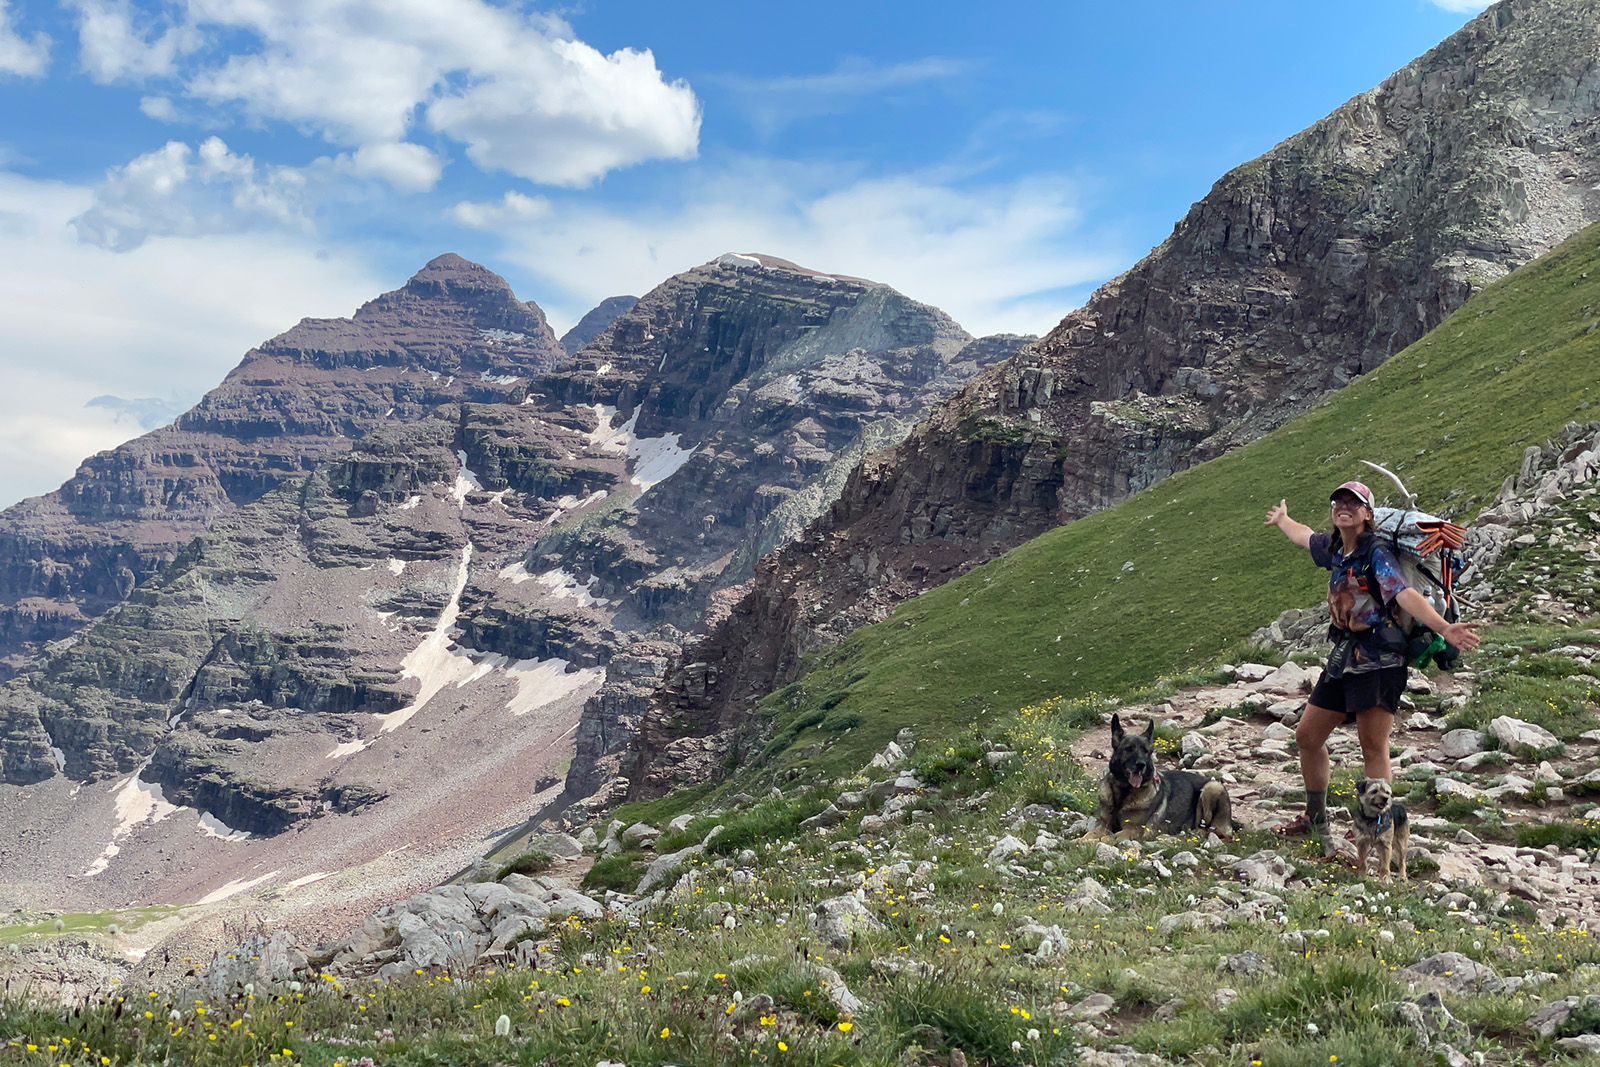
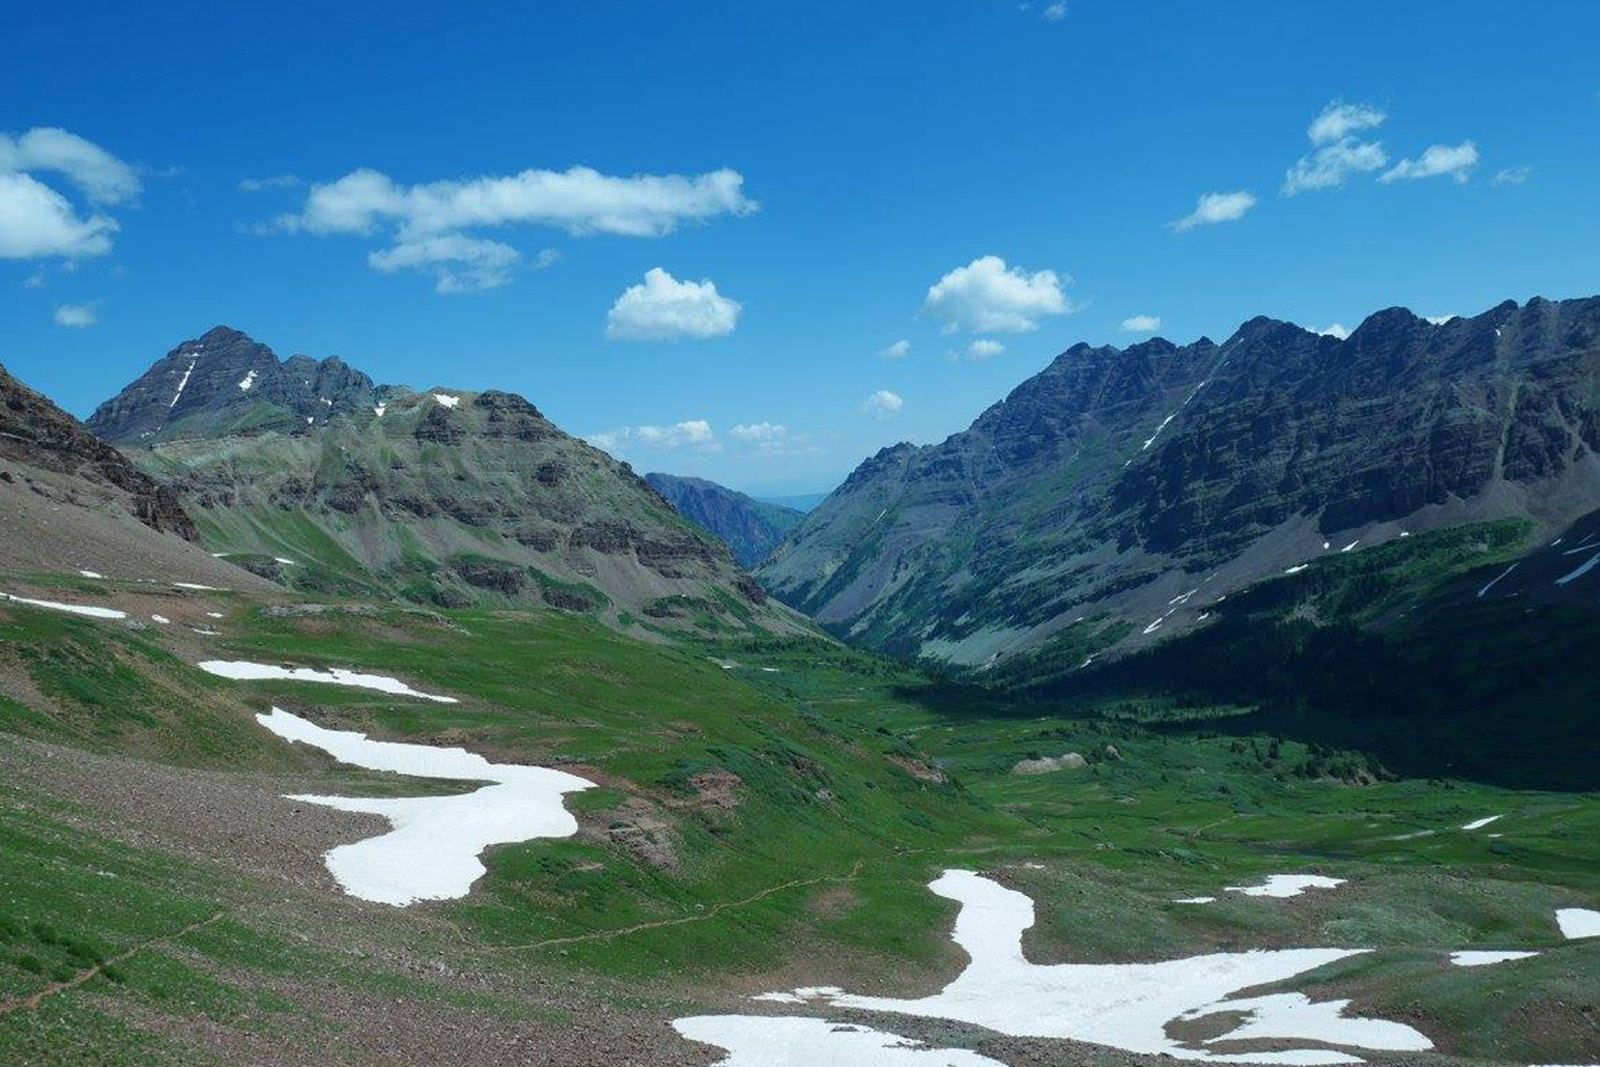
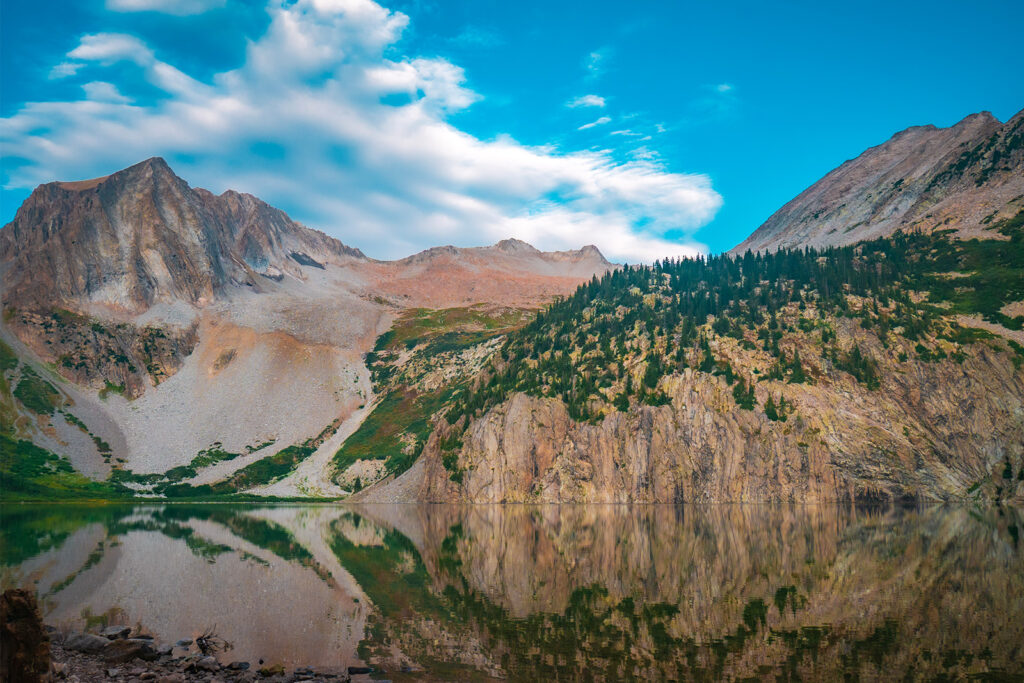
This route takes you around the north side of the Maroon Bells up to Buckskin Pass. There are many wildflowers around the pass in the summer. The views from the top of the pass are stupendous, with Pyramid Peak visible to the east and Snowmass Mountain to the west.
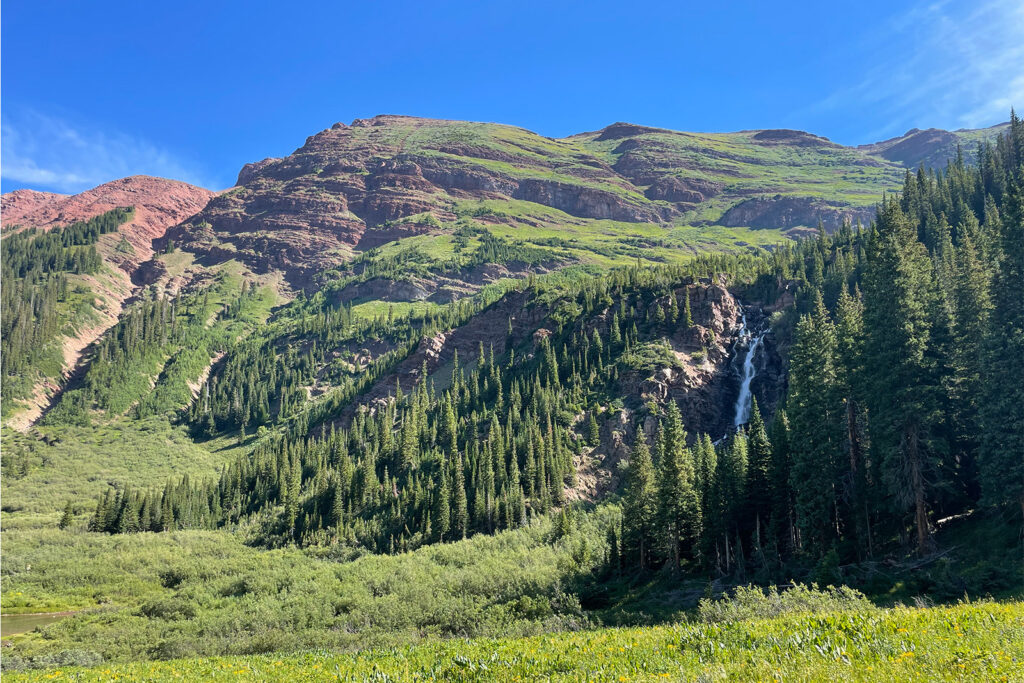
Descend the west side of the pass down a series of switchbacks to Snowmass Creek. There are many campsites in this valley, but the most scenic sites are a bit further around the shores of Snowmass Lake. Enjoy lounging around camp or taking a dip in the lake after you’ve completed your hard work for the day.
Daily Mileage- 8.3 miles
Daily Elevation Gain- 3228 feet
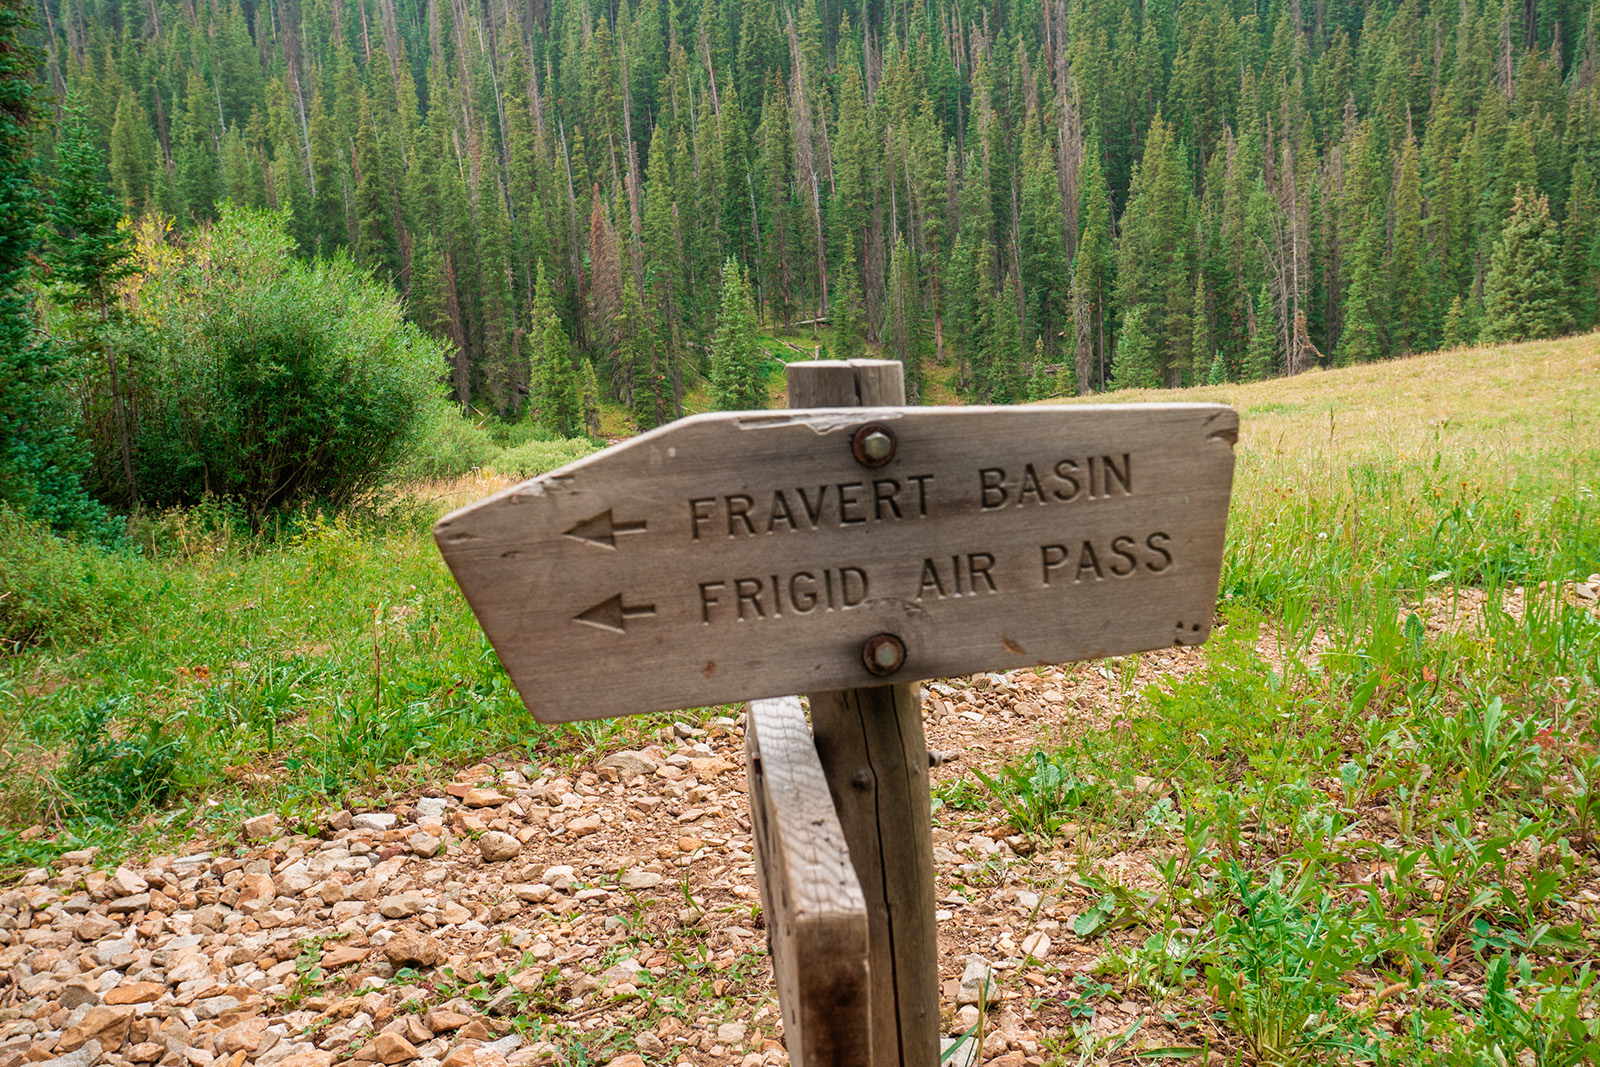
Day 2: Snowmass Lake to Fravert Basin via Trail Rider Pass
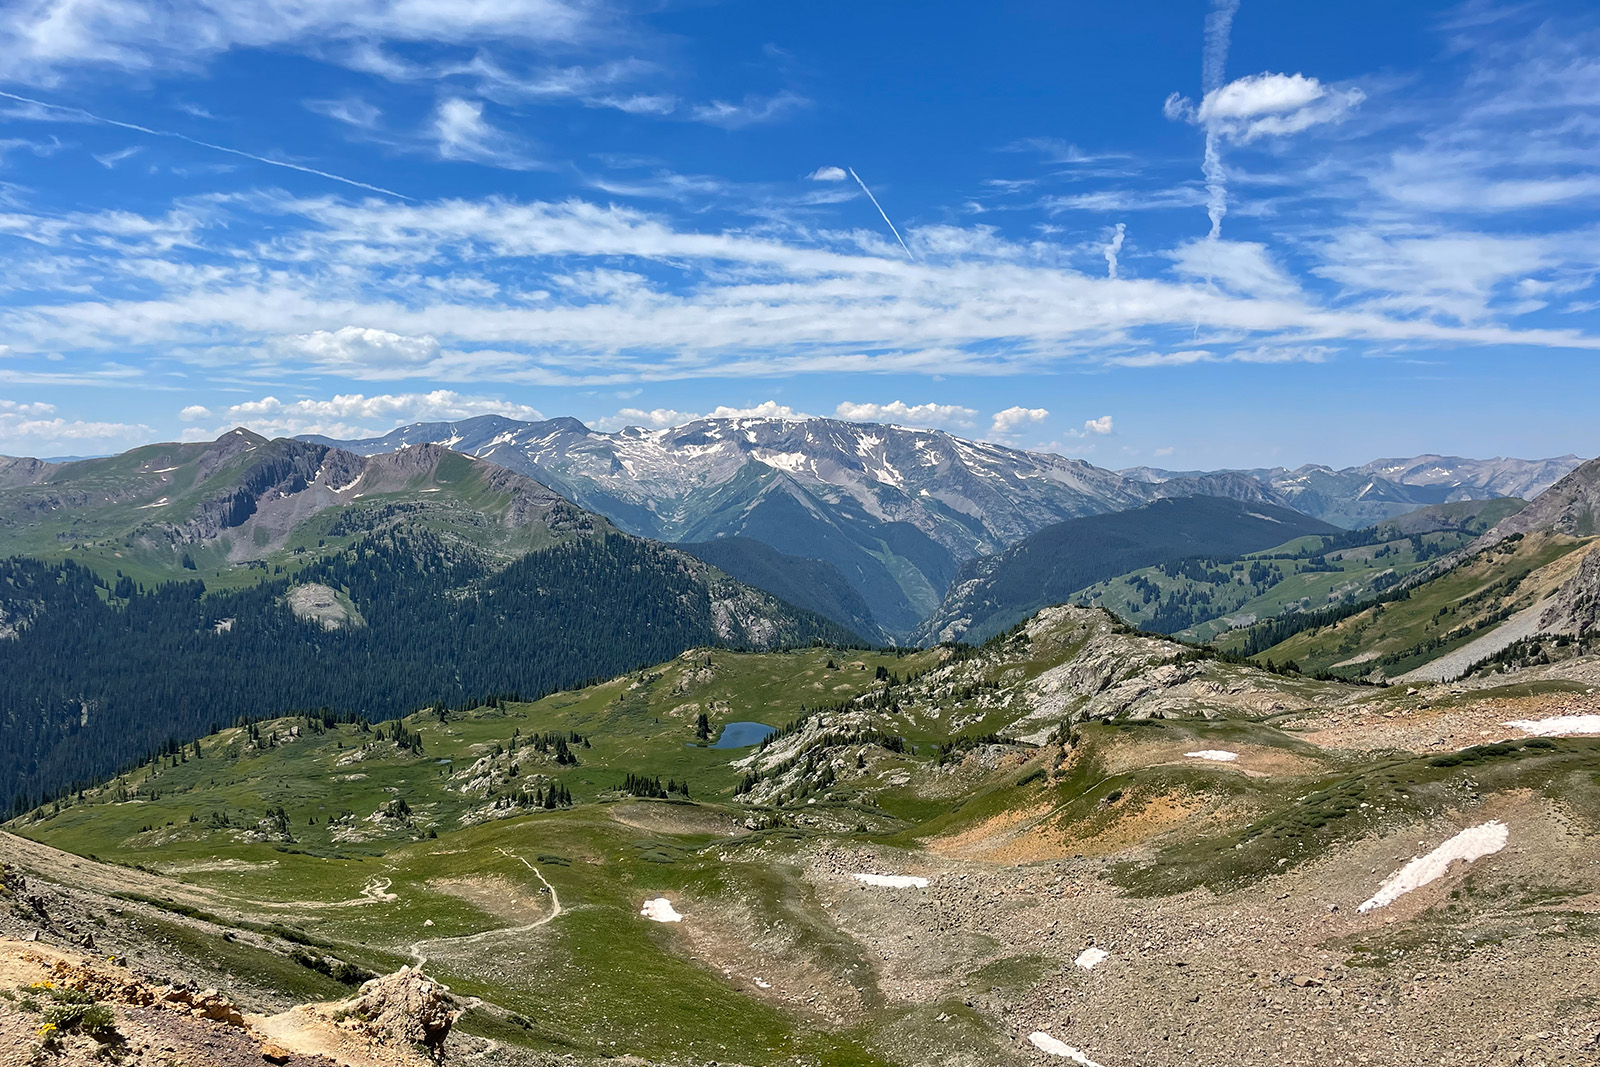
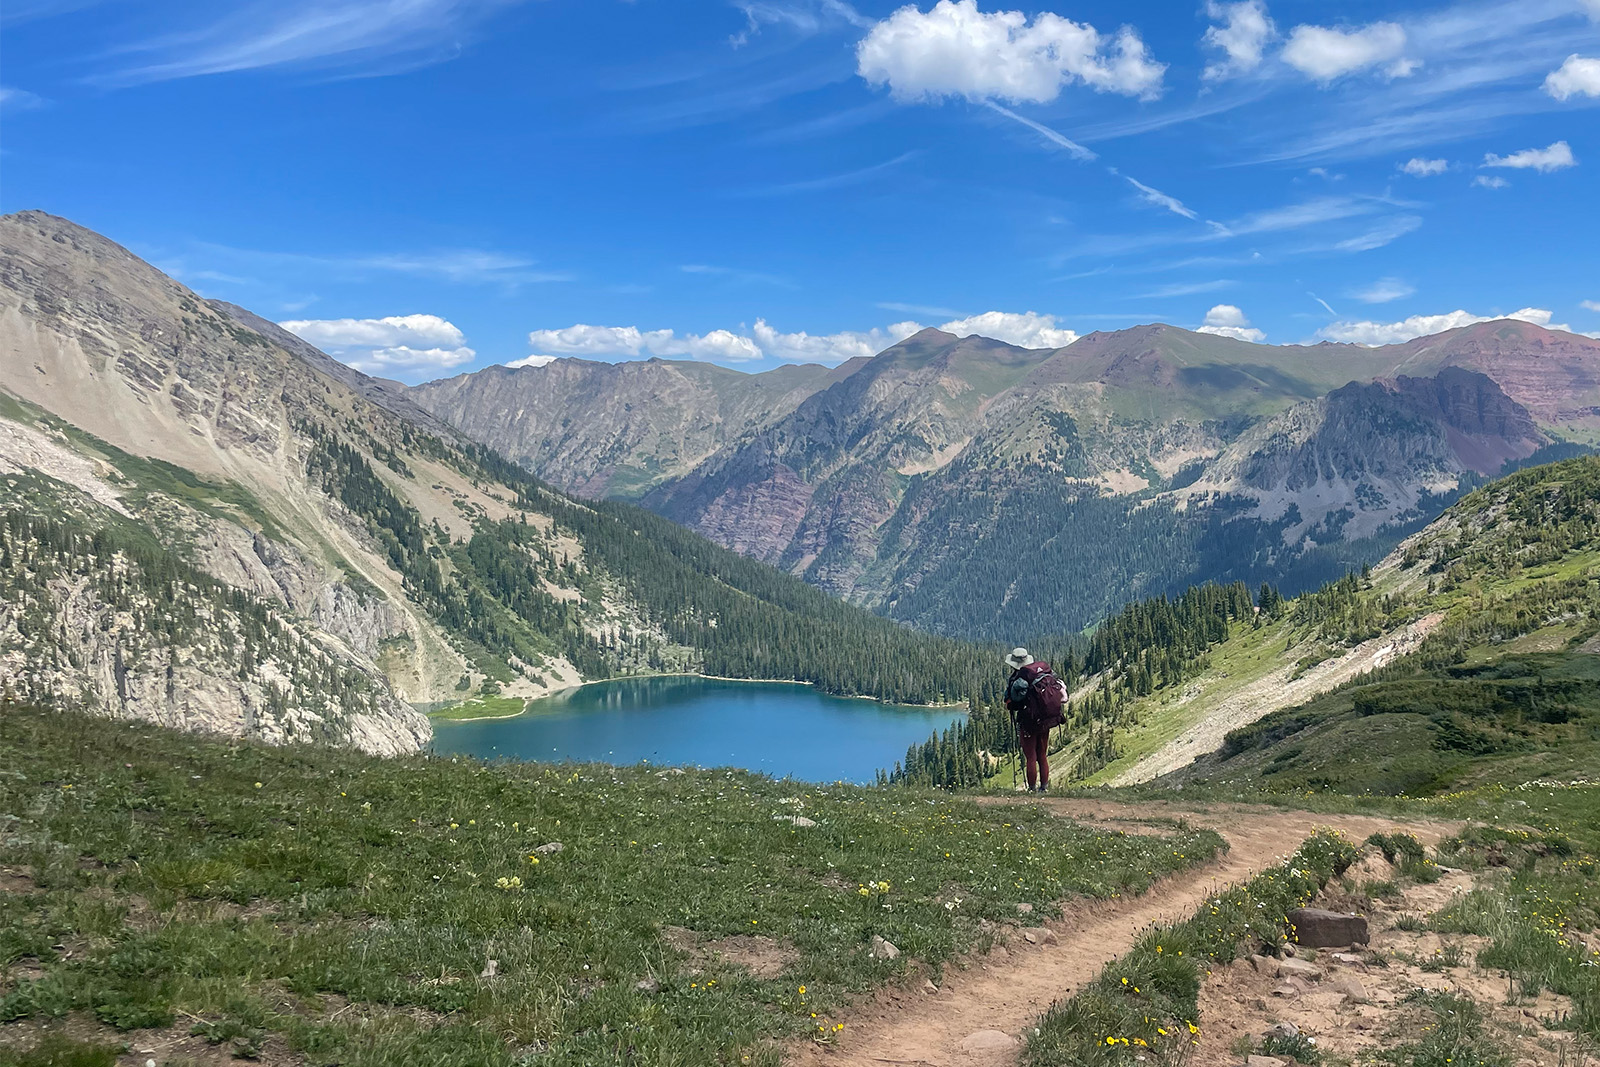
Starting from Snowmass Lake, the trail quickly begins climbing again towards Trail Rider Pass. After climbing a few steep sections around the side of some scree fields, the trail levels out and offers fanatic views down the valley. A quick climb up some switchbacks tops out on a ridge saddle below Snowmass Peak.
After taking a break to soak in the views, the hike downhill oscillates between steep and mellow sections. Pass a few small ponds and a turnoff to Geneva Lake before making the final descent to the North Fork Crystal River.
The afternoon is spent hiking up the valley towards Fravert Basin. There are various campsites all along the valley, but we prefer camping close to treeline to better set up the final day.
Daily Mileage- 7.4 miles
Daily Elevation Gain- 2,437 feet
Day 3: Fravert Basin to Maroon Lake Trailhead via Frigid Air and West Maroon Passes
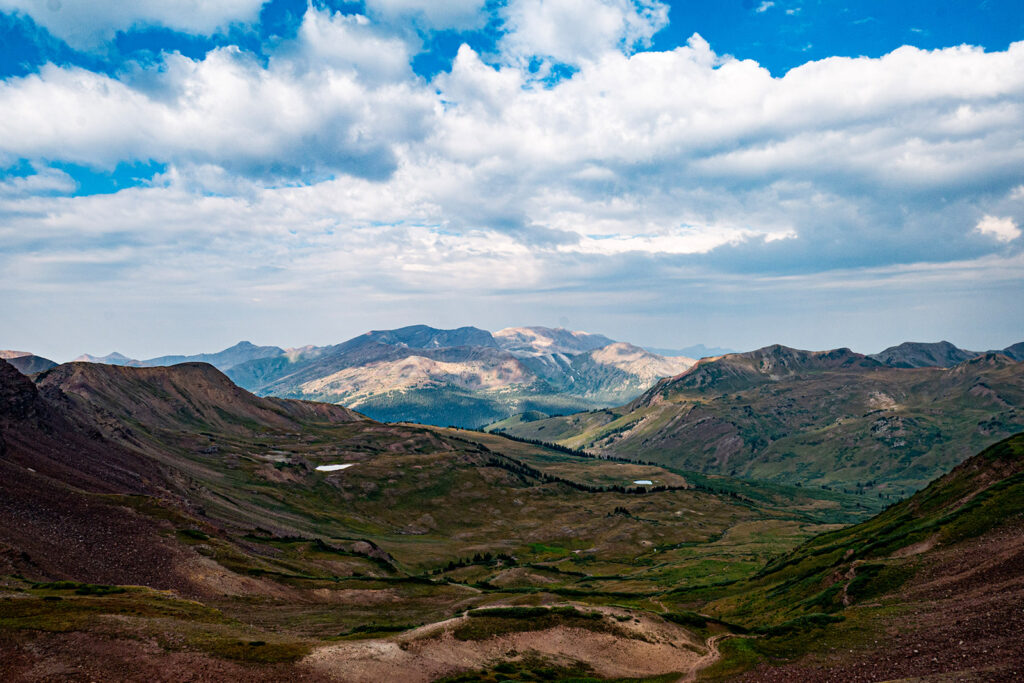
The final day of the trip ascends the final two passes of the Four Pass Loop. Camping high up in Fravert Basin on day 2 means that the climb up to Frigid Air Pass is relatively short. The trail wanders through some willows and wildflowers before reaching the top in the course of a few switchbacks.
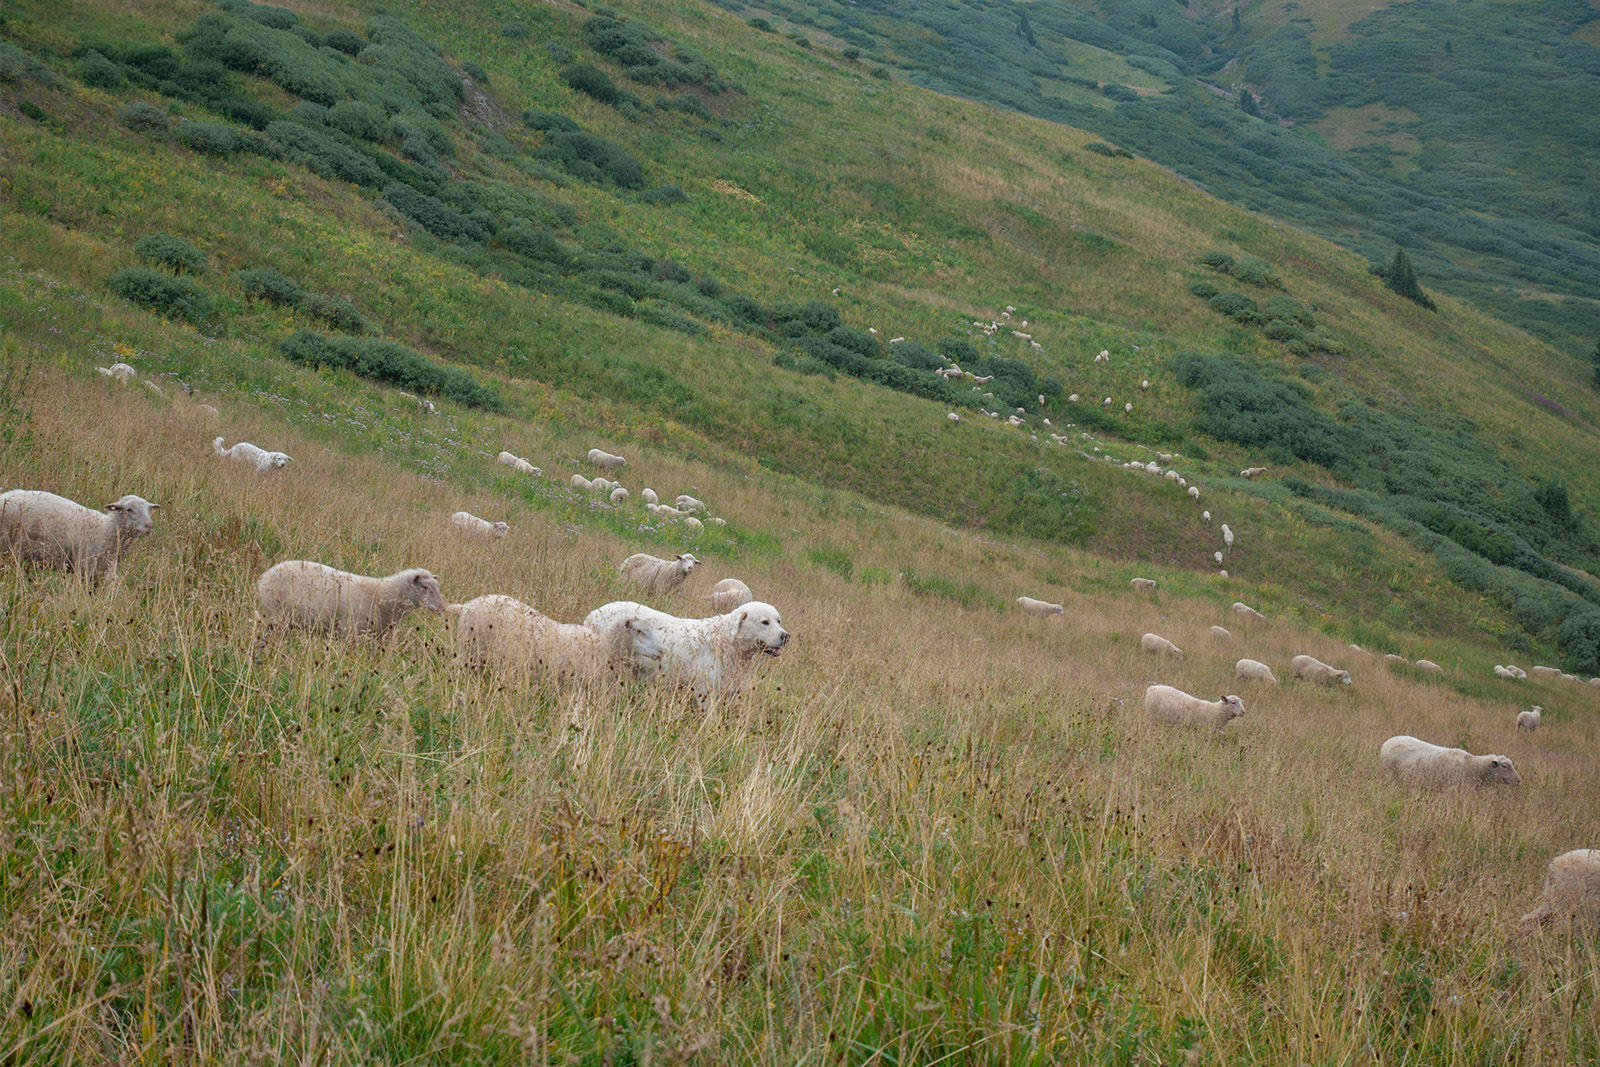
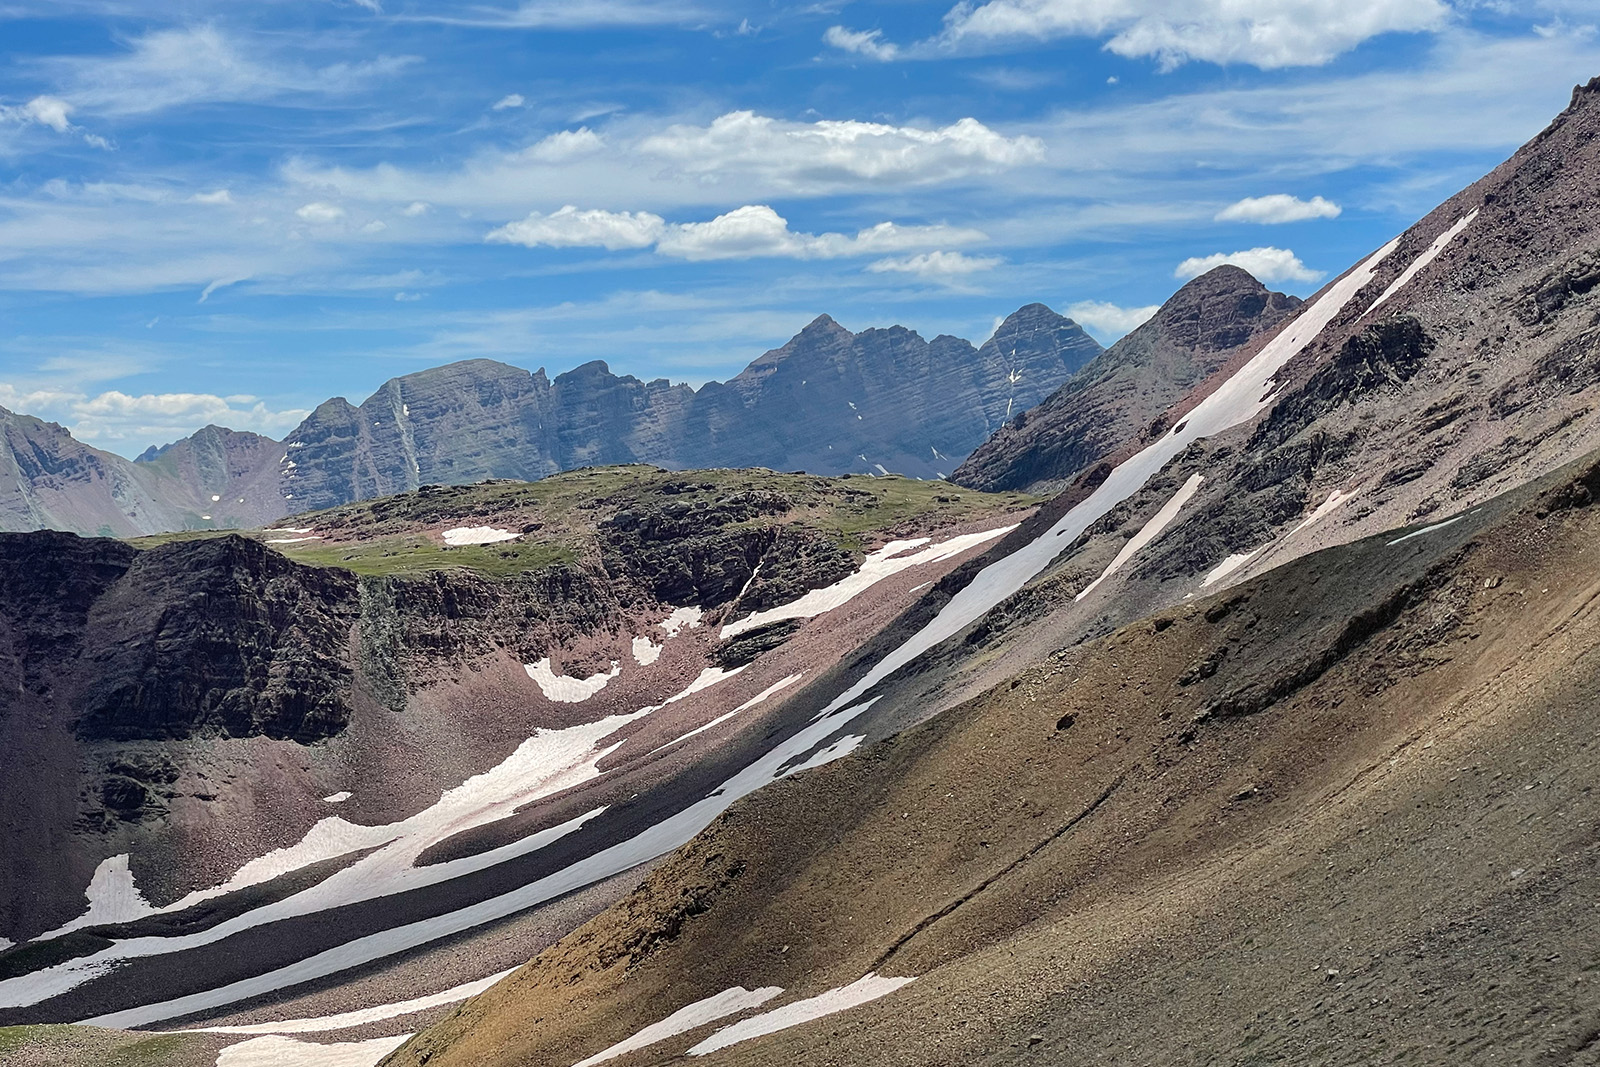
After marveling at the views of the Raggeds off in the distance, the trail loses some elevation on its way to West Maroon Pass. This section does not descend below 11,700 feet, so the views are stunning. Sometimes sheep ranchers graze their sheep here in the summer. Keep an eye out for guardian dogs and give the flock space!
The climb up to West Maroon can feel tiring at this point in the hike: it is a bit steep, but it is the last big uphill push. The red rocks encompassing this pass are a bit more sheer than the other passes on the hike. There may also be more foot traffic from day hikers and those hiking the Aspen to Crested Butte trail.
After a quick drop off of the pass, the rest of the trail slowly loses elevation. It winds down the West Maroon Creek valley past the Maroon Bells and Pyramid Peak before eventually rejoining the original trail at Crater Lake. Continue on to the Maroon Lake Trailhead, then head back to Aspen for a well-deserved meal in town!
Daily Mileage- 10.8 miles
Daily Elevation Gain- 2,087 feet
Gear List
Make sure to check out our Ultimate Backpacking Checklist, so you don’t forget something important.
Below you’ll find our current favorite backpacking gear. If you want to see additional options, our curated gear guides are the result of many years of extensive research and hands-on testing by our team of outdoor experts.
BACKPACK
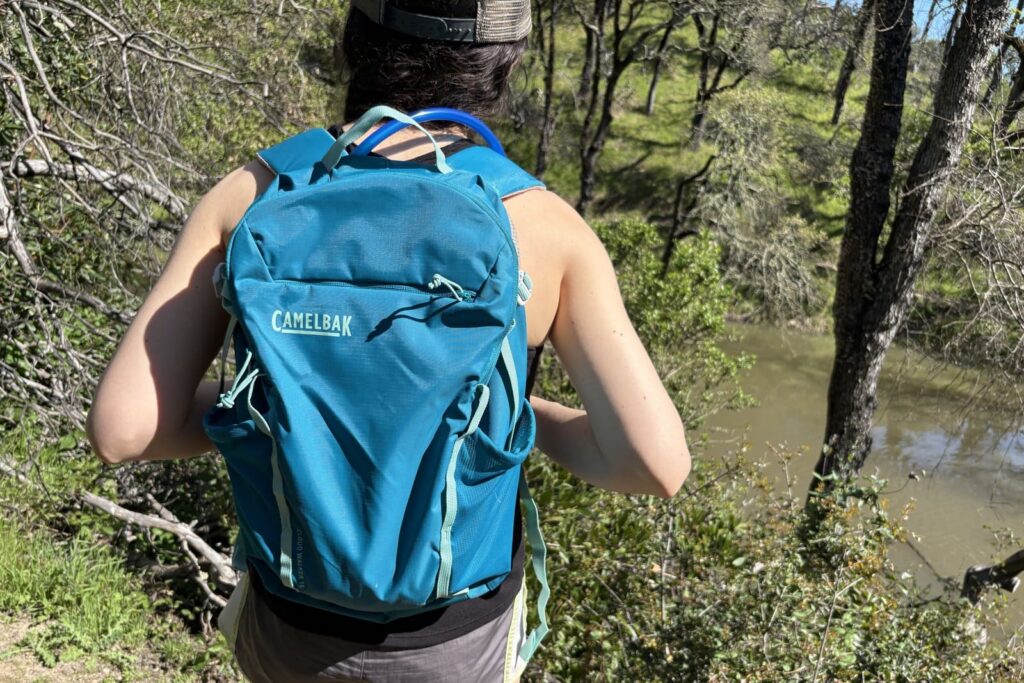
- Best Backpacking Pack Overall: Gregory Paragon 58 – Men’s / Gregory Maven 58 – Women’s
- Best Ultralight Backpacking Backpack: Hyperlite Mountain Gear Unbound 40
- More: Check out our best backpacking backpacks guide for ultralight and trekking options
TENT
- Best Backpacking Tent Overall: Big Agnes Copper Spur HV UL2
- Best Ultralight Tent: Zpacks Duplex
- Best Budget Tent: REI Half Dome 2
- Best Tent Stakes Overall: All One Tech Aluminum Stakes
- More: Check out our best backpacking tents guide for more options
SLEEPING BAG/QUILT
- Best Sleeping Bag Overall: Men’s Feathered Friends Swallow YF 20 / Women’s Feathered Friends Egret YF 20
- Best Quilt Overall: Enlightened Equipment Revelation 20
- More: Check out our best backpacking sleeping bags guide and best backpacking quilts guide for more options
SLEEPING PAD
- Best Sleeping Pad Overall: NEMO Tensor All-Season
- Best Foam Sleeping Pad: NEMO Switchback
- More: Check out our best backpacking sleeping pads guide for ultralight and trekking options
CAMP KITCHEN
- Best Backpacking Stove Overall: MSR PocketRocket 2
- Best Backpacking Cookware Overall: TOAKS Titanium 750ml
- Best Backpacking Coffee Overall: Starbucks VIA
- More: Check out our best backpacking stoves guide and best backpacking cookware guide for ultralight and large group options
WATER & FILTRATION
- Best Water Filter Overall: Sawyer Squeeze
- Best Hydration Bladder Overall: Gregory 3D Hydro
- Best Backpacking Water Bottles: Smartwater Bottles
- More: Check out our best backpacking water filters guide and best backpacking water bottles guide for ultralight and large group options
CLOTHING
- Best Hiking Pants Overall: Men’s Outdoor Research Ferrosi / Women’s The North Face Aphrodite 2.0
- Best Hiking Shorts Overall: Men’s Patagonia Quandary / Women’s Outdoor Research Ferrosi
- Best Women’s Hiking Leggings: Fjallraven Abisko Trekking Tights HD
- Best Rain Jacket Overall: Men’s Patagonia Torrentshell 3L / Women’s Patagonia Torrentshell 3L
- Best Rain Pants: Men’s Patagonia Torrentshell 3L / Women’s Patagonia Torrentshell 3L
- Best Down Jacket Overall: Men’s Patagonia Down Sweater Hoodie / Women’s Patagonia Down Sweater Hoodie
- Best Fleece Jacket Overall: Men’s Patagonia Better Sweater / Women’s Patagonia Better Sweater
- Best Sunshirt Overall: Men’s Outdoor Research Echo / Women’s Outdoor Research Echo
- Best Socks Overall: Men’s Darn Tough Light Hiker Micro Crew / Women’s Darn Tough Light Hiker Micro Crew
- Beste Ultralight Liner Glove: Patagonia Capilene Midweight Liner
- More: Check out our best backpacking apparel lists for more options
FOOTWEAR & TRACTION
- Best Hiking Shoes Overall: Men’s HOKA Speedgoat 6 / Women’s HOKA Speedgoat 6
- Best Hiking Boots Overall: Men’s Salomon X Ultra 5 GTX / Women’s Lowa Renegade Evo GTX
- Best Hiking Sandals Overall: Men’s Chaco Z/1 Classic / Women’s Chaco Z/1 Classic
- Best Camp Shoes Overall: Crocs Classic Clogs
- Best Traction Device for Hiking Overall: Kahtoola MICROspikes
- More: Check out our best backpacking footwear lists for more options
NAVIGATION
- Best GPS Watch Overall: Garmin Instinct 2 Solar
- Best Personal Locator Beacon (PLB): Garmin inReach Mini 2
- More: Check out our article How to Use Your Phone as a GPS Device for Backpacking & Hiking to learn more
FOOD
FIRST-AID & TOOLS
- Best First-Aid Kit Overall: Adventure Medical Kits Ultralight/Watertight .7
- Best Pocket Knife Overall: Kershaw Leek
- Best Multitool Overall: Leatherman Wave+
- Best Headlamp Overall: Black Diamond Spot 400-R
- Best Power Bank Overall: Nitecore NB 10000 Gen 3
- More: Check out our best first-aid kit guide, best pocket knife guide, best multitool guide, best backpacking headlamps guide, and best power banks guide for more options
MISCELLANEOUS
- Best Trekking Poles Overall: Black Diamond Pursuit
- Best Backpacking Chair Overall: REI Flexlite Air
- Best Backpacking Stuff Sack Overall: Hyperlite Mountain Gear Drawstring
- More: Check out our best trekking poles guide, best backpacking chairs guide, and best stuff sacks guide for more options

Conclusion
We thoroughly enjoyed ourselves on the stunning Four Pass Loop. Sure, it can get hectic with crowds and permit hassles, but we still think it’s worth the work. Be sure to review all the latest standards for how to leave no trace while visiting the great outdoors.
And be sure to check out some of our other popular content: