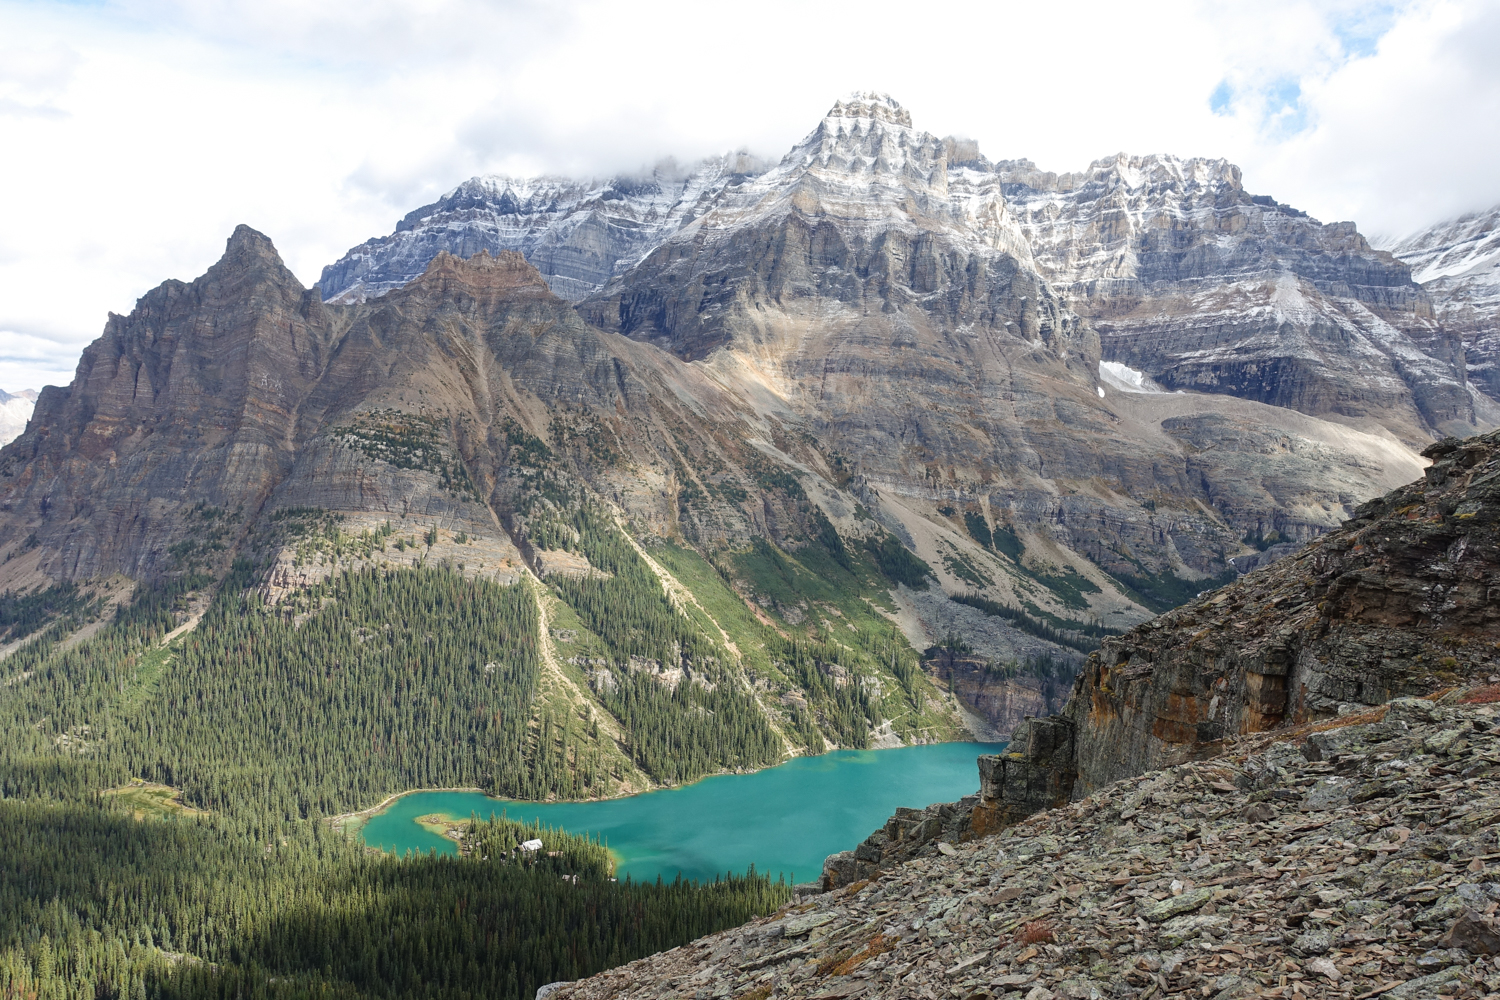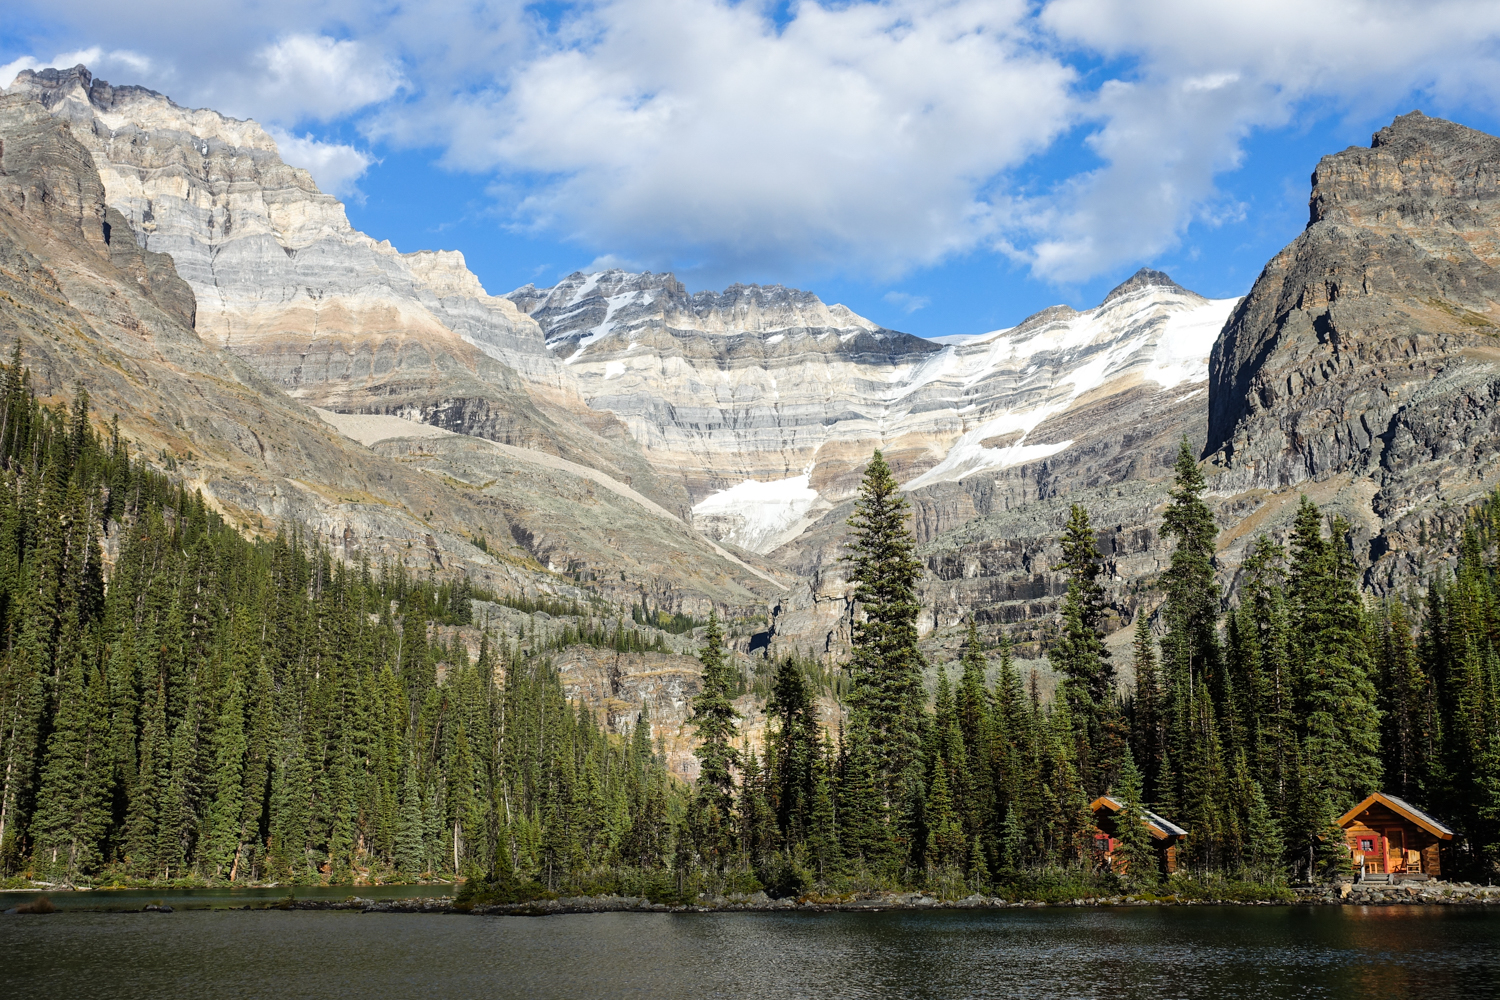
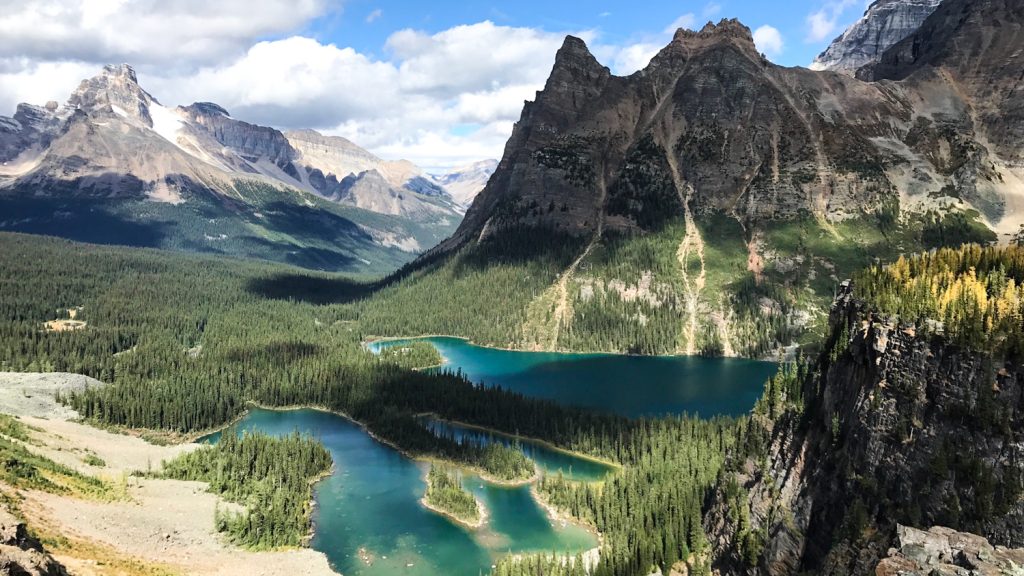
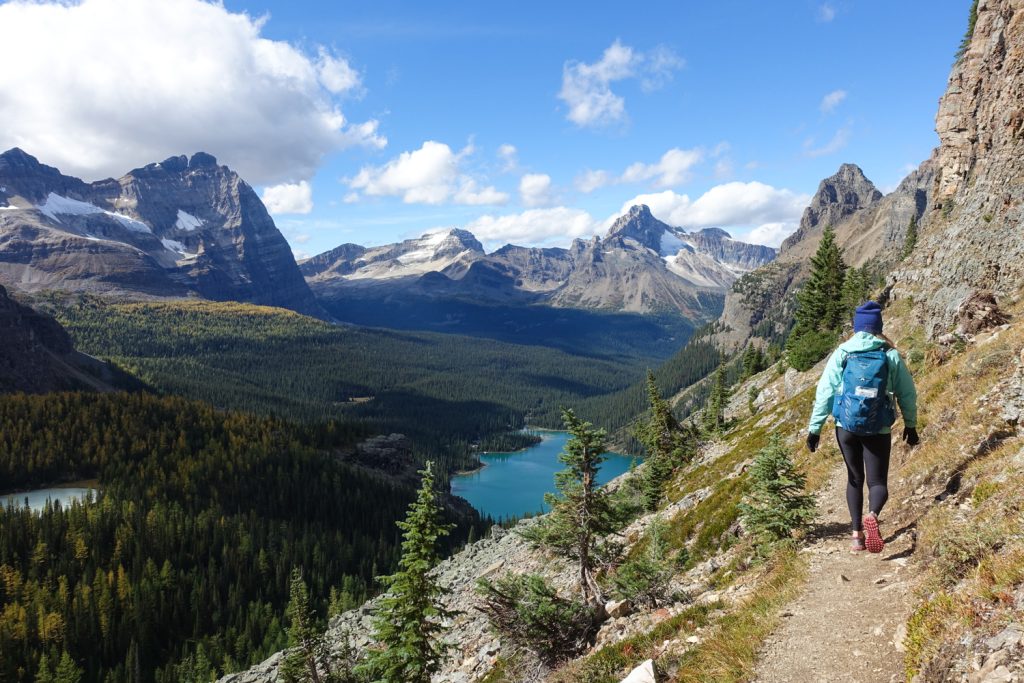
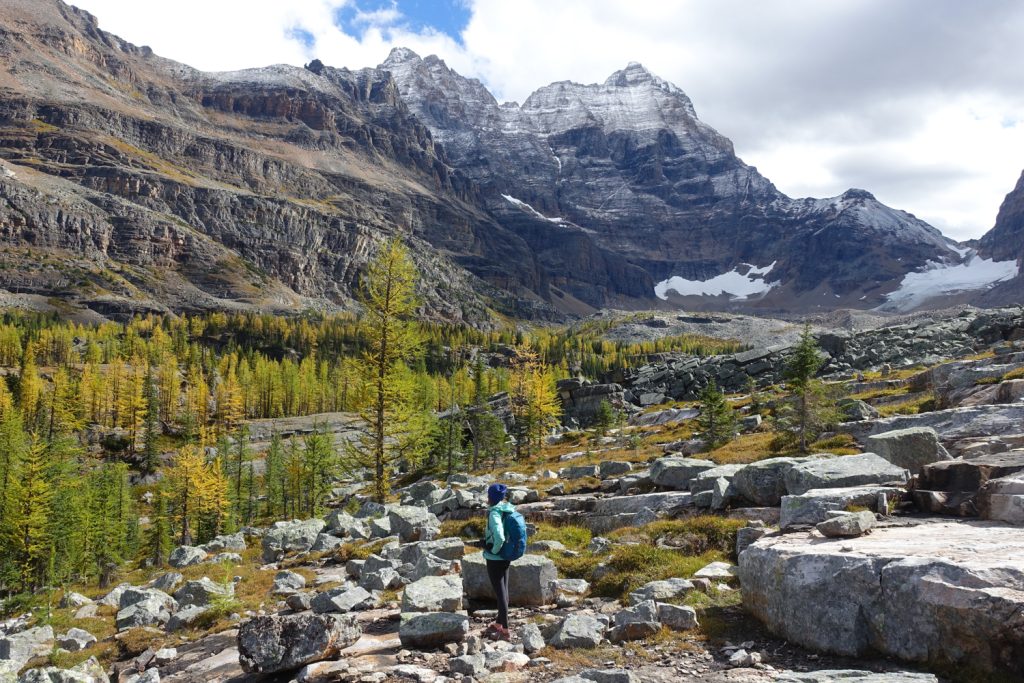
If we had to choose one location to illustrate the immense beauty of the Canadian Rockies, the Lake O’Hara backcountry would be the place. Eighty kilometers of well-maintained trails wind through this breathtaking alpine wilderness filled with turquoise lakes, stunning meadows, and expansive views. The Lake O’Hara backcountry, located in Yoho National park, is restricted to public use, which makes permits very hard to obtain, but also allows for relative solitude in this truly breathtaking wilderness. It’s no wonder the lovely Parks Canada rangers who are stationed at Lake O’Hara regard this place with such reverence. It’s truly remarkable and should be on every hiker’s bucket list.
Getting There
The Lake O’Hara backcountry is located in Yoho National Park in British Columbia, which is 13 km west of Lake Louise. The most sought after way to access the Lake O’Hara backcountry is by bus, which you pick up from the Lake O’Hara Parking Lot, but the bus reservation process is highly competitive (more info below). If you’re unable to secure a spot on the bus, you can hike 11km in on the road and take a bus back in the afternoon, but that method is far from ideal. Reservations for the return bus are not required, but you’ll need to bring cash for the one-way fee ($10 as of 2018).
Planning Your Trip & Reservations
The Lake O’Hara area can be explored through a day-use permit or you can spend the night (campsite/hut/lodge) and hike around the park multiple days. There is a quota permit system in place to help protect this fragile alpine area which limits the bus service to 42 visitors per day, including overnight guests.
Day-Use Reservations
If you want a day-use bus permit for Lake O’Hara, you’ll need to be ready the first day (maybe even the first hour) permits open for the season. For 2018, the reservation system opens on April 20th at 8 am MDT.Day-use bus permits generally sell out within a couple hours. You can obtain a reservation by telephone (Canada and USA: 1-877-737-3783 or International 1-519-826-5391) or online through the Parks Canada Reservation System.
Not able to get a day-use reservation?
If you’re unable to secure a day-use reservation, there are a couple options. First, you can show up at the bus staging area and check in with a Parks Canada employee to be put on a wait list. If this option is unsuccessful, you can walk in along the 11 km access road. The route is not terribly grueling, nor is it scenic, it’s merely a way to get to the Lake O’Hara backcountry. If you are walking in, be sure to calculate this mileage into your day as you may not be able to cover as much trail. The good news is that you can take the outgoing bus without a reservation.
Camping or Lodge / Hut Reservations
Our recommended way to experience this truly breathtaking area is to spend multiple days exploring the trails. There are four overnight options, each with a different reservation system.
- Camp at the Lake O’Hara Campground
The campground at Lake O’Hara has 30 sites available. In order to obtain a camping reservation, you need to call the reservation system (1-250-343-6433) exactly three months before your anticipated date, beginning April 2nd for the 2018 season. Reservations are usually fully booked within a couple hours of opening. If you obtain a camping reservation, you are guaranteed a reserved spot on an ingoing bus.
You can book a maximum of three nights camping. When making your reservation, you are able to reserve up to two campsites with only one tent allowed at each site. More information regarding campground amenities can be found here.
- Stay at the Lake O’Hara Lodge
The most luxurious option for spending the night in the Lake O’Hara region is the lodge, which offers rooms in their main building as well as lakeshore cabins. It’s far from cheap, but you’ll be wined and dined in luxury. They also offer guided hikes around the region. Lake O’Hara Lodge runs its own shuttle service into the backcountry, which is included in your room rate.
- Stay at the Elizabeth Parker Hut
This backcountry hut is one of the most accessible and popular in Yoho, located in a beautiful meadow about 500 meters from Lake O’Hara. This rustic accommodation sleeps 24 in the summer. They provide sleeping pads, however you must bring your own sleeping bag. Reservations are highly competitive and must be made through a lottery system starting in October for the following summer. A reservation at the Elizabeth Parker Hut will include a reserved spot on an ingoing bus.
- Stay at the Abbot Pass Hut (advanced hikers only)
A stay at this historic stone hut (2nd highest permanent structure in Canada!) is a memorable experience, however should only be attempted by experienced hikers. To get there follow the trail to Lake Oesa and then climb 1,500 feet of difficult scree fields up a gully to the hut. According to Parks Canada, to attempt this route requires appropriate knowledge, equipment and safety precautions. Helmets are mandatory. To reserve a spot at the Abbot Pass Hut, which sleeps 24, you can make a reservation here. Because of the challenging route to the hut, it is not nearly as competitive to reserve as the Elizabeth Parker Hut. Similar to lodging options above, your reservation will include a reserved spot on an ingoing bus.
Bus Information
The ingoing bus staging area is near the parking lot under a small pavilion. There will be a Parks Canada employee who will check you in and answer any questions you may have. Arrive at the bus staging area 15-20 minutes before your anticipated departure time. When you get on the bus, you will be given a small green chip, which will be used as your outgoing bus ticket.
The outgoing bus staging area is in front of Le Relais Day Use Shelter. Again, arrive 15-20 minutes prior to your departure time. If you walked in, you will need to pay a one-way fee ($10 as of 2018) to get an outgoing bus. If you took the bus in, you will present your green chip to get on the bus.
To find the most up-to-date bus times and info, please visit the Parks Canada site.
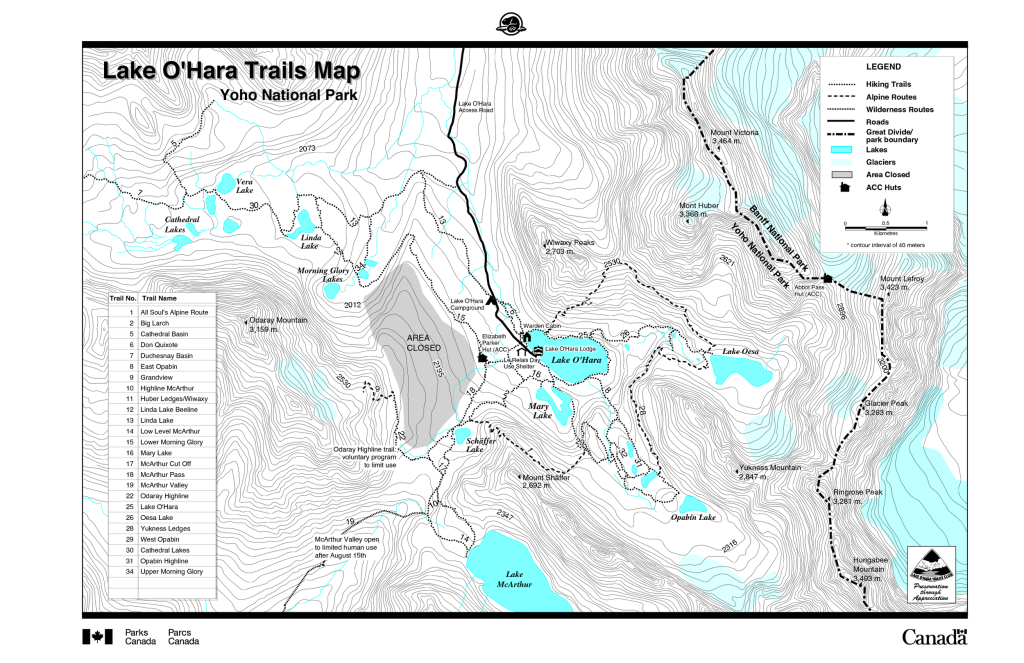
Possible Hiking Routes
The Parks Canada website has in-depth route descriptions for all the trails in the Lake O’Hara backcountry. Beyond the regular trail system, there are also five alpine routes in the Lake O’Hara area: Wiwaxy Gap, Huber Ledges, Yukness Ledges, All Soul’s Prospect, and the Odaray Grandview. These routes are for hikers who are experienced with mild route finding, comfortable with heights and are able to navigate exposed terrain. If you are looking for trails that are less strenuous than the alpine routes, there are over 80 km to choose from, offering a range of difficulty and length. Above is a map provided by Parks Canada to get a better idea of the trail system.
Alpine Circuit
- Length: 11.7 km (7.3 miles)
- Elevation Gain: 1051 meters (3,448 feet)
- Estimated Time: 5-8 hours
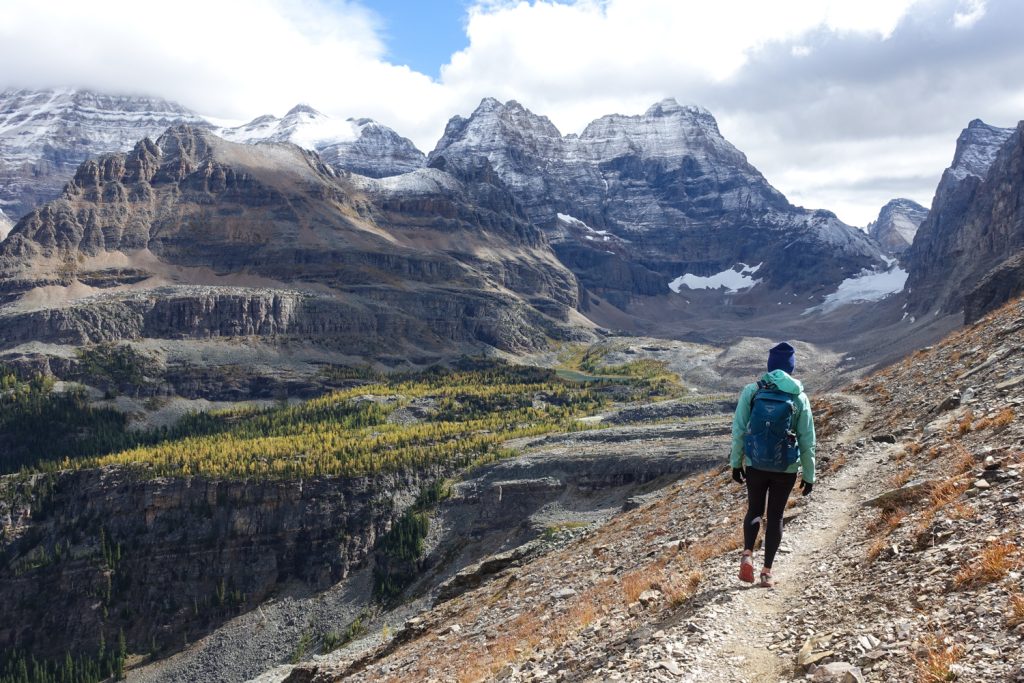
Description: If you only have one day and are up to the challenge, the alpine circuit is the gem of the Lake O’Hara region. This spectacularly scenic loop covers a lot of ground and traverses the exposed, but incredible Huber and Yukness Ledges. Along the way you will pass a handful of small scenic lakes and streams, visit Lake Oesa and the Opabin Plateau, and climb to the viewpoint from the Wiwaxy Gap. The scenery is ever-changing and stunning from every angle.
*The Huber and Yukness Ledges have some areas that are steep and exposed. Those with a fear of heights may not enjoy these portions, though we feel the route is safe if you watch your step. The entire alpine route is well-marked with blue and yellow blazes.
Odaray Highline to Odaray Grandview
- Length: 2.4 km (1.5 miles) out and back from the McArthur Pass Trail junction
- Elevation Gain: 90 meters (300 feet)
- Estimated Time: 2-3 hours
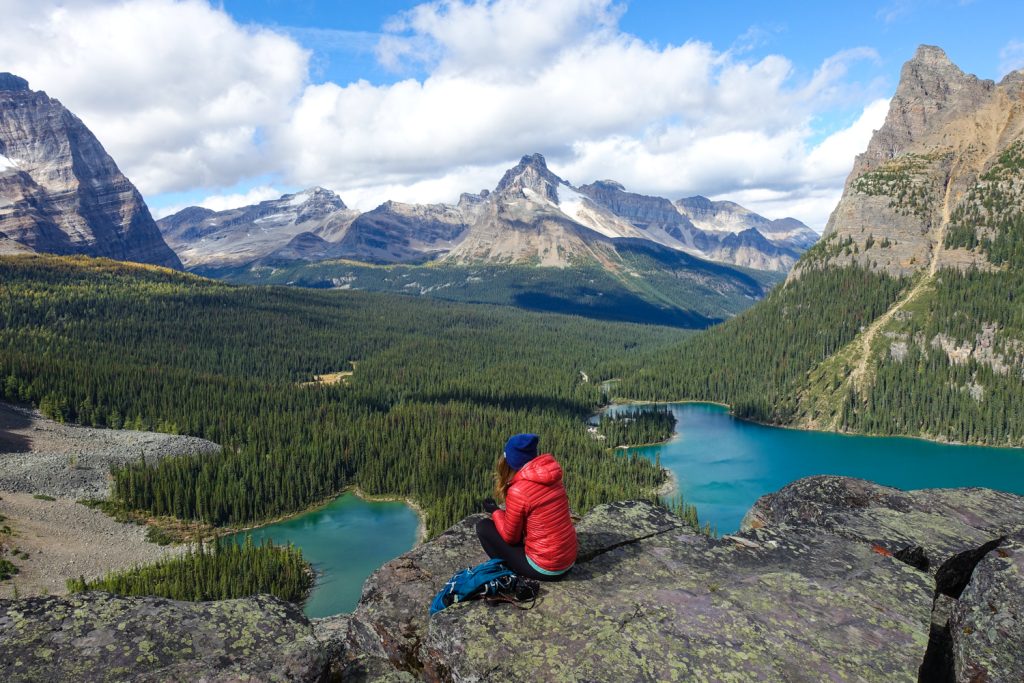
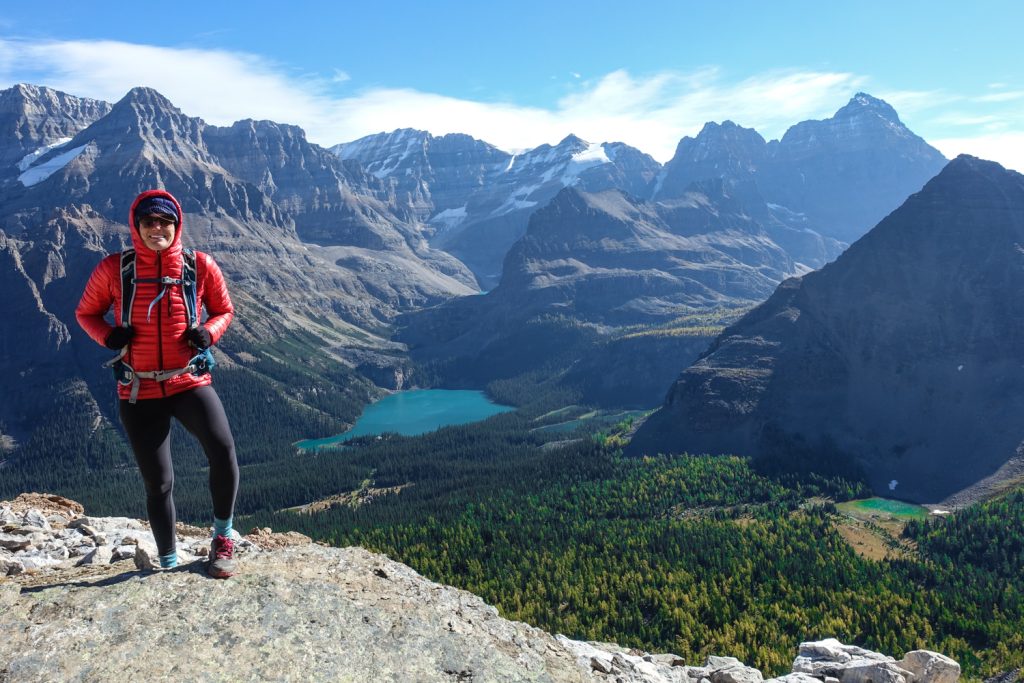
Description: This hike offers one of the most expansive views in the park, giving you the widespread vantage point of Lake O’Hara and impressive Lake McArthur. It’s a steep scramble to the top, but well worth it for the view. In order to hike this portion of trail, you will need to arrive at the junction with the Odaray Highline from the Lake McArthur trail before the daily limit of groups has been reached. There is a voluntary program in place which restricts this area to two groups per day in order to protect an important wildlife corridor. Please respect this policy.
Lake Oesa Trail
- Length: 6.4 km (4 miles) out and back
- Elevation Gain: 240 meters (800 feet)
- Estimated Time: 2-4 hours
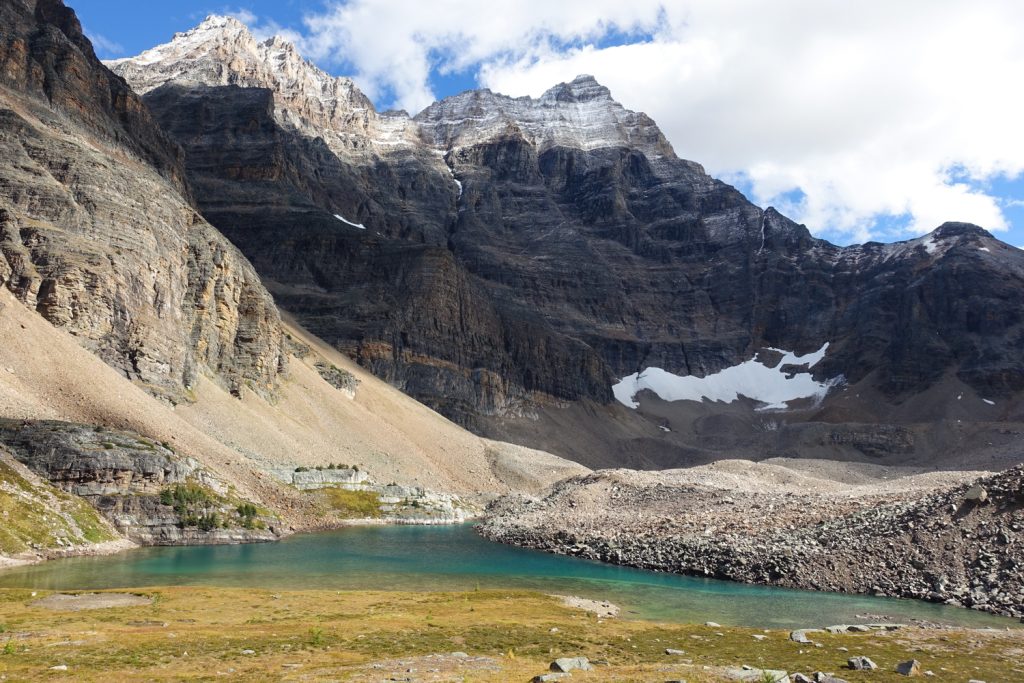
Description: If you are only completing one trail and don’t have the time or stamina to do the Alpine Circuit, we recommend the Lake Oesa Trail. This trail traverses scree slopes, rocky outcrops and delicate meadows as it ascends to gorgeous Lake Oesa. You can retrace your steps back to Lake O’Hara or you could make a loop through the Huber Ledges to the Opabin Plateau, if you have the time and are comfortable with mild exposure.
Opabin Plateau Circuit
- Length: 5.9 km (3.7 miles)
- Elevation Gain: 250 metres (820 feet)
- Estimated Time: 2-4 hours
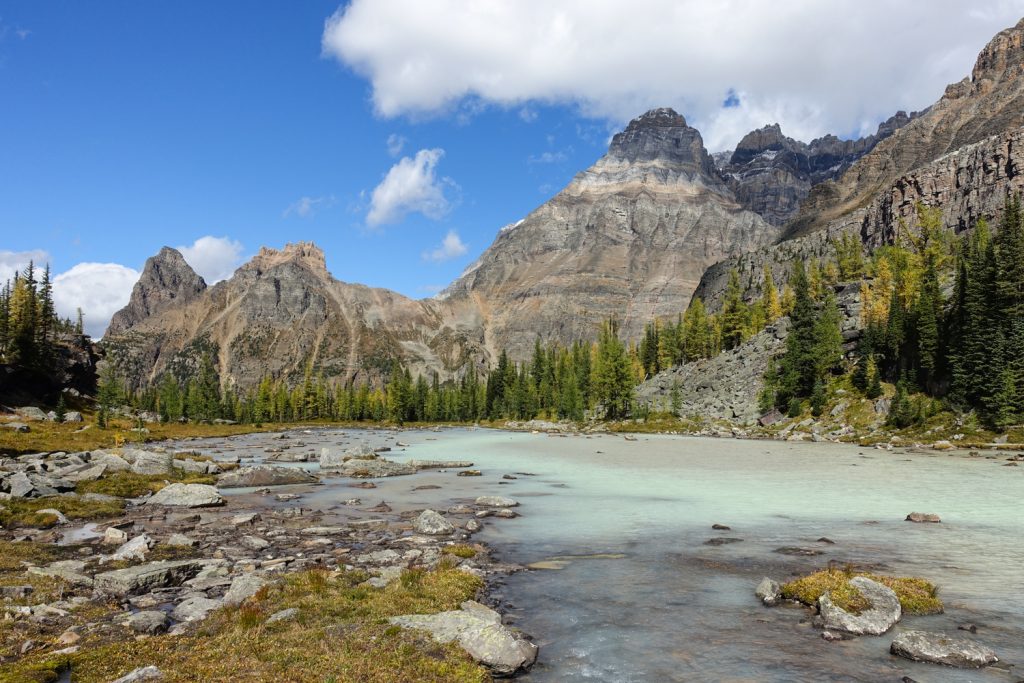
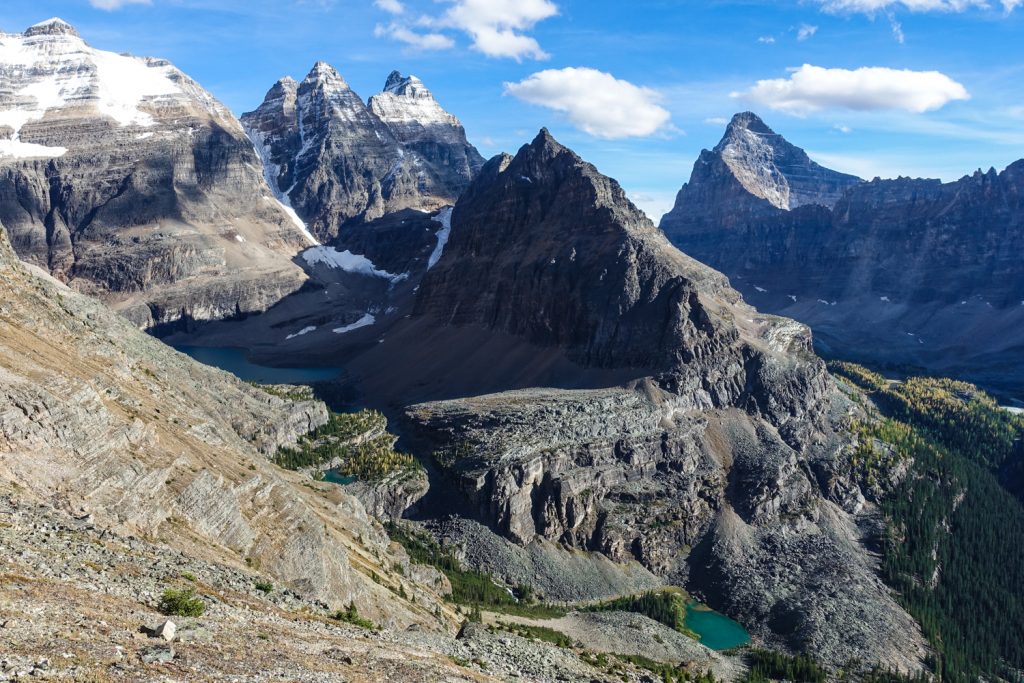
Description: The Opabin Plateau is a truly stunning area that is not to be missed in the Lake O’Hara region. You can complete a lollipop loop with both the West and East Opabin Trails once you climb the talus slopes past Mary Lake. The Opabin Plateau Circuit climbs into a beautiful meadow filled with milky aqua streams and lakes along a grassy, rolling terrain. Opabin Lake is a beautiful alpine lake nestled on all sides by commanding mountains and glaciers. On your way out, don’t miss a side trail that leads to the Opabin Prospect for the quintessential photo opportunity of Mary Lake and Lake O’Hara.
Lake O’Hara Shoreline Trail
- Length: 2.8 km (1.7 miles)
- Elevation Gain: minimal ups and downs
- Estimated Time: 1-2 hours
Description: This hike is a beautiful and easy stroll around pristine Lake O’Hara. On this loop you’ll also pass lovely Seven Veil Falls. This straightforward option may be a good choice for those with little time or those looking for an easier hike.
McArthur Pass and Lake McArthur trails
- Length : 8 km (5 miles)
- Elevation Gain : 310 meters (1,000 feet)
- Estimated Time: 2-4 hours
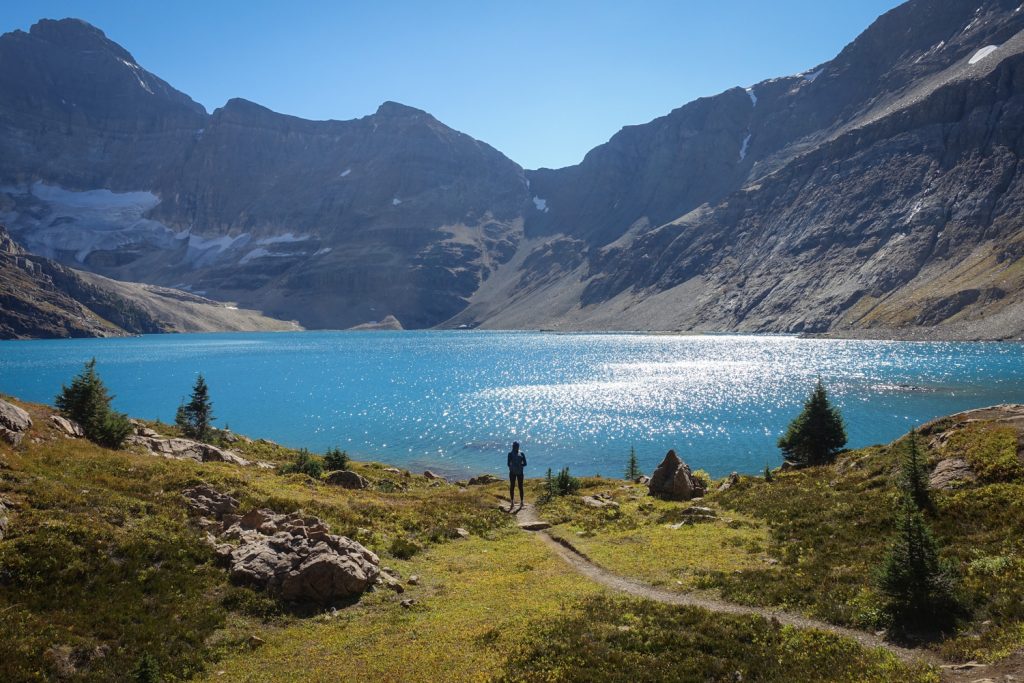
Description: This trail to the large, jewel blue McArthur Lake is tucked away in its own valley and is a beauty to behold. You can make a minor loop hike by hiking up the west branch and returning via the east branch. You’ll also hike past the small, but charming Shaffer Lake along the way. If you get the chance to hike the Odaray Highline, it’s easy to combine these two routes into a day hike.
Linda Lake Circuit and Morning Glory Lakes
- Distance: 7 km (4.3 miles)
- Elevation Gain: 140 metres (460 feet)
- Estimated Time: 2-4 hours
Description: This pleasant and relatively easy hike will bring you to several beautiful backcountry lakes. You’ll pass the Elizabeth Parker hut along the way as you travel through meadows and forest. This is a great option if you have several days in the backcountry and want to explore a less-visited and more secluded area of Lake O’Hara.
What Do I Need To Pack?
Most people access the Lake O’Hara backcountry via bus and set up a base camp. Although you won’t have to hike all your gear in, you still want to pack as if you’re backpacking, with maybe a few extra luxury items.
Parks Canada has a few equipment restrictions in place:
- Baggage is restricted to two small bags per person (max weight: 25 kg / 55 lbs; max length 97 cm / 38”)
- Hard sided food coolers, storage bins, plastic bags, and loose items are not permitted on the bus. Please leave musical instruments, electronics, chairs and hammocks behind.
- Be sure to bring a backpacking stove for cooking. The wood stoves and fire pits are best used for heat.
Gear List
Make sure to check out our Ultimate Backpacking Checklist, so you don’t forget something important.
Below you’ll find our current favorite backpacking gear. If you want to see additional options, our curated gear guides are the result of many years of extensive research and hands-on testing by our team of outdoor experts.
BACKPACK
- Best Backpacking Pack Overall: Gregory Paragon 58 – Men’s / Gregory Maven 58 – Women’s
- Best Ultralight Backpacking Backpack: Hyperlite Mountain Gear Unbound 40
- More: Check out our best backpacking backpacks guide for ultralight and trekking options
TENT
- Best Backpacking Tent Overall: Big Agnes Copper Spur HV UL2
- Best Ultralight Tent: Zpacks Duplex
- Best Budget Tent: REI Half Dome 2
- Best Tent Stakes Overall: All One Tech Aluminum Stakes
- More: Check out our best backpacking tents guide for more options
SLEEPING BAG/QUILT
- Best Sleeping Bag Overall: Men’s Feathered Friends Swallow YF 20 / Women’s Feathered Friends Egret YF 20
- Best Quilt Overall: Enlightened Equipment Revelation 20
- More: Check out our best backpacking sleeping bags guide and best backpacking quilts guide for more options
SLEEPING PAD
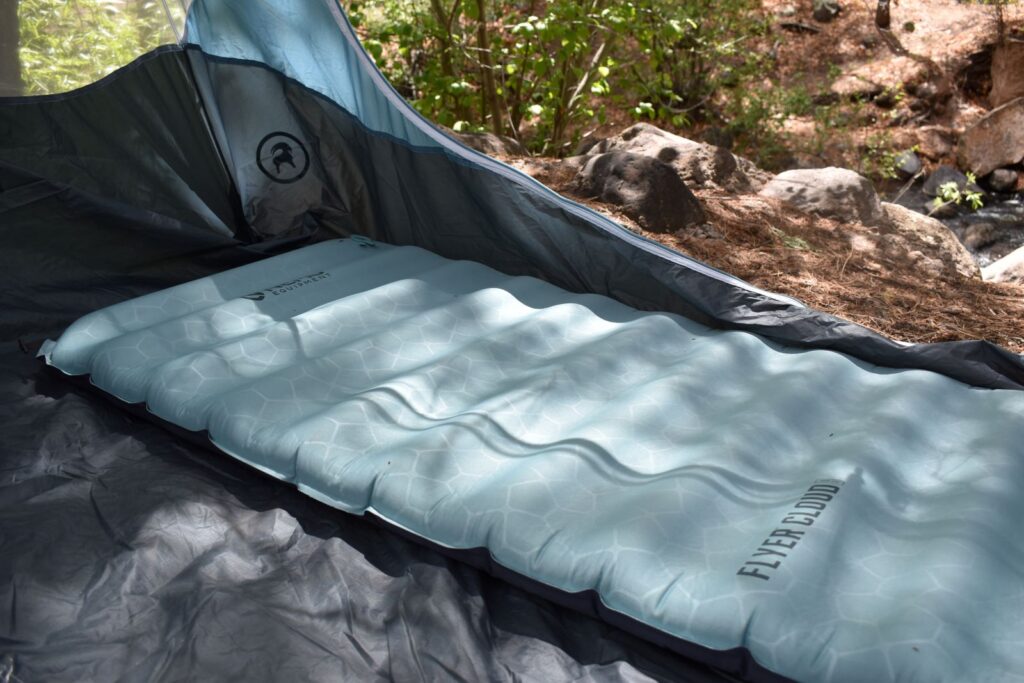
- Best Sleeping Pad Overall: NEMO Tensor All-Season
- Best Foam Sleeping Pad: NEMO Switchback
- More: Check out our best backpacking sleeping pads guide for ultralight and trekking options
CAMP KITCHEN
- Best Backpacking Stove Overall: MSR PocketRocket 2
- Best Backpacking Cookware Overall: TOAKS Titanium 750ml
- Best Backpacking Coffee Overall: Starbucks VIA
- More: Check out our best backpacking stoves guide and best backpacking cookware guide for ultralight and large group options
WATER & FILTRATION
- Best Water Filter Overall: Sawyer Squeeze
- Best Hydration Bladder Overall: Gregory 3D Hydro
- Best Backpacking Water Bottles: Smartwater Bottles
- More: Check out our best backpacking water filters guide and best backpacking water bottles guide for ultralight and large group options
CLOTHING
- Best Hiking Pants Overall: Men’s Outdoor Research Ferrosi / Women’s The North Face Aphrodite 2.0
- Best Hiking Shorts Overall: Men’s Patagonia Quandary / Women’s Outdoor Research Ferrosi
- Best Women’s Hiking Leggings: Fjallraven Abisko Trekking Tights HD
- Best Rain Jacket Overall: Men’s Patagonia Torrentshell 3L / Women’s Patagonia Torrentshell 3L
- Best Rain Pants: Men’s Patagonia Torrentshell 3L / Women’s Patagonia Torrentshell 3L
- Best Down Jacket Overall: Men’s Patagonia Down Sweater Hoodie / Women’s Patagonia Down Sweater Hoodie
- Best Fleece Jacket Overall: Men’s Patagonia Better Sweater / Women’s Patagonia Better Sweater
- Best Sunshirt Overall: Men’s Outdoor Research Echo / Women’s Outdoor Research Echo
- Best Socks Overall: Men’s Darn Tough Light Hiker Micro Crew / Women’s Darn Tough Light Hiker Micro Crew
- Beste Ultralight Liner Glove: Patagonia Capilene Midweight Liner
- More: Check out our best backpacking apparel lists for more options
FOOTWEAR & TRACTION
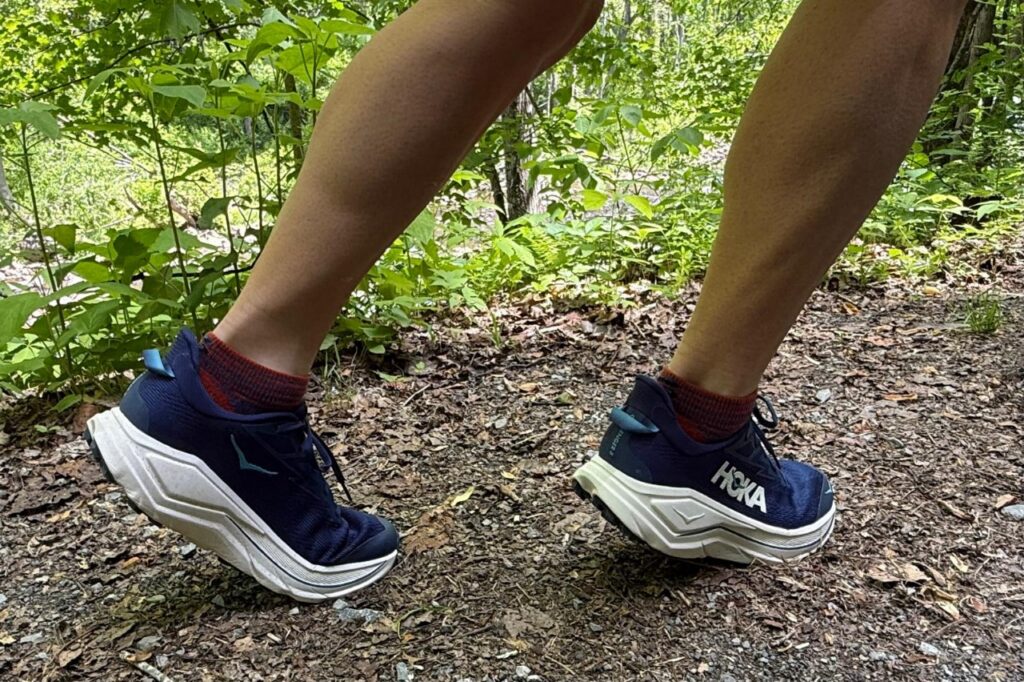
- Best Hiking Shoes Overall: Men’s HOKA Speedgoat 6 / Women’s HOKA Speedgoat 6
- Best Hiking Boots Overall: Men’s Salomon X Ultra 5 GTX / Women’s Lowa Renegade Evo GTX
- Best Hiking Sandals Overall: Men’s Chaco Z/1 Classic / Women’s Chaco Z/1 Classic
- Best Camp Shoes Overall: Crocs Classic Clogs
- Best Traction Device for Hiking Overall: Kahtoola MICROspikes
- More: Check out our best backpacking footwear lists for more options
NAVIGATION
- Best GPS Watch Overall: Garmin Instinct 2 Solar
- Best Personal Locator Beacon (PLB): Garmin inReach Mini 2
- More: Check out our article How to Use Your Phone as a GPS Device for Backpacking & Hiking to learn more
FOOD
FIRST-AID & TOOLS
- Best First-Aid Kit Overall: Adventure Medical Kits Ultralight/Watertight .7
- Best Pocket Knife Overall: Kershaw Leek
- Best Multitool Overall: Leatherman Wave+
- Best Headlamp Overall: Black Diamond Spot 400-R
- Best Power Bank Overall: Nitecore NB 10000 Gen 3
- More: Check out our best first-aid kit guide, best pocket knife guide, best multitool guide, best backpacking headlamps guide, and best power banks guide for more options
MISCELLANEOUS
- Best Trekking Poles Overall: Black Diamond Pursuit
- Best Backpacking Chair Overall: REI Flexlite Air
- Best Backpacking Stuff Sack Overall: Hyperlite Mountain Gear Drawstring
- More: Check out our best trekking poles guide, best backpacking chairs guide, and best stuff sacks guide for more options
Do Your Part: Protect and Preserve
The Lake O’Hara alpine environment is an incredibly fragile and sensitive environment. Please do your part to help protect and preserve this incredibly special place. Parks Canada asks that you strongly follow these guidelines:
- Respect wildlife – Do not feed or approach wildlife, and please carry bear spray. Read the Bears and People brochure for more information about bear safety.
- Leave no trace – Be sure to pack out all garbage including food waste, diapers, tampons, sanitary napkins and toilet paper.
- Stay on the trails – This helps minimize trail braiding, trampling and erosion.
- Let it be – Please leave natural and historical objects in their natural setting for others to discover and enjoy.
- Respect warnings, closures and seasonal restrictions. Research has identified important grizzly bear habitat and a regional wildlife corridor in the area
- Be safe – As always, your safety is your responsibility.