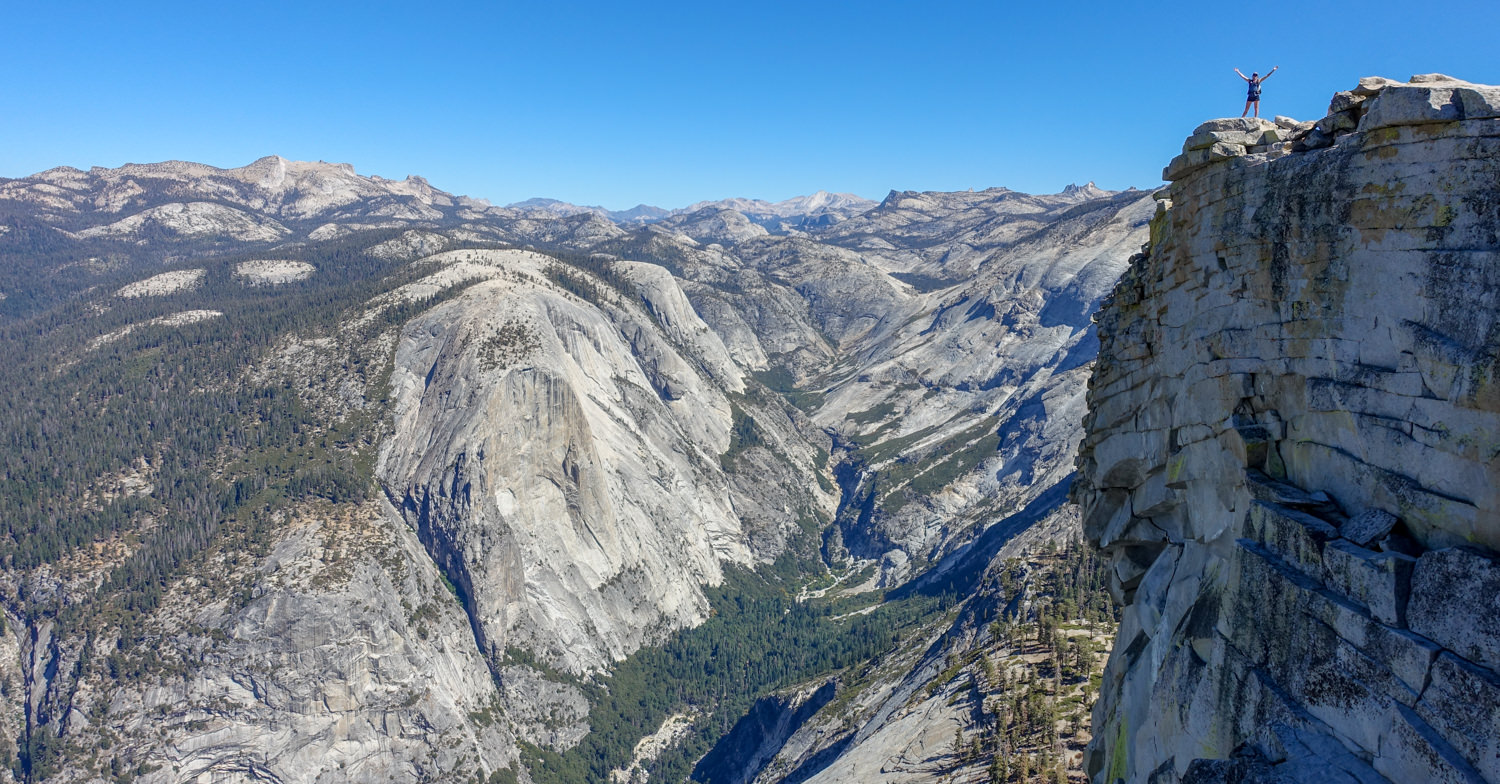
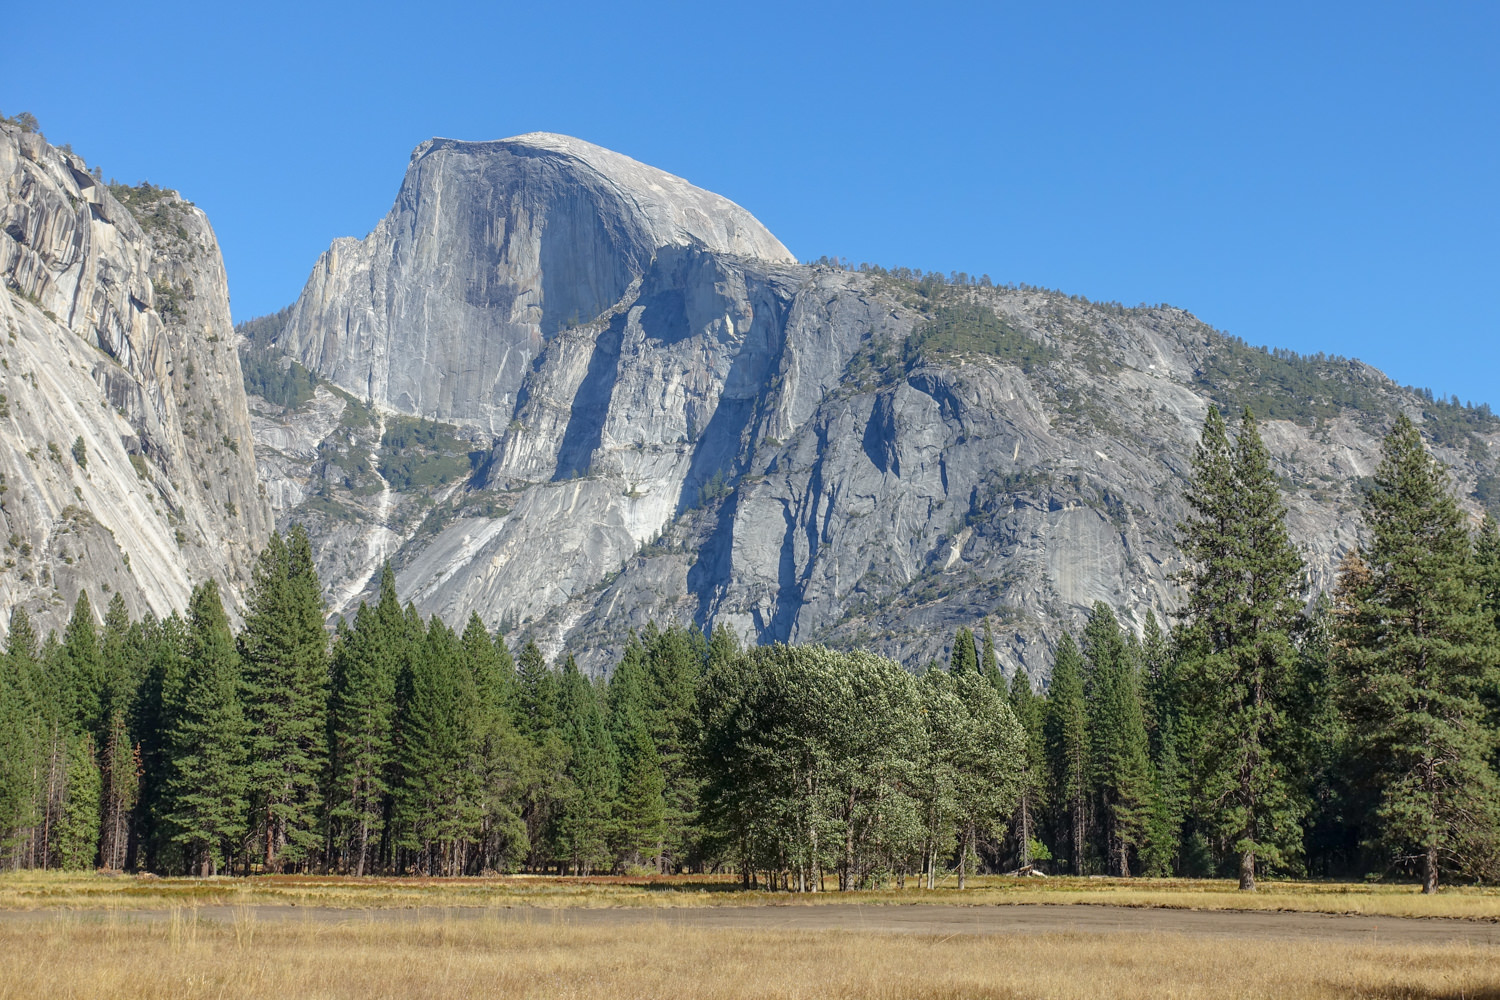
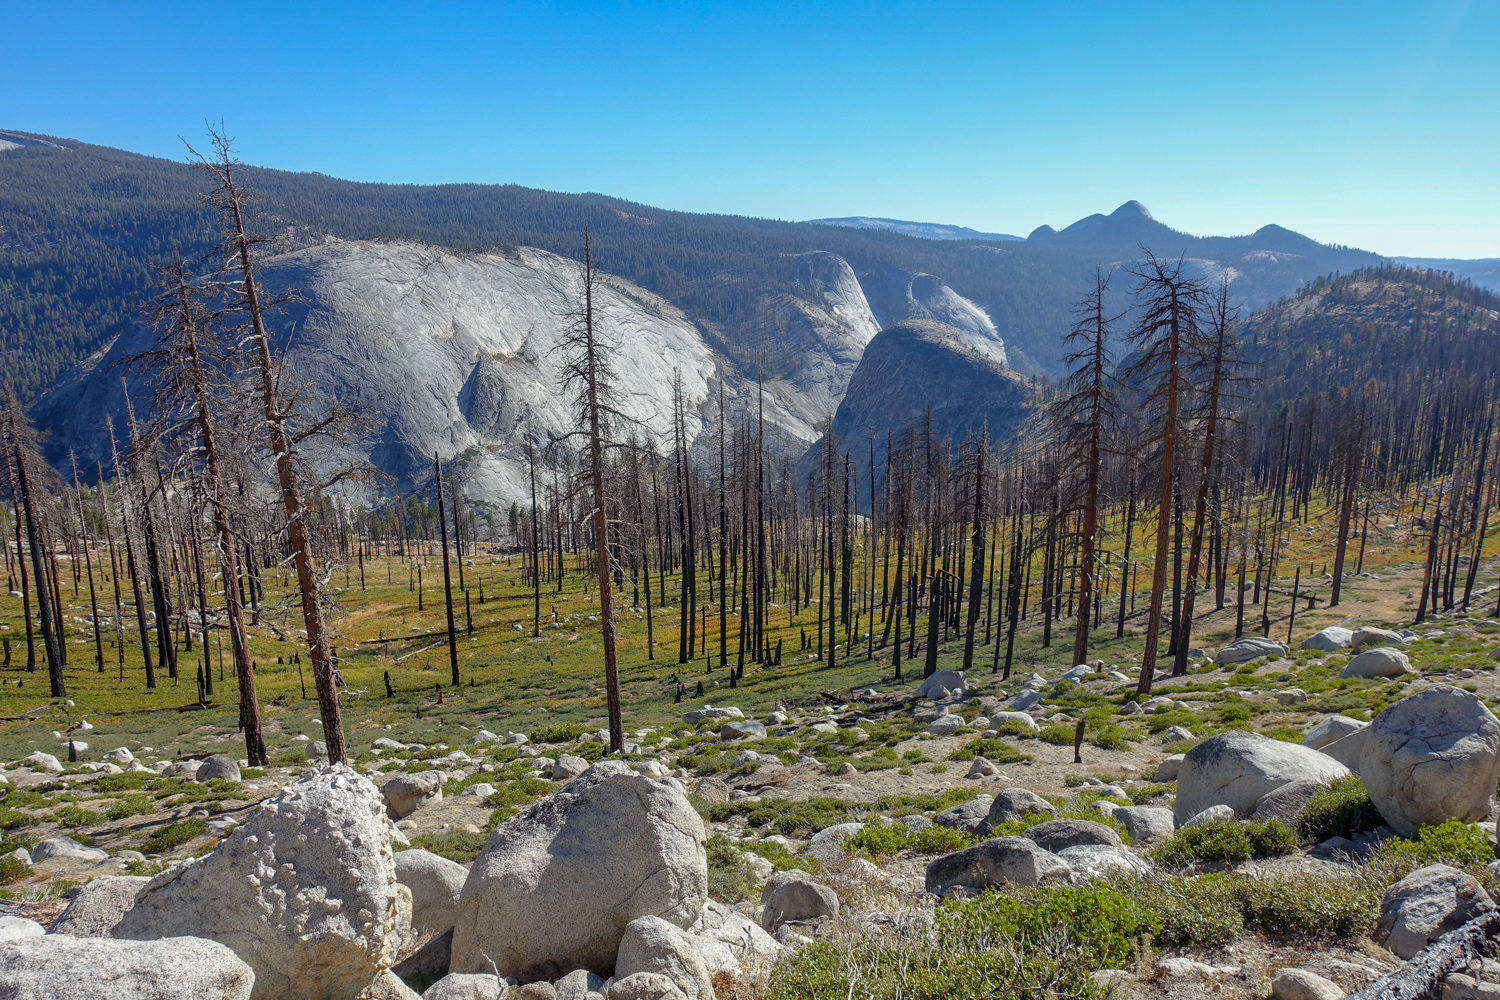
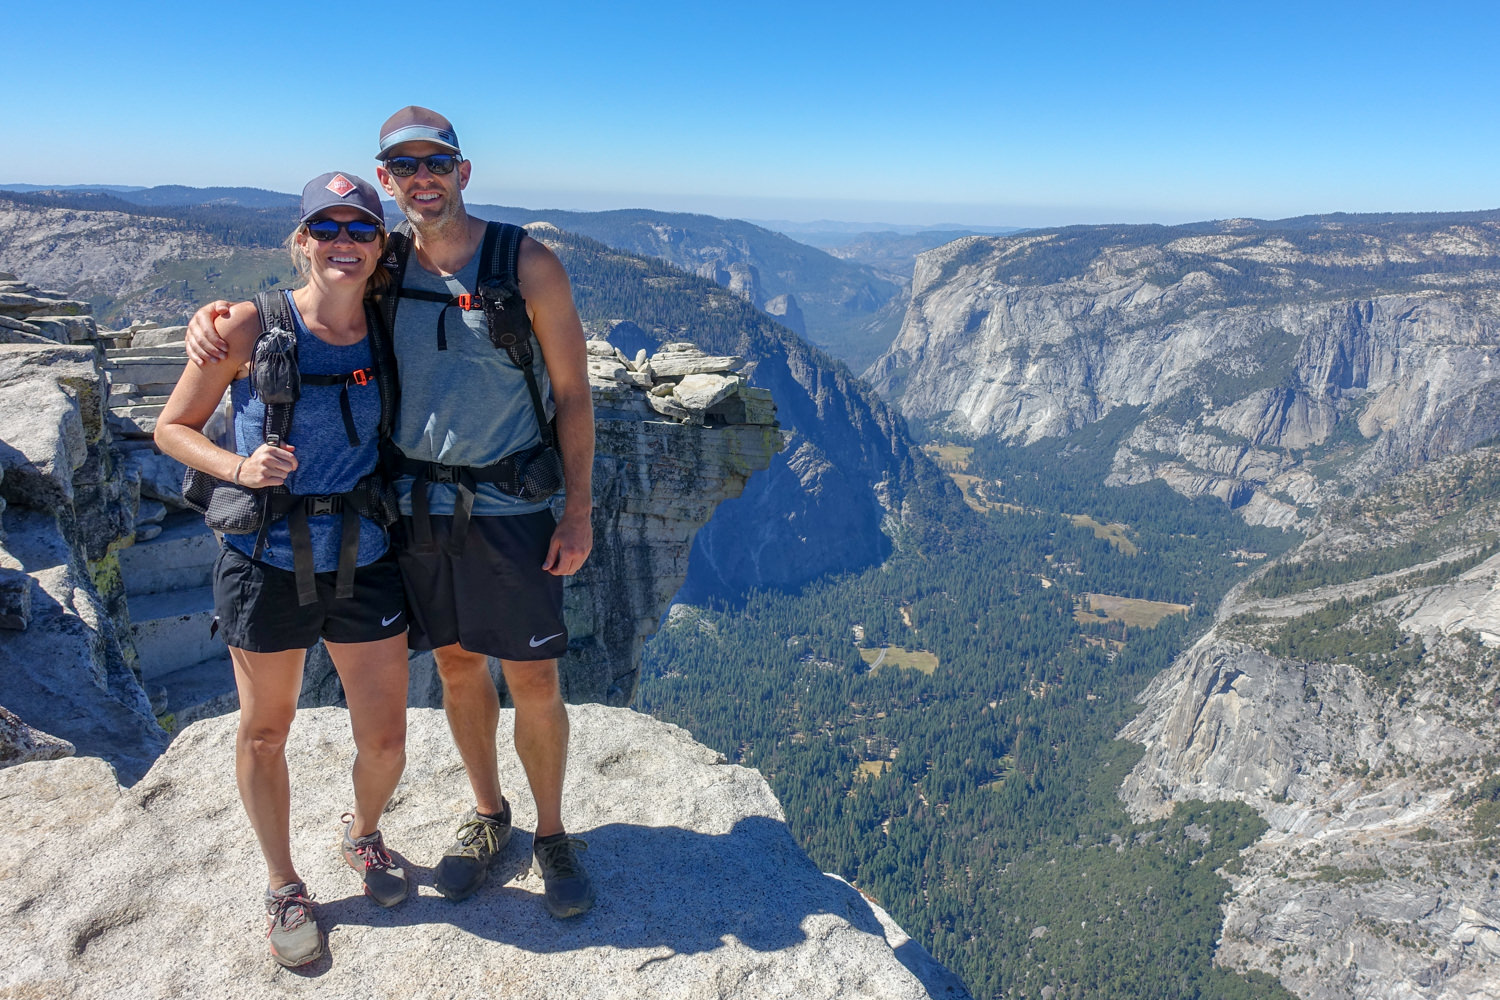
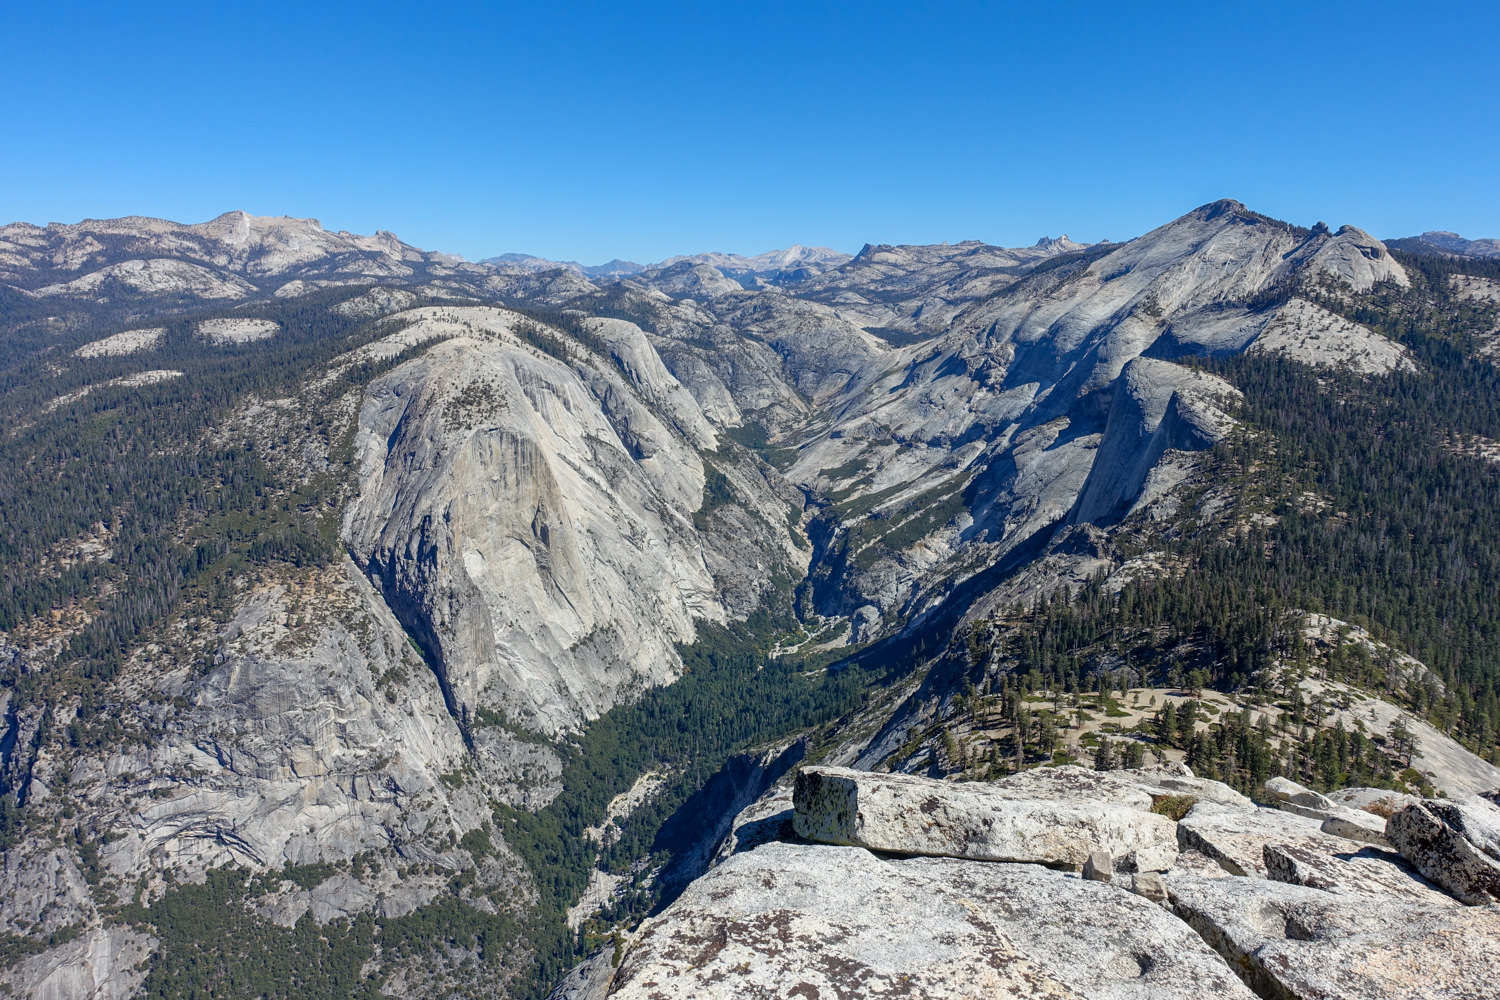
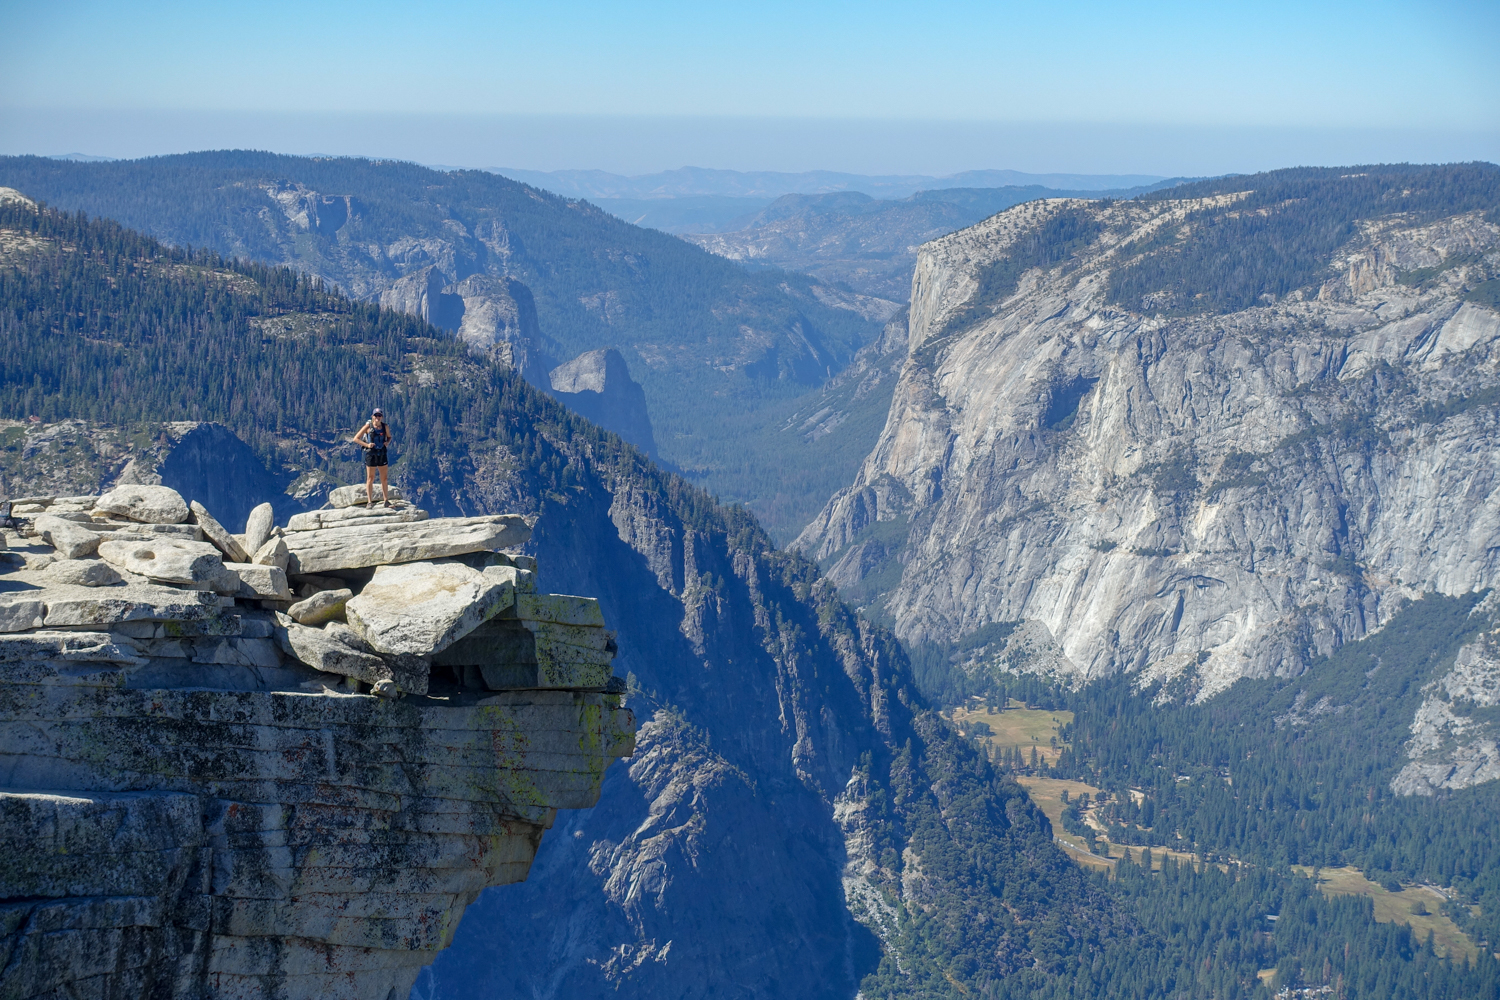
Standing 5,000 feet above Yosemite Valley, Half Dome is without a doubt an icon. The route to the summit traverses some of Yosemite National Park’s most popular and spectacular hiking trails. It takes in its most famous waterfalls, Vernal and Nevada, passes beneath Liberty Cap and the face of Half Dome, and winds through an amazing forest of Sequoia trees. The most exhilarating part of the hike — hauling yourself up the cables to the summit of Half Dome — is a challenge you won’t soon forget. The ultimate reward for all your hard work is one of the best views in Yosemite Valley.
Make no mistake, this hike requires considerable effort. Gaining over 5,000 feet of elevation in eight miles is no easy feat. You’ll also need a lot of luck to snag one of the competitive hiking permits. But if the stars align and you’re physically prepared for the challenge, you’re in for one heck of an adventure.
Quick Facts
- Distance: 16.4 Miles roundtrip via Mist Trail
- Days Needed: 1-3 days – Most people complete as a long day hike
- Elevation Gain/Loss: 5,457 ft (1,663 m)
- Best Travel Time: June – October
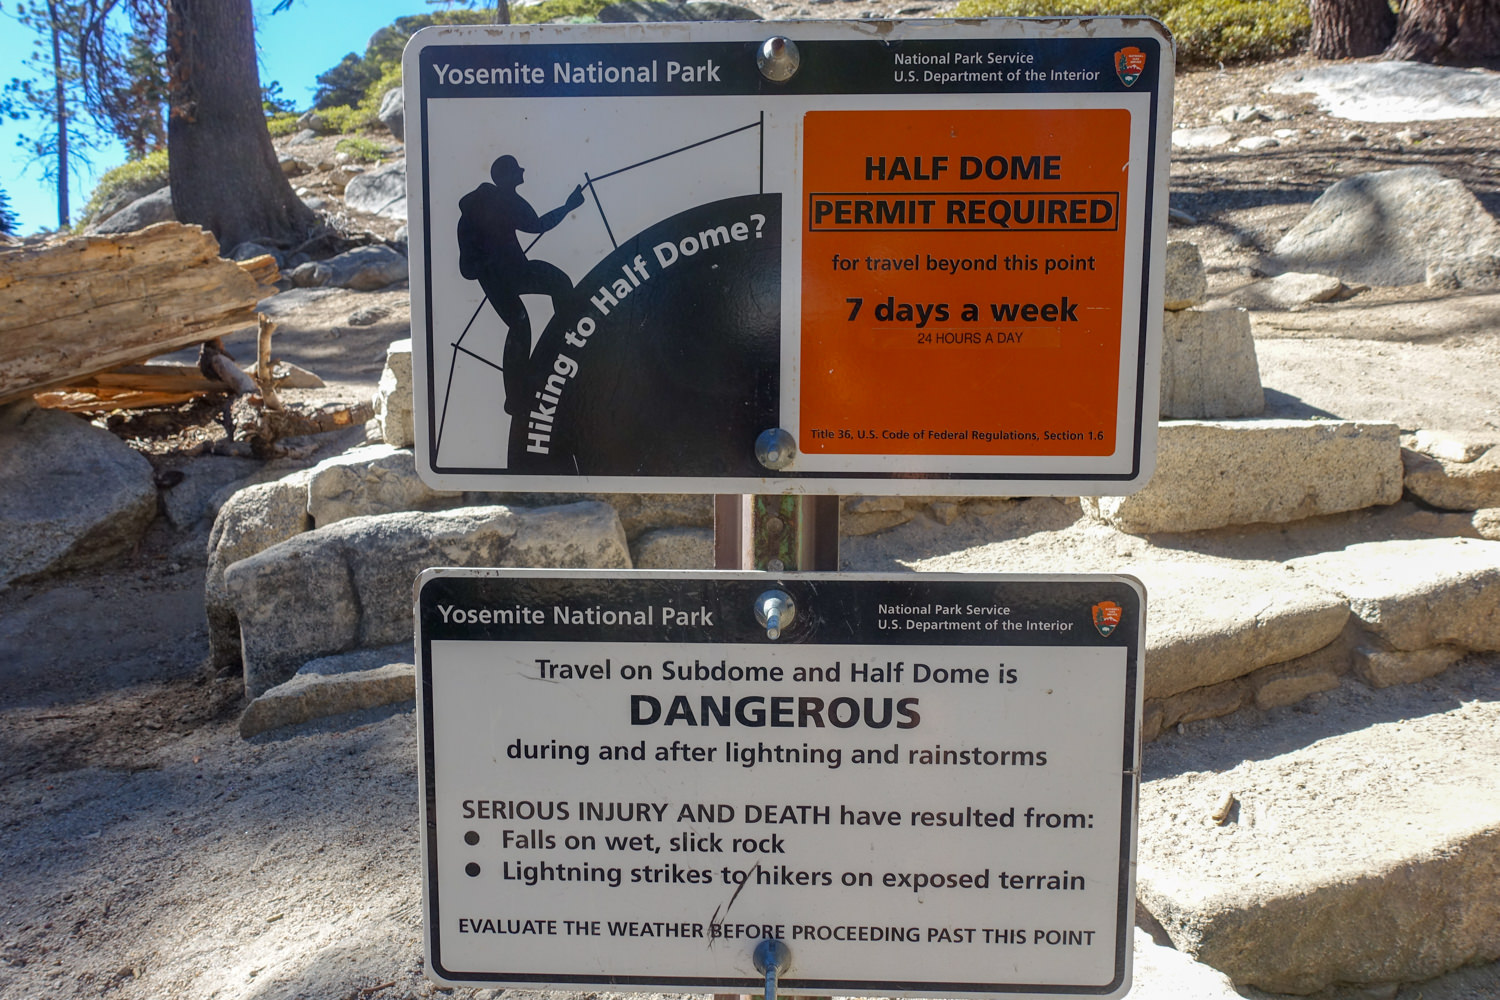
- Permits: Required
- Difficulty: Very strenuous
Best Time To Hike
The National Park Service installs the cables on Half Dome around Memorial Day (late May) if conditions permit and takes them down around the first week in October. As long as the cables are up, you have a permit, and the weather is safe, you can climb Half Dome. Check with Yosemite National Park for current conditions and firm dates.
You can technically hike Half Dome when the cables are down (more on that below). However, we don’t recommend it.
If you want to see the spectacular waterfalls in all their glory, you’ll want to hike Half Dome earlier in the season when water levels are high. Hiking in the fall months will bring beautiful colors, snow-free trails, and fewer bugs but less spectacular waterfalls.
How to Get a Permit
You need a permit to hike Half Dome once the National Park Service has installed the cables. Permits are awarded two ways: a preseason lottery (March submission) or a daily lottery during hiking season.
The preseason lottery is competitive with over 35,000 applicants and a ~22% success rate. The daily lottery has over 29,000 applicants with a ~19% success rate.
Preseason Lottery
With only 300 permits awarded each day (225 for day hikers and 75 for backpackers), snagging a Half Dome permit is tough. The application period is from March 1st to March 31st for all preseason lottery submissions. Permits cost $10 per application (non-refundable), regardless of the number of people listed on the application.
To apply, visit the recreation.gov website. If you win a permit, you’ll be notified by email in mid-April. Hikers lucky enough to score a Half Dome permit will then pay a second fee of $10 per person.
One person (called the team leader) can apply for up to six people for seven different dates. The team leader is only allowed to apply once per lottery. Don’t even try to apply multiple times – all of your permit applications will be deleted from the lottery. The trip leader or the alternate person listed on the application must be present at the sub-dome when the permits are checked.
Your permit is “use it, or lose it.” In other words, it’s non-transferable.
TIP: If you are looking for the highest likelihood that you’ll get a permit, check out these graphs, which show how popular different days are for permit applications. If you have the flexibility, avoid submitting for a permit to hike on a Friday, Saturday and Sunday.
If you’re backpacking and want to camp in Little Yosemite Valley, you’ll need to request a Half Dome permit with your wilderness permit. For more information on the backcountry and Half Dome permit process, visit Yosemite’s NPS page to help with the process.
Daily Lottery
If you were unable to snag a permit during the preseason lottery, you’re not completely out of luck. Another batch of permits is awarded on a daily basis; the number is dependent on cancellations and no-shows. You can apply online for these permits two days before your anticipated hiking date. Visit Recreation.gov to file your application for a daily permit.
If you have any questions, call 877-444-6777. For more information, visit the National Park Service website.
Difficulty
The route to the summit of Half Dome ascends 5,457 feet in 8.2 miles, which means it’s a constant climb the entire way. The trail, however, is well-maintained and easy to follow.
If completed in a day, we rate this hike as very strenuous due to the mileage, elevation gain/loss, and the added obstacle of climbing the cables at the end. Do not underestimate this trail. Strong legs, decent upper body strength, and nerves of steel are all required for this hike, especially the cable-assisted climb section. We highly recommend training vigorously starting at least 3-4 weeks prior to hitting the trail.
If you plan to do this hike in one day, it will take between 10 to 12 hours to reach the summit of Half Dome and return to the trailhead. Check sunrise and sunset times before you hike. You’ll need to start around sunrise and set a non-negotiable turn-around time for your group.
Many hikers set a firm 4 pm turnaround time in summer for reaching the top of Half Dome. This gives you about 5 hours of diminishing daylight to get back to the valley before nightfall.
If you’re just hitting the subdome at 4 pm, it’s best to give it up or be prepared to return in the dark. Always pack a trusty headlamp, just in case. It weighs next to nothing and can be a lifesaver.
Trailhead and Parking
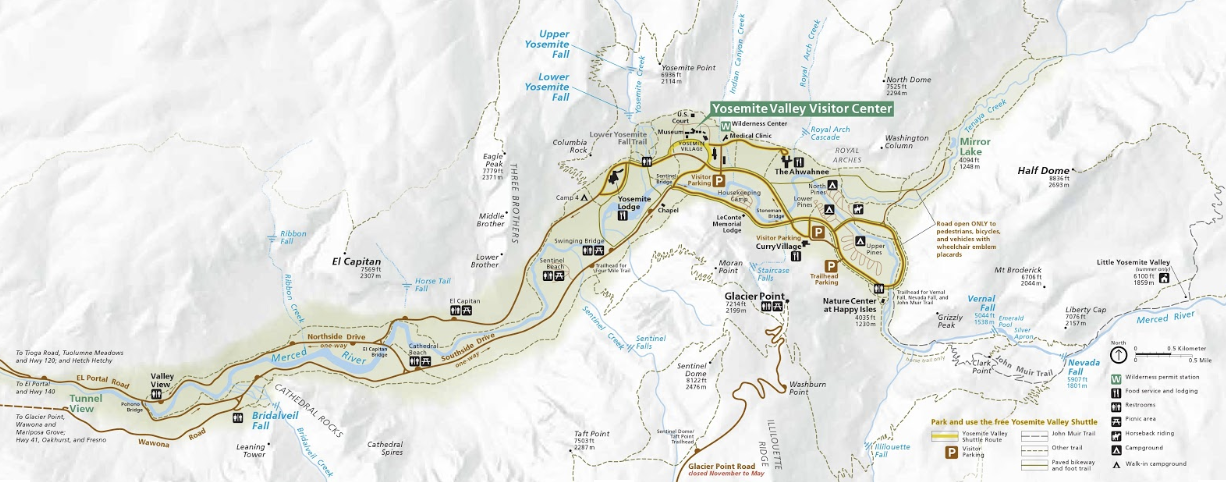
The hike starts on the Mist Trail, which is the same route you’d use for the traditional John Muir Trail. The closest parking lot is the Yosemite Valley Trailhead, located just past the Half Dome Village (formerly Curry Village) though this lot fills up quickly. From this lot, you’ll have to walk 1/2 mile to the Happy Isles Bridge to start the hike.
Another option for day hikers is to park at Half Dome Village (formerly Curry Village). From this parking lot, it is a 3/4 mile walk down a service road to the Happy Isles Bridge and the start of the hike. There is no parking at the Happy Isles trailhead.
You may see that the easiest access to Happy Isles is via the Valley Visitor Shuttle (7 am to 10 pm year-round) at Shuttle Stop #16. However, the shuttle doesn’t start until 7 am. If you’re planning on hiking Half Dome in a day, you should be on the trail before 7 am. If you’re planning on visiting Half Dome as part of a multi-day backpacking trip, the shuttle may be a good option because you won’t need to be on the trail as early.
Campgrounds
If you plan to car camp before or after your hike, the nearest campgrounds to the Mist Trailhead are Upper, Lower, and North Pines Campgrounds. Be sure to plan ahead and reserve well in advance because reservations are very difficult to get in the summer. Camp 4 walk-in campground is very competitive and is also usually full. The best practice is to book your campground as soon as you get your permits approved in mid-April.
The nearest campgrounds outside Yosemite Valley are Bridalveil Creek Campground and Tamarack Flat Campgrounds.
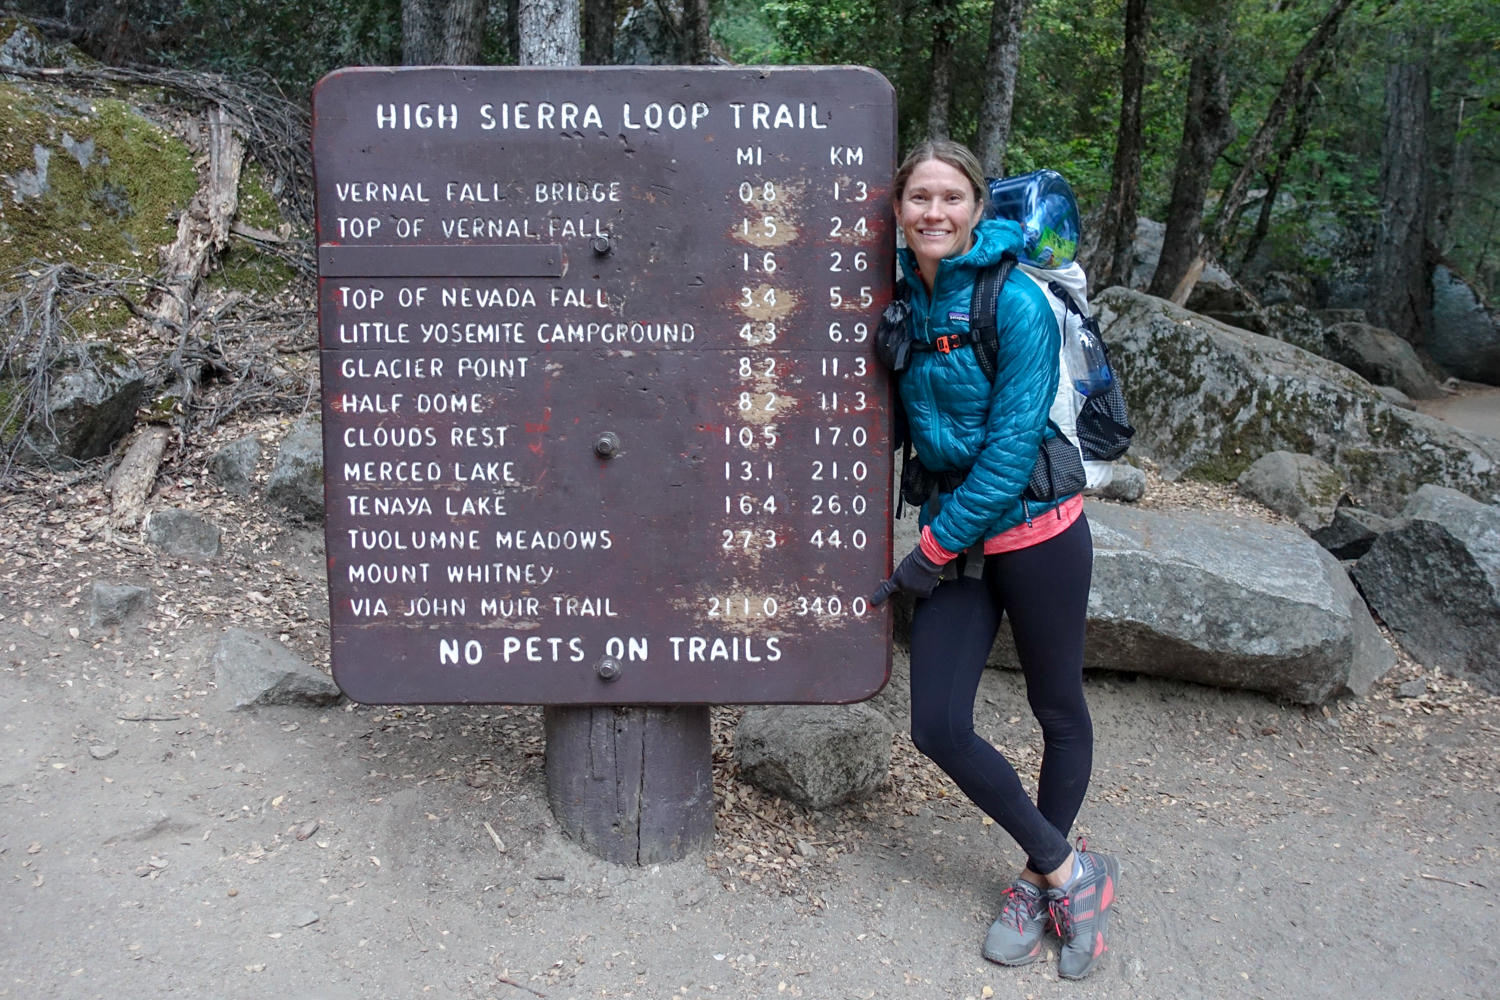
The Hike
The Mist Trail begins as a steep paved trail that steadily gains elevation. From the trailhead to the top of Vernal Falls is 1.5 miles.
Just past the Vernal Falls footbridge, there’s a potable water station. This is your last chance for purified drinking water on the hike, so drink up and fill your bottles or bladder. We recommend carrying 2-3 liters from this point – maybe more on hot summer days.
The trail takes a strenuous steady climb to the falls, following a slippery rock staircase up along the river. Expect to get misted as the trail makes its way to a fabulous view at the top of the falls.
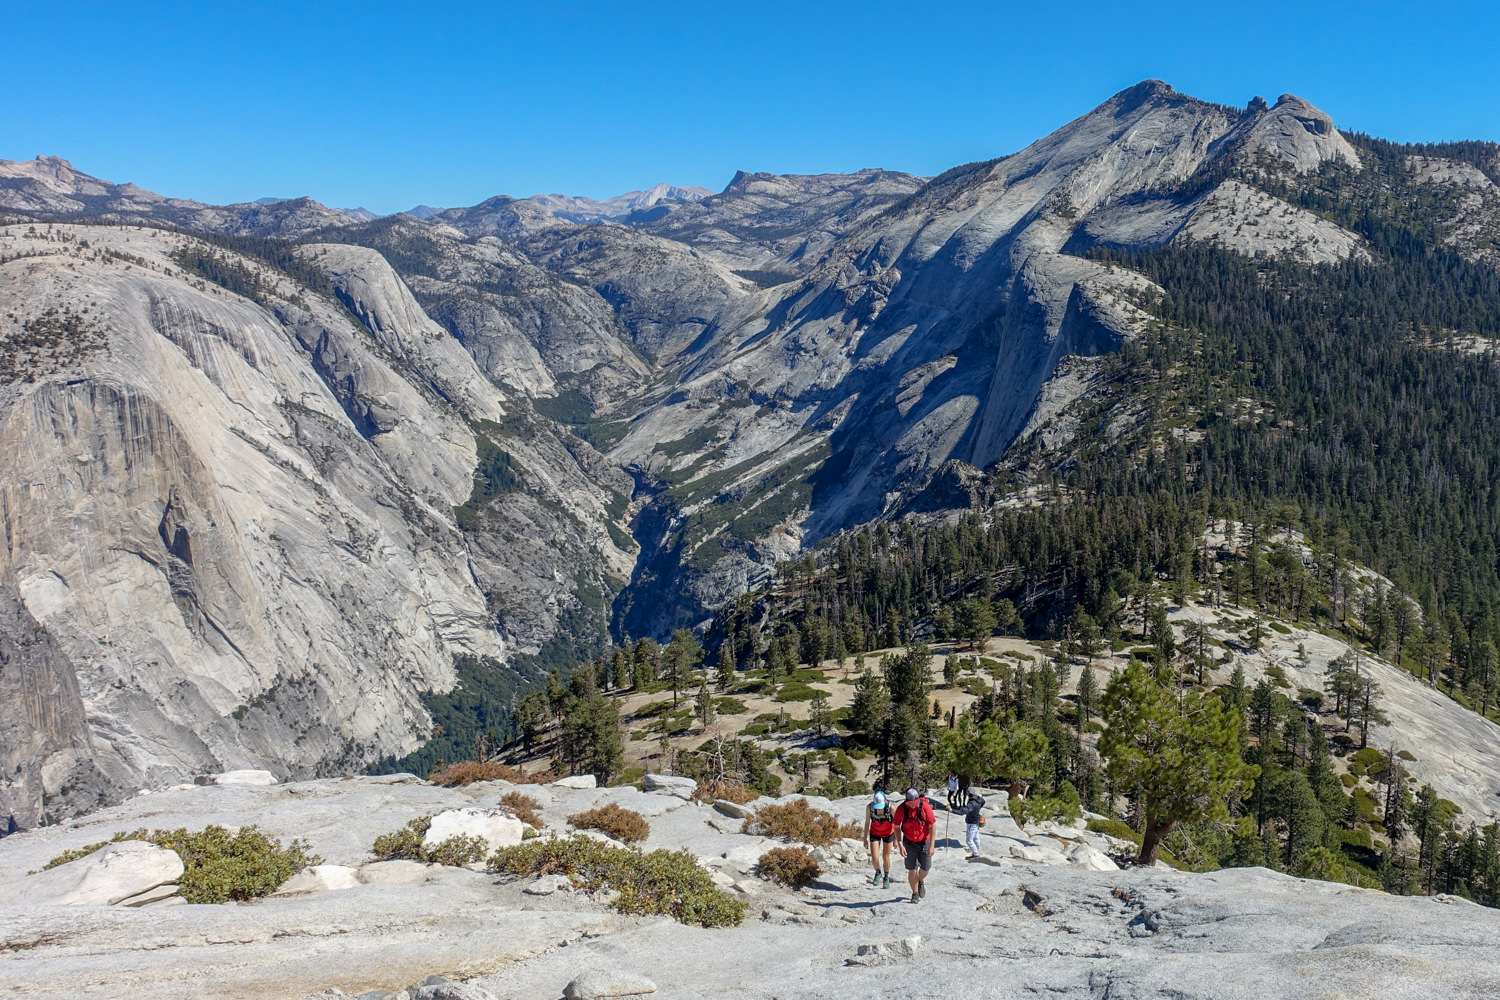
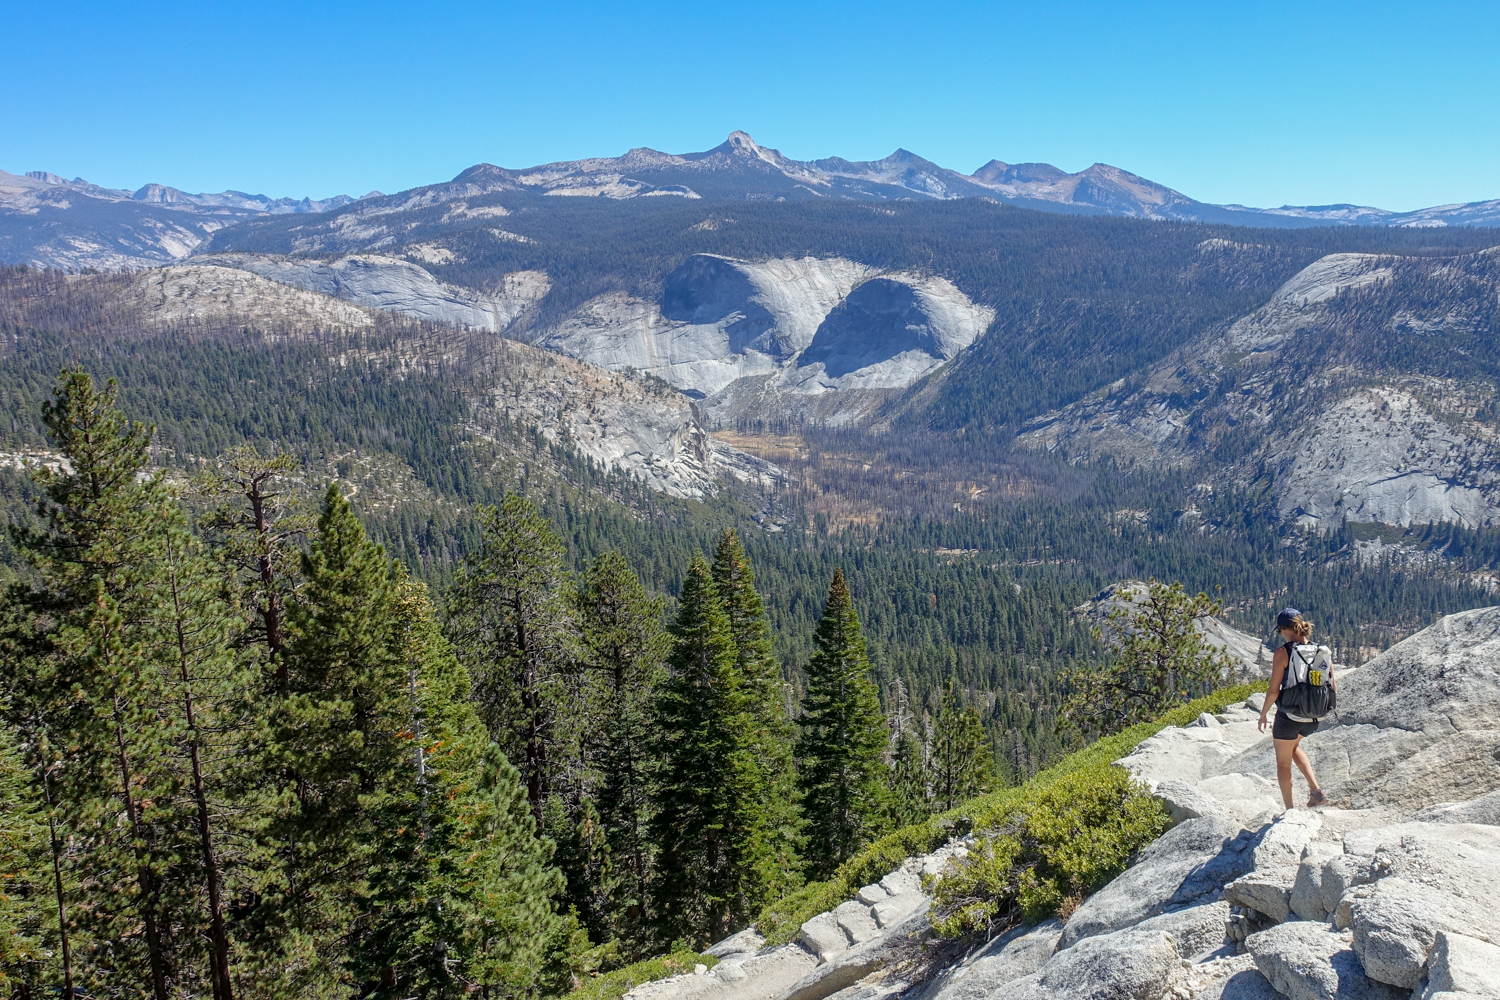
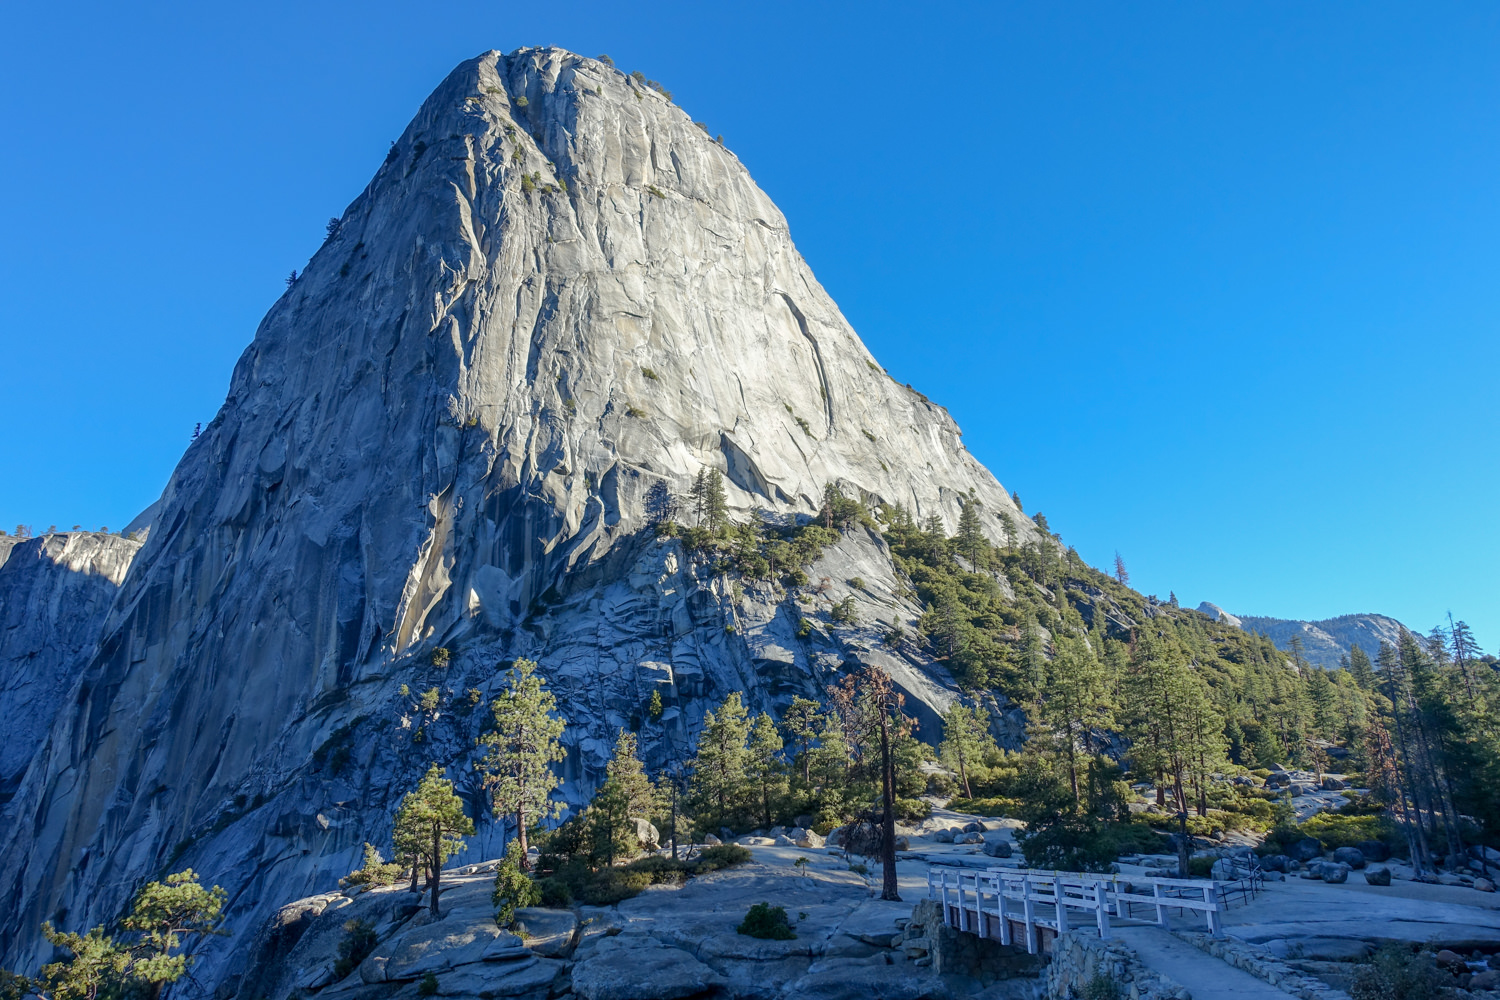
Beyond Vernal Falls, the trail continues onward and upward for 2 miles to Nevada Falls, winding through a forest canopy and more rock and boulder “stairways to heaven.” At the top of Nevada Falls (4.3 miles in), the trail splits, heading left to Half Dome, or right for a half-mile round trip to an optional overlook. (If you take the Muir Trail on your return, you’ll pass this same viewpoint).
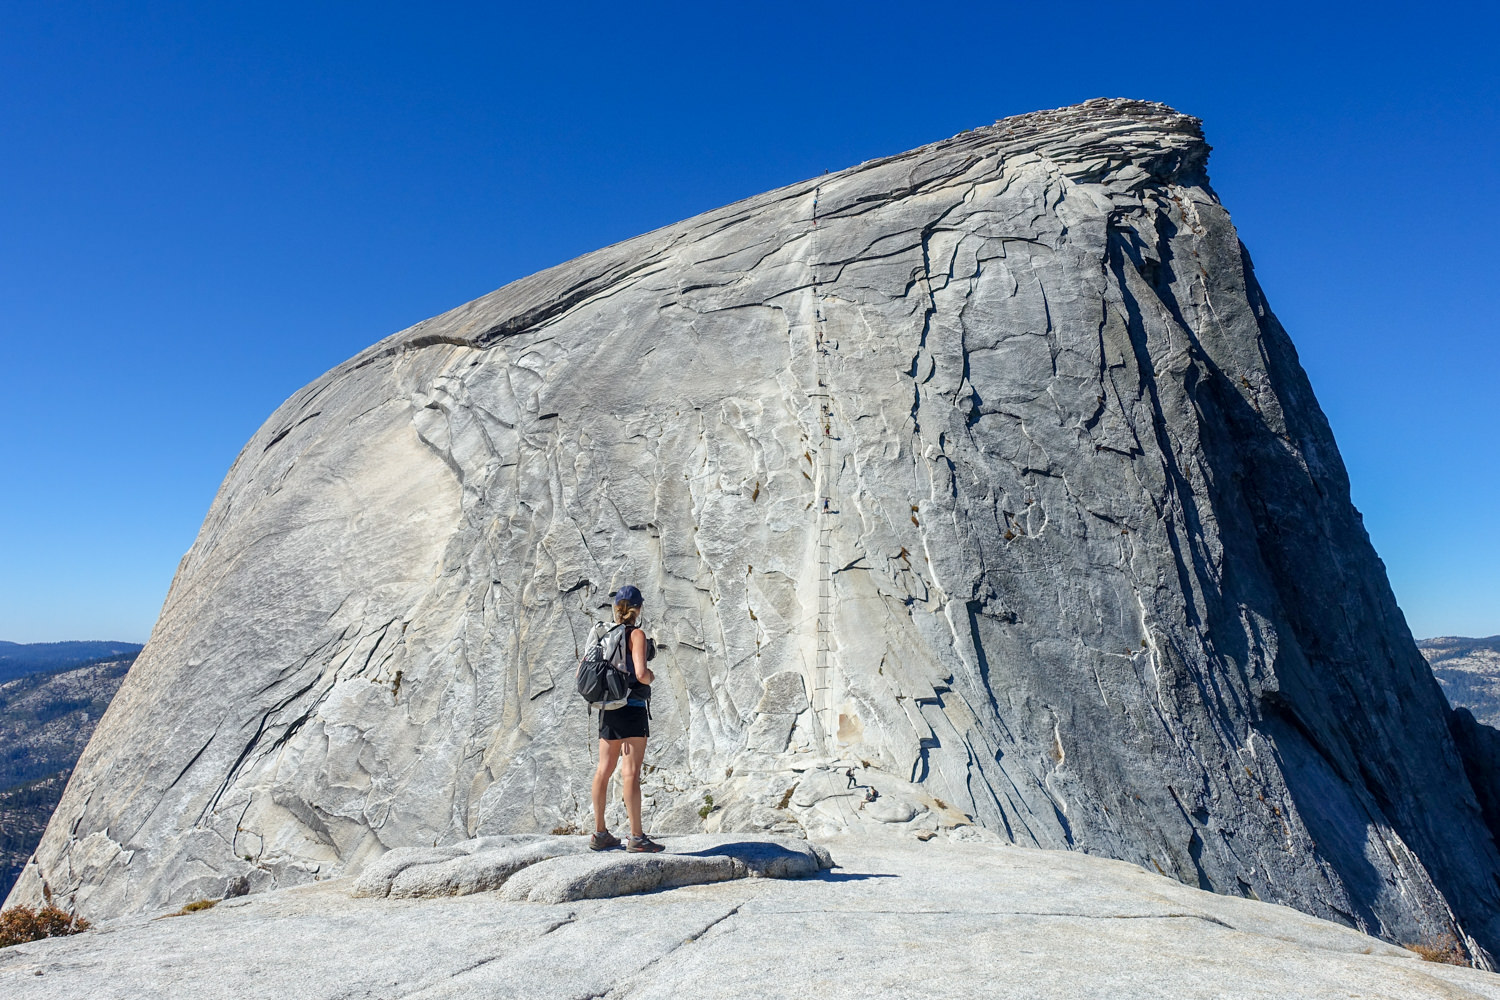
The trail then passes through Little Yosemite Valley and its campground and begins to climb to the subdome. You’ll see intermittent views through the trees of climbers on the cables and the summit of Half Dome.
At 8,000 feet, you reach the subdome. Once you crest it, the views get increasingly better. But with each step, breathing gets a little harder. At this point, take a rest and secure your water bottles and any loose gear. Eat some food and hydrate.
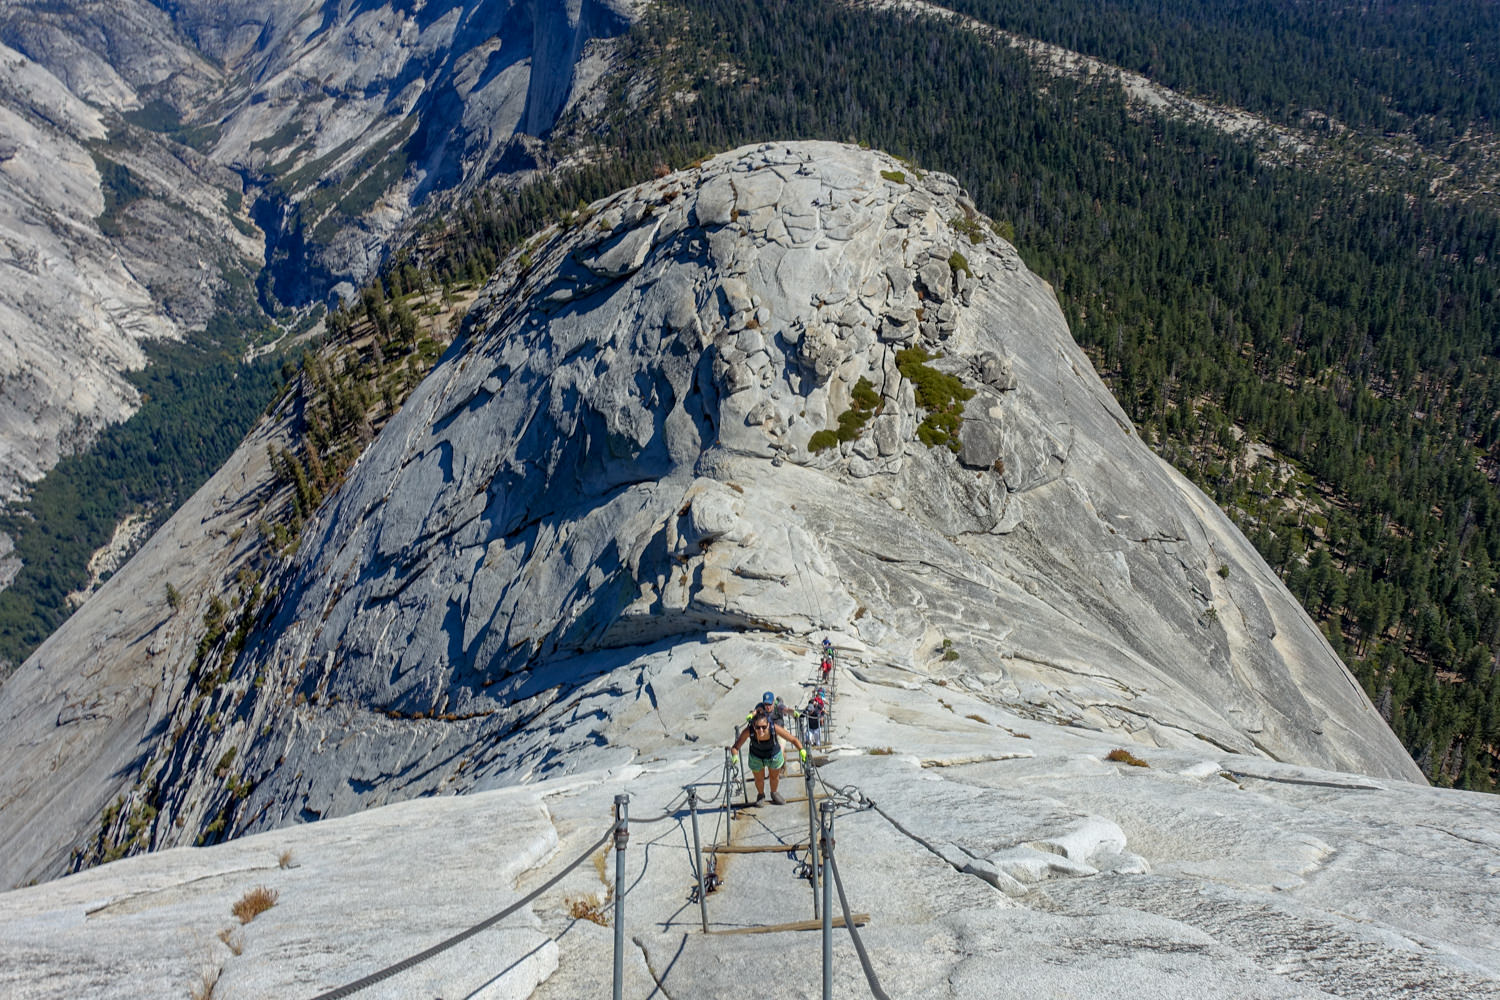
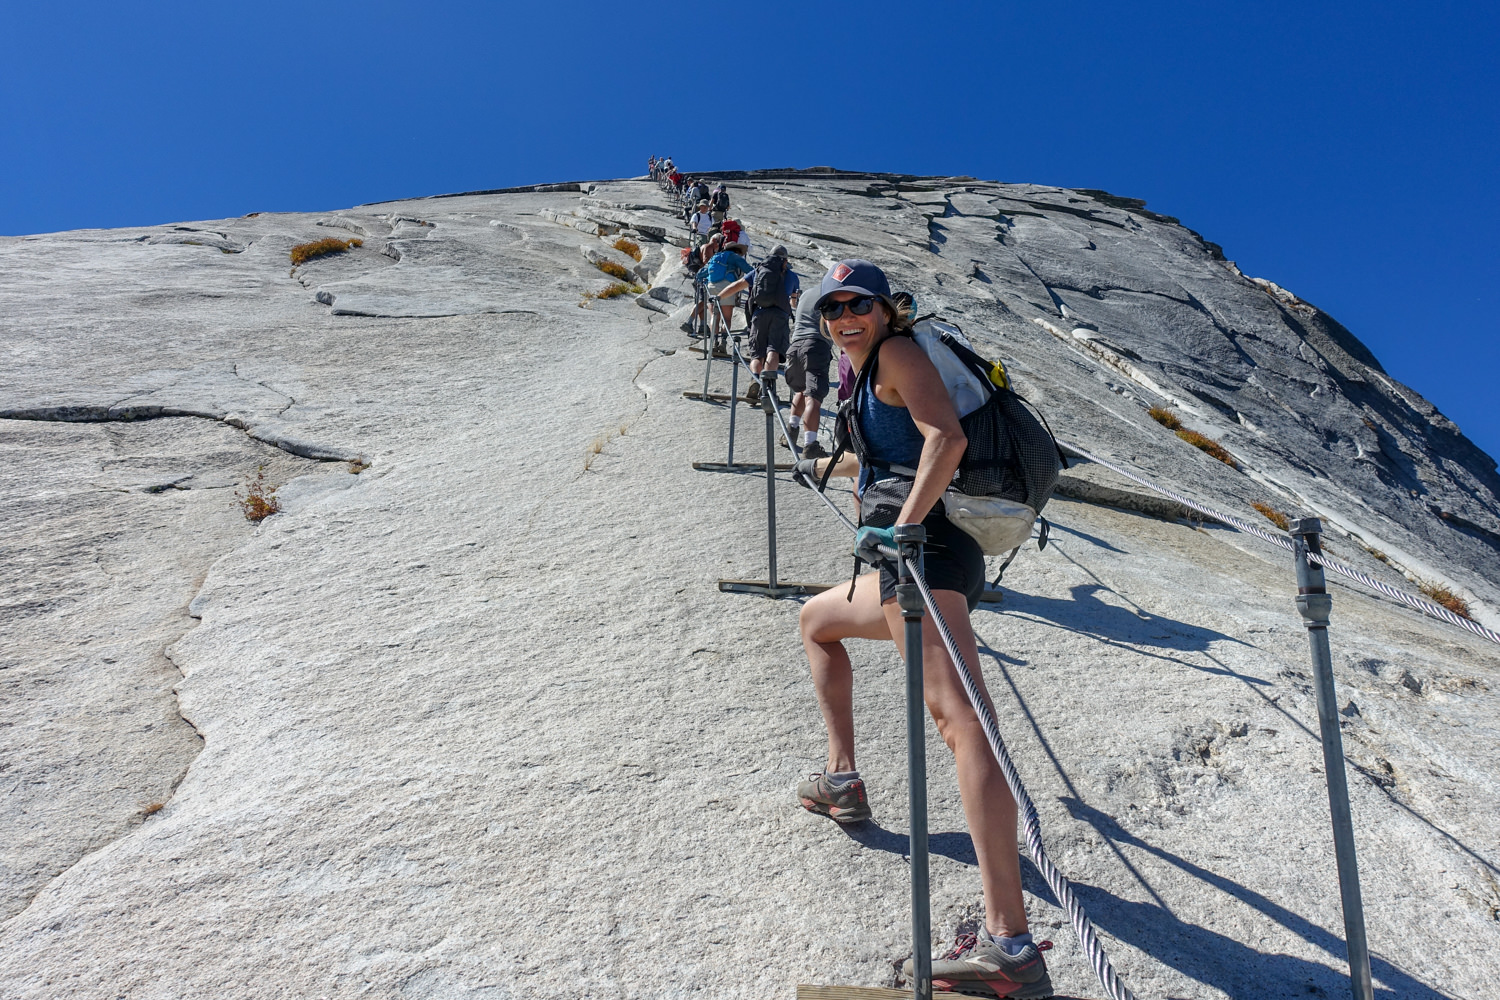
The steel cables, placed at 45-50 degree angles, also come into focus, and you get a sense of what you’re in for. Soon you’ll start up the slick rock (granite) route worn smooth by millions of boots and begin the body-and mind-challenging grind to the top.
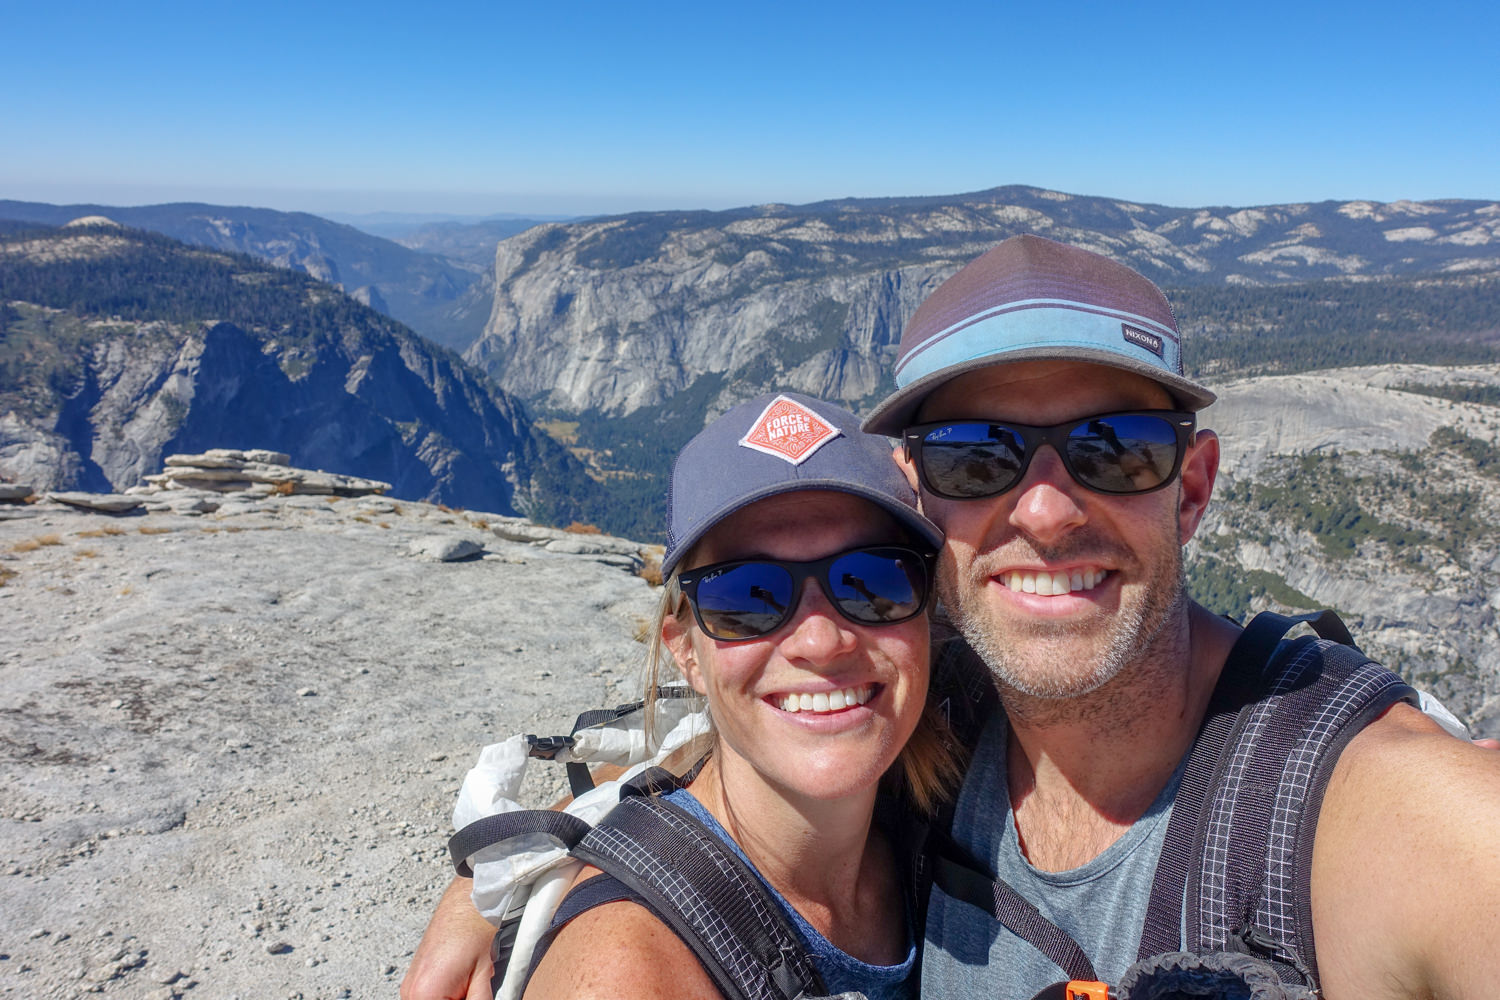
It’ll take between 20 and 40 minutes on the cables to get to the top of Half Dome, depending on the size of the crowd waiting and your upper body strength. Once you summit, your time will be limited only by the number of other people up there. No matter – it is a stunning, rewarding view unlike any other.
The Descent
It can take 45-50 minutes to get back down to the subdome, depending on the crowd and the number of approaching climbers you have to maneuver around on the cables.
Breathe. Be Chill. Take your time, take some photos, and enjoy the view.
At the top of Nevada Falls, make a decision: The Mist Trail or the John Muir Trail.
If you still have daylight, take the Muir trail and enjoy the falls and views of Liberty Cap. In either case, if you still have daylight, the going is fast back to the trailhead, though it can be tough on the knees. Once down, catch the free shuttle back to your car or head to a concession to celebrate!
Alternative Routes
Although most people begin and end their hike via the Mist Trail, there are some alternative routes that offer different viewpoints and difficulty levels.
- Return via John Muir Trail 16.5 miles total — The Muir Trail gives you a different view of Half Dome than the Mist Trail and provides scenic views of Nevada Falls. It’s a bit longer but offers a less steep descent than the Mist Trail.
- Round trip via Glacier Point: 20 miles total — The hike from Glacier Point will be longer and more difficult, but the reward will be far less crowds and stunning views.
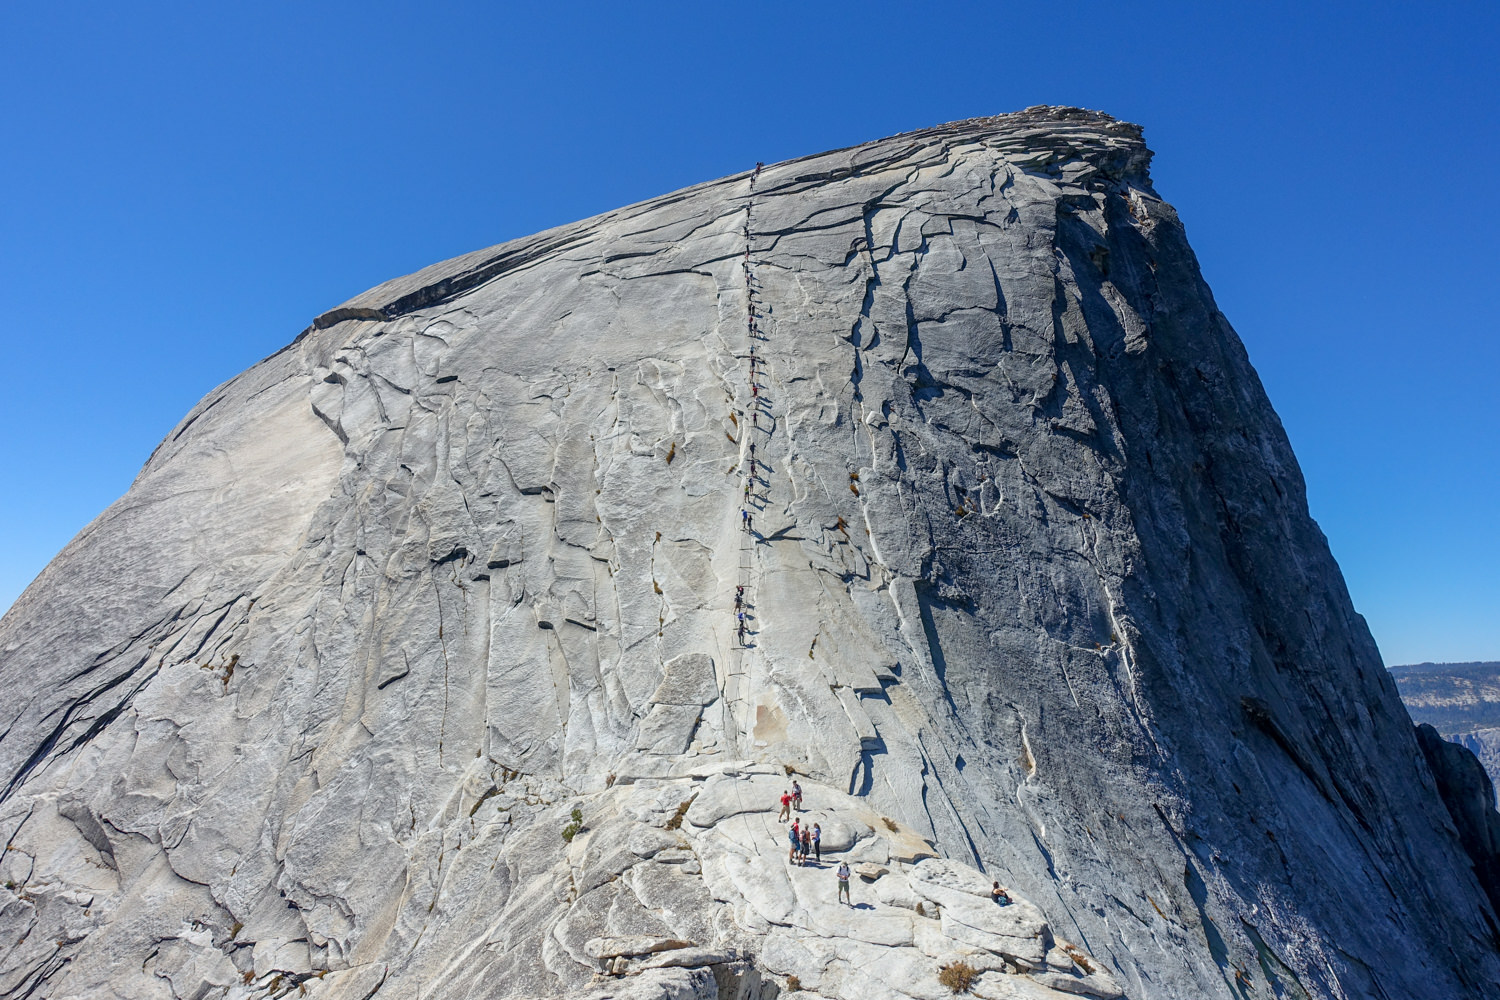
Half Dome Cables
The famous Half Dome cables have captivated hikers for decades. What should you expect?
Two metal cable lines allow hikers to navigate the last 400 feet to the summit without rock climbing equipment. The cables are usually erected in late May and removed in early October. They are placed several feet above the rock surface (about waist-high) with wooden planks about every 10 to 12 feet that reinforce the stanchions and provide some relief from rock worn smooth by millions of people having traversed it.
We highly recommend bringing gloves with good traction to make it easier to grab the cables and pull yourself along. If you already own the gear or can afford to rent it, it’s not a bad idea to use a climbing harness with a tether to a carabiner that can be clipped onto the cables as well. Also, the cables can get very congested by mid-day, making it much more time-consuming and potentially dangerous as you have to navigate around other hikers moving in both directions. We highly recommend getting a very early start to avoid prime-time congestion by mid-day.
If you’re afraid of heights or unprepared for the strenuous challenge of climbing the cables, we highly recommend not attempting this section of the hike. Once you start hiking up the cables, it will be very hard to turn around, and going down can be scarier than going up.
Although relatively few people have died traversing Half Dome over the past century, there’s definitely a risk for unprepared or careless hikers. Ten people have died falling from the cable section of Half Dome. Of those fatal falls, five occurred when the rock was wet. Three people have died from lightning strikes on top of Half Dome, so take stormy conditions very seriously. Recently, a couple died while taking a selfie on the summit too close to the edge of a big drop-off. Please take extreme care during all stages of this hike.
Can I Hike Half Dome When The Cables Are Down?
The short answer is yes, it is legal to hike Half Dome when the cables are down. But it’s at your own risk, and we don’t recommend it. You should consider this an option only if you’re a highly experienced climber/hiker.
When the cables are down, it means the stanchions (support poles) have been removed that hold the cables up at elbow/waist height. At this point, the cables are just lying on the granite slope. So instead of working along a fixed cable, you’ll need to pick it up and hike up it (with the possibility of other hikers pulling on the same cable).
There are a couple of situations where this should most definitely be avoided. When the granite is wet, it’s too slippery to get any grip on the approach. Also, if there’s a possibility of stormy weather or snow/ice on the route, you should definitely not attempt to summit.
Wilderness permits are required during off-season too – though, you won’t need a reservation from November through April. For this trip, you must get your permit from the permit station nearest the trailhead.
Do I Need A Harness?
Most people do not use a harness to climb Half Dome. That said, some do, and it’s the optimal way to ensure safety (and peace of mind) while ascending and descending the cables.
If heights make you nervous, we highly recommend wearing a harness or not attempting this section of the hike. If you decide to use safety equipment, we recommend a Via Ferrata, which is a Y-shaped lanyard with carabiners to clip onto the cables. You will need a harness to properly attach the personal protection system to yourself.
The cables are not unimpeded or continuous, so the two carabiners allow you to move one carabiner to the next section of cable above the eyebolt without ever being unprotected. Most people do not wear a helmet to climb Half Dome. We recommend practicing with this gear before heading up the cables to ensure you know how to use the gear properly and efficiently.
Backpacking Options
Although most people hike half dome as a long and strenuous day hike, there are options to make the route more manageable by spending 2-3 days on your approach and descent.
Permits can be very competitive for backcountry campgrounds in the Yosemite Valley. But if you’re able to procure one, it can make your visit to Half Dome very enjoyable.
One option would be to hike 4.3 miles on the first day to an overnight staging camp at Little Yosemite Campground. The next day, hike 7 miles round trip to Half Dome and either return to the trailhead or camp at Little Yosemite for a second night. Then hike out on Day 3 hike via the Muir or Mist Trails.
Black Bears and Critters
Black bears are not uncommon in the Yosemite Valley. Your likelihood of seeing one along such a highly trafficked route is quite low, but not unheard of.
If you encounter a black bear, make a lot of noise and attempt to scare it away. The black bears in Yosemite can be quite habituated to humans and are adept at obtaining food from hikers who have left food unattended or stored improperly.
Never feed bears, or any other wildlife for that matter. A fed bear is a dead bear – bears often have to be put down once they learn to associate humans with food. So please, always keep your food in your backpack or within arms length.
Follow the same guidelines for any critters you encounter in the park; never feed them. Bear Canisters are required for all overnight backcountry trips in Yosemite NP.
Gear List
Visiting Half Dome as a day hike is no walk in the park. It’s a very strenuous hike with high mileage and a lot of elevation gain. We recommend looking over this list of 10 Things You Should Bring on Every Day Hike prior to hitting the trail.
Here’s the most important gear that should be in your pack.
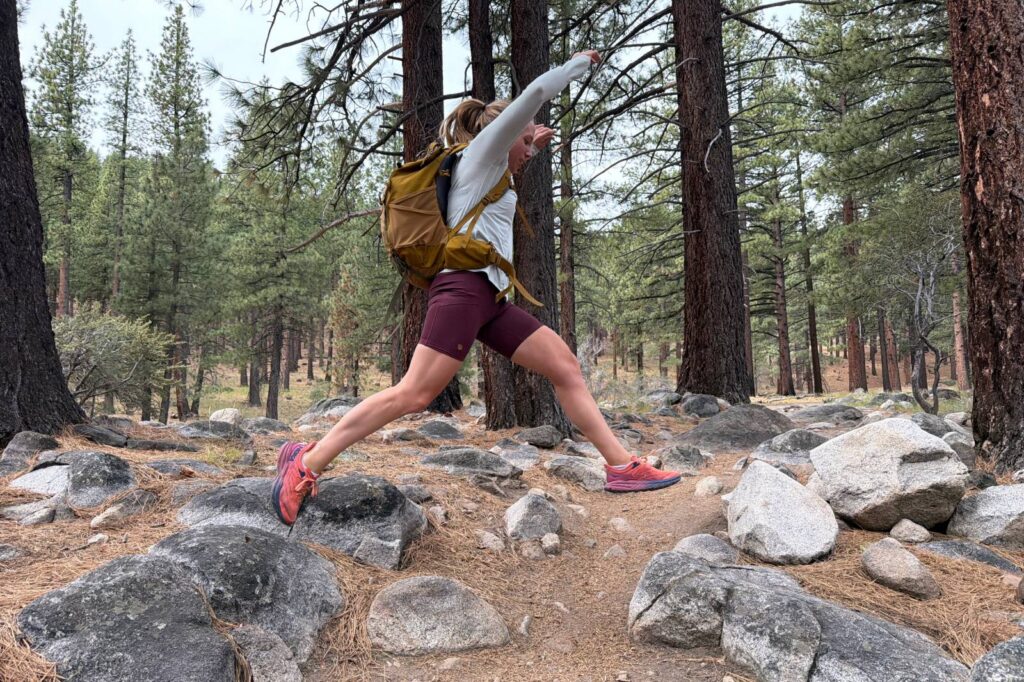
DAYPACK – A well-fitting and comfortable daypack is essential for carrying the gear you’ll need for Half Dome. Choose a pack large enough to carry essential gear with convenient storage compartments and easy access to water bottles or a hydration bladder. To learn more about the most important daypack considerations and to see our top backpack recommendations, check out our Best Hiking Daypacks list.
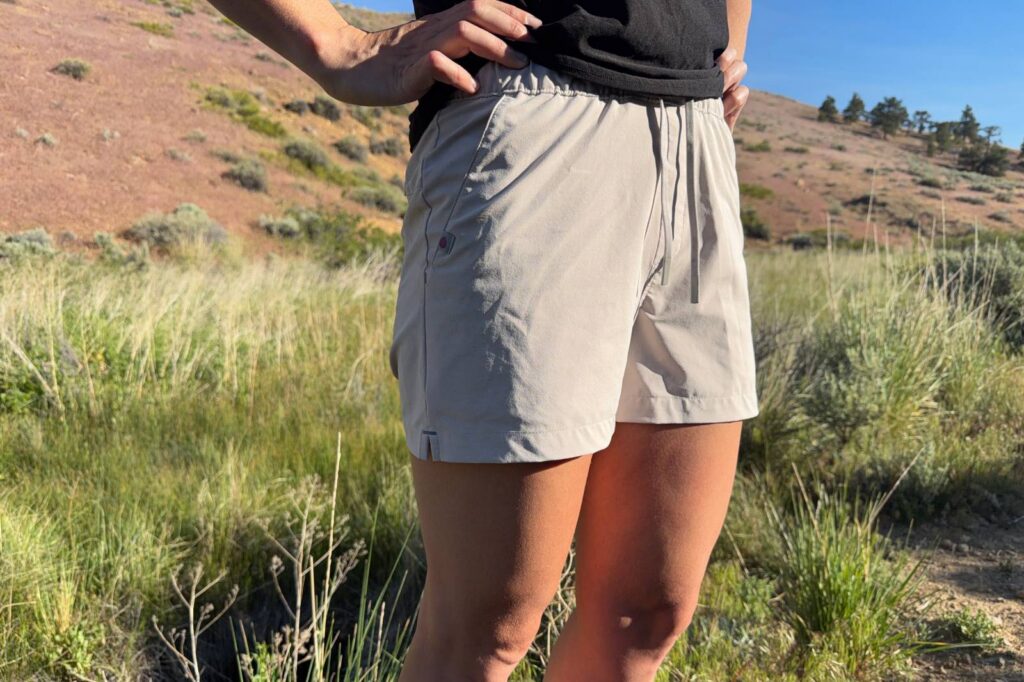
HIKING SHOES – Make sure you have a good pair of trail runners or hiking boots with sticky outsoles and sufficient traction. This is very important because the granite at the top of Half Dome has been polished smooth by thousands of hikers before you. For our top recommendations on hiking shoes, check out our lists, Best Hiking Shoes for Men & Best Hiking Shoes for Women.
GLOVES – You will absolutely want to use a pair of gloves for hiking the cables on Half Dome. You’ll want to be able to firmly grip the slippery cables and prevent your hands from being torn up. We recommend Nitrile Multi-Purpose Utility Work Gloves. At times, there will be a mixed pile of gloves at the base of Half Dome you can borrow, but you shouldn’t rely on this. If you bring gloves with you, please pack them out. The NPS regularly ends up hauling out lots of glove trash.
HEADLAMP – The best-laid plans may have you off the trail before dark, but you should always be prepared for the unexpected. Sometimes a hike will take longer than planned, and getting lost in the dark can quickly compound into a bad situation. Always bring a reliable headlamp – it weighs next to nothing and can be a lifesaver. We have a great list of the best headlamps on the market
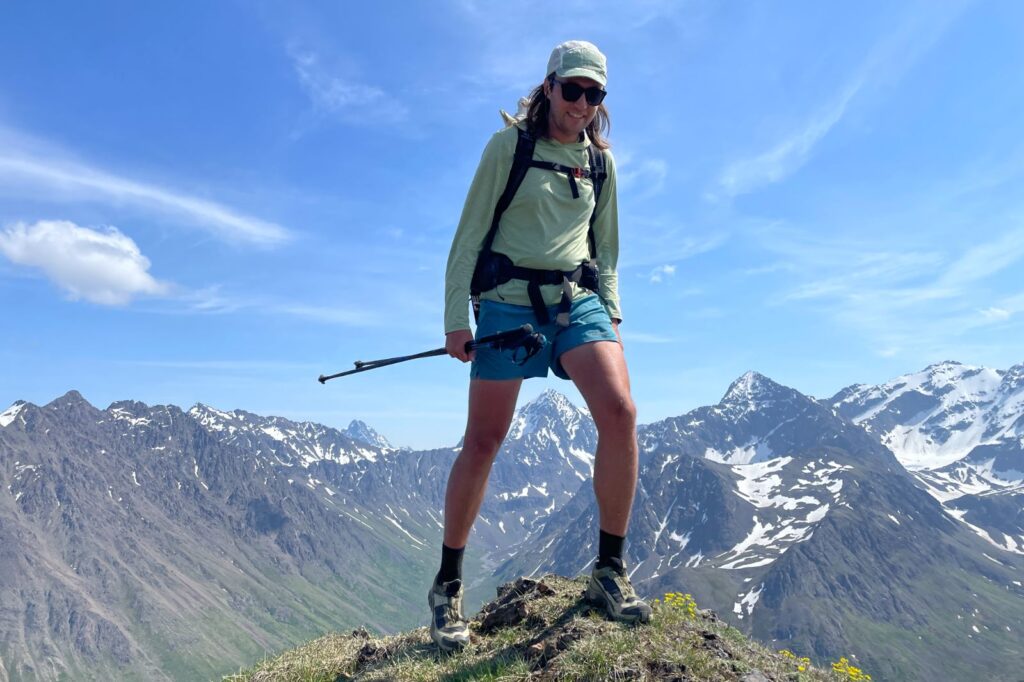
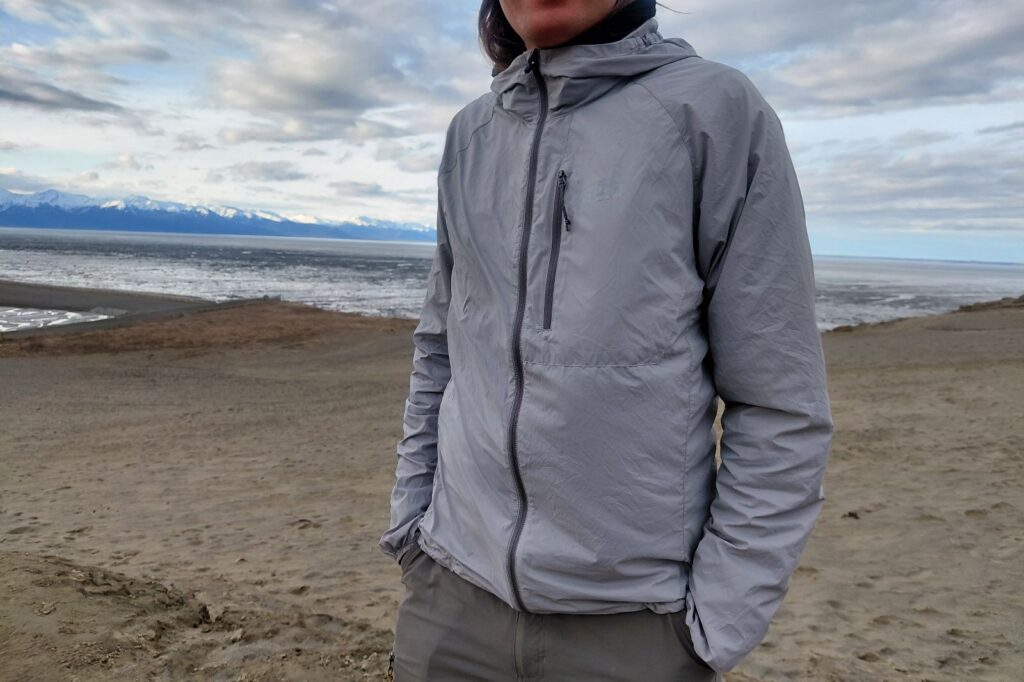
SUN PROTECTION – Although the beginning of this hike is through shaded forest, the second half to Subdome and Half Dome have high sun exposure and little to no shade. Sun protection is an incredibly important part of any hike, even when the weather is cloudy. Sunscreen, SPF lip balm, sunglasses (preferably polarized), a brimmed hat, and protective clothing should be considered essential on every hiking trip.
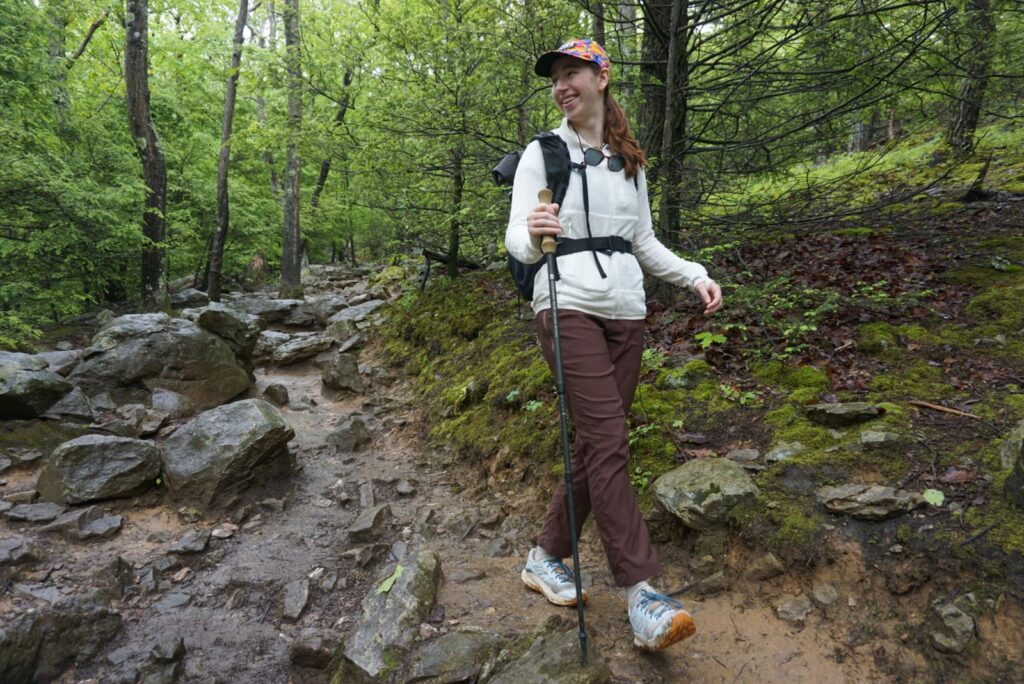
TREKKING POLES (optional) – Trekking poles can be very useful on some parts of this trail but an annoyance/handicap on others.
You won’t want to use them near the top of this climb, for example. But trekking poles may be beneficial on other steep sections of the hike. For a list of our top recommendations, check out our list of the best trekking poles.
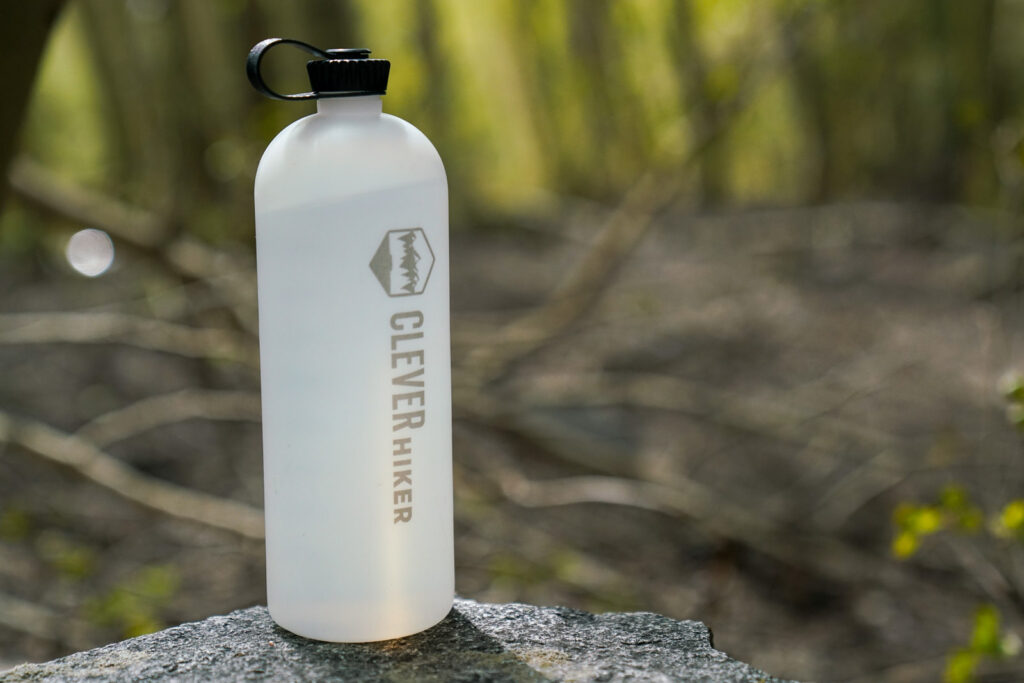
WATER – Perhaps the most important consideration on this hike, you’ll want to make sure you have a solid hydration plan. Treated water is available in summer at a drinking fountain at the Vernal Fall Footbridge (less than a mile from the trailhead). You’ll also be able to get water from the Merced River up to Little Yosemite Valley, but you’ll have to treat that water with a filter or purifier.
After that point, there’s little chance of reliable water for the rest of the hike. We recommend filling up your water bottles or bladder in the Little Yosemite Valley and treating it with a lightweight water filter (here’s a list of our favorite filters and purifiers). Weather conditions and personal preference will affect the amount of water you’ll need, but a good rule of thumb is to plan on at least 1 gallon (4 liters) of water per person per day.
FOOD AND SNACKS – When preparing for any day hike, you’ll want to make sure to bring along enough calories to sustain your energy for a long day of activity. We commonly bring several bars (Larabar, Clif Bar, ProBar, Luna, and Kind bars tend to be our favorites), dried fruits, nuts, and jerky while we hike. For a more substantial lunch, we like to pack tortillas or bagels and make sandwiches with hard meats (like salami) and cheeses (like parmesan).
We recommend bringing a little more food than you think you’ll need, just to be certain you don’t go hungry. For more ideas, check out our Backpacking and Hiking Food Guide.
TOPOGRAPHICAL MAP & COMPASS – Although the trails in Yosemite are well-marked, you should always hike with a topographical map and compass. We found the National Geographic Yosemite National Park map to be a great resource for this hike.
SAFETY EQUIPMENT – If you opt to use climbing gear, we recommend a Via Ferrata (a personal protection system with two carabiners and a y-shaped lanyard). This should be looped to a harness. Most people do not wear helmets to climb Half Dome, but that’s up to you.
Safety & Tips
- Take it easy on the steel cables. Don’t rush but keep moving to prevent traffic jams.
- Allow faster hikers to pass you (when possible).
- Always remain on the inside of the cables.
- Skip the final cable ascent if you have a fear of heights. It will wreck you with anxiety and be a bottleneck to other hikers. Once you’re on the cables, you have to be committed and confident, especially if there are crowds of people waiting to go up.
- If you’re nervous but still confident you can complete Half Dome, you can wear a harness with a carabiner to clip into the cables. More information on that is above in the Half Dome Cables section and Safety Equipment section.
- Train for this hike with lots of miles of steep ascents and descents. Even people in peak physical shape will likely arrive at the subdome feeling exhausted. Keep in mind that you will also need upper body strength to navigate the cables to the top.
- Once you summit, you face a minimum of four more hours of hiking to return to the trailhead in Yosemite Valley – which can be tough on the knees.
Do Not Attempt Half Dome If:
- Storm clouds are on the horizon or overhead. Three people have been struck and killed by lightning on Half Dome. Keep an eye on the weather (we like NOAA’s point forecast)
- It has been raining very recently. The cables and rock will be very slick and slippery. Most accidents on the cables occur during wet conditions.
- You are not in good physical shape. This is one of the most challenging hikes in the park, and for many, it will be the hardest hike they’ve ever attempted. You will be climbing over 5,000 feet, and if you’re fatigued before you even reach the cables, it can quickly turn into a dangerous situation. Train properly and know your own limitations before hitting the trail.
- The cables are down for the winter (unless you’re a very experienced all-season hiker or climber). It can be incredibly dangerous to attempt Half Dome when the cables are down, so we don’t recommend it. See notes above.
Final Thoughts
Hiking Half Dome is an absolute bucket lister for most hikers, and it’s well worth the effort. The view from the top looking down into Yosemite Valley is like no other; the ultimate reward for all your hard work.
But do not underestimate what it will take to climb Half Dome. This is a strenuous and full-day adventure, so make sure you’re prepared for it. Train properly, pack the right gear, and know what you’re in for.
If you do that, you’ll earn one of our nation’s best vistas and create memories you won’t soon forget.