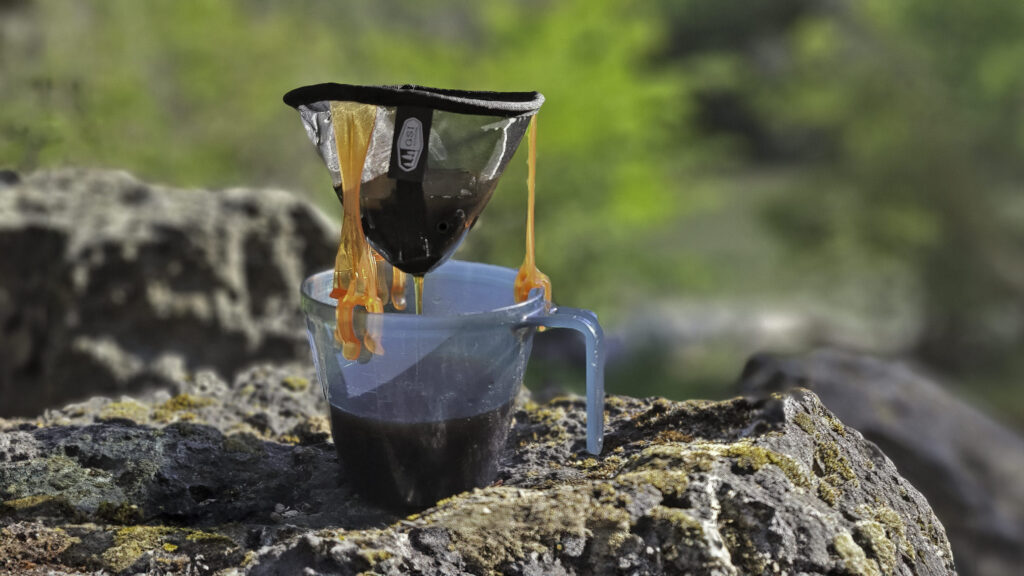

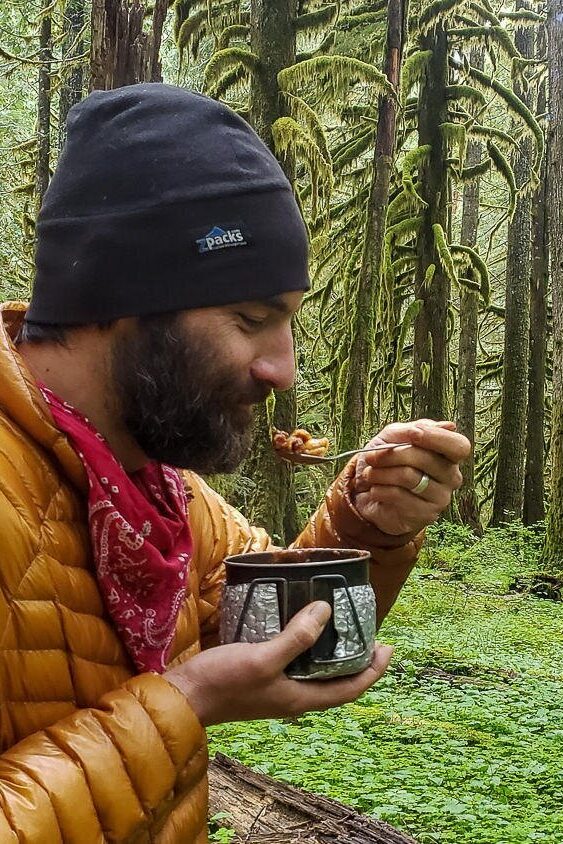
This guide outlines food dehydration and shares our favorite tried-and-true recipes. After thousands of miles of backcountry cooking and front-country meal prep, we eat pretty well while backpacking.
If you enjoy cooking and want to take a taste of home on trail, making your own meals can be a fun way to prepare for the adventure ahead. If you have food allergies or dietary needs, it’s also a way to ensure that you have what you need to stay safe and healthy in the backcountry.
Backpacking Food Favorites
If you’re just getting started and want an idea of what other backpackers eat for breakfast, lunch, dinner, and snack time, check out our other meal guides.
Backpacking Nutrition
We break down backcountry nutrition into two parts: quality and caloric density. By quality, we mean the variety and amount of nutrients your body gets from the food you eat. It’s just as important to have a well-rounded, balanced diet on trail as it is in the frontcountry (and sometimes even more so).
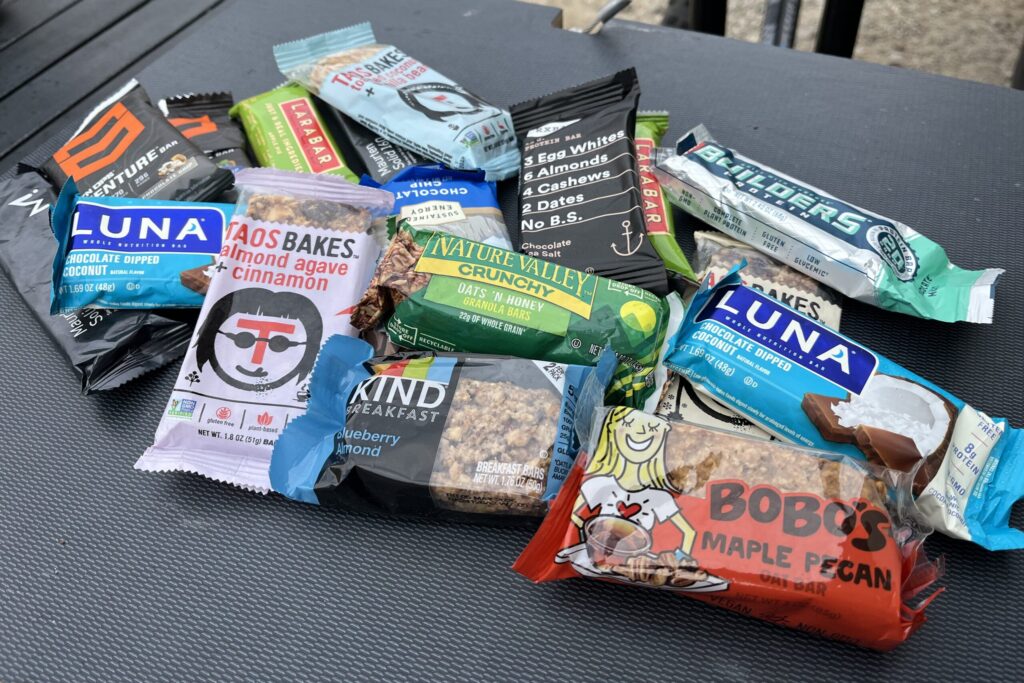
Pounding protein bars, candy, and salty snacks certainly have their place on the trail; you likely wouldn’t do that all day, every day for a week straight at home. Speaking from experience, only chowing on highly processed bars and snacks can be hard to digest when you’re doing a lot of physical exertion. Variety also keeps backcountry meals exciting, and you’ll spend less time daydreaming about frontcountry food.
Dehydrating your own meals at home lets you control the nutrients you eat and adds variety to your backcountry diet.
The other critical component of wilderness nutrition is caloric density. We can burn 300-500 calories per hour of active hiking (depending on body weight, pack weight, terrain, and speed). That’s in addition to what your body typically consumes at its baseline for the rest of the day.
In an eight-hour day, you can burn 5,000 calories (again, depending on a few different factors). In reality, it’s actually pretty difficult to carry that many calories of food in your pack. All to say, when you are preparing your meals, try to maximize caloric intake (and nutrition), not minimize it.
Food Weight
Keeping your pack weight to a minimum is really important on multi-day trips, which you need to balance against a good variety of foods that you enjoy and make you feel good.
The goal is to create meals that provide the most calories and nutrition with the least amount of weight. Look for rich, calorically-dense foods (100+ calories per ounce) that offer real hunger-crushing value and keep you fuller for longer.
Think “less volume, more substance”. Adding healthy oil (e.g. olive) and/or butter is another excellent way to supplement your caloric intake and make your meals taste great too.

Making Your Own Backpacking Meals
There are three ways in which you can make your own backpacking meals, ranging from fairly easy to complex. We’ll go through each option below.
- Option 1: Combining dried goods (no cooking at home required)
- Option 2: Dehydrating individual ingredients and assembling them into meals (cooking and dehydrating required)
- Option 3: Cooking and dehydrating complete meals
Portioning Food: How Much Is Enough
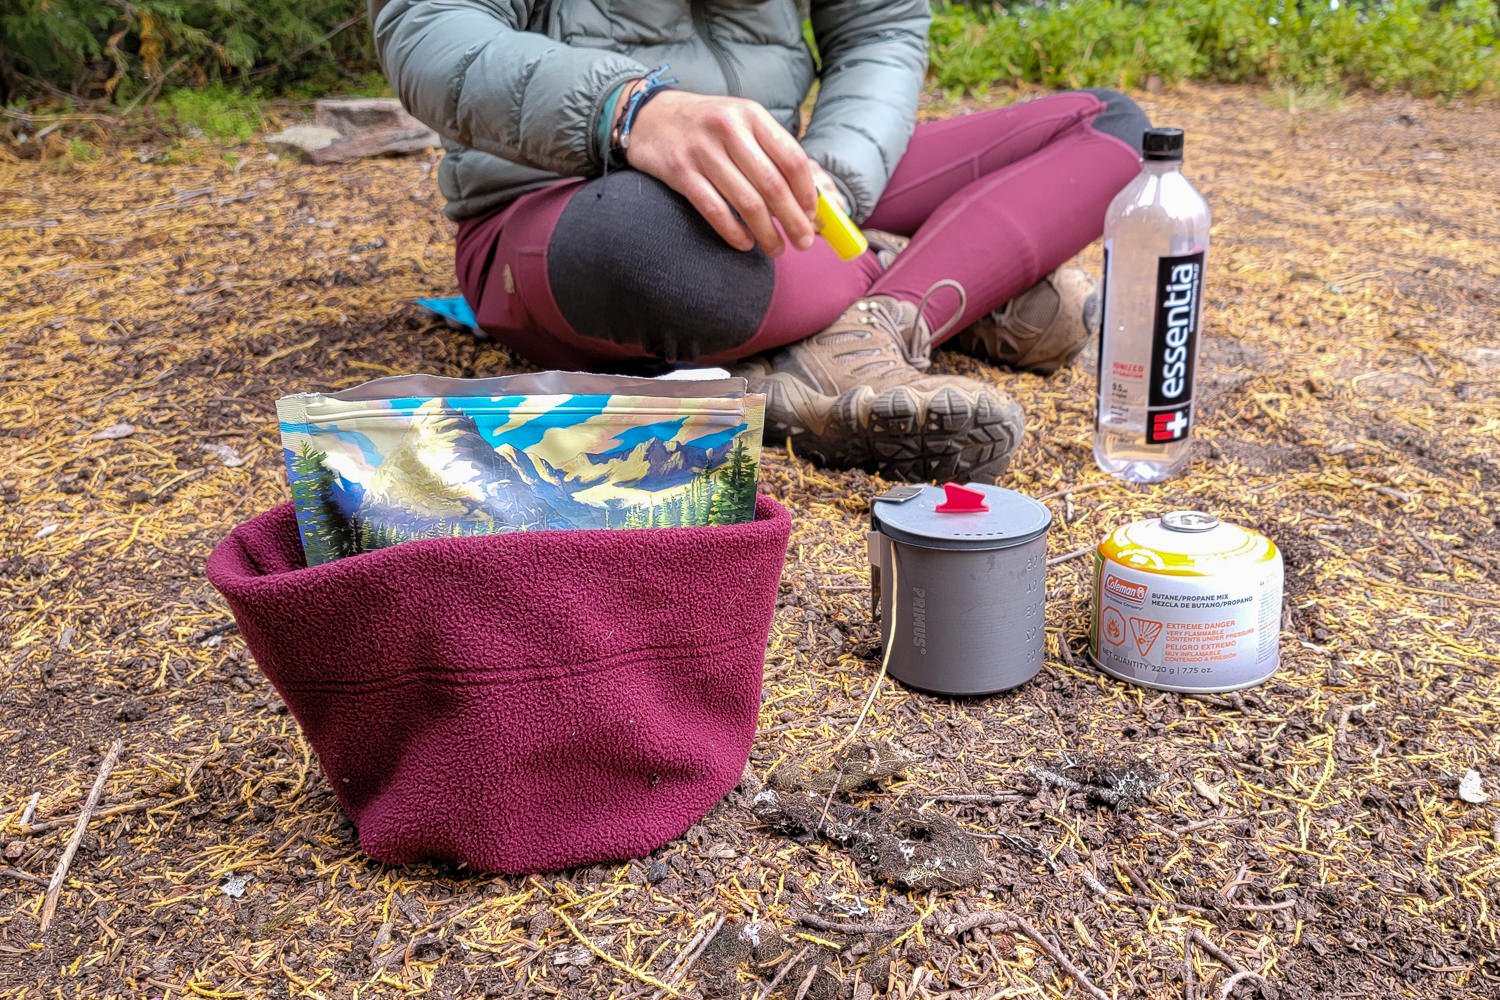
A small, lightweight bowl and a digital scale make portioning meals easy, especially since many dehydrated foods are tough to measure accurately with cups/spoons.
We’ve found that one meal 100-gram (dehydrated weight) is usually sufficiently filling for an average hiker, and 150 grams is satisfying for a large or very hungry hiker. Some go with a 1.7 lb a day approach, but so much depends on fitness, weight, terrain gains/losses/difficulty, and metabolism.
We recommend experimenting at home to find out how big you want your meals, since carrying out wasted food or going hungry is a major bummer. Keep in mind that it may not look like a lot in the bag, but when the ingredients rehydrate, they expand substantially.
To Measure Out Portions:
- Place a small lightweight bowl on your digital scale and power the scale ON
- If the weight of the bowl is being measured, press ‘TARE’ to zero it out
- Switch the mode to grams
- Slowly pour dried food into the bowl until you reach the desired weight
- Add the contents of the bowl to a Ziploc and move on to the next food – Aim for a ratio of ⅓ protein, ⅓ starch, and ⅓ sauce/vegetables, etc., for a total of about 100-150 grams
- Add spices or flavorings with measuring spoons
- Package condiment packets or anything extra to go with each serving in a small bag
Repackaging
It’s best to measure and repackage ingredients at home to minimize the number of wrappers and garbage you’ll have to carry on trail. Use heavy-duty Ziploc-style bags for short-term use (2 weeks or less), or vacuum-seal your meals for long-term storage and bulk meal preps.
Use a permanent marker to label your servings with the date, recipe title, and the approximate amount of water to add. Package small bags of toppings, condiments, oil packets, etc., with your meals so you don’t forget them.
Alternatively, mark the bags with reminders (example: “Add tortillas from freezer,” or “add tuna packet”).
The benefits of Vaccum-sealing
Vacuum-sealed meals are compact, low-odor, and the bags are durable enough to hold boiling water to cook your meals. Properly dried and vacuum-sealed meals last for months at room temperature, but they can also be kept in the freezer (stops all biological processes) until you need them for up to a year. If you plan on making quite a few dehydrated meals, it’s worth it to invest in your own vacuum-sealer, as well as a supply of vacuum-seal roll/bags.
Sealing tip
Pasta, rice, or other “sharp” ingredients may create pinholes in vacuum-sealer bags, allowing oxygen to enter and cause spoilage.
As a precaution, you can add a layer of parchment paper between the food and plastic on meals you suspect may cause problems. Simply measure a piece of parchment paper twice the length of your meal, fold it in half, and insert it into the sealable bag and seal.
Tips to Reduce Waste
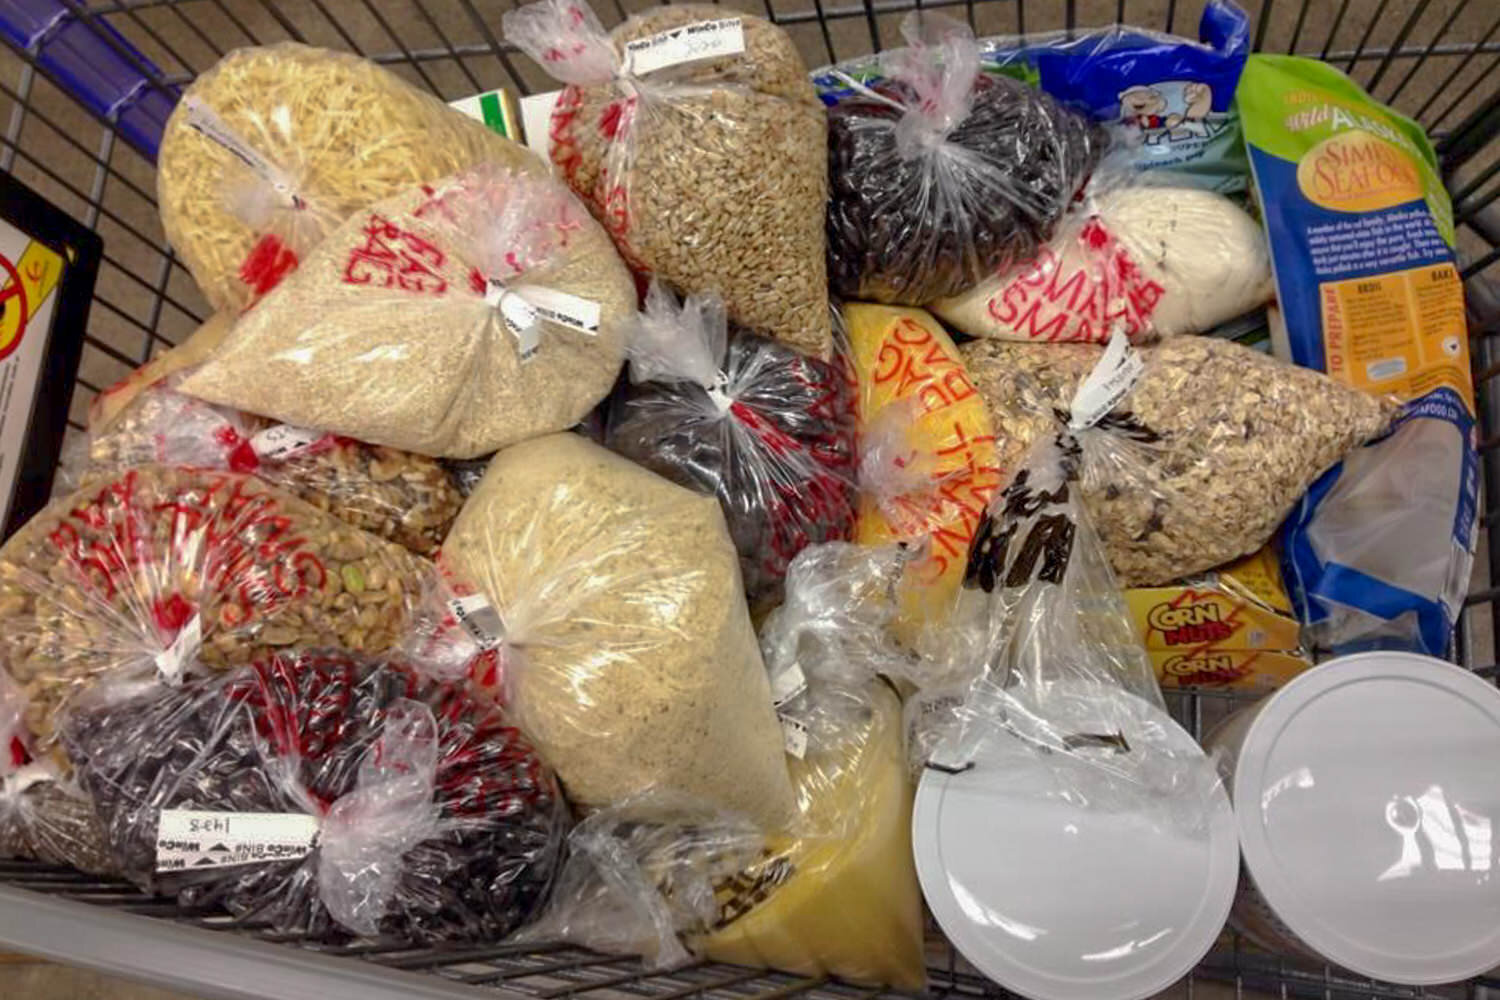
The most eco-friendly way to purchase ingredients for making backpacking meals is to buy in bulk.
Bring or buy reusable containers to purchase bulk foods whenever possible, and try to recycle packaging.
Wash lightly used Ziploc bags and dry them by hanging them upside-down (open) with a magnet on your refrigerator.
Option 1: Combine Dry Goods
A very simple way to start making your own backpacking meals without cooking is to buy pre-dried ingredients readily available at grocery stores. Blend proteins, starches, and spices together to create thousands of combinations. Look for quick cooking options to save time and fuel.
Dried foods Usually in grocery stores
- Instant grits
- Textured veggie protein
- Peanut butter powder
- Powdered milk
- Protein powder
- Cheese powder
- Powdered eggs
- Quinoa
- Real bacon bits (or make your own)
- Jerky
- Refried beans/black bean flakes
- Hummus
- Instant potatoes
- Instant rice
- Stuffing mix
- Dried fruit
- Dried vegetables
- Pasta/Ramen/Couscous/Rice noodles
- Mac and cheese
- Instant oatmeal (can be savory too)
Order online or in specialty stores
- Coconut milk powder
- Dried shrimp
- True Lemon
- True Lime
- Butter powder (try using it to make “bulletproof” coffee on strenuous trips)
- Textured Vegetable Protein
- Dried mixed vegetables
- Dehydrated Egg Crystals
Condiments to Carry or Pack With Meals
- Salt and pepper (packets or small refillable container)
- Oil in packets or a small container
- Ghee packets
- Soy sauce packets
- Hot sauce (perhaps in this neat keychain bottle or packets)
Protiens
Dried proteins are a bit tougher to find in regular grocery stores, but there are some excellent products that you can order ahead of time. First and foremost, if you can, source locally. Meat shares are a good way to go if you want to dehydrate your own jerky (jump to how to dehydrate meat).
Dehydrated refried beans and black bean flakes are also great, just don’t overdoodoo it.
There are options like Meat Shredz – packets of dried pulled pork – that are fairly lightweight, super tasty, and very convenient on the trail.
You can order freeze-dried meats from Mountain House. Buying freeze-dried meats can be a bit expensive, but they are usually a good value since they last almost forever, and you’ll get a lot of servings from a large can or pouch.
Heavy But Easy PROTEIN Additions
Another popular, but heavier protein option is to pack summer sausage, chicken, tuna, or salmon packets to add to meals on the trail.
Nut butters (also available in packets) are on the heavy side as well, but they pack a punch of healthy fat and complement dishes with delicious, rich flavor and creamy texture.
Easy-Prep Backpacking Recipes
All measurements in the following recipes are approximate, and ratios should be adapted to your preferences. The amount of water it takes to rehydrate these meals may also vary.
Also, many of the following recipes use meat as protein, but they can easily be adapted for vegetarians and vegans by substituting quinoa, nuts, nut butters, legumes, TVP, soy products, etc.
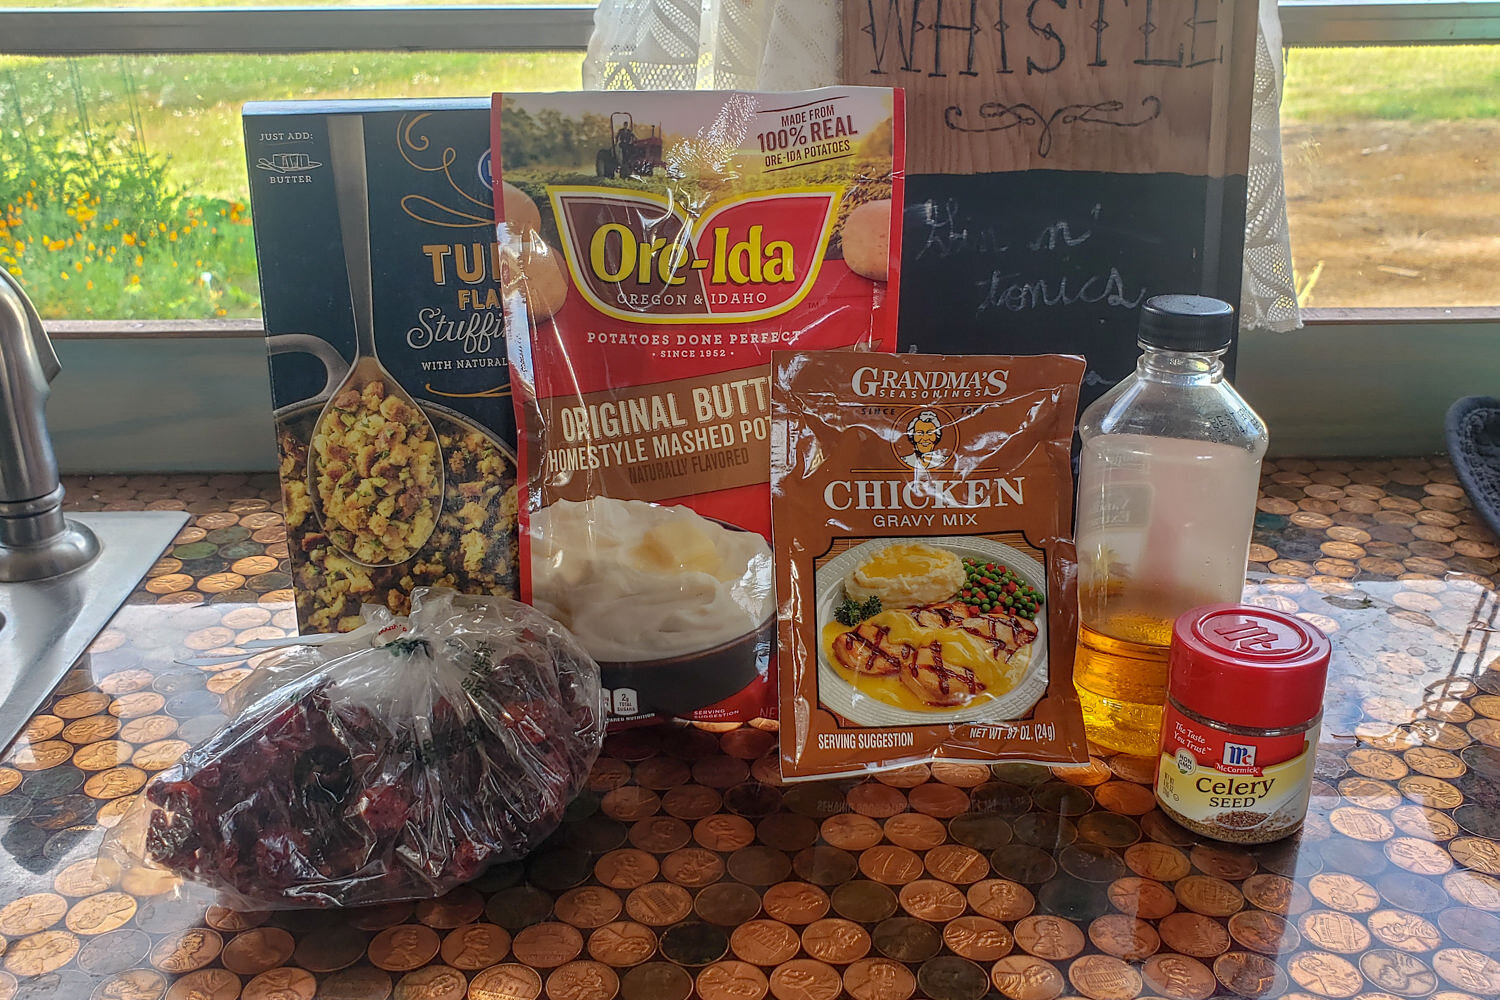
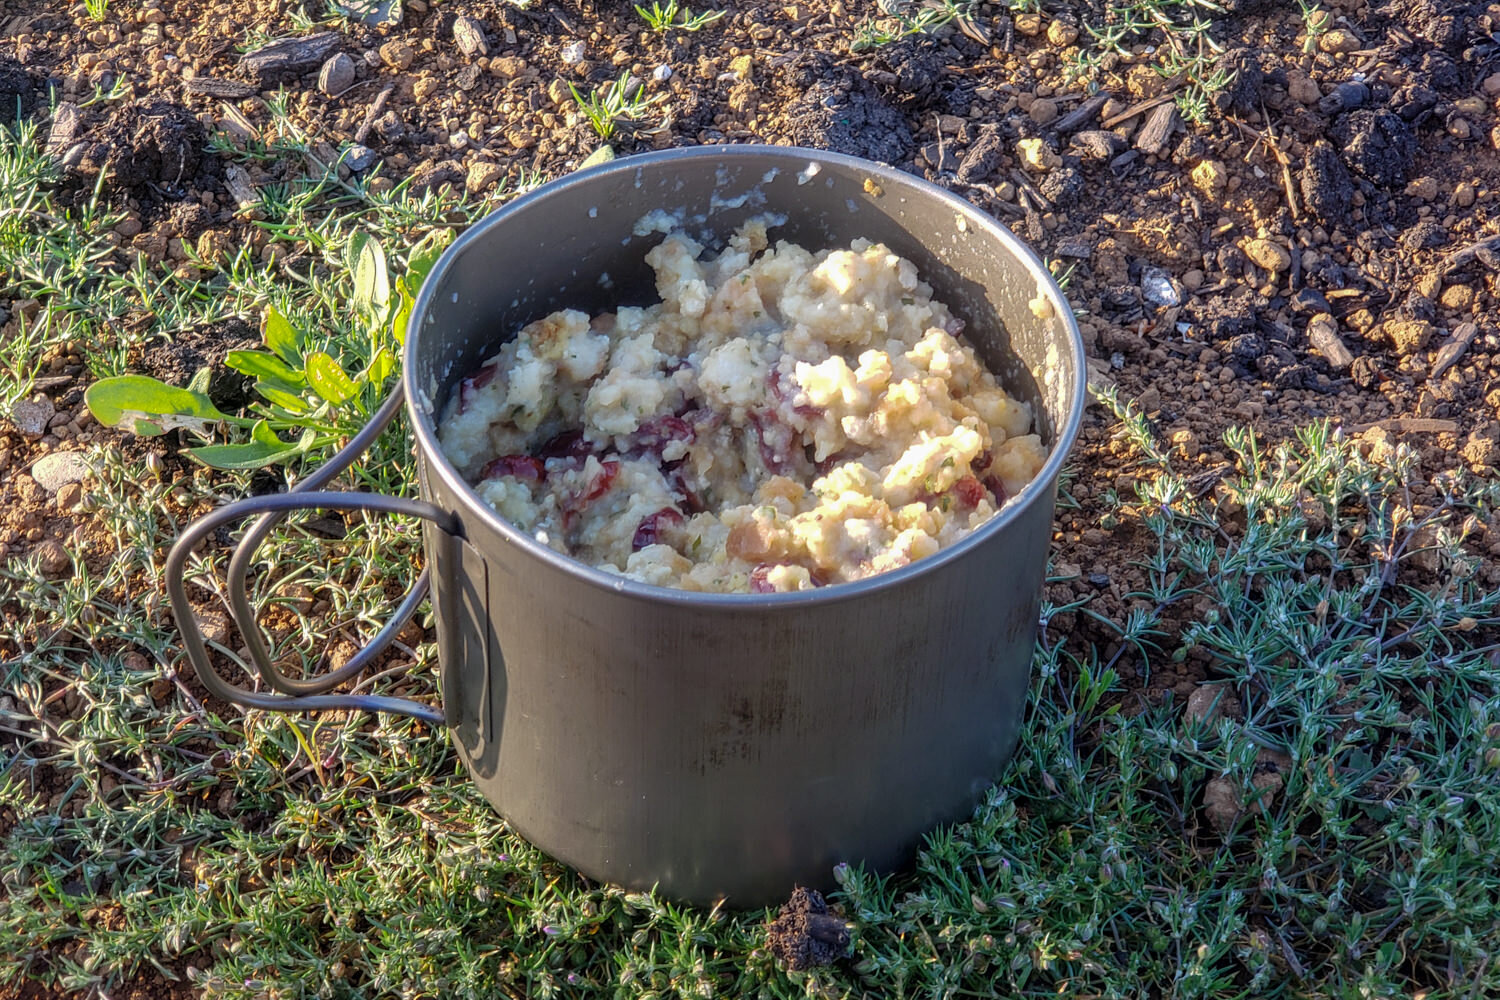
Backcountry Thanksgiving Recipe
At home, package:
- 30 g (about ½ c) stuffing mix
- 25 g (about ¼ c) instant potatoes
- 30 g turkey jerky (or dehydrated ground turkey/lunch meat)
- 35 g (about ¼ c) dried cranberries
- 1 Tbsp celery flakes OR ⅛ tsp celery seed – not salt (optional)
- 2 tsp gravy powder
- Oil or butter powder (optional)
- Makes: 1 serving
On the Trail: Boil about 1 ¾ c water, then turn your stove off. Add stuffing mixture to the pot and stir to combine. The water should just cover the mixture. Put the lid on your pot and place it in a cozy (or fleece hat). Wait about 10-15 minutes to make sure everything gets thoroughly rehydrated. Then check and see if a little more water or time is needed. Stir it up, and if desired, add a bit of oil or butter to replace some of the tasty fat lost in the dehydration process. Enjoy and give thanks for the beauty that surrounds you!
Notes: We love this hearty, savory meal as is, but if you want it a little less mushy, you can set the potatoes aside and cook them separately, or cook them in the same pot to the side. You can also add toppings like French-fried onions or sweet potato chip crumbles for a bit of crunch.
Rugged Mountain Glory Bacon And Grits Recipe
At home, package:
- 2 packets (total of about 56 g) Instant grits
- ½ Small bag of bacon bits (or dehydrated ham)
- 1 Tbsp Parmesan cheese (or fresh hard cheese/cheese stick)
- Oil or butter (optional)
- Makes: 1 serving
On the Trail: Boil about 1 ¼ c water, then turn your stove off. Add everything to the pot and stir to combine. The water should just cover the mixture. Put the lid on your pot and place it in a cozy. Wait about 10-15 minutes to make sure everything gets thoroughly rehydrated. Then check whether a little more water or more time is needed. Stir it up, and if desired, add a bit of oil or butter, along with hot sauce. Enjoy!
Notes: If using dehydrated ham, pack it in a small, separate bag and pre-soak it in water to help it begin to soften while you’re still hiking into camp. Boil the water, then add the remaining ingredients as described above. You can also add a splash of color and herbal flavor by adding a tsp of dried green onions or parsley.
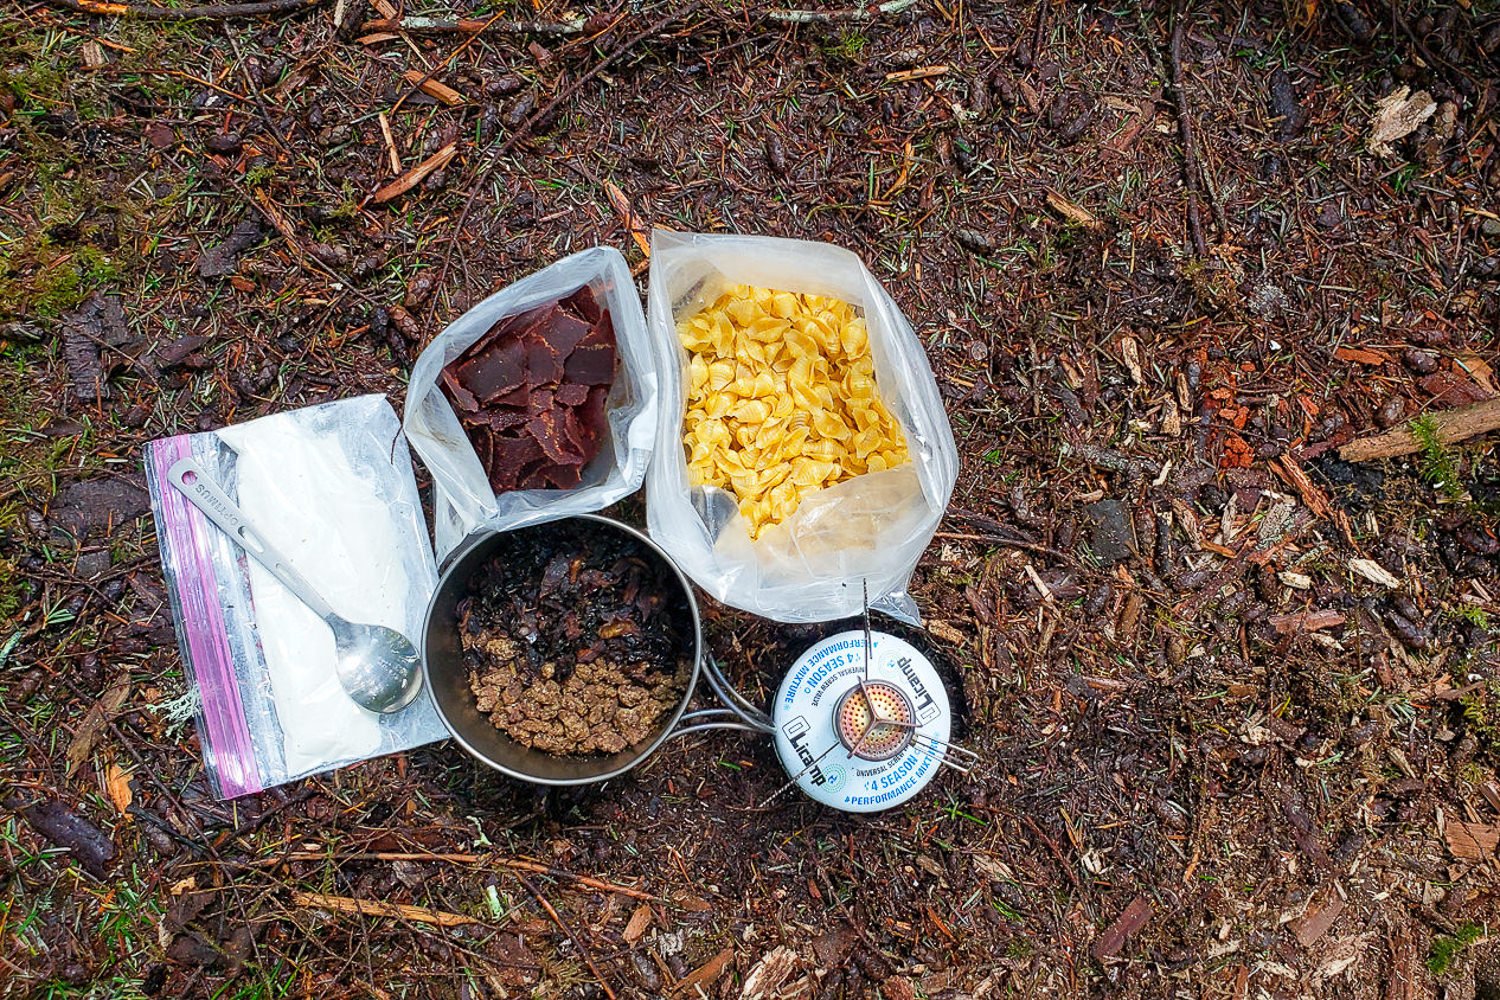
Backpacker Beef Noodle Soup Recipe
At home, package:
- 1 tsp vegetable, beef, or chicken bouillon powder
- ¼ c dried vegetables
- 1 block (about 50 g) ramen noodles
- About 25 g low sodium natural jerky
- Makes: 1 serving
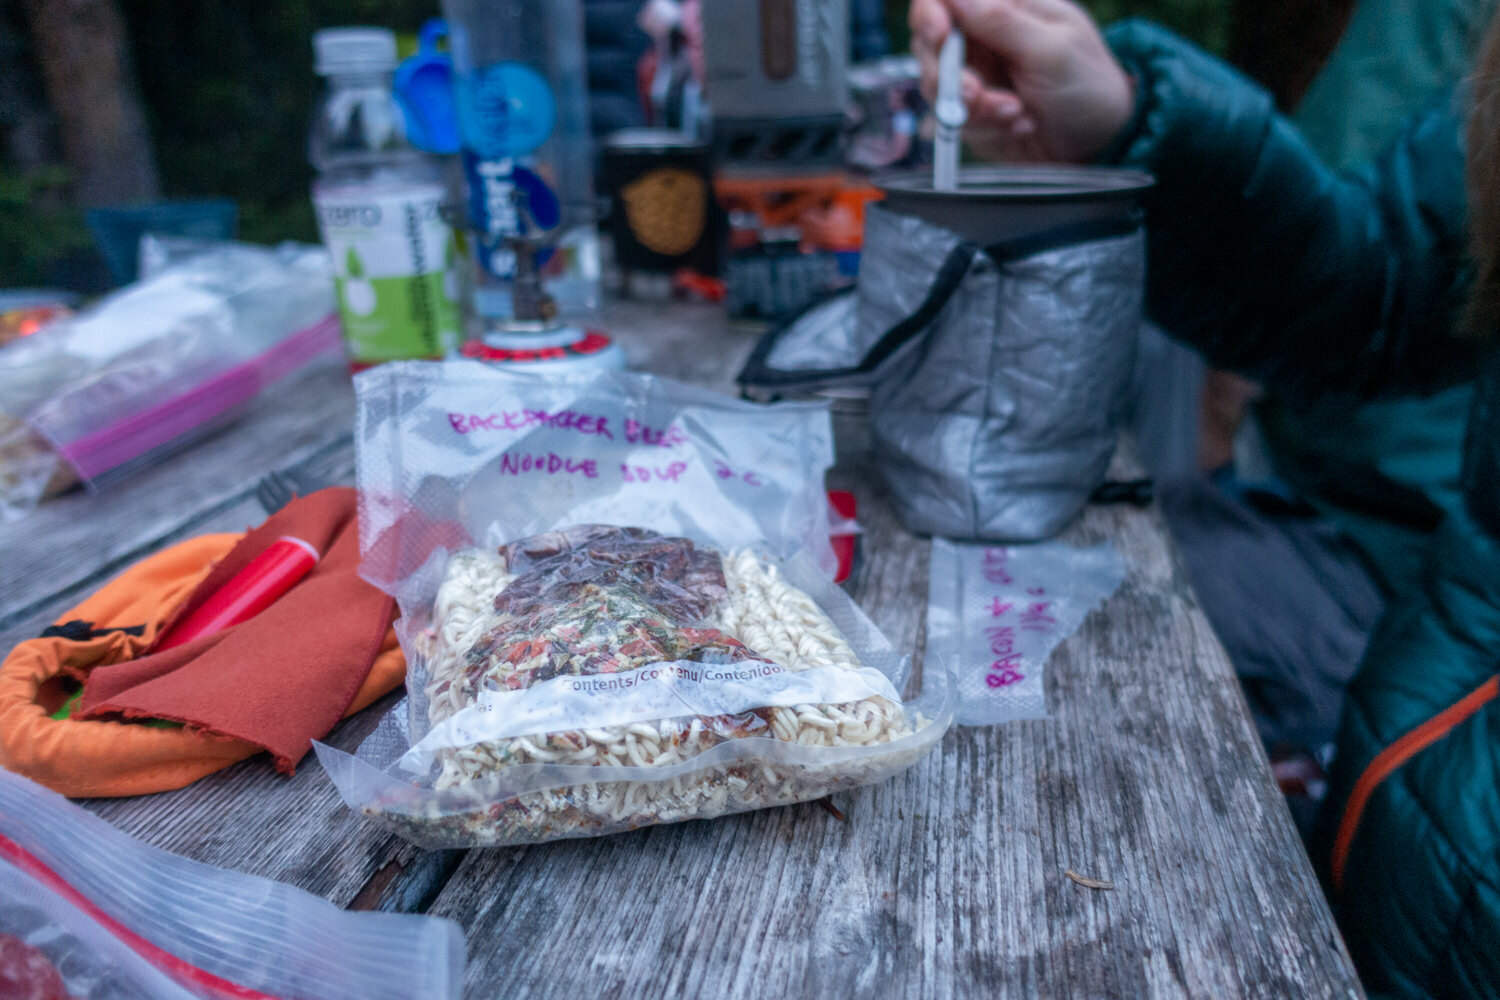
On the Trail: Boil about 2 ½ c water, then turn your stove off. Add everything to the pot and stir to combine. Put the lid on your pot and place it in a cozy. Wait about 10-15 minutes to make sure everything gets thoroughly rehydrated. Then check whether a little more water or more time is needed. There should be a little extra liquid for a soup-like consistency. Stir, and if desired, add a bit of oil, butter, or hot sauce. Enjoy!
Notes: To make this meal feel more gourmet, pack a teaspoon or more of sesame seeds in a small bag and sprinkle them over the noodles after cooking.
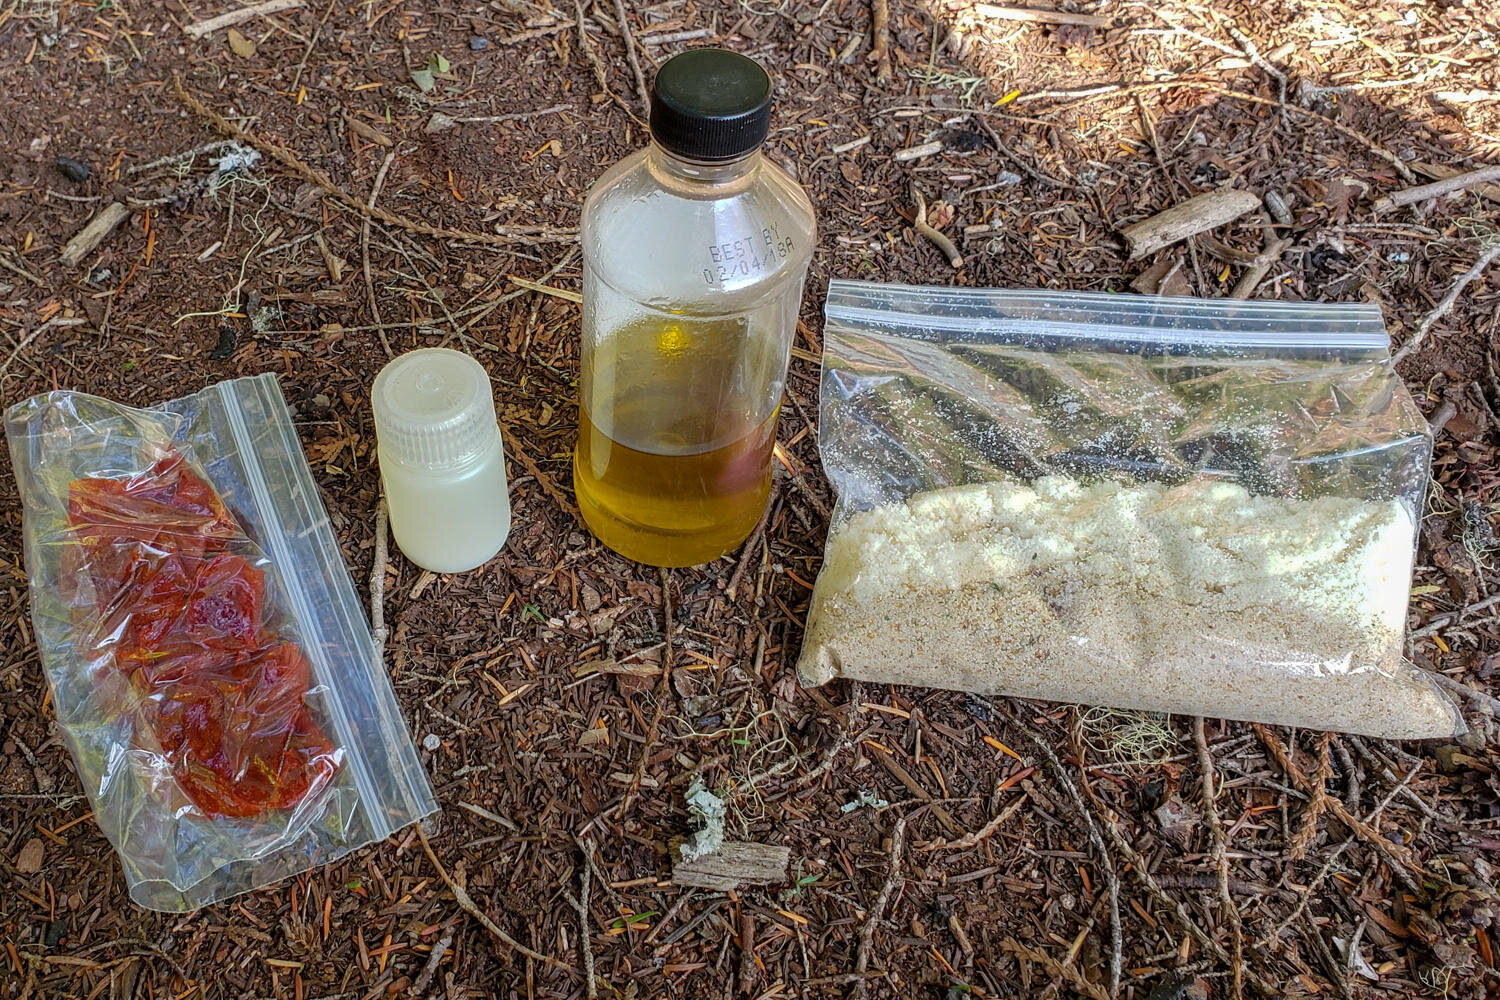
Piñon Pasta Recipe
We love this combination of pungent citrus with comforting pasta and sweet, buttery pine nuts. Pine nuts have more than just a delicious taste. They provide loads of protein, fat, and nutrients for this vegetarian meal.
At home, package:
- 2 True Lemon packets
- 1 tsp Dried parsley
- ½ tsp Garlic powder
- 2nd bag:
- 2-3 oz. (diameter of a quarter) angel hair pasta
- 3rd bag:
- 1-2 Tbsp Olive oil (single-serve packet or small bottle)
- Salt and pepper to taste
- Handful of sun-dried tomatoes (chopped into small pieces)
- Handful of pine nuts
- Makes: 1 serving
On the trail: Boil a full pot of water, add salt, and cook your pasta according to package directions (angel hair takes about 4 minutes for al dente). Drain the pasta, saving the starchy liquid for a hot drink if you desire. Add the olive oil to the pasta and stir to combine. Next, add the lemon, herbs, and spices. Toss in the sun-dried tomatoes and pine nuts, season with salt and pepper to taste, and enjoy while it’s warm!
Miso Salmon Bowl
At home, package:
- ¾ c Instant white rice
- 1 Miso soup packet (with tofu and seaweed)
- 1 Salmon packet
- Makes: 1 serving
On the trail: Boil 2-2 1/2 cups of water, depending on how soupy you want your meal. Stir in miso and rice. Cover, turn off the heat, and insulate your pot while it sits for about 10 min. When the rice is soft and about half the liquid has been absorbed, stir in your salmon and enjoy the savory, brothy goodness.
Backpacker Shepard’s Pie
This delicious and healthy meal can only be described as backcountry comfort food. It leaves you full, warm, and ready for your sleeping bag.
At home, package:
- ½ c Dried ground beef (use mushrooms or TVP instead for vegetarian)
- 1-2 oz. Dried vegetables (carrots, corn, and peas are classic)
- 1 tsp Dried minced onion
- 1 small bouillon cube (beef or vegetable)
- ¼ tsp Powdered Worcestershire sauce (optional for more flavor)
- 2nd bag:
- ½ c Instant mashed potatoes (we like Buttery Homestyle Idahoan)
- 1 tsp Butter powder (optional for more flavor/calories)
- Salt and Pepper to taste
- Makes: 1 serving
On the trail: Boil about 2 ½ c water. Reduce the heat to low and pour 1 c of hot water into a bag with the instant potatoes and butter powder (if desired), then stir, seal, insulate, and set aside. With your pot back over the heat, drop the bouillon cube into the remaining water to dissolve. Then stir in ground beef, vegetables, onion, and worcestershire. Simmer for a minute or two. Remove the pot from the heat and allow the mixture to sit, keeping it insulated for about 10 minutes. Once the liquid has been absorbed and the meat is soft, spoon mashed potatoes over the mixture and spread in a thick layer. Add salt and pepper to taste and enjoy!
Savory Oats
Try this satisfying new spin on oatmeal if you dare. It’s wholesome, healthy, and delicious. It makes an excellent hearty breakfast, but it’s also great as a warming evening meal.
At home, package:
- ½ c old-fashioned rolled oats
- 1 small chicken, beef, or vegetable bouillon cube (or ½ of a large one)
- Dried veggies of your choice (we like tomatoes, green onions, and mushrooms)
- 1 tsp Dried herbs (parsley, thyme, basil, rosemary, cilantro, etc.)
- Pinch Black pepper
- 2nd bag:
- 4 Tbsp Ova Easy Egg Crystals (2 eggs)
- 3rd bag:
- 1 Tbsp Olive oil (to cook the eggs)
- Parmesan cheese (optional topping)
- Hot sauce (optional)
- True Lemon packet (optional)
- Makes: 1 serving
On the trail: Boil 1-½ cups of water, depending on how many veggies you’re adding and how ‘brothy’ you want your oats to be. It’s better to have a bit of extra liquid than not enough for this meal. Drop the bouillon cube into the boiling water and stir until dissolved. Add the oats, veggies, and spices, then stir well and cover. Turn off the heat and insulate your pot while it sits for about 10 min. Meanwhile, mix the egg crystals with 6 Tbsp of water in a plastic bag. Heat the oil in another pot, then cook the eggs over low heat, stirring constantly until solid. Stir your oats, then add the scrambled eggs and toppings. True Lemon and a bit of salt help to bring out the flavors and give it a pop of freshness.
Notes: If you don’t have two pots to work with, you have options. You can make the eggs first and set them aside in a cup or bag while you cook the oats. Or you can cook your oats first, then pour them back into your sealable bag to soak in their broth mixture (just make sure it’s a heavy-duty freezer Ziploc-type bag that can take the heat!)
The Hiker Hunger Super Snack
This combo might look a bit odd at first, but if you’re adventurous and you like salty and sweet together, this just might be your new favorite calorie-bomb on the trail. It packs a punch of carbs, fat, protein, sugar, and salt in every bite. The super snack came to fruition on our Continental Divide Trail thru-hike to combat cravings and hiker hunger.
At home, package:
- 1 Rice crispy treat (bottom)
- 1 Nut butter packet (middle)
- Summer sausage slices (top)
- Makes: 1 serving
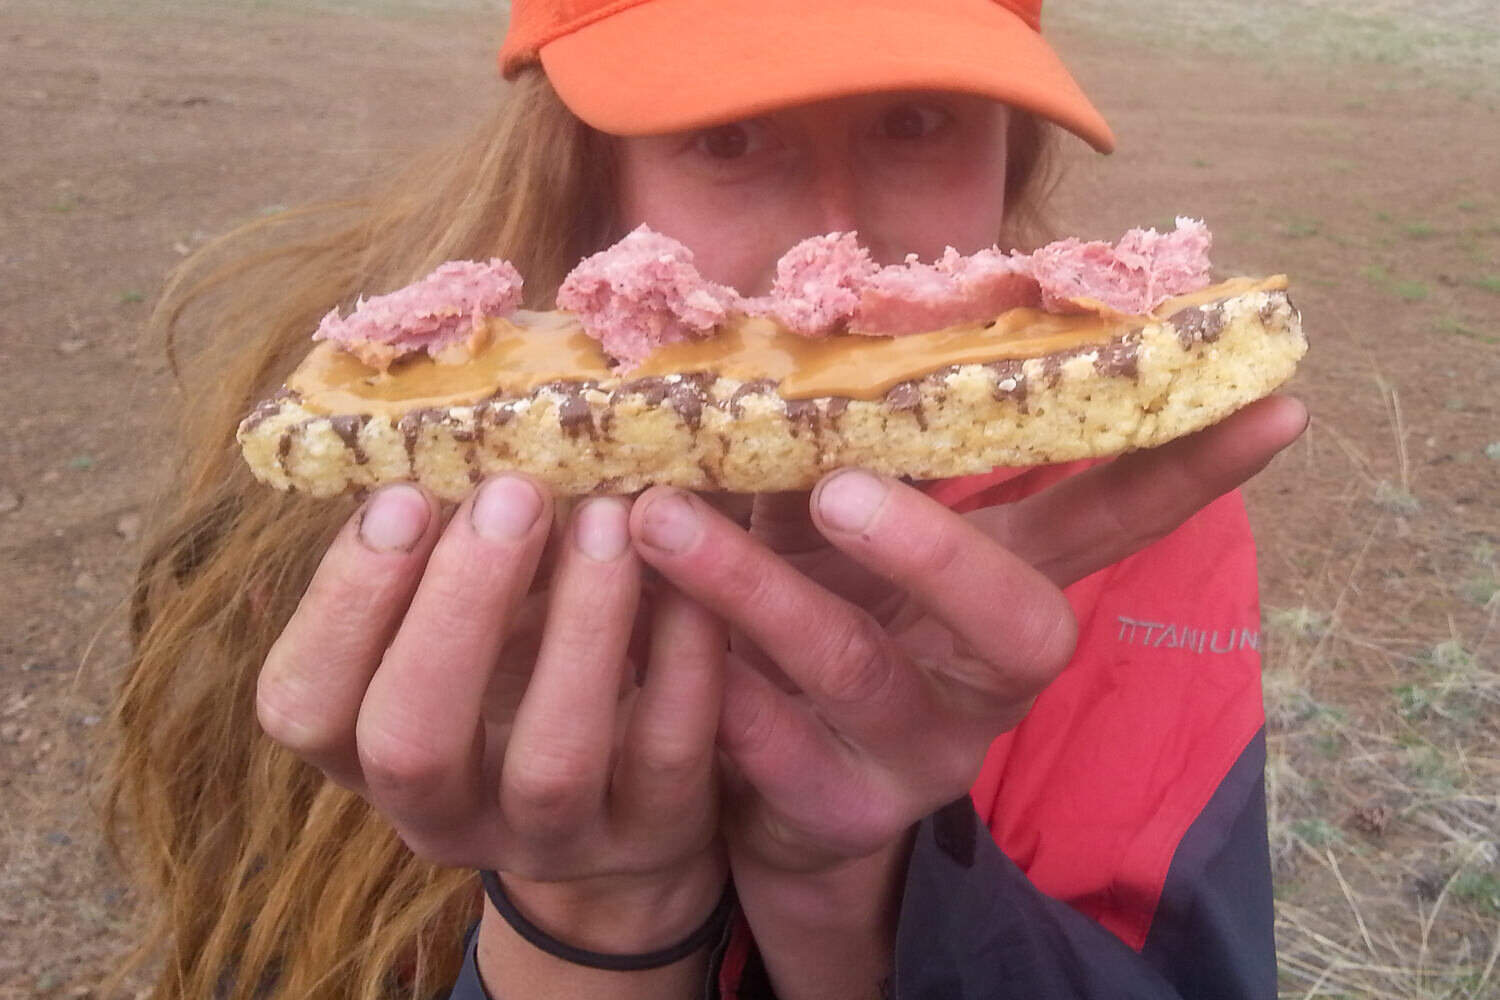
On the trail: Layer the ingredients one on top of the other
The Backpacker Elvis
Elvis Presley didn’t shy away from decadence, nor do we when we’re putting in big-mile days on the trail. We modeled this absurd, but delicious concoction after Elvis’s famous favorite sandwich after trying it in Graceland.
At home, package:
- 1 Tortilla or bagel
- 1-2 Peanut butter packet
- Banana leather
- Bacon jerky or vegan jerky (optional for extra protein)Makes: 1 serving
On the trail: Layer the ingredients one on top of the other
Notes: Bacon jerky and banana leather are usually pretty soft and chewy to start with, but if you want to soften them up a bit more and make them easier to bite through, add a very small amount of water to a bag and let the meat and banana pre-soak in a warm place for a few minutes before you make your wrap.
Option 2: Dehydrating & Assembling Meals
Using a food dehydrator to dry your own ingredients will open up a world of variety where your culinary imagination is the limit. Dehydrating can be a lot of fun for those who enjoy cooking, but making your own meals and lightweight snacks doesn’t have to be complicated. Start with the basics, like raw fruits and vegetables, and add to your repertoire from there.
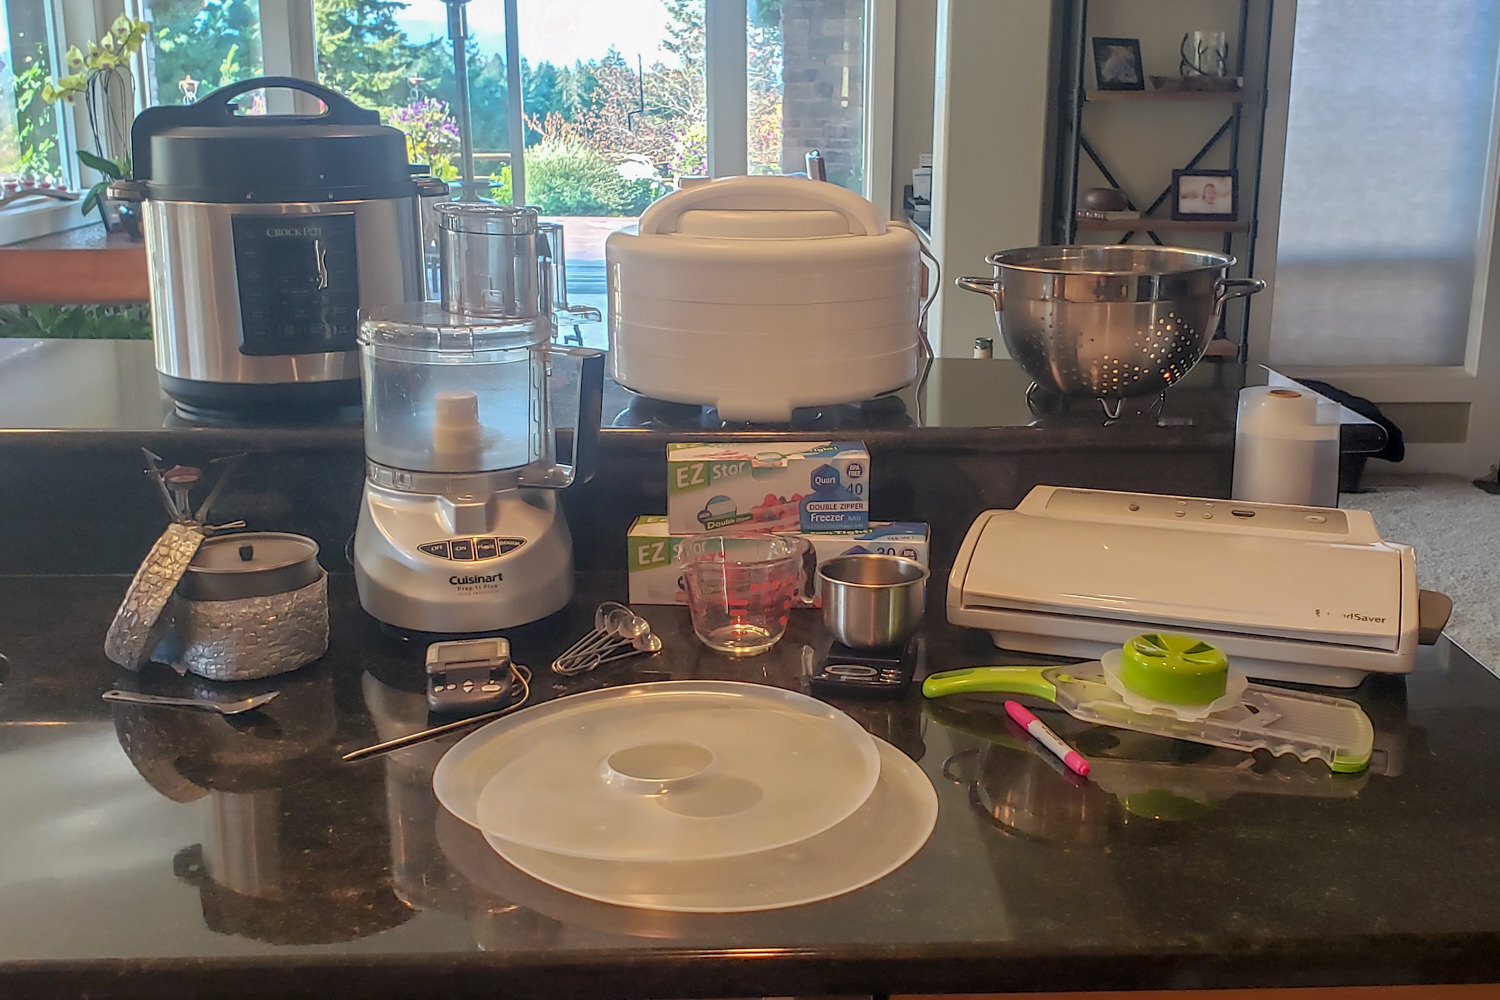
Tools for DIY Backpacking Meals
- Plastic tray liners / fruit roll sheets
- Tray screens (optional)
- Extra dehydrator trays (optional)
- Measuring cups/spoons
- Cooking utensils
- Digital scale (optional)
- Small lightweight bowl (for scale)
- Ziploc bags (various sizes)
- Vacuum-sealer (for long-term storage)
- Vacuum-seal roll / bags
- Pots / pans
- Strainer
- Parchment paper
- Permanent marker
- Mandoline slicer (optional but a game-changer)
- Food processor (optional but a game-changer)
- Meat thermometer (optional)
- Instant-Pot (optional)
- Backpacking cookpot (see our guide to the best cooksets)
- Backpacking stove (see our guide to the best stoves)
- Pot cozy, or fleece hat
- Food dehydrator
How to Dehydrate fruits and vegetables
There are lots of different styles of food dehydrators on the market and they range from budget to high-end, but a basic one is all you need to get started. If you love dehydrating and get really into it, you can always upgrade later. Brands we’ve used and recommend are: NESCO and Excalibur.
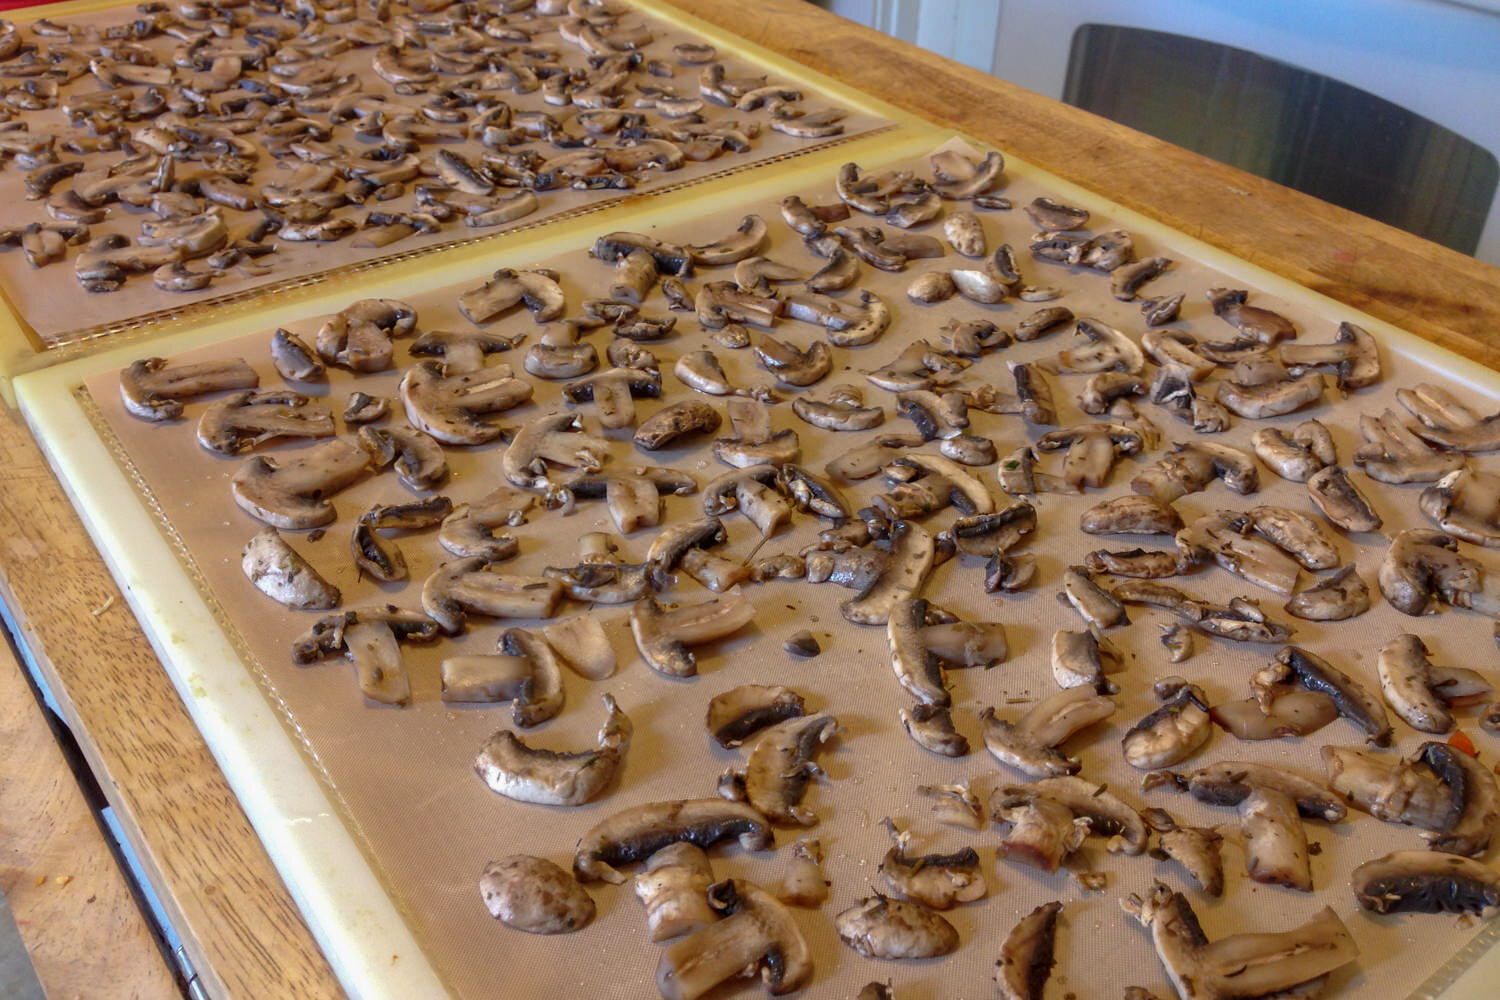
- Thinly slice raw fruits and vegetables as evenly as possible for fast and consistent drying. A mandoline slicer comes in super handy for this and perfectly slices produce like: potatoes, beets, carrots, onions, mushrooms, apples, strawberries, kiwis, etc.
- Lay the fruit/veggie slices on the dehydrator trays in a single layer
- Change the temperature setting on your dehydrator to 135°F and dry for several hours
- Turn them over partway through the drying process so that they dry evenly
- When the slices are completely dry, remove them from the trays and toss them into a sealable bag or container. Label them (description and date), and stick them in a cool dry place (or the freezer) until you’re ready to assemble them into meals.
How Long? The dry time will depend on the moisture content and the thickness of the slices. Check every hour or so, but don’t worry too much — it’s tough to over-dry fruits and vegetables. If you want fruit “leather, “ stop sooner.
Produce that needs special attention
- Apples, Pears, and Bananas: Some fruit turns brown when exposed to air, but browning can easily be prevented by using a very sharp knife and dipping/brushing the cut fruit in lemon juice (or any juice high in citric acid) before drying. If your fruits do oxidize, they are still very edible – they just look a little less appetizing.
- Leafy Greens: Steaming or blanching leafy greens before the dehydration process will help ensure you get all of the vitamins and minerals from the greens.
- Mushrooms: You may rinse them to remove dirt, but make sure to dry them with a paper towel before the dehydration process begins to preserve their natural color. They may get darker after dehydrating, but also really tasty.
- Blueberries: To allow them to dry properly, submerge them in boiling water for 15 to 30 seconds to crack their skins, then pull them out quickly. A fine metal strainer makes this easy.
- Low-Acid Vegetables and Fruits: Some foods, like beets and potatoes, taste better if you steam or saute them before dehydrating. If you wouldn’t eat something raw, cook it first to make it more palatable (and easier to digest).
How to dehydrate meats
Learning to dry your own meat doesn’t have to be scary. Lean meats, properly cooked, dehydrated, vacuum-sealed, and stored, can last for months without going bad. Dehydrating your own meats drastically reduces the cost of buying freeze-dried proteins to add to your backpacking meals and reduces pack weight significantly by replacing much heavier “packets” of tuna, salmon, and chicken.
Keys to Meat-Drying Success
- Use lean meats (excess oil and fat cause meat to go bad)
- Add breadcrumbs to ground meats while browning to help them absorb water later
- Use canned or pressure-cooked chicken (an Instant-Pot speeds the process)
- Slice cooked meats thinly (lunch meats work great)
- Dehydrate meats separately from other ingredients for best results (meat needs a higher temperature.)
How Much to Make
Because it’s easiest, we prefer to cook and dehydrate entire packages of meat or whole fruits and veggies, then use them to make an array of meals (or several servings of the same meal).
Use a fresh-to-dry equivalency chart to estimate how much of a fresh product you need to start with to end up with an approximate amount of a dry ingredient for specific meals, but there’s always a little guess-and-check involved.
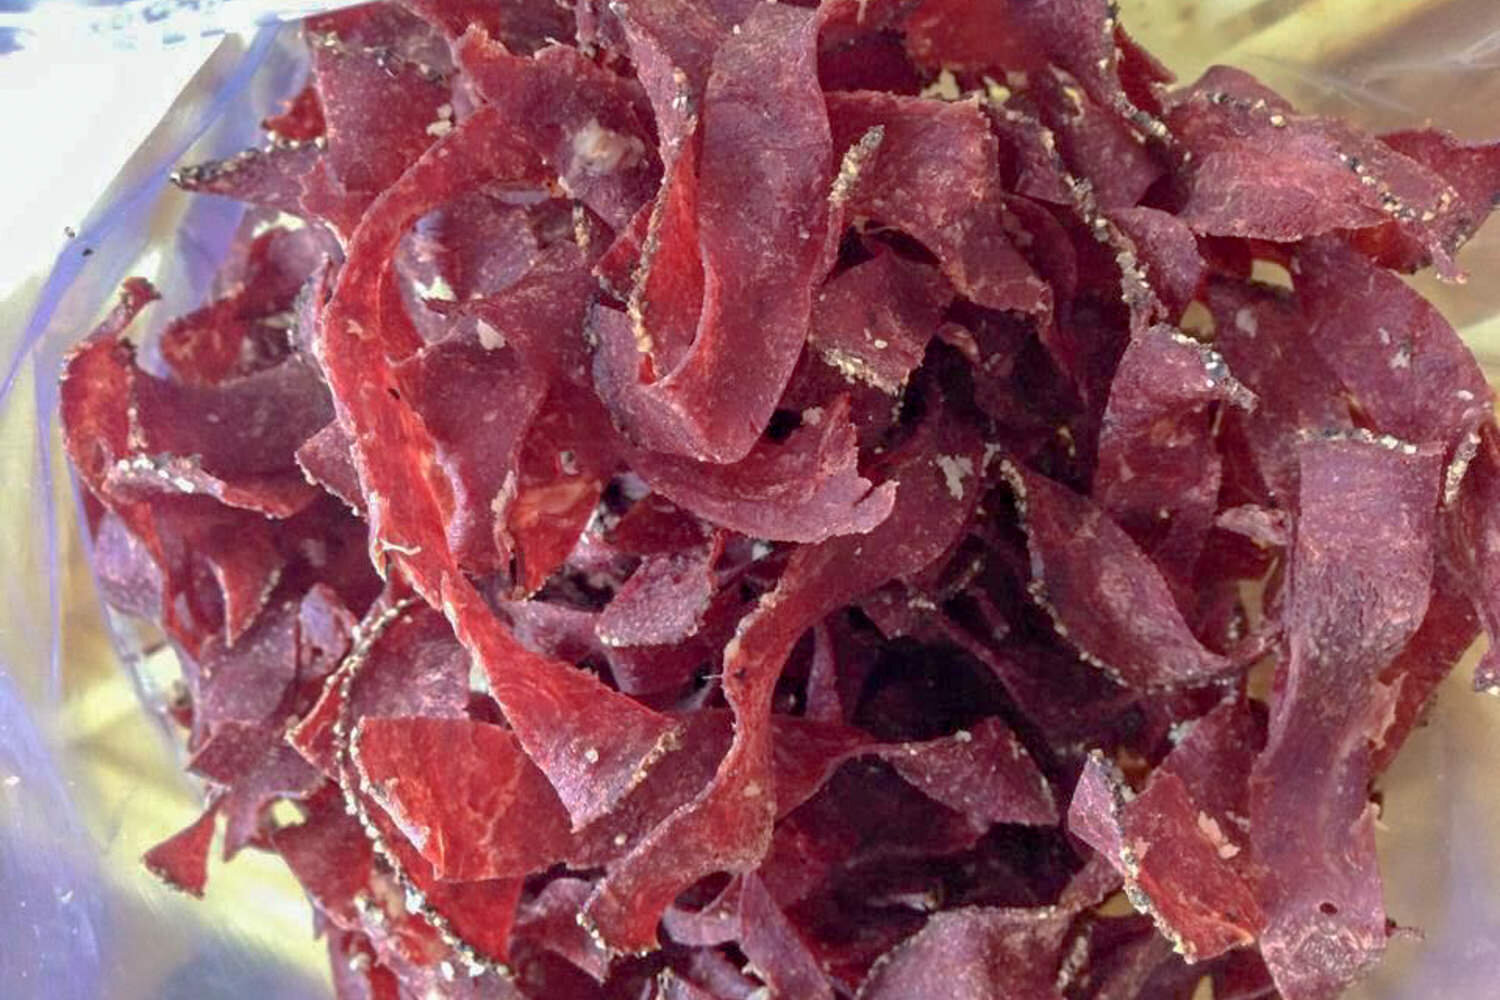
How to make jerky
- Choose a lean cut of meat
- Remove skin and bones (for poultry)
- Important: Trim the visible fat off and discard any membrane tissue (fat doesn’t dry well and can turn rancid)
- Cut into thin strips or slices, no more than ¼ inch thick (a mandoline is handy for this)
- Marinate for 6–12 hours in the refrigerator
- Pre-cook meat by either roasting or steaming until the internal temp. is 160–165°F (destroys bacteria before drying)
- Rinse the meat and spread on dehydrator trays
- Dehydrate at 160°F for 4–6 hours or until dry (it should be leathery or partly brittle when done)
- Store in Ziploc bags with the air removed or vacuum-seal
- Store in a dry, dark place at room temperature for up to 2 months or freeze for a longer shelf life
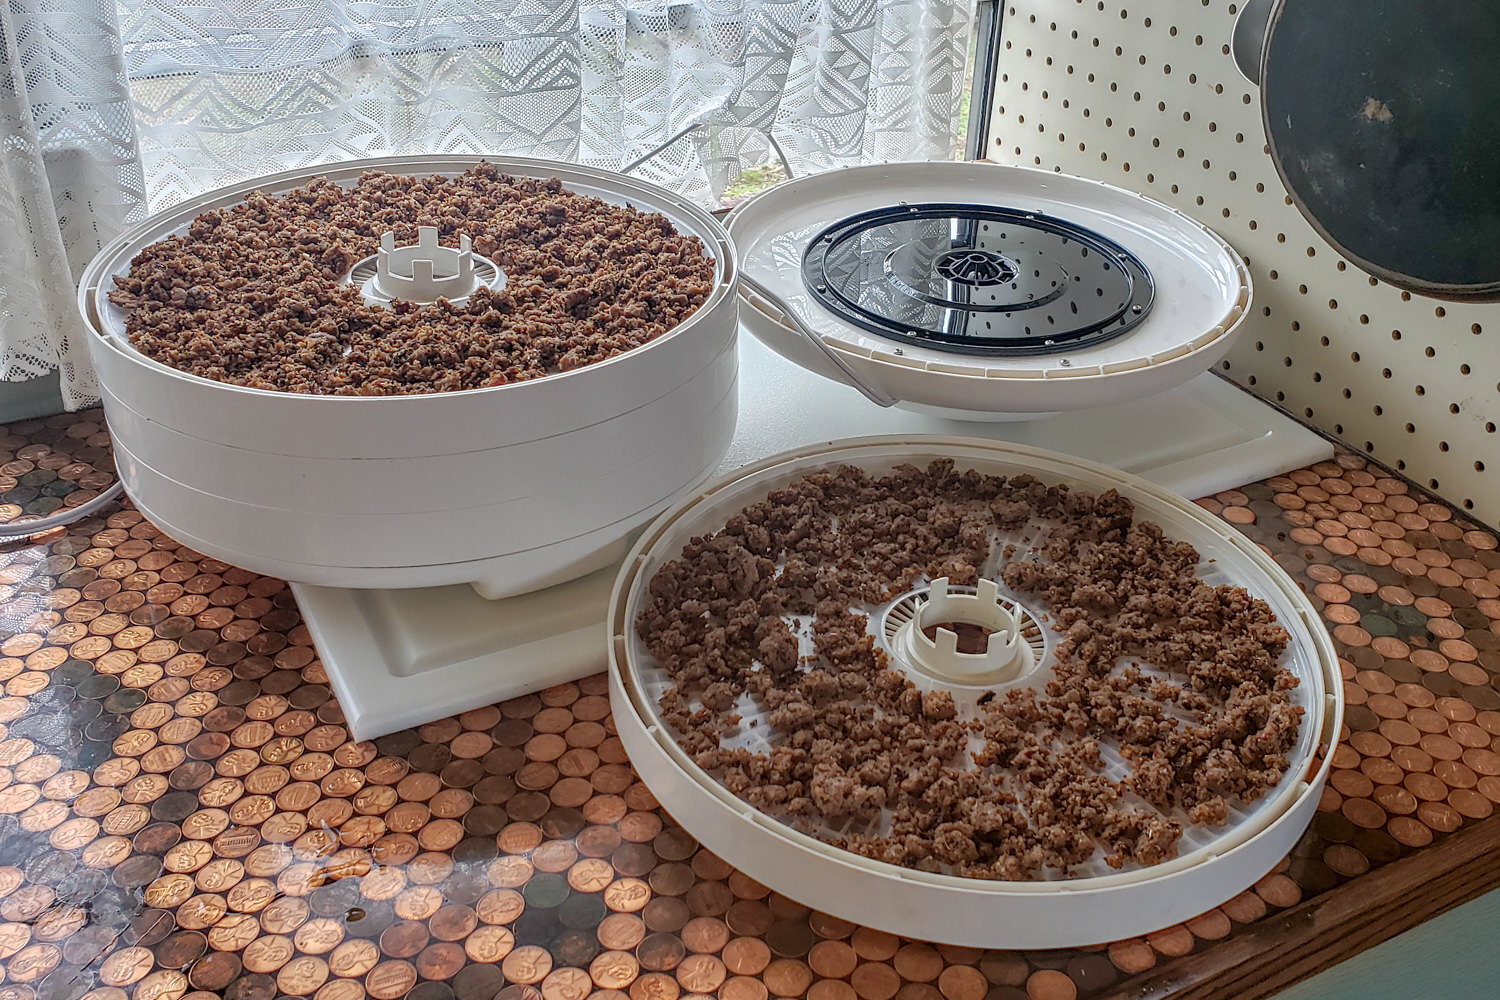
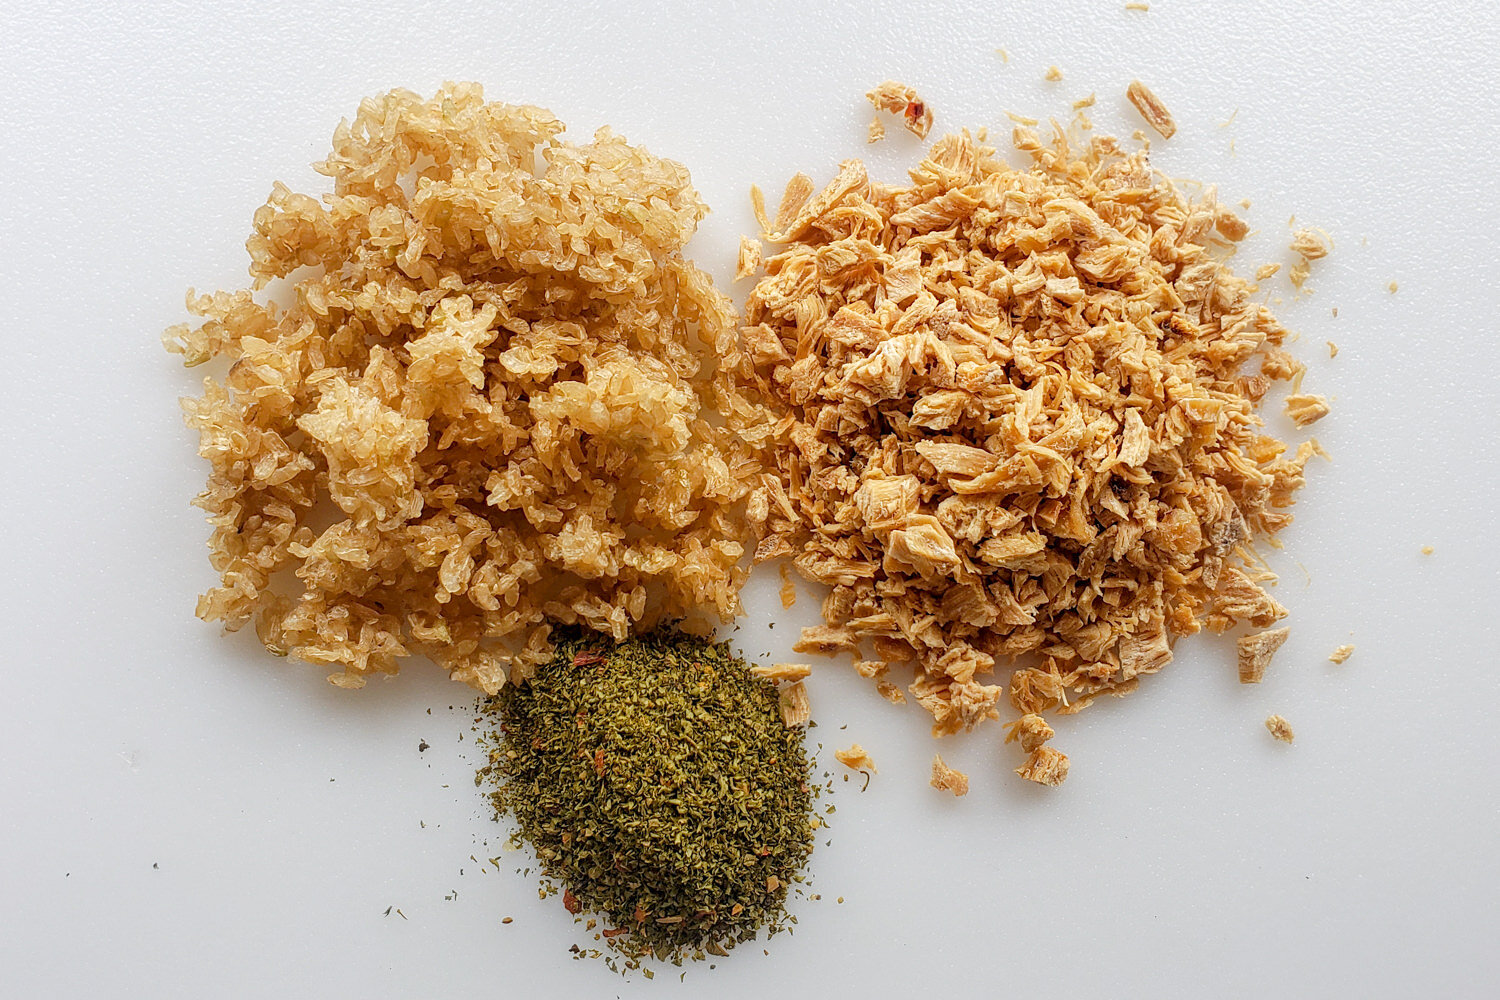
How to dehydrate ground meats (Beef, turkey, lamb, etc.)
- Choose the leanest meat available (7-15% fat). A pound of ground beef yields about 2 ½ cups (or 5-50 g servings) dried.
- Use hands to combine breadcrumbs with raw meat to help it rehydrate properly (about ½ c bread crumbs per pound of meat)
Note: If you are drying ground meat for long-term storage over 1 year, leave out the bread crumbs as they retain a small amount of the fat from the meat, but they won’t rehydrate nearly as quickly and will require boiling.
- Brown the meat in a skillet (with as little oil as possible) breaking it into fine pieces
- Add seasonings as desired (or add spices to individual meals later)
- Transfer meat to a strainer and rinse with hot water to remove as much fat and oil as possible and let drain
- Spread cooked ground meat on dehydrator trays covered with non-stick tray liners or parchment paper
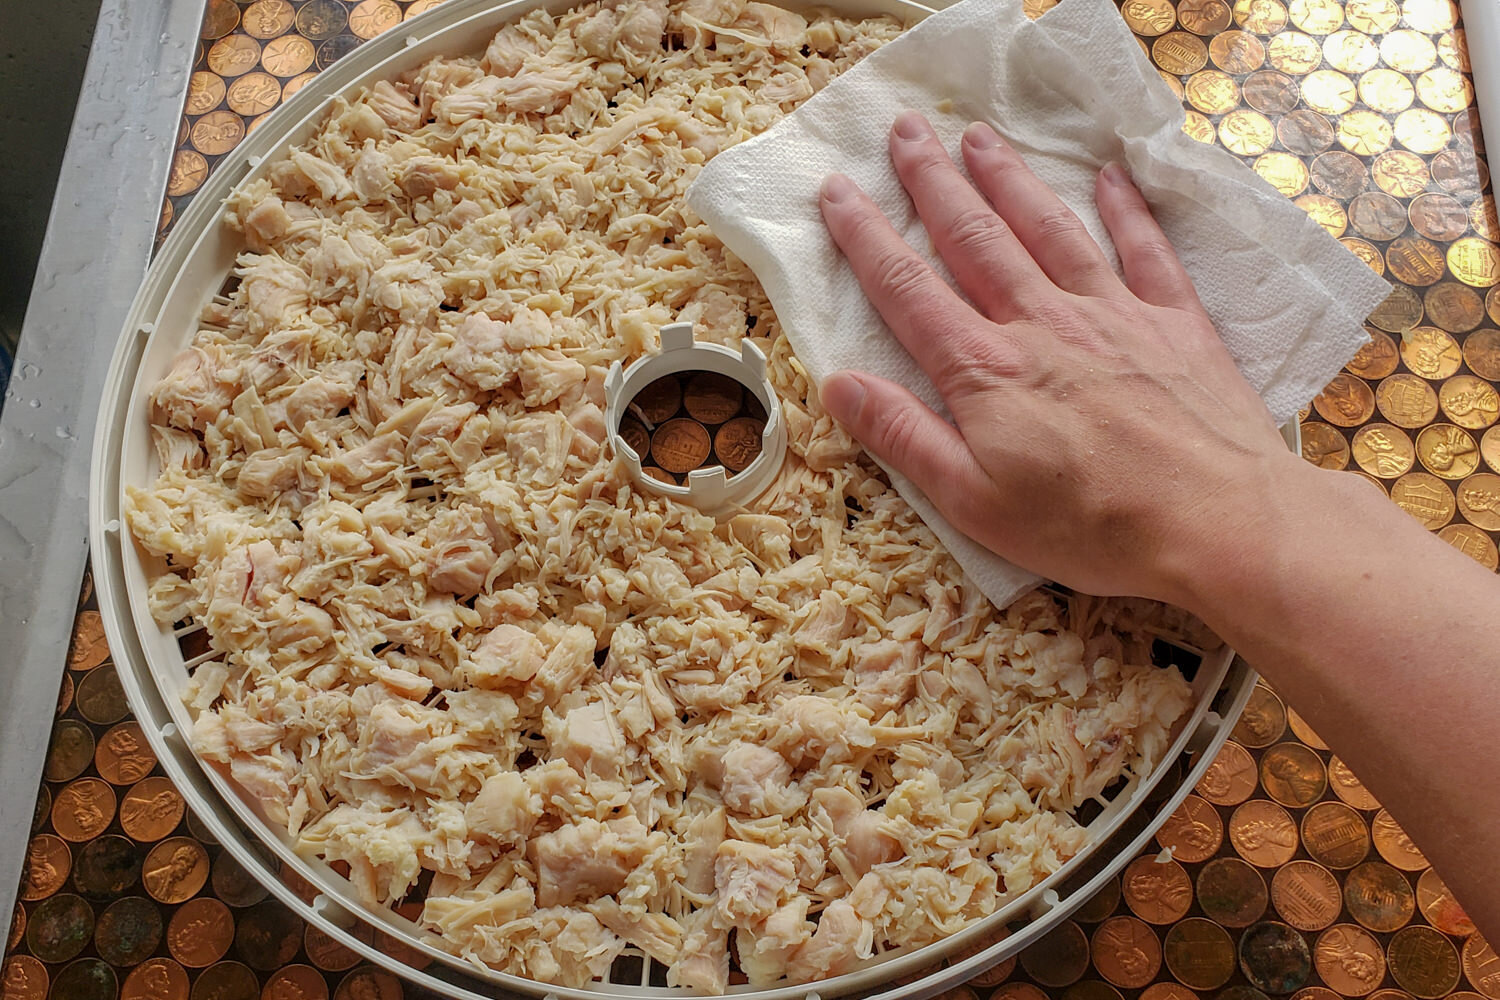
- Dehydrate at 160°F for 4–6 hours until completely dry and brittle (blotting excess oil off with a paper towel during the process)
- Immediately assemble into meals or store in Ziploc bags/sealed containers in a dry, cool, dark place for up to two months. Vacuum-seal or freeze meat or assembled meals for longer shelf life.
Tip: When removing dried food from the freezer, allow it to return to room temperature before opening the container to keep condensation from forming on the food.
Chicken and Poultry: Chicken can turn rock-hard with dehydration and be especially difficult to rehydrate in backpacking meals, however, canned chicken is an exception. Follow steps 5-8 above to dry canned chicken or consider pressure cooking your own to save money. If you plan to prepare a lot of meat (including chicken) for backpacking meals, you may want to invest in an Instant-Pot, which cooks fall-off-the-bone, soft shredded meat in about 15 minutes. A pound of fresh chicken yields about 2 cups (or 4-50 g servings) dried.
Lunch Meats: Lean deli meats like ham, roast beef, and turkey are really easy to dehydrate and make excellent additions to backpacking meals. Simply cut them into thin strips and dry them at 160°F for about 6 hours, flipping once. Follow the same storage protocol above.
Tuna, Shrimp, and Seafood: We recommend dehydrating this stuff in your garage or outside since they get pretty stinky. Use solid white tuna packed in water (fattier varieties of tuna and tuna packed in oil won’t dry as well) or pre-cooked, peeled shrimp with tails off (thawed from frozen). Break tuna, shrimp, or other seafood up into small pieces and spread out in a single layer on non-stick tray liners to keep small pieces from falling through. Dehydrate at 160°F for about 6 hours or until crispy.
Moderately Involved-Prep Recipes
Cured Cashew Couscous
At home: Thaw, steam, and dehydrate frozen peas or other vegetables at 135°F for 4-6 hours.
Add to a gallon-size Ziploc:
- 25 g (about ¼ c) dried vegetables (peas, carrots, etc.)
- 75 g (about ½ c) couscous
- 1 Tbsp coconut milk powder
- ½-1 tsp curry powder (depending on how strong you like it)
- 1 chicken bouillon cube or powder
- ½ tsp dried cilantro (optional)
Combine in separate snack-size bag:
- 40 g (about ¼ c) golden raisins
- 35 g (about ¼ c) cashews (or slivered almonds)
- 1 nut butter packet (optional)
- oil or butter (optional)Makes: 1 serving
On the trail: Layer the ingredients one on top of the other
Talus Thai Tom Yum Soup
This soup is excellent for those days when you’re cold, feeling under the weather, or need a lighter meal. The broth infused with lemongrass, ginger, lime leaves, and Thai chilies is delicious, warming, and sinus-clearing. It can even help soothe an upset stomach and kick-start sluggish digestion.
At home: Dehydrate a small amount of sliced mushrooms, diced tomatoes, and chopped onion at 135°F for 4-6 hours.
Add to a gallon-size Ziploc:
- 1 tom yum bouillon cube
- 25 g (about ⅓ c) dried shrimp (or chicken)
- 1-2 Tbsp dried mushrooms
- 1-2 Tbsp dried tomatoes
- 1-2 Tbspdried onion
- 1 tsp dried cilantro
- 85 g (about 1 c) instant white rice (makes about 1 ½ c cooked)
- Makes: 1 serving

On the Trail: Boil about 3 c water, then turn your stove off. Add all ingredients and stir to combine. Put the lid on your pot and place it in a cozy. Wait about 10-15 minutes to make sure everything gets thoroughly rehydrated. When the rice and vegetables are soft, the soup is ready. There should be plenty of fragrant liquid broth to sip and enjoy.
Notes: Though the bouillon cubes are high in sodium, they make a great hot pick-me-up spicy drink on cold, rainy days. If you’re backpacking, you’re likely sweating a lot anyway, so a little salt can be good for the body. If you like this recipe, you might also like tom ka (thai coconut chicken soup). Tom ka paste is available online or in Asian markets and can be combined with dried chicken, coconut milk powder, vegetables, and instant rice, similar to this recipe.
Chimichurri Chicken And Rice
At home:
- Dehydrate ¼ lb canned or pressure cooked chicken at 160°F for 4–6 hours until dry
- Pre-cook and dehydrate rice (or use instant)
Combine in Ziploc bag:
- 2 Tbsp Chimichurri seasoning (or make your own by combining: parsley, oregano, black pepper, salt, garlic, and lemon powder)
- 50 g (about ½ c) dehydrated chicken (or dried shrimp)
- 55 g (about ⅔ c) instant rice (about 1 c cooked)
- Olive oil
- Makes: 1 serving
On the Trail: Boil about 1 ½ c water, then turn your stove off. Add olive oil to the water and stir. Add seasoning, chicken (or shrimp), and rice mixture to pot. Stir to combine. Put the lid on your pot and place it in a cozy. Wait about 10-15 minutes to make sure everything gets thoroughly rehydrated. Then, stir it up and check and see if a little more water or time is needed. When all the water is absorbed and it’s ready to eat. Enjoy!
Notes: If you’re confident in your plant identification skills, a bed of foraged greens like lamb’s quarters, miner’s lettuce, and dandelion leaves make an excellent addition to this meal. If you’re unsure, err on the side of caution and abstain.
Backpacker Pad Thai
At home:
- Dry1 chopped green onions (either overnight on a paper towel or in a dehydrator)
- Dehydrate ⅛ lb canned or pressure cooked chicken at 160°F for 4–6 hours until dry (optional)
Combine in Ziploc bag:
- 6 oz rice noodles
- Dried green onions
- 25 g (about ¼ c) dehydrated chicken (optional)
Combine in separate snack-size bag:
- 24 g (about ¼ c) powdered freeze-dried eggs
- 1 Tbsp freeze-dried cilantro
Combine in 2nd snack-size bag:
- 1 Tbsp oil
- 2 packets of soy sauce
- 1 Tbsp sugar (or 2 sugar packets)
- 1 tsp1 True Lime powder (or 1 packet)s
- 1 Tbsp chopped, roasted unsalted peanuts
- Makes: 1 serving
On the Trail: Boil close to a full pot of water. Very carefully pour water into the gallon Ziploc bag you packed them in and fully submerge noodles, green onion, and chicken. Set aside (covered) for about 10 minutes. Meanwhile, add about 3 Tbsp¾ c water to powdered eggs; mix well. Heat 1 tsp of oil in your pot, add eggs, and scramble until firm. (If you have more than 1 pot, you can also soak the noodles in 1 pot while you cook the eggs in another). When noodles are soft, carefully drain, add the eggs, and set aside. Add remaining oil to now-empty pot and heat before adding the soy sauce, sugar, and lime. Stir to combine the sauce, then toss in noodle mixture to coat. Finish by topping with peanuts.
Notes: This meal is also wonderful with dried carrot shreds and other vegetables. For those sensitive to peanuts, use slivered almonds.
Classic Mac And Cheese With Ham
At home:
- Cut about 5 oz of thinly sliced ham (lunch meat) into strips and dry in food dehydrator at 160°F for 4-6 hours, turning once
- Pre-cook and dehydrate about ½ box macaroni noodles
Combine in plastic bag:
- 30 g (⅓ c) dried ham and
- 85 g (about 1 ¼ c) pre-cooked and dried macaroni noodles
- ½ powdered cheese packet (comes with mac and cheese) or 3 Tbsp cheese powder
- ½ Tbsp powdered milk (optional)
- ½ Tbsp powdered butter (optional)
Combine in separate snack-size bag:
- Parmesan cheese (dry)
- Bread crumbs
- Oil (optional)
- Makes: 1 serving

On the Trail: Boil about 2 c water and add macaroni and ham. Water should just cover the food. Pour off excess if necessary. Put the lid on your pot and place it in a cozy. Wait about 10-15 minutes to make sure everything gets thoroughly rehydrated. Open it up and check and see if a little more water or time is needed. When most of the water is absorbed and the noodles are soft, it’s ready. Drain any excess liquid and pour the noodles and ham back into the bag. Heat about 3Tbsp water (or use reserved excess from noodles) and stir together cheese, milk, and butter powders together. Combine cheese sauce with noodles, add additional oil or butter if desired, and top with parmesan-breadcrumb mixture.
Notes: As long as there’s a small amount of liquid left in the pot, you can add the cheese, milk, and butter powders directly to the cooked noodles to simplify the process, but the sauce is a bit smoother and creamier if you heat and combine it separately. You can also modify this recipe to make chili mac (just swap the ham for ½ dehydrated beef/ ½ dried beans, use tomato powder instead of cheese/milk/butter, add a dash of chili powder, and omit the breadcrumbs).
Forest Fiesta Mexican Burrito Bowl
At home:
- Drain, rinse, and dehydrate canned pinto beans
- Dehydrate ⅛ lb canned or pressure cooked chicken at 160°F for 4–6 hours until dry
- Dehydrate salsa (low-sodium is best)
- Dehydrate diced and cooked vegetables such as chilies and corn
Combine in plastic bag:
- 25 g (about ½ c) dried beans (add up to 50 g for large meal)
- 25 g (about ½ c) dried chicken (add up to 50 g for large meal)
- 25 g (about ¼ c) instant rice (or pre-cooked and dehydrated rice)
- 25 g (about ½ c) dried salsa
- ¼ tsp chili powder
- ¼ tsp garlic powder
- ¼ tsp onion powder
- ¼ tsp cuminMakes: 1 serving
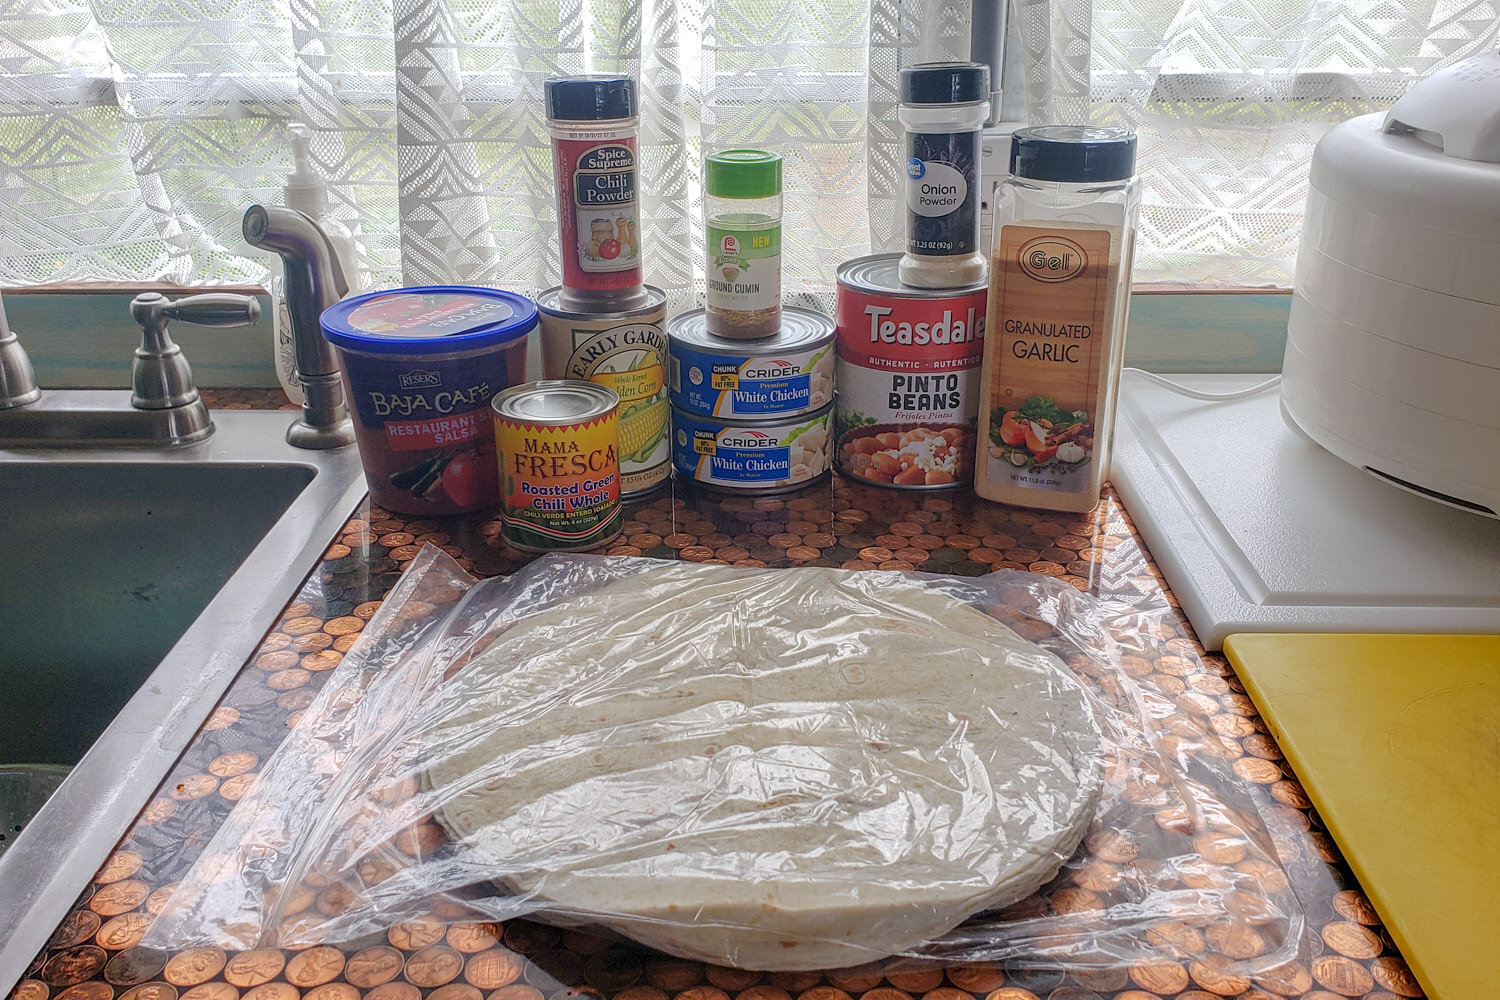
On the Trail: Boil about 2 c water, then turn your stove off. Add all ingredients to pot and stir to combine. Put the lid on your pot and place it in a cozy. Wait about 10-15 minutes to make sure everything gets thoroughly rehydrated. Then, stir it up and check and see if a little more water or time is needed. When all the water is absorbed and the chicken is soft it’s ready to eat. Add hot sauce if you like spicy food.
Notes: If you’ll be eating this meal within a day or 2, pack a fresh avocado or cheese stick to make this meal extra delicious. If you prefer a burrito instead of a bowl, pack 1 large tortilla for each serving and fold cooked ingredients into them at mealtime. For long-term storage, vacuum-seal tortillas in appropriate quantities and store in the freezer (flat). Get them out right before your trip or before shipping the resupply box.
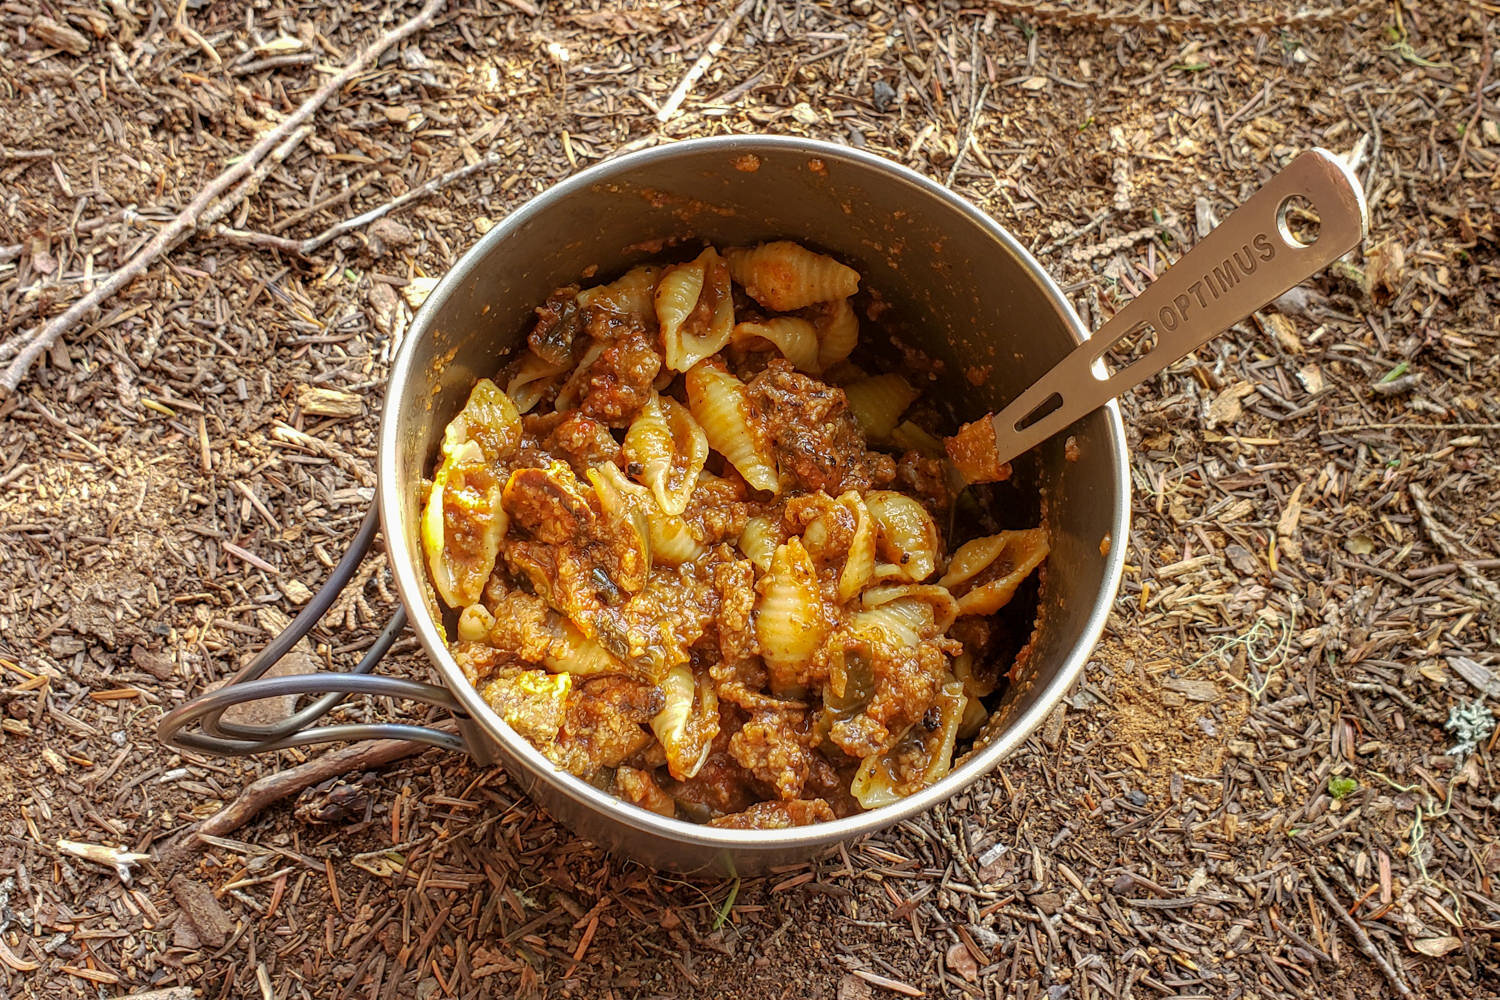
Sunset Spaghetti Recipe
At home:
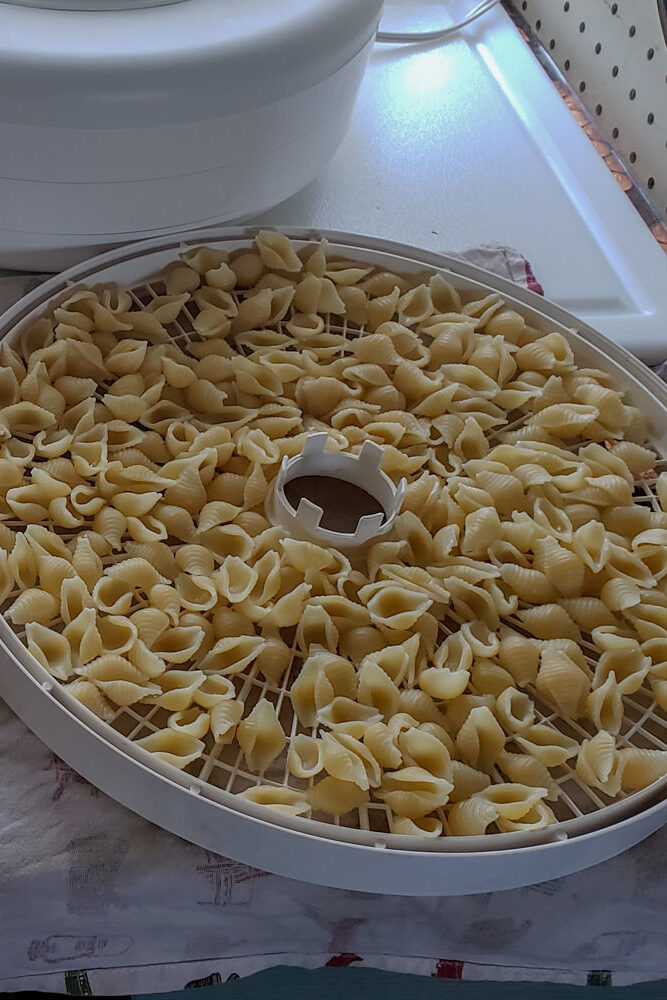
- Pre-cook and dehydrate pasta (shells or small pieces are best) at 135°F for 2-4 hours
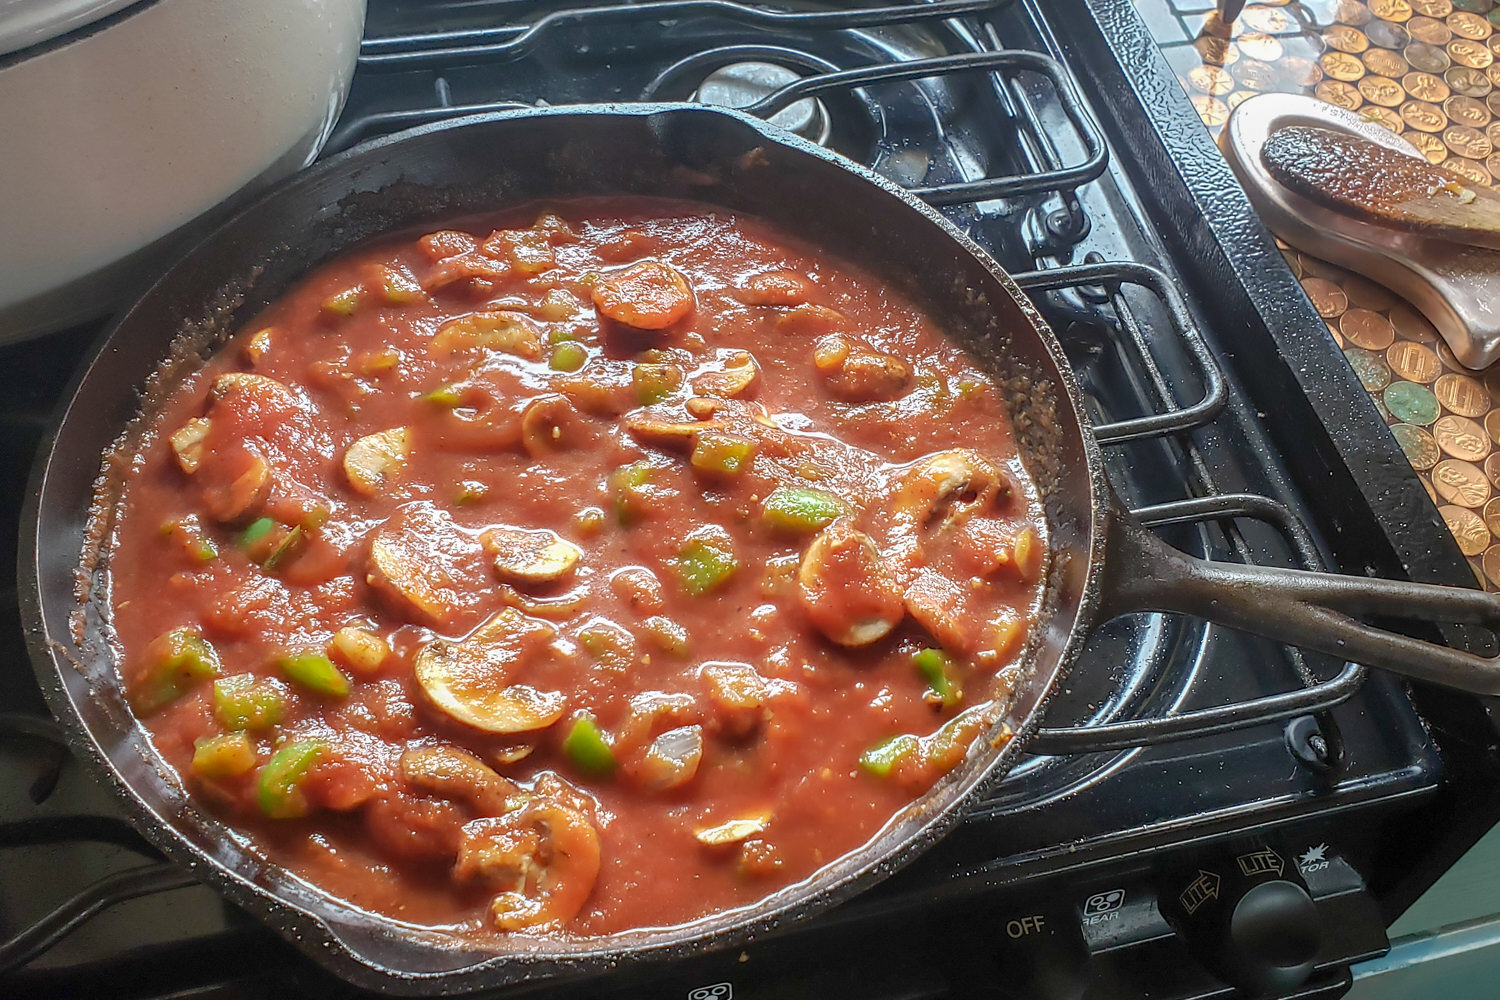
- Dehydrate low-sodium spaghetti sauce at 135°F for 4–6 hours
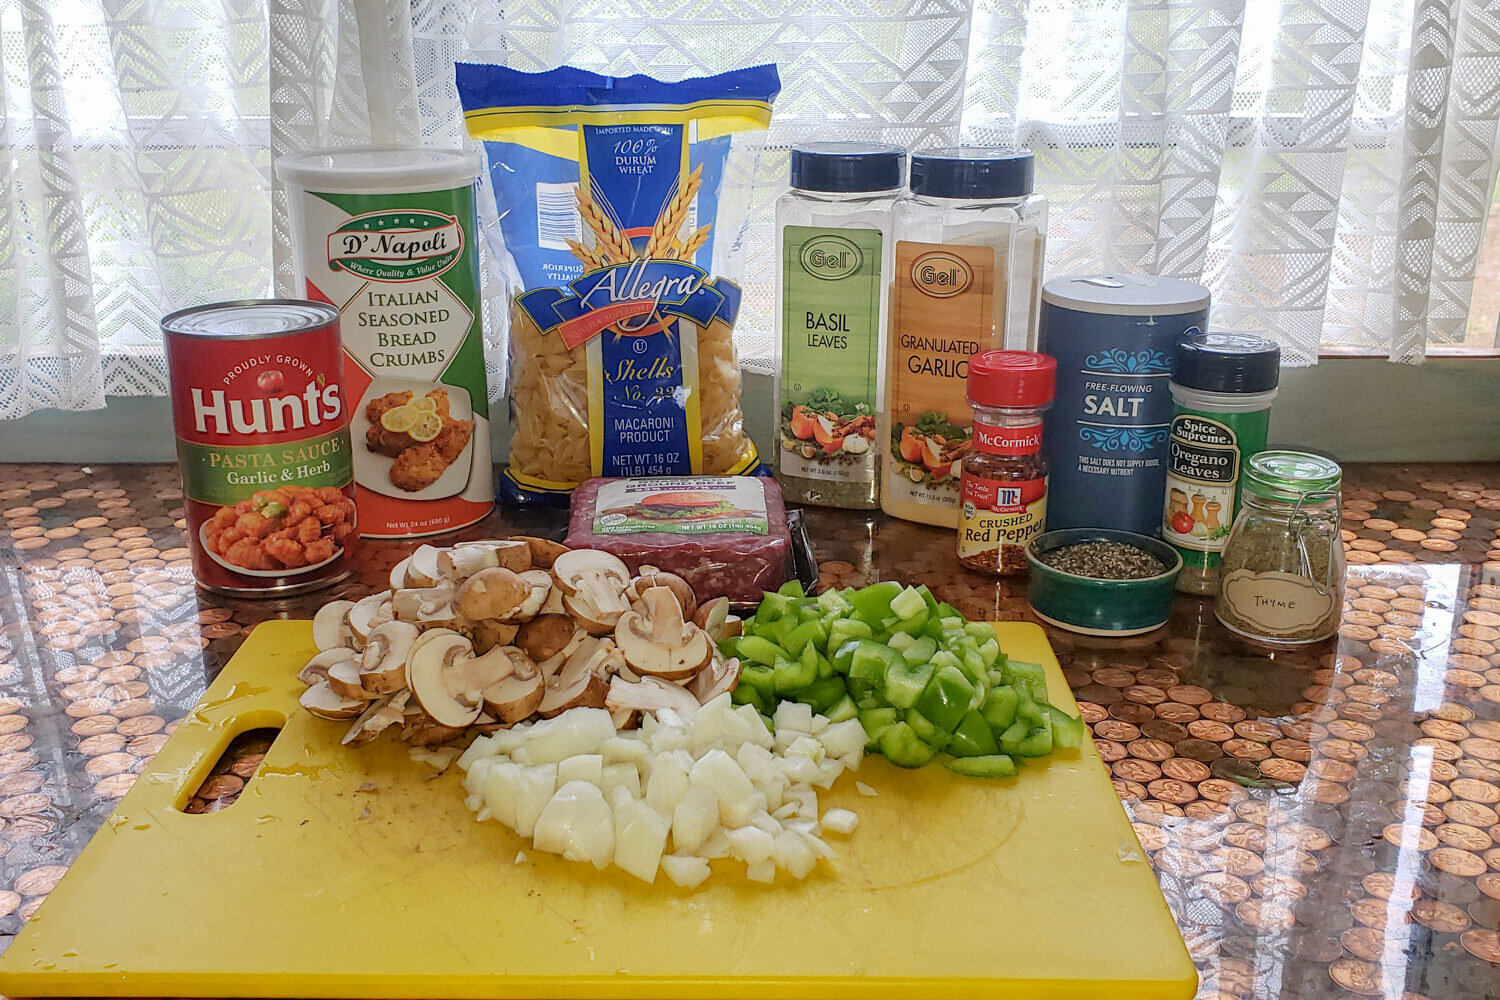
- Dice and sauté onions, green peppers, and mushrooms, then dehydrate at 135°F for 4–6 hours
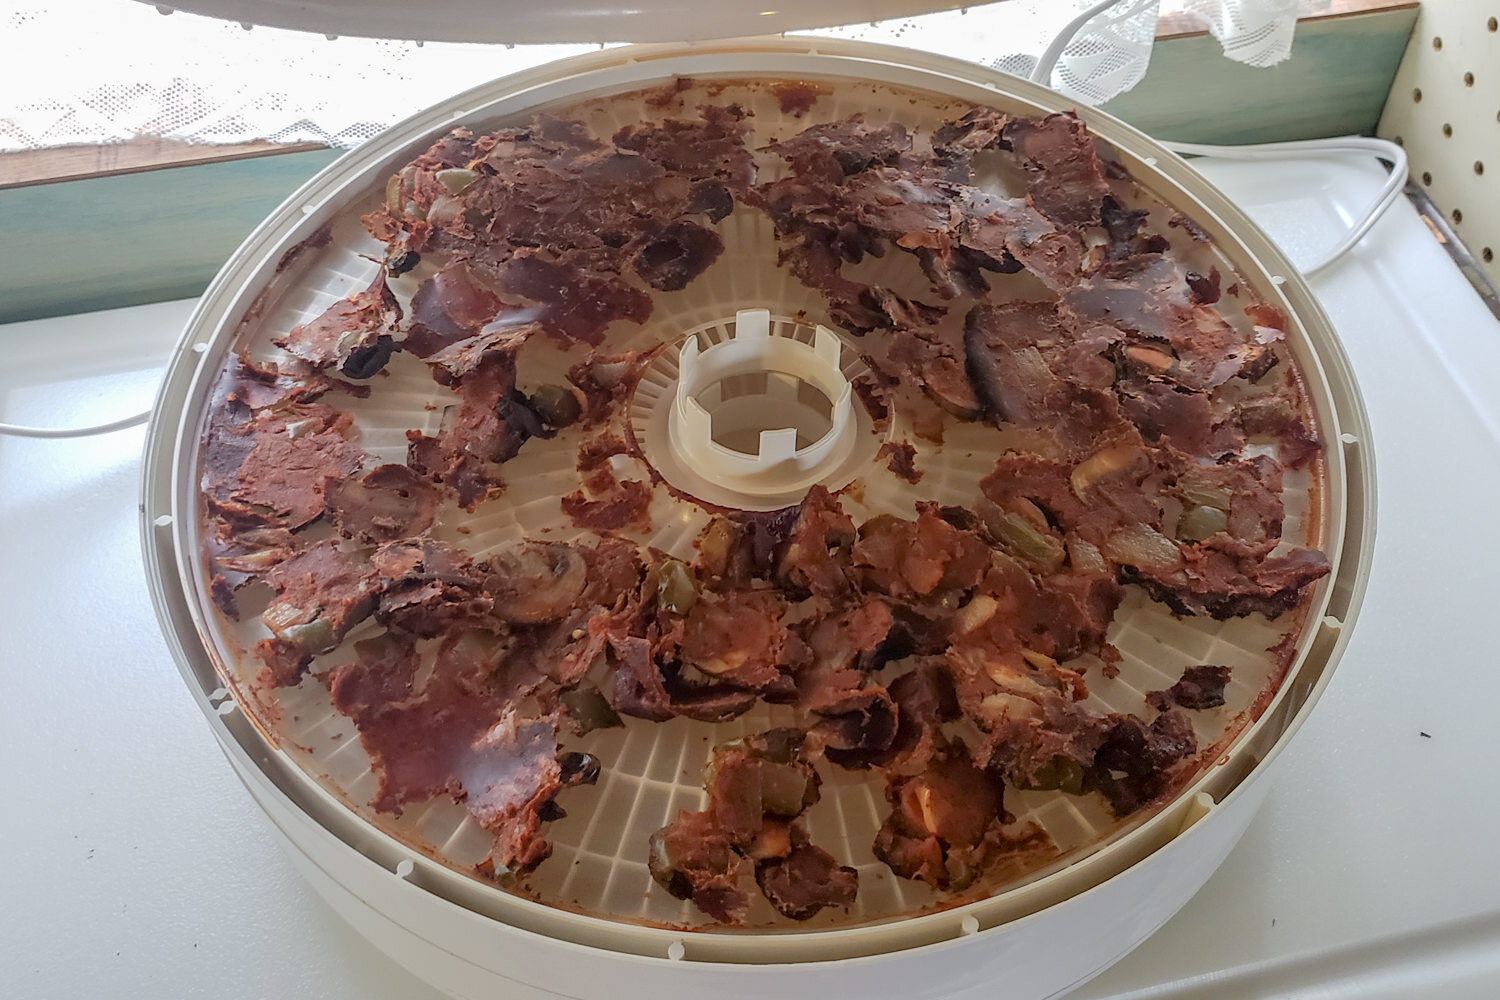
- Cook lean ground beef, drain fat, and add breadcrumbs and Italian seasonings (crushed red pepper, oregano, basil, garlic, fennel, black pepper, etc.) Dehydrate at 160°F for 8-10 hours. Stirring occasionally.
Combine in a plastic bag:
- 25 g (about ½ c) pre-cooked and dried pasta (up to 50 for large meal)
- 25 g (about ¼ c) dried beef (up to 50 for large meal)
- 25 g (about ½ c) dried sauce
- 25 g (about ½ c) dried vegetables
Combine in separate snack-size bag:
- Parmesan cheese (dry)
- Oil (optional)Makes: 1 serving
On the Trail: Boil about 2 c water, then turn your stove off. Add all ingredients to pot and stir to combine. Put the lid on your pot and place it in a cozy. Wait about 10-15 minutes to make sure everything gets thoroughly rehydrated. Then, stir it up and check and see if a little more water or time is needed. When most of the water is absorbed and the meat is soft, it’s ready to eat. Add oil or butter to enhance flavor and parmesan cheese to add texture. Enjoy!
Notes: It is possible to cook pasta the traditional way (boil for 7-10 min. and drain) on the trail, but it takes more time and fuel. If you prefer to do this, simply boil the pasta and beef together following the directions on the pasta packaging. Drain some of the water off when the pasta is cooked and add the sauce and vegetables to the mix. Stir, cover, and let sit for an additional 10-15 min.
Pristine Pasta Carbonara
At home:
- Dehydrate ⅛ lb canned or pressure cooked chicken at 160°F for 4–6 hours until dry
- Pre-cook and dehydrate penne pasta
- Steam and dry frozen peas
Combine in large plastic bag:
- 40 g real bacon bits
- 50 g (about 1 c) pre-cooked and dried pasta ((up to 100 for large meal)
- 25 g (about ½ c) dried chicken
- 15 g (about ⅛ c) dried peas
- ¼ tsp dried parsley
- ¼ tsp Paprika
- ¼ tsp Garlic powder
- ½ tsp Salt
- ½ tsp black pepper
Combine in separate snack-size bag:
- Parmesan cheese
- Oil or butterMakes: 1 serving
On the Trail: Boil about 2 ½ c water and add everything except the parmesan cheese and butter/oil to the pot. Water should just cover the food. Pour off excess if necessary. Put the lid on your pot and place it in a cozy (or fleece hat). Wait about 10-15 minutes (without peaking) to make sure everything gets thoroughly rehydrated. Open it up and check and see if a little more water or time is needed. When most of the water is absorbed and the noodles are soft, it’s ready. Add the parmesan cheese and butter (preferred) or oil and stir to combine. Enjoy!
Notes: This meal should be eaten within a reasonable amount of time since the bacon bits are fatty, or throw in a whole sealed package of them (79 g) for a longer shelf life.
Option 3: Cooking & Dehydrating A Whole Meal
Already do a lot of cooking at home? You might prefer preparing an entire meal to dry in your food dehydrator vs. drying and assembling individual ingredients as described above. As long as you follow a few simple rules, you can whip up and dehydrate almost any of your favorite thick soups, stews, and sauces safely and make them into lightweight, adventure-ready meals.
Below are some examples of hearty, delicious recipes that dehydrate/rehydrate well. You can cook a big batch in the evening to eat for dinner, load the rest in the dehydrator to dry overnight, and weigh out/package the dried meal in single servings for the trail the following day. Repeat. (This is an excellent method for busy people preparing for a thru-hike).
Rules to follow
- Use only trimmed, lean meats (no sausage, bacon, etc.)
- Chicken should be very soft (canned, pressure-cooked and finely shredded)
- Use low sodium broths, tomato sauce, salsa, etc. (sauces become concentrated)
- No dairy (not suitable for long-term storage)
Remember: Butter, oil, toppings, and condiments can be packaged with the meal and added on the trail to return fat, enhance flavor, and add texture.
Think “Thick”
You may want to use less water or broth than usual in recipes, add cornstarch, or reduce (cook on low for a long time) soups and stews to thicken them before dehydrating. Partially blend soups that contain starchy vegetables like squash and potatoes with a food processor to help thicken them up and make them dehydrator-friendly.
Instructions
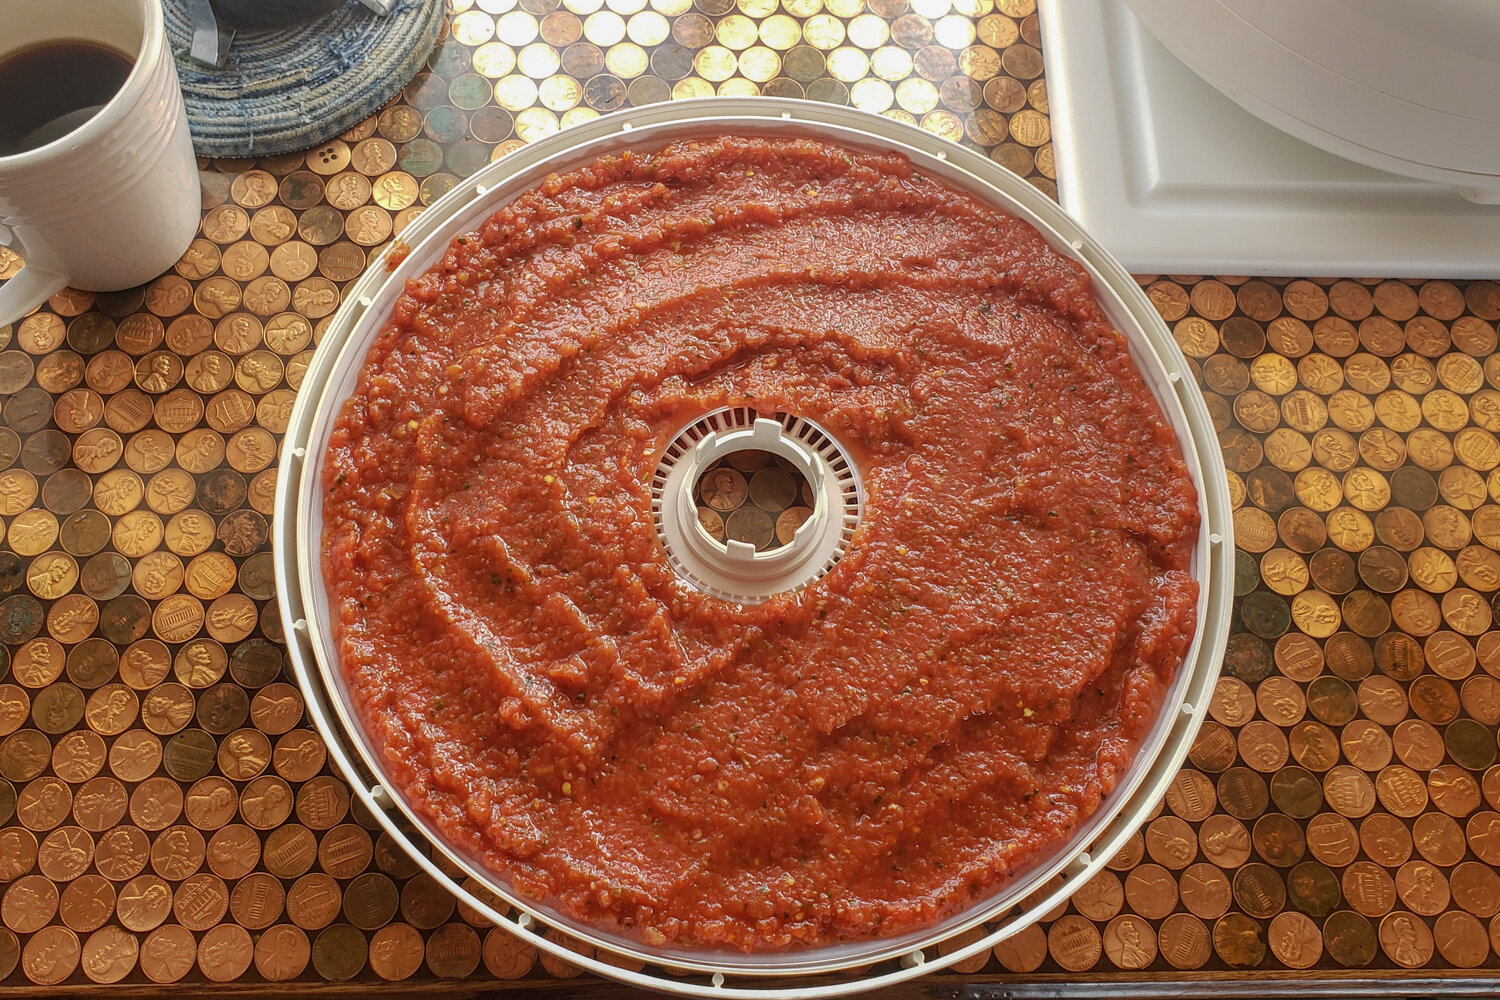
- Spread thick soups, stews, and sauces evenly on non-stick tray liners
- Dehydrate at 145°F for 4–8 hours or until completely dry and brittle.
- Flip the “leather” over partway through the drying process and blot excess oil as needed.
- Vacuum-seal and freeze meals that won’t be used promptly, just to be safe.
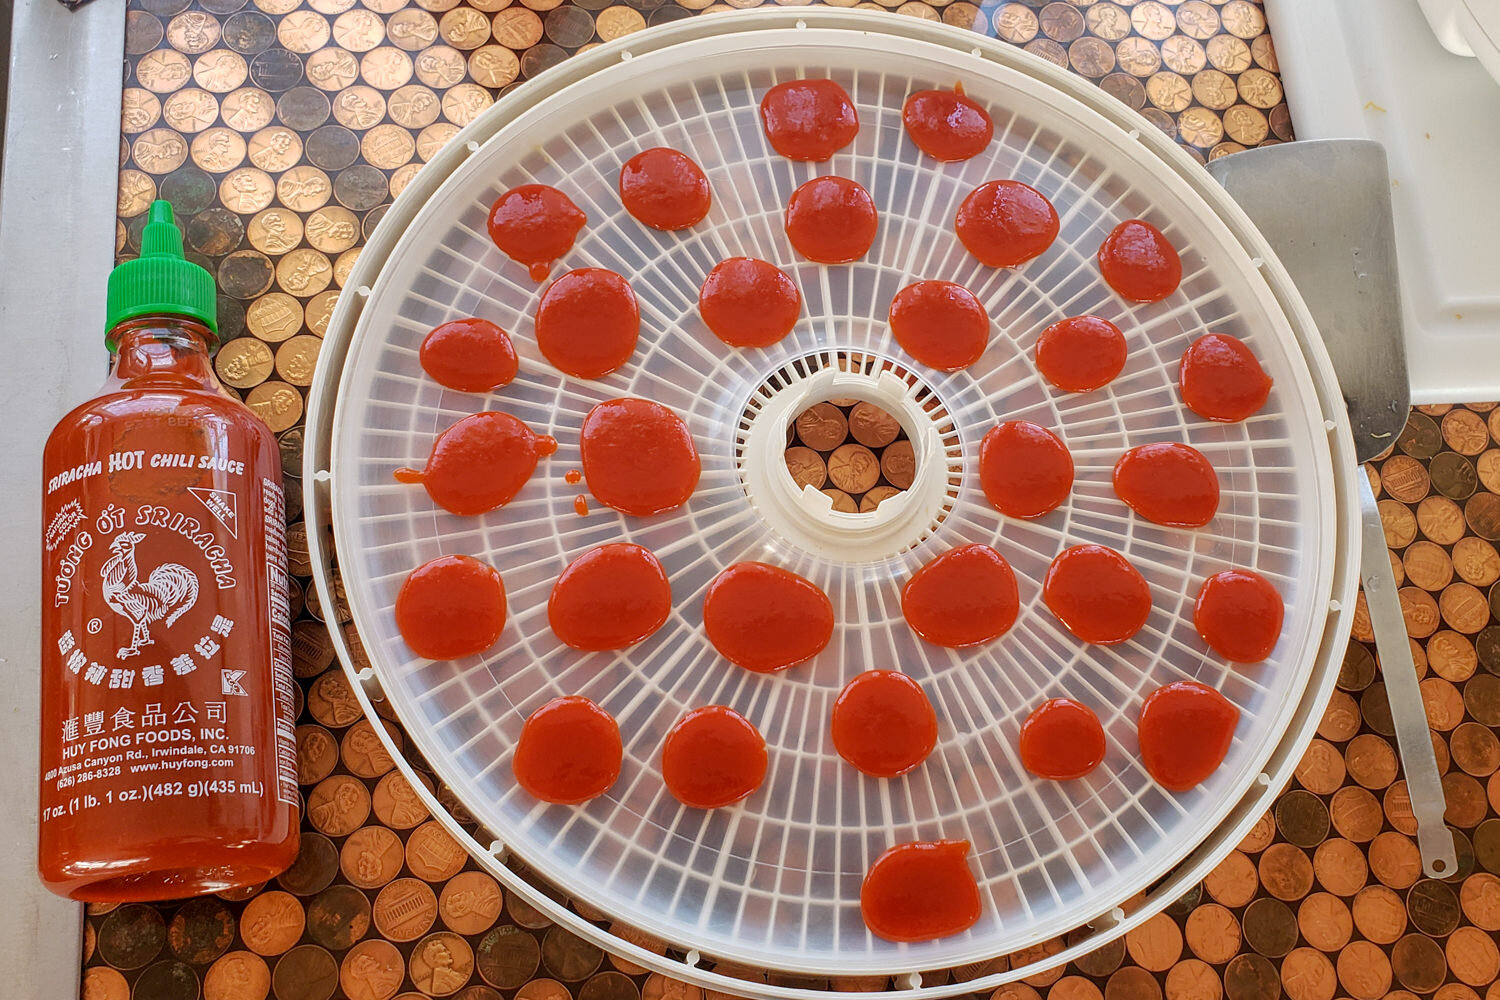
Dehydrating Prepared Foods: If you’re short on time, you can also dehydrate prepared or canned foods like chili or beef stew, though they tend to be pretty salty and full of preservatives. Tomato sauce, salsa, and even Sriracha (a popular chili sauce) can be dried into “leather” or flakes to add to meals.
Dehydrated Whole Meal Recipes
Desert Dream Green Chili Stew Recipe
Ingredients:
- 1 lb lean pork stew meat chopped into very small ½” pieces
- ½ c flour or cornstarch
- ½ tsp kosher salt
- ½ tsp freshly ground black pepper
- ½ tsp garlic powder
- 1 Tbsp olive oil
- 1/2 yellow onion chopped into 1/2 “ pieces
- 3 large cloves garlic minced
- ¾ c or 7-ounce can freshly roasted or frozen green chile, chopped small
- 3 ½ c or 28 oz can salsa verde or green chile sauce
- 3 c chicken stock or water, plus 1 tablespoon chicken base
- ½ tsp kosher salt adjust to taste
- 4 c diced potatoesMakes: 4-6 servings
Instructions:
- Combine the pork, flour, pepper and garlic powder in a gallon size Ziploc bag. Shake to coat thoroughly and then set aside. In a large pot over medium heat, warm the oil.
- Add the fresh garlic and onion and sauté until translucent, approximately 2-3 minutes.
- Add the dusted pork and cook until browned, approximately 5 minutes.
- Add chiles, salsa verde, stock and salt and bring to a boil. Cover and simmer on low for 45 minutes.
- Add the potatoes and raise heat to boil. Reduce to a simmer and cook until the potatoes are tender, approximately 15 minutes.
Dehydrate and Repackage:
- Dehydrate stew using tray liners at 160°F for 8-10 hours (or overnight)
- Weigh out 100-150 g servings using small digital scale
- Vacuum pack single servings, label, and store in the freezer until needed
On the Trail: Boil about 1 ½- 2 c water, then turn your stove off. Add stew mixture to pot and stir to combine. The water should be just covering the stew flakes. Pour off excess water or top it up if needed. Put the lid on your pot and place it in a cozy. Wait about 10-15 minutes to make sure everything gets thoroughly rehydrated. Then, stir and check and see if a little more water or time is needed (a little watery is ok, it’s soup afterall). When the meat and potatoes are soft, the meal is ready. Add a bit of oil if you’d like to add a little tasty fat flavor back in.
Notes: Serve with flour tortillas or corn chips. If you’d like the meat shredded instead, you could place a whole pork roast with all ingredients in a crock pot, slow cook it for 4-6 hrs., then remove the pork, shred with 2 forks, and return it to the stew.
Something’s bound to get damp on multi-day trips in the rain, even if you try your best to avoid it. Fortunately, most outdoor clothing and gear is made to dry quickly. We usually bring a large safety pin to attach wet socks to the outside of our backpacks so they can dry, or at least air out, as we hike.
We also pull damp gear out of our backpacks to dry if the sun pops out during breaks or meal times. Even a few minutes of direct sunlight helps a lot. It’s also a good idea to let your feet dry out at night and once or twice throughout the day if possible to avoid blisters.
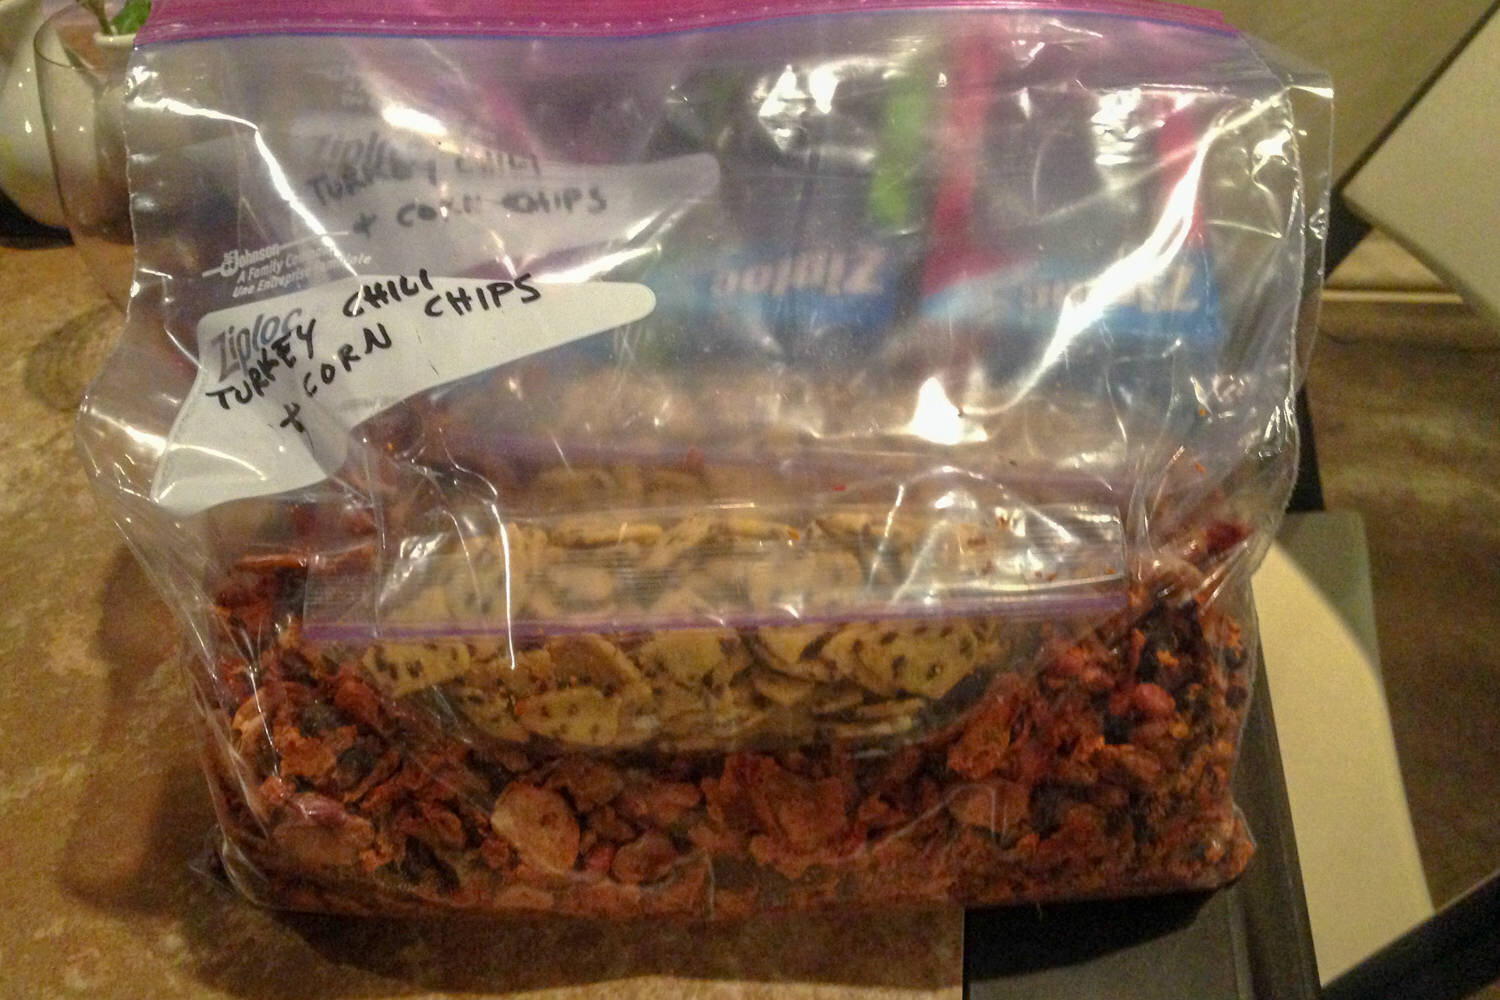
Cowboy Chili And Corn Chips Recipe
Ingredients:
- ½ c uncooked quinoa
- 1 Tbsp olive oil
- 1 large onion diced
- 6 cloves garlic minced
- 2 cans diced tomatoes (28 oz total)
- 1 14oz can tomato sauce
- 1 can diced green chiles (optional)
- 2 ½ Tbsp chili powder
- 2 tsp cumin
- 2 tsp cacao powder (cocoa works too)
- 1 ½ tsp smoked paprika
- 1 tsp sugar
- ½ tsp coriander
- ½ tsp cayenne pepper (optional)
- salt and pepper to taste
- 1 12 oz can corn drained and rinsed
- 2 19 oz cans kidney beans drained and rinsed
- 1 19 oz can black beans drained and rinseMakes: 6 servings
Instructions:
- Cook ½ c quinoa as per directions on bag and set aside (makes 2 c cooked).
- Heat olive oil in a large pot over medium-high heat. Once the oil is hot add the onion and cook until tender, add garlic for the last few seconds
- Add diced tomatoes, tomato sauce, cooked quinoa, chili powder, cumin, cacao, paprika, sugar, coriander, salt, and pepper. Add the chiles and cayenne if you like it spicy
- Bring to a boil and then reduce to a simmer for 30 min
- Add in corn and beans, cook about 15 min
- Remove from heat and let the chili cool
Dehydrate and Repackage:
- Dehydrate stew using tray liners at 145°F for 8-10 hours (or overnight)
- Weigh out 100-150 g servings using small digital scale
- Vacuum pack single servings, label, and store in the freezer until needed
- Repackage mini tortilla chips or grain crackers in small bags to go with each serving
On the Trail: Boil about 1-1/2 c water (depending on meal size), then turn your stove off. Add chili mixture to pot and stir to combine. Put the lid on your pot and place it in a cozy (or fleece hat). Wait about 10-15 minutes (without peeking) to make sure everything gets thoroughly rehydrated. Then stir it up and check whether a little more water or more time is needed. When the beans are soft, they’re ready to eat. Top with corn chips or crackers for crunch.
Notes: This recipe has good protein from the quinoa, but if you’d like to make it with meat, it’s very tasty with ground beef as well. For best results, cook ground beef separately and add breadcrumbs to it before dehydrating. Add 30-50 g per serving when packaging. (Each meal should total about 100-150 g, not including chips.)
Tips For The Trail
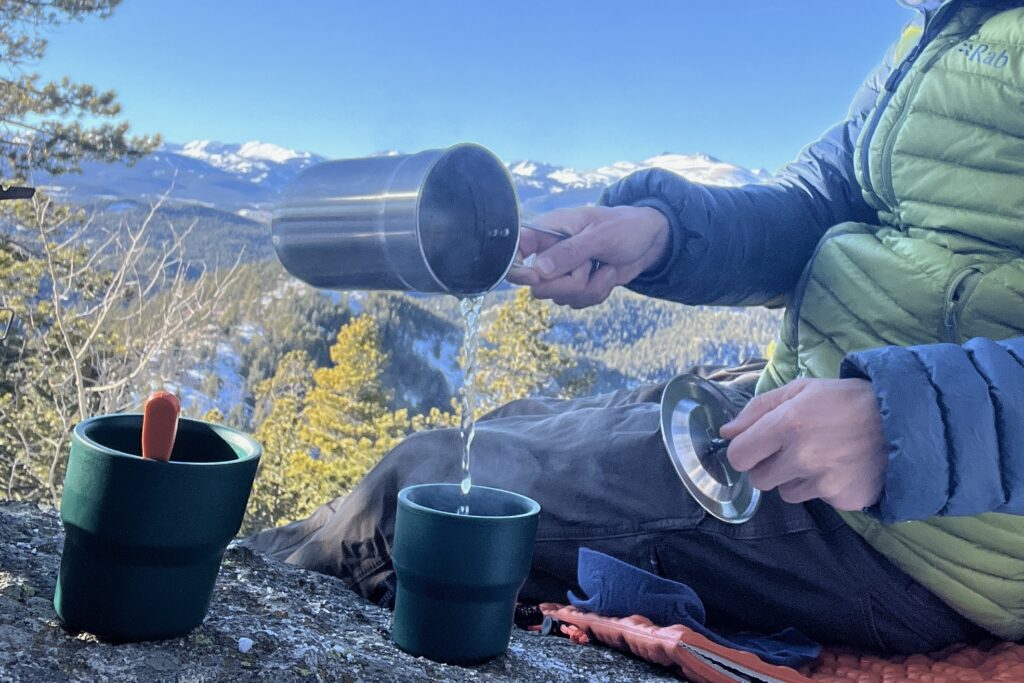
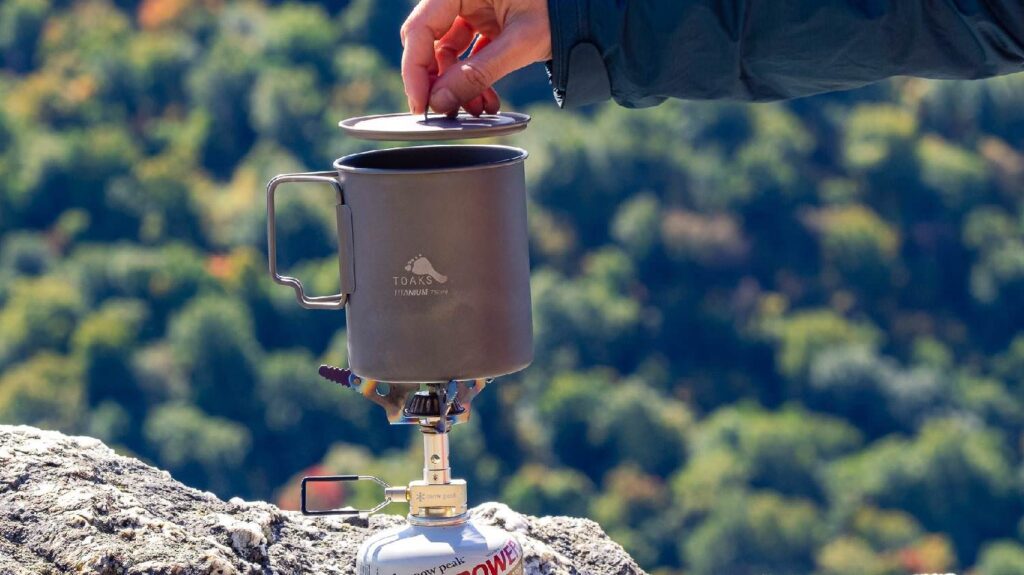
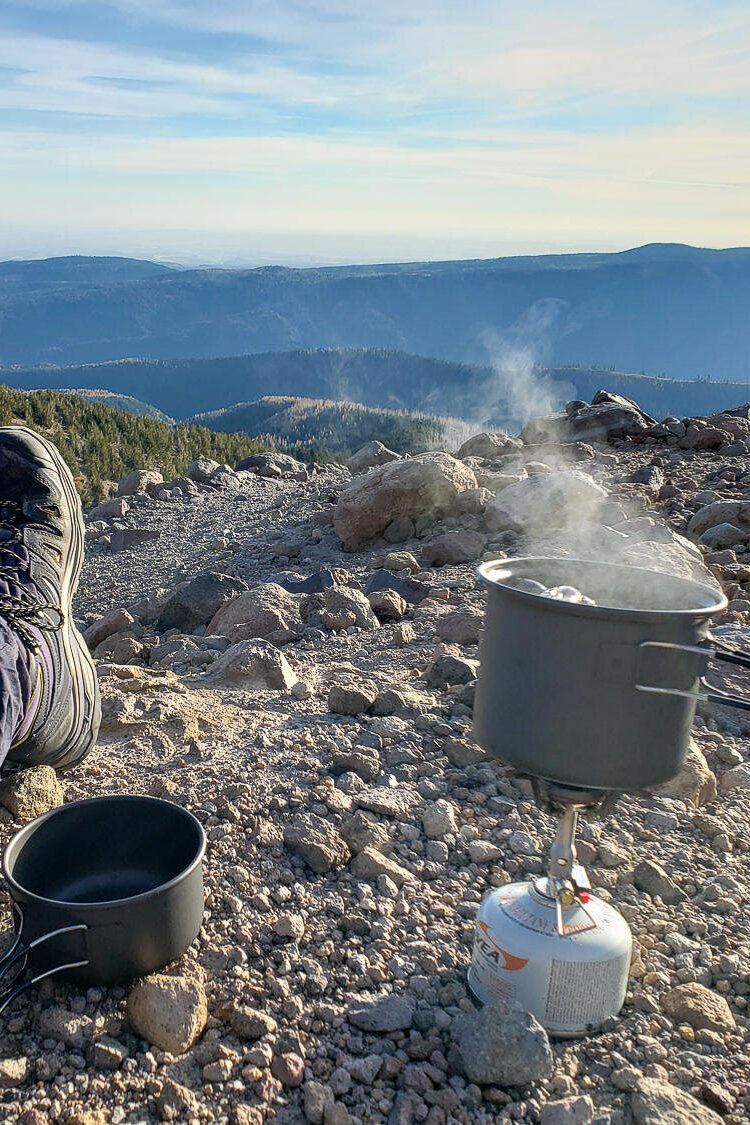
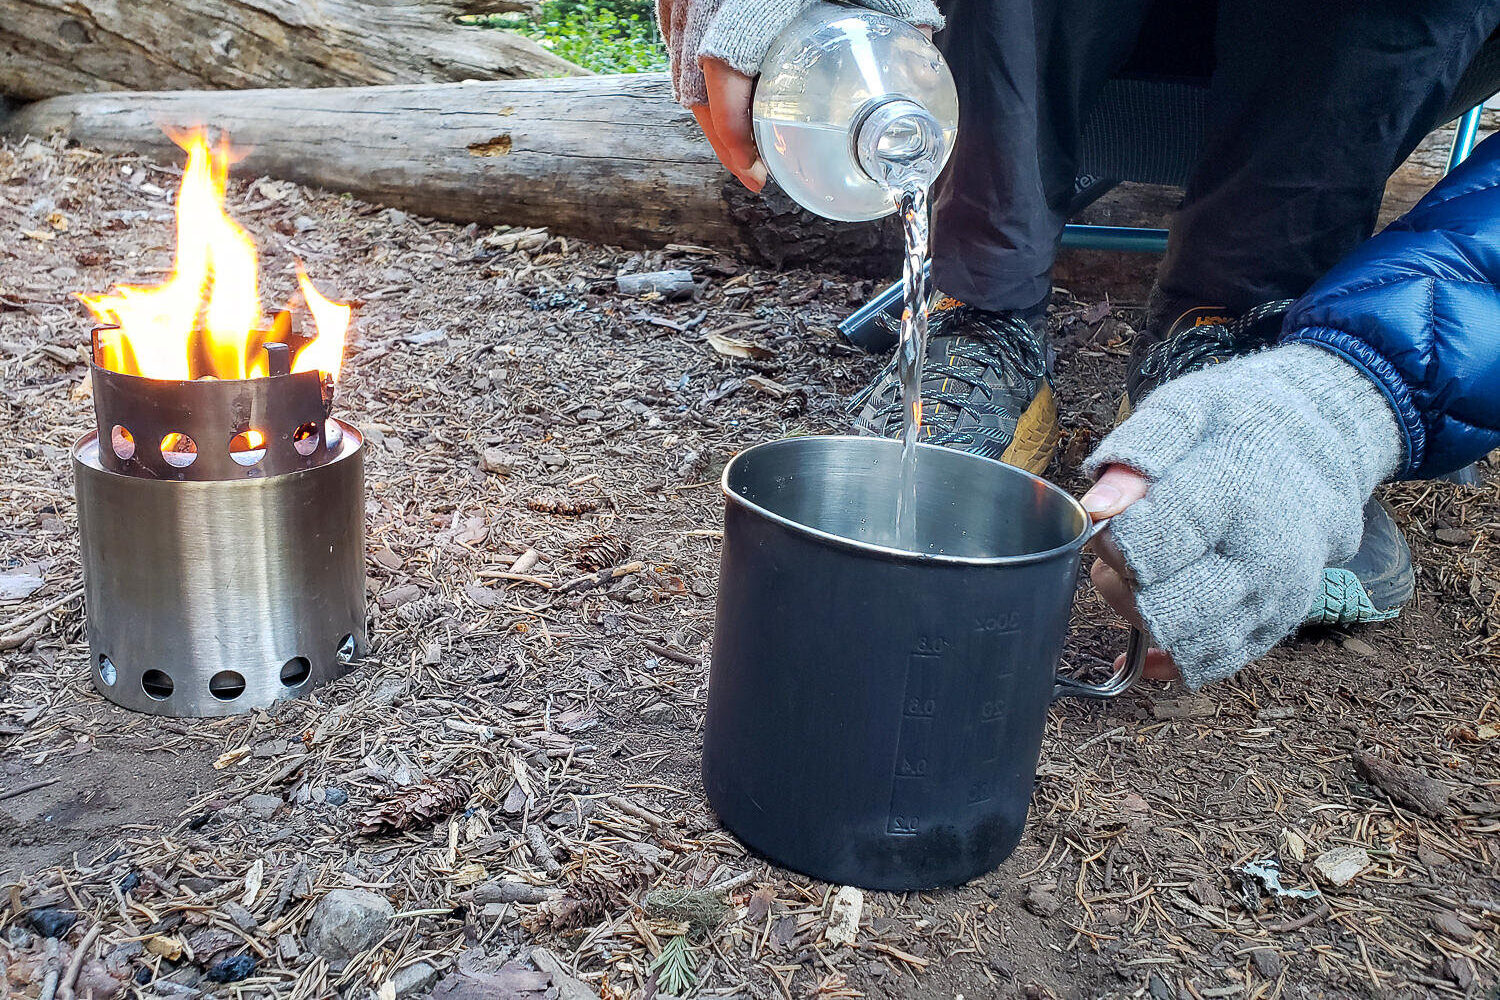
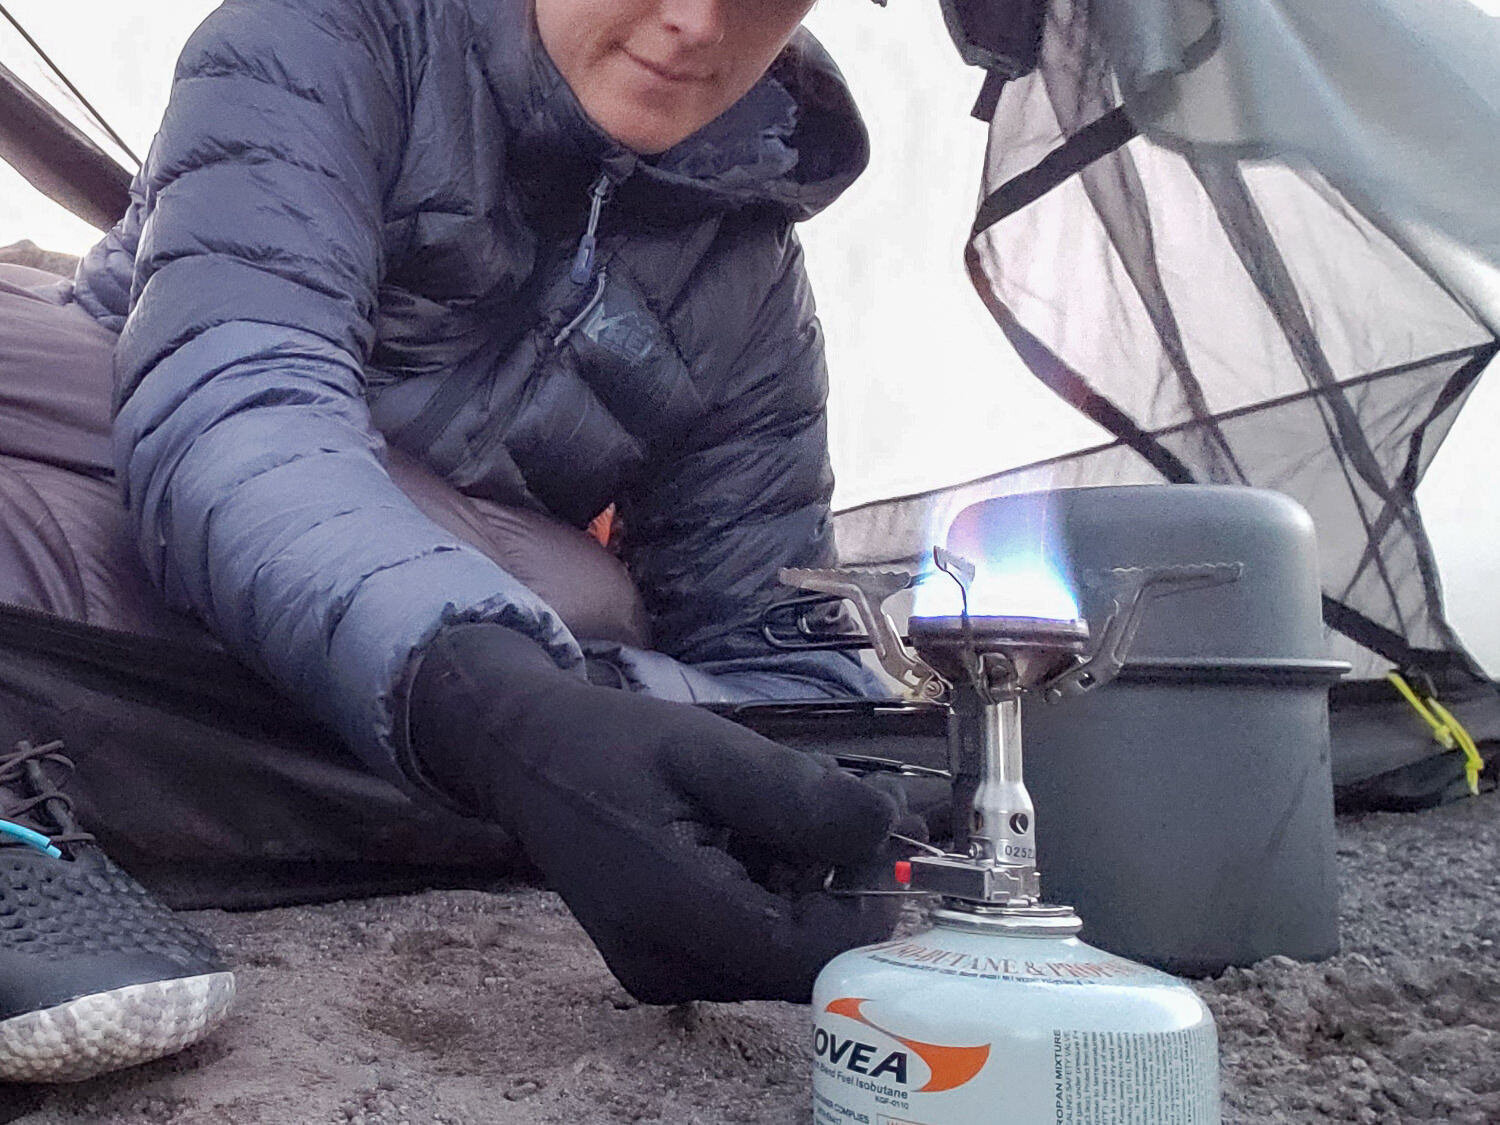
POT COZIES
You might not have a pot cozy if you’ve mostly eaten freeze-dried meals up until now, but when you’re cooking homemade backpacking meals, it’s an essential piece of gear that saves fuel and simplifies the cooking process. All the “cozy” does is insulate your cookpot or Ziploc bag so it retains heat more efficiently, extending the length of time the water stays hot while soaking into your food. You can easily make your own pot cozy from a windshield sun shade. Or purchase a custom pot cozy.
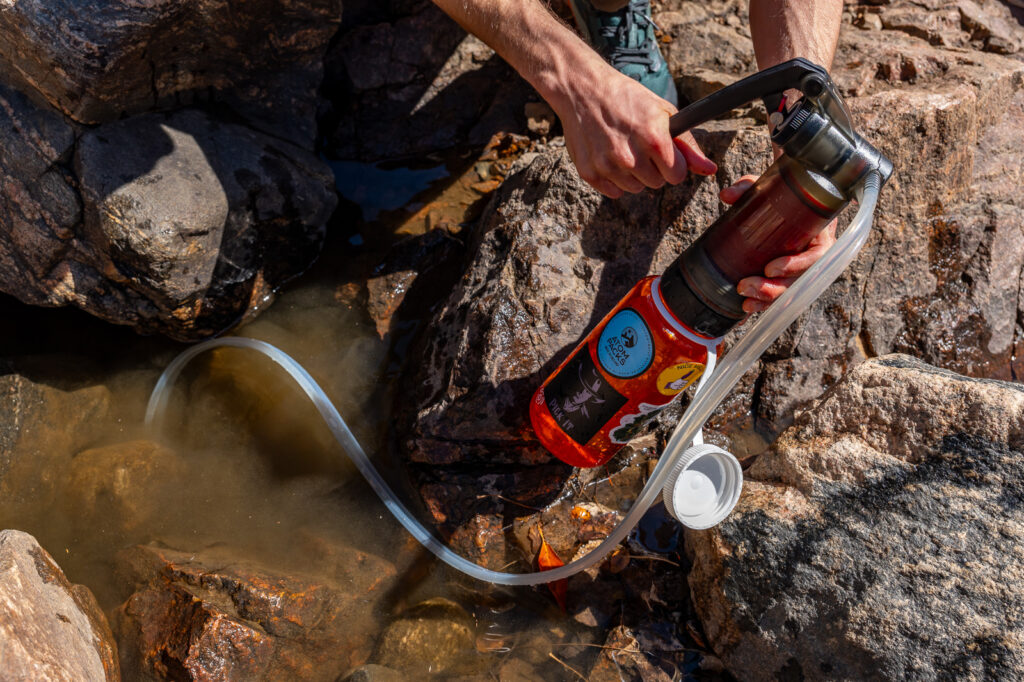
It’s very important to be extra on top of your hydration when you’re consuming dehydrated meals. To avoid intestinal distress, make sure to use adequate amounts of water to rehydrate your meals and give them time to properly cook and absorb water before you eat them. Drink water before, during, and after your meals and listen to your body.
MEAT GRAVEL & Cold-Soaking
If you have a hard time getting meat to rehydrate on the trail, you may want to try “cold-soaking” the meat or the entire meal (as long as it’s not instant potatoes, stuffing, or ramen) for 10 minutes or so before adding the water to the pot, boiling it, and returning it to the food as usual.
You can pre-soak it in the bag or in another vessel like a cup, pot, or wide-mouth water bottle. “Cold-soaking” is another technique ultralight hikers use to skip carrying a stove and instead use the day to hydrate their meals. It’s worth trying some of the techniques before committing to the strategy. Most of our staff prefer a hot meal for longer trips.
WHAT ABOUT BREKKIE AND LUNCH?
If you’re new to the world of backpacking, you might like our Best Lightweight Backpacking Food guide. It has the basics of packing food for a backpacking trip and gives examples of simple breakfasts, lunches, dinners, and snacks that work well on the trail.
No Time Right Now?
Not ready to make your own backpacking meals and just want to know which store-bought meals are the best? Get the skinny on our Best Freeze-Dried Backpacking Meals list.
If you like this article, you might also like our Food and Camp Kitchen hub page.