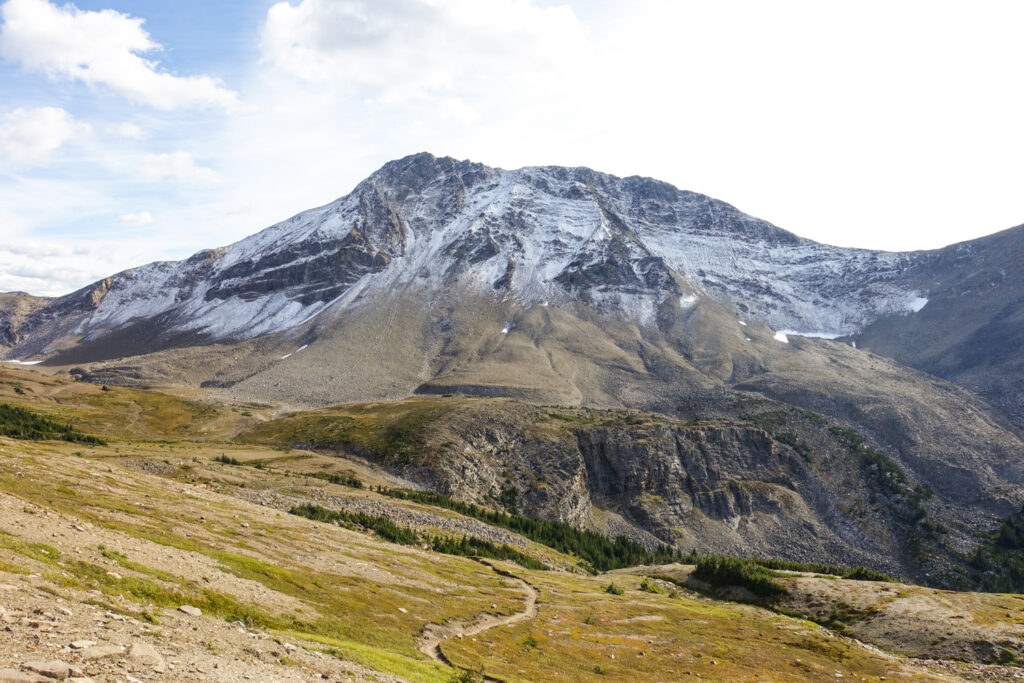
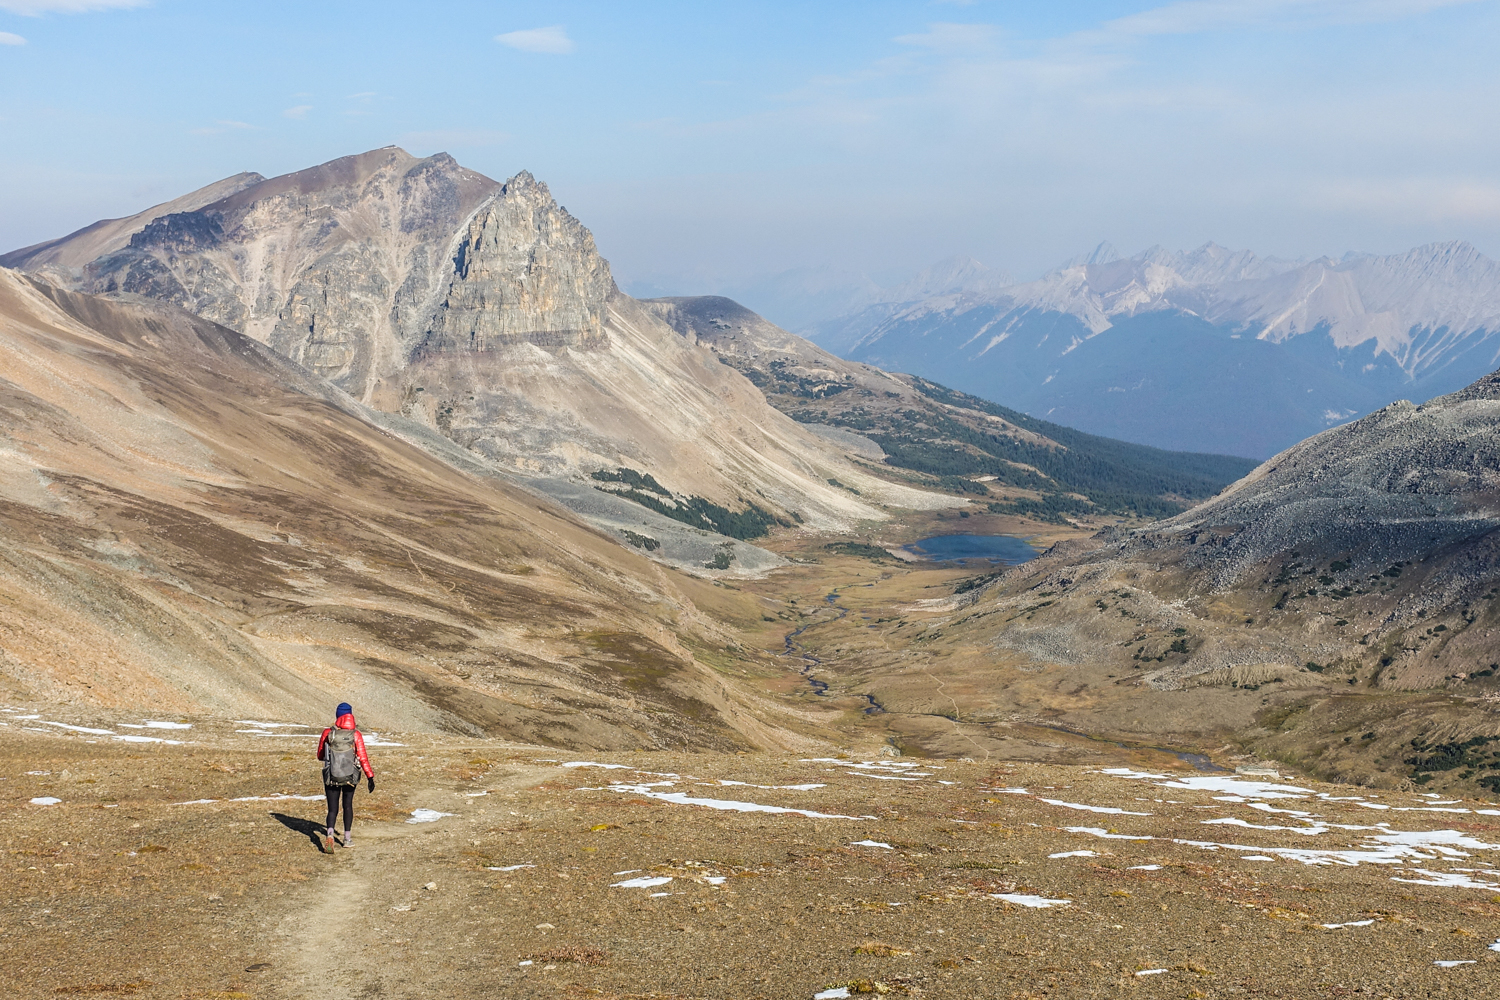
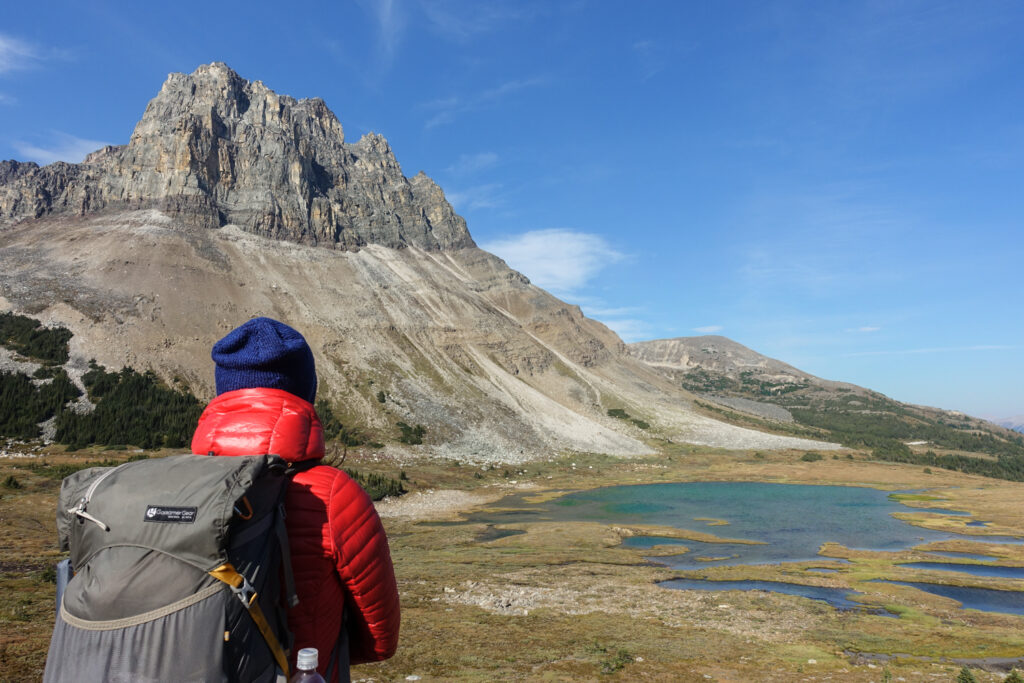
The Skyline Trail in Jasper National Park is a spectacular backpacking destination in the Canadian Rockies. Of the 44.1 kilometers of trail (27.4 miles), nearly two-thirds of the route is above treeline. You can expect sweeping mountain views in all directions, beautiful glacial lakes, and wind-swept ridges for miles. Usually completed in 2-4 days, the trail climbs over three mountain passes along a moderately graded path. You’ll encounter diverse flora, including a breathtaking wildflower display in August, as well as vast meadows that are great for viewing wildlife, from caribou to pikas. Since the Skyline is one of the most coveted backcountry hiking trails in Jasper, securing a permit for this trail can be challenging. However, if you’re lucky enough to obtain one, you’re in for a fantastic high-alpine adventure.
Quick Facts
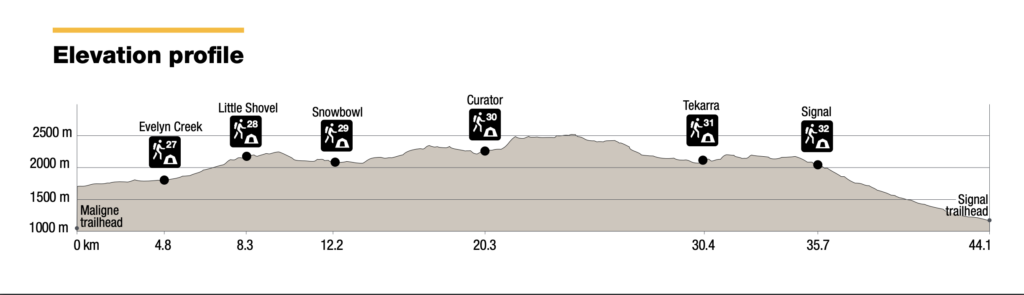
- Distance: 44.1 kilometers (27.4 miles)
- Days needed: 2-4 days
- Elevation gain: 1,410 meters (4,625 feet)
- Peak elevation: “The Notch,” 2511 meters (8311 feet)
- Low elevation: Depends on starting point: The Maligne Trailhead is 1,690 meters (5,545 feet), whereas the Signal Trailhead is around 1,300 meters (4,265 feet)
- Best travel time: Early July to late October, with the best conditions window between late July to mid-September
- Permits: Required, info below
- Difficulty: Moderate to Difficult, info below
Highlights
- Approximately 25 km./16 mi. of the hike stays above treeline
- Stunning panoramic views of the Canadian Rockies in all directions
- A moderately graded path and mellow elevation profile
- Well-maintained and well-marked trail
- Many free, interactive maps to help with planning
- Pockets of solitude due to permit process limiting foot traffic
- Several gorgeous, unique campgrounds
- Bear boxes and picnic tables at campgrounds
- Convenient shuttle service options
Lowlights
- Highly competitive permit process due to popularity
- Permitting can make coordinating groups tricky
- Susceptible to quickly changing weather conditions – the trail can be very windy above treeline, and storms can manifest suddenly
- 9 km. (5.6 mi.) To and from the Signal Trailhead is a forested road walk
- Campfires not permitted
- Expect limited or no cell service
Best Time to Hike
July through September is the best time to hike the Skyline Trail. However, as you may have caught wind, Jasper’s vicious fire season rapidly tore through parts of the park and destroyed one-third of the town of Jasper. While this area was poised to have a severe fire, what with the pine beetle leaving a graveyard of dead trees, any wildfire season can quickly shut down your backpacking plans. Keep in mind that recovery efforts could delay permit launching and trail openings. Over 32,000 hectares is now a charred landscape in the infancy of rebirth, which you will see from the trail approaching the Maligne River Valley, on your drive to trailheads, and in town. Your business and support to help the residents and businesses recover from the Jasper Wildfire are greatly appreciated.
Aside from wildfire season, those prepared for rain, snow, and mud can trek through the shoulder seasons. Snowpack is a key factor for trip planning in this area, as snow can linger on the passes, especially The Notch, until late in the summer. Rain and snow can fall at any time of year, and freezing temperatures are possible even in summer months.
As always, be prepared to diligently monitor current and upcoming weather conditions before your trek in this region. Before heading out, reference the Jasper National Park trail report for up-to-date conditions.
Difficulty
- Total Distance – 44 kilometers (27 miles)
- Total Elevation Gain/Loss – 1,410 meters (4,625 feet)
- Overall Difficulty – Moderate to Difficult
We rate this hike as moderate to difficult. You will have a steady climb on your first day regardless of which trailhead you choose to start from. After that, most of the route will undulate up and over three moderate mountain passes on a well-graded trail. Even the descents from the passes, which can be strenuous for many, are reasonably gentle. That means happy knees and ankles!
As always, difficulty ratings depend on your experience, physical fitness, pack weight, and weather conditions. Any hike is likely to be difficult if you’re carrying 50+ pounds, or you’re attempting a multi-day hike after months of streaming TV from your couch. This is not a technically demanding hike, but you should plan accordingly, train properly, know your limitations, brush up on your skills, and dial in your gear. These steps will make for a safe, gratifying, and unforgettable adventure.
Permits
A backcountry permit is mandatory for hiking the Skyline Trail. Permits can be obtained online at reservation.pc.gc.ca or by calling 1-877-737-3783 (1-519-826-5391 outside of North America). Since this is one of the most sought-after backpacking trips in Jasper National Park and the Jasper’s recent wildfire, we recommend keeping an eye on their website for updates. The trail openings and permit reservation launch dates could be delayed because of all the damage and rebuild efforts.
On a normal year, you’ll want to book as soon as Canada Parks launches reservations (usually at the end of January or the first week of February). If you cannot snag a spot so far ahead of time, monitor the website regularly, as there are occasionally cancellations. As always, cancel any reservations you can make for good permit karma!
Trailheads & Shuttle Info
The Skyline Trail has two trailheads, Maligne Trailhead (south) at 1,690 meters elevation and Signal Trailhead (north) at 1300 meters elevation. The Jasper wildfire impacted the Signal Trailhead, so keep checking back in with Park Canada for updated information on road and trail conditions for the next hiking seasons. For easier logistics, we recommend beginning the trail at Maligne and ending at Signal. Most people complete the trail by using the Maligne Adventure’s Shuttle, which allows hikers to park their car at the Signal Trailhead and take a 45-minute bus shuttle to the Maligne Trailhead. At the time of this update, the cost was $42 per person and we felt it was well worth it for the convenience.
Getting There
Signal Trailhead: Located 15 minutes from the town of Jasper, head east on Hwy 16 towards Edmonton. Two kilometers from Jasper, turn right onto Maligne Lake Road. After 8 km, look for a sign with a small hiker symbol on the right, designating parking for the Signal Trailhead. If you hit Maligne Canyon, you’ve gone too far.
Maligne Trailhead: Located one hour from the town of Jasper, head east on Hwy 16 towards Edmonton. Two kilometers from Jasper, turn right onto Maligne Lake Road. Continue on this road for 48 kilometers until arriving at Maligne Lake. Pass the chalet and cross the bridge, then keep going to the parking lot on the west side of the lake. Maligne trailhead is on the right side of the road, just before the parking lot.
Campsites
There are six campsites along the Skyline Trail. All campsites have seven individual sites that can be booked, except Evelyn Creek (which has four). For more information on individual campsites and a map and elevation profile for each, visit Jasper National Park’s information page. Below are the distances of each campsite from Maligne Lake.
- Evelyn Creek – 4.8 km. / 3 mi.
- Little Shovel – 8.3 km. / 5.2 mi.
- Snowbowl – 12.2 km. / 7.6 mi.
- Curator – 21.3 km. / 13.3 mi.
- Tekarra – 30.9 km. / 19.2 mi.
- Signal – 35.6 km. / 22.2 mi.
How Long Does It Take?
Most people complete the Skyline Trail in three days, but faster and more experienced hikers can complete it in two. Those who prefer a leisurely pace, don’t mind covering less distance each day, or wish to explore the alpine terrain thoroughly may choose a four-day trip. There are many spur trails and off-trail scrambles to surrounding peaks like Sunset and Aberhart if you have the experience and time to drop some gear in camp and explore even higher. At CleverHiker, we enjoy hiking and keep our packs light, so we completed the trail in two days and would hike it that way again. Below are three potential itinerary options:
Two Day Trip
- Starting Trailhead: Maligne Lake
- Day 1 hike: 21.3 kilometers (13.2 miles) to Curator Camp
- Day 2 hike: 22.8 kilometers (14.1 miles) to Signal Trailhead
Three Day Trip
- Starting Trailhead: Maligne Lake
- Day 1 hike: 12.2 kilometers (7.5 miles) to Snowbowl Camp
- Day 2 hike: 18.7 kilometers (11.6 miles) to Tekarra Camp
- Day 3 hike: 13.2 kilometers (8.2 miles) to Signal Trailhead
Four Day Trip
- Starting Trailhead: Maligne Lake
- Day 1 hike: 8.3 kilometers (5.16 miles) to Little Shovel Camp
- Day 2 hike: 12 kilometers (7.45) miles to Curator Camp
- Day 3 hike: 10.1 kilometers (6.27 miles) to Tekarra Camp
- Day 4 hike: 13.7 kilometers (8.51 miles) to Signal Trailhead
Maps & Guidebooks
- Lonely Planet: Banff, Jasper, and Glacier National Parks – We used this book for planning all our trips in this region and would recommend it. Although it provided a good overview, it did not give all the specifics needed to complete the Skyline Trail.
- National Geographic Trails: Jasper South – This map provides in-depth information about the Skyline Trail, including campsites, mileage, and elevation. You will also be able to use this map for other hikes in this area.
- Parks Canada Jasper Park Website – We’ve been continually impressed with Parks Canada information on various trails and the Skyline is no exception. Their backcountry guide offers clear and detailed information on completing the Skyline Trail.
Regulations
According to the Parks Canada site, the following regulations are in place for the Skyline Trail. We are not an official source on current regulations, so please consult the official website prior to your trip.
- No campfires
- No dogs
- No bikes allowed between Maligne Lake and Signal Fireroad
Water
Water is plentiful along this trail and easily accessible from small streams. Make sure to carry enough water to get from one source to the next. If you are unsure of what to bring, we have our list of favorite lightweight water purifiers. Every campsite along this trail has nearby running water. We carried the SteriPEN Ultra and were happy with its performance. Two other good lightweight options are the Sawyer Squeeze and Aquamira Drops.
Bears & Food Storage
Jasper National Park is home to a healthy grizzly and black bear population. Each campground has food storage facilities (bear lockers or hanging cables) for nighttime food storage. Be sure to stow all items with a smell that could attract bears (food, garbage, toiletries, etc.). In addition, each campsite has a designated cooking area with picnic tables to ensure that all food-related activity is away from where you sleep. Please abide by these regulations to limit bear-human interactions.
Bugs
During the most popular summer hiking months – especially late July into late August – the Canadian Rockies are home to hungry mosquitoes, flies, ticks, and other insects that can make your hiking and camping experience less than ideal. Even though much of the Skyline Trail travels through enough windy, alpine terrain to prevent swarms, it’s worth planning ahead when traveling to buggy areas. Our guide to hiking in mosquito territory will help prepare and protect yourself so you can backpack alongside skeeters relatively unscathed.
For the peak of summer, our advice is to cover clothes in Permethrin and bring a small bottle of bug repellent, like Picaridin Lotion, for exposed skin. We also recommend wearing long clothes to minimize exposed skin, avoiding scented products like flowery deodorants, or even consider bringing along a light headnet for relaxing in the evenings.
Gear List
Make sure to check out our Ultimate Backpacking Checklist, so you don’t forget something important.
Below you’ll find our current favorite backpacking gear. If you want to see additional options, our curated gear guides are the result of many years of extensive research and hands-on testing by our team of outdoor experts.
BACKPACK
- Best Backpacking Pack Overall: Gregory Paragon 58 – Men’s / Gregory Maven 58 – Women’s
- Best Ultralight Backpacking Backpack: Hyperlite Mountain Gear Unbound 40
- More: Check out our best backpacking backpacks guide for ultralight and trekking options
TENT
- Best Backpacking Tent Overall: Big Agnes Copper Spur HV UL2
- Best Ultralight Tent: Zpacks Duplex
- Best Budget Tent: REI Half Dome 2
- Best Tent Stakes Overall: All One Tech Aluminum Stakes
- More: Check out our best backpacking tents guide for more options
SLEEPING BAG/QUILT
- Best Sleeping Bag Overall: Men’s Feathered Friends Swallow YF 20 / Women’s Feathered Friends Egret YF 20
- Best Quilt Overall: Enlightened Equipment Revelation 20
- More: Check out our best backpacking sleeping bags guide and best backpacking quilts guide for more options
SLEEPING PAD
- Best Sleeping Pad Overall: NEMO Tensor All-Season
- Best Foam Sleeping Pad: NEMO Switchback
- More: Check out our best backpacking sleeping pads guide for ultralight and trekking options
CAMP KITCHEN
- Best Backpacking Stove Overall: MSR PocketRocket 2
- Best Backpacking Cookware Overall: TOAKS Titanium 750ml
- Best Backpacking Coffee Overall: Starbucks VIA
- More: Check out our best backpacking stoves guide and best backpacking cookware guide for ultralight and large group options
WATER & FILTRATION
- Best Water Filter Overall: Sawyer Squeeze
- Best Hydration Bladder Overall: Gregory 3D Hydro
- Best Backpacking Water Bottles: Smartwater Bottles
- More: Check out our best backpacking water filters guide and best backpacking water bottles guide for ultralight and large group options
CLOTHING
- Best Hiking Pants Overall: Men’s Outdoor Research Ferrosi / Women’s The North Face Aphrodite 2.0
- Best Hiking Shorts Overall: Men’s Patagonia Quandary / Women’s Outdoor Research Ferrosi
- Best Women’s Hiking Leggings: Fjallraven Abisko Trekking Tights HD
- Best Rain Jacket Overall: Men’s Patagonia Torrentshell 3L / Women’s Patagonia Torrentshell 3L
- Best Rain Pants: Men’s Patagonia Torrentshell 3L / Women’s Patagonia Torrentshell 3L
- Best Down Jacket Overall: Men’s Patagonia Down Sweater Hoodie / Women’s Patagonia Down Sweater Hoodie
- Best Fleece Jacket Overall: Men’s Patagonia Better Sweater / Women’s Patagonia Better Sweater
- Best Sunshirt Overall: Men’s Outdoor Research Echo / Women’s Outdoor Research Echo
- Best Socks Overall: Men’s Darn Tough Light Hiker Micro Crew / Women’s Darn Tough Light Hiker Micro Crew
- Beste Ultralight Liner Glove: Patagonia Capilene Midweight Liner
- More: Check out our best backpacking apparel lists for more options
FOOTWEAR & TRACTION
- Best Hiking Shoes Overall: Men’s HOKA Speedgoat 6 / Women’s HOKA Speedgoat 6
- Best Hiking Boots Overall: Men’s Salomon X Ultra 5 GTX / Women’s Lowa Renegade Evo GTX
- Best Hiking Sandals Overall: Men’s Chaco Z/1 Classic / Women’s Chaco Z/1 Classic
- Best Camp Shoes Overall: Crocs Classic Clogs
- Best Traction Device for Hiking Overall: Kahtoola MICROspikes
- More: Check out our best backpacking footwear lists for more options
NAVIGATION
- Best GPS Watch Overall: Garmin Instinct 2 Solar
- Best Personal Locator Beacon (PLB): Garmin inReach Mini 2
- More: Check out our article How to Use Your Phone as a GPS Device for Backpacking & Hiking to learn more
FOOD
FIRST-AID & TOOLS
- Best First-Aid Kit Overall: Adventure Medical Kits Ultralight/Watertight .7
- Best Pocket Knife Overall: Kershaw Leek
- Best Multitool Overall: Leatherman Wave+
- Best Headlamp Overall: Black Diamond Spot 400-R
- Best Power Bank Overall: Nitecore NB 10000 Gen 3
- More: Check out our best first-aid kit guide, best pocket knife guide, best multitool guide, best backpacking headlamps guide, and best power banks guide for more options
MISCELLANEOUS
- Best Trekking Poles Overall: Black Diamond Pursuit
- Best Backpacking Chair Overall: REI Flexlite Air
- Best Backpacking Stuff Sack Overall: Hyperlite Mountain Gear Drawstring
- More: Check out our best trekking poles guide, best backpacking chairs guide, and best stuff sacks guide for more options
We prefer lightweight backpacking because it’s more comfortable and it allows us to cover more ground with less effort. For recommendations on our favorite lightweight backpacking equipment, check out the CleverHiker Gear Guide and Top Picks page.
More Photos
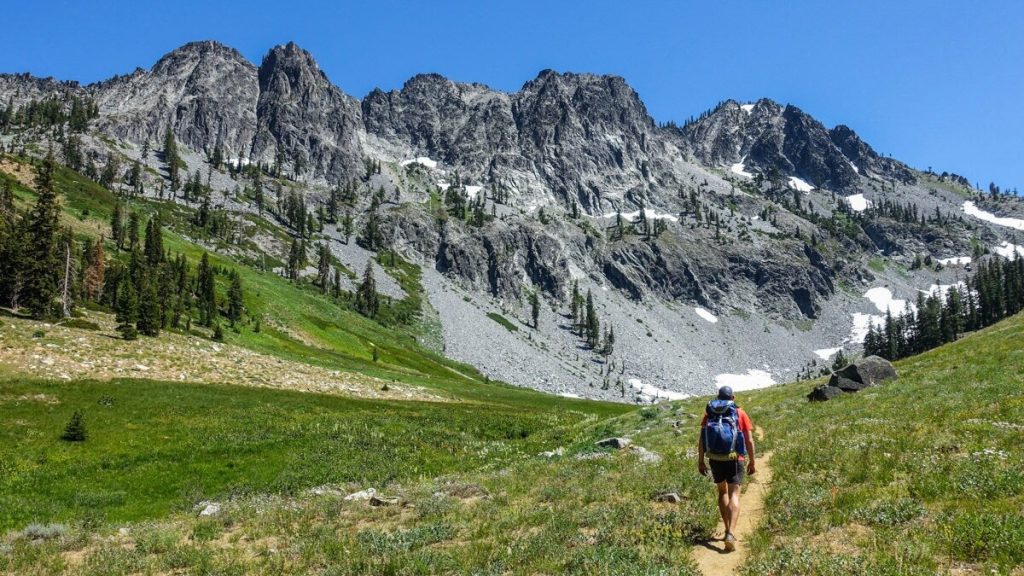
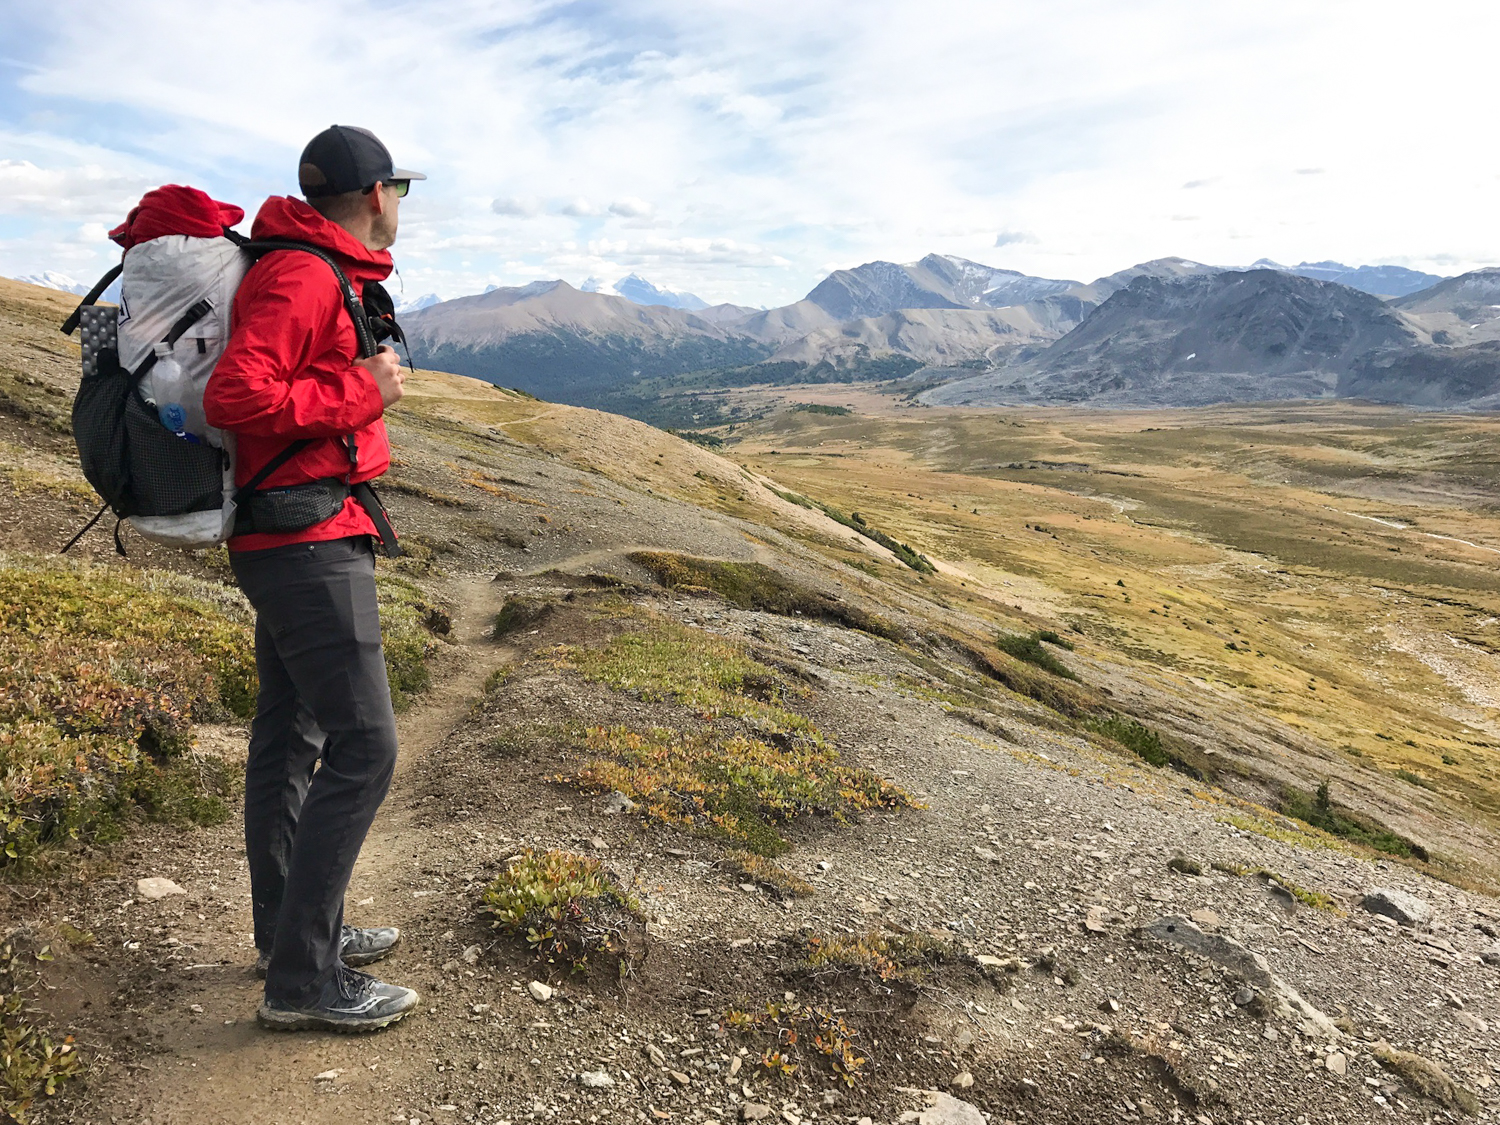
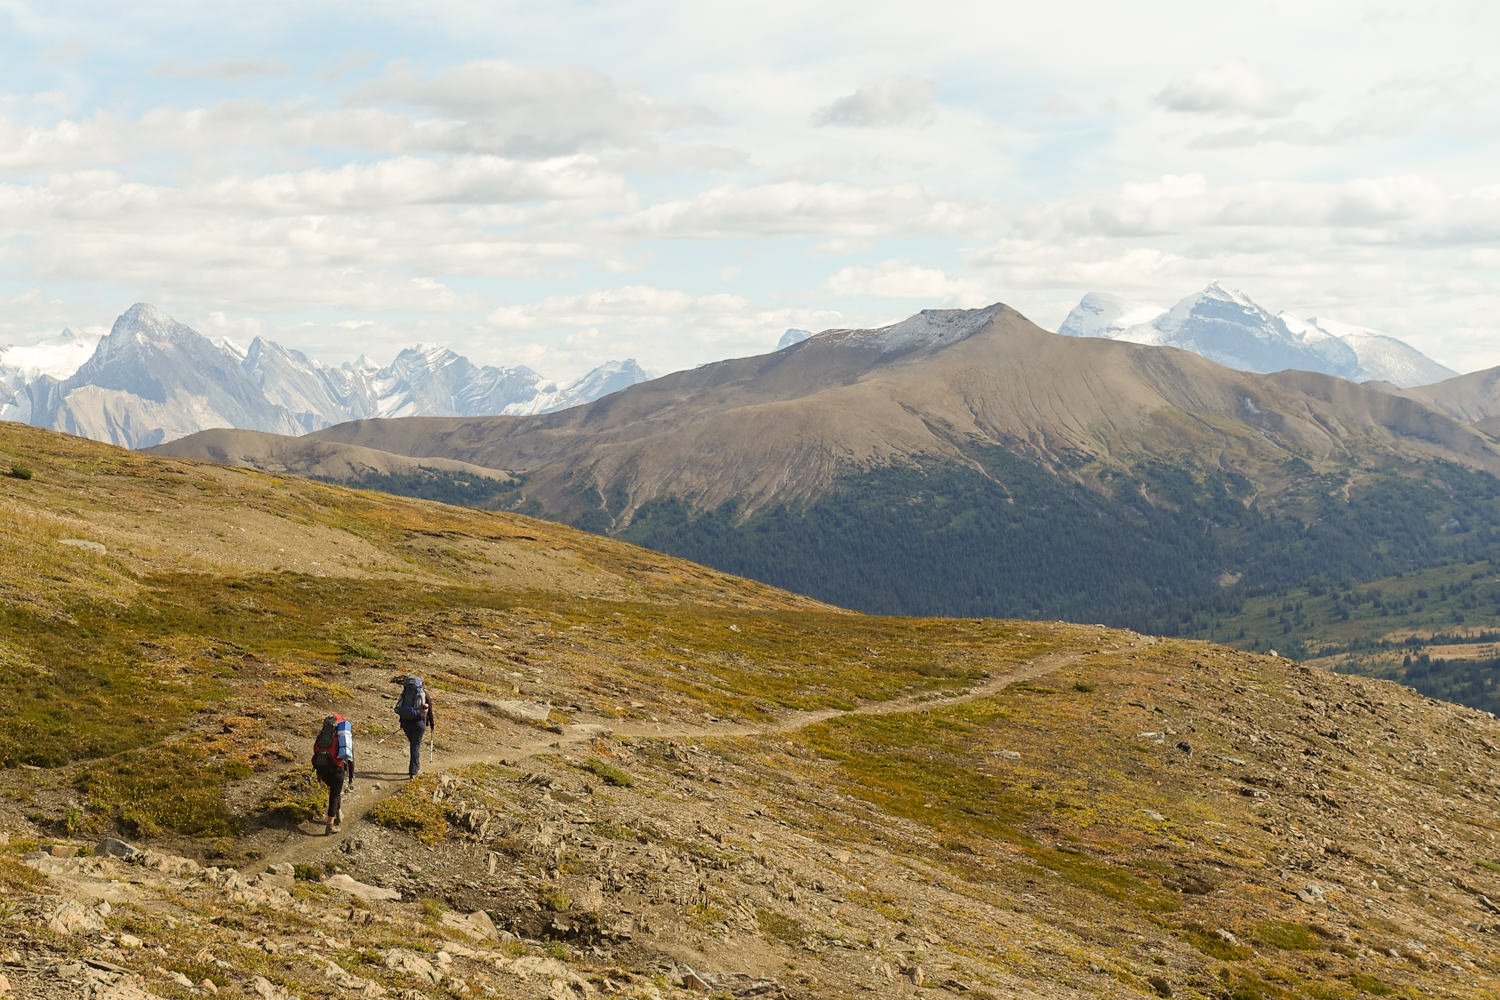
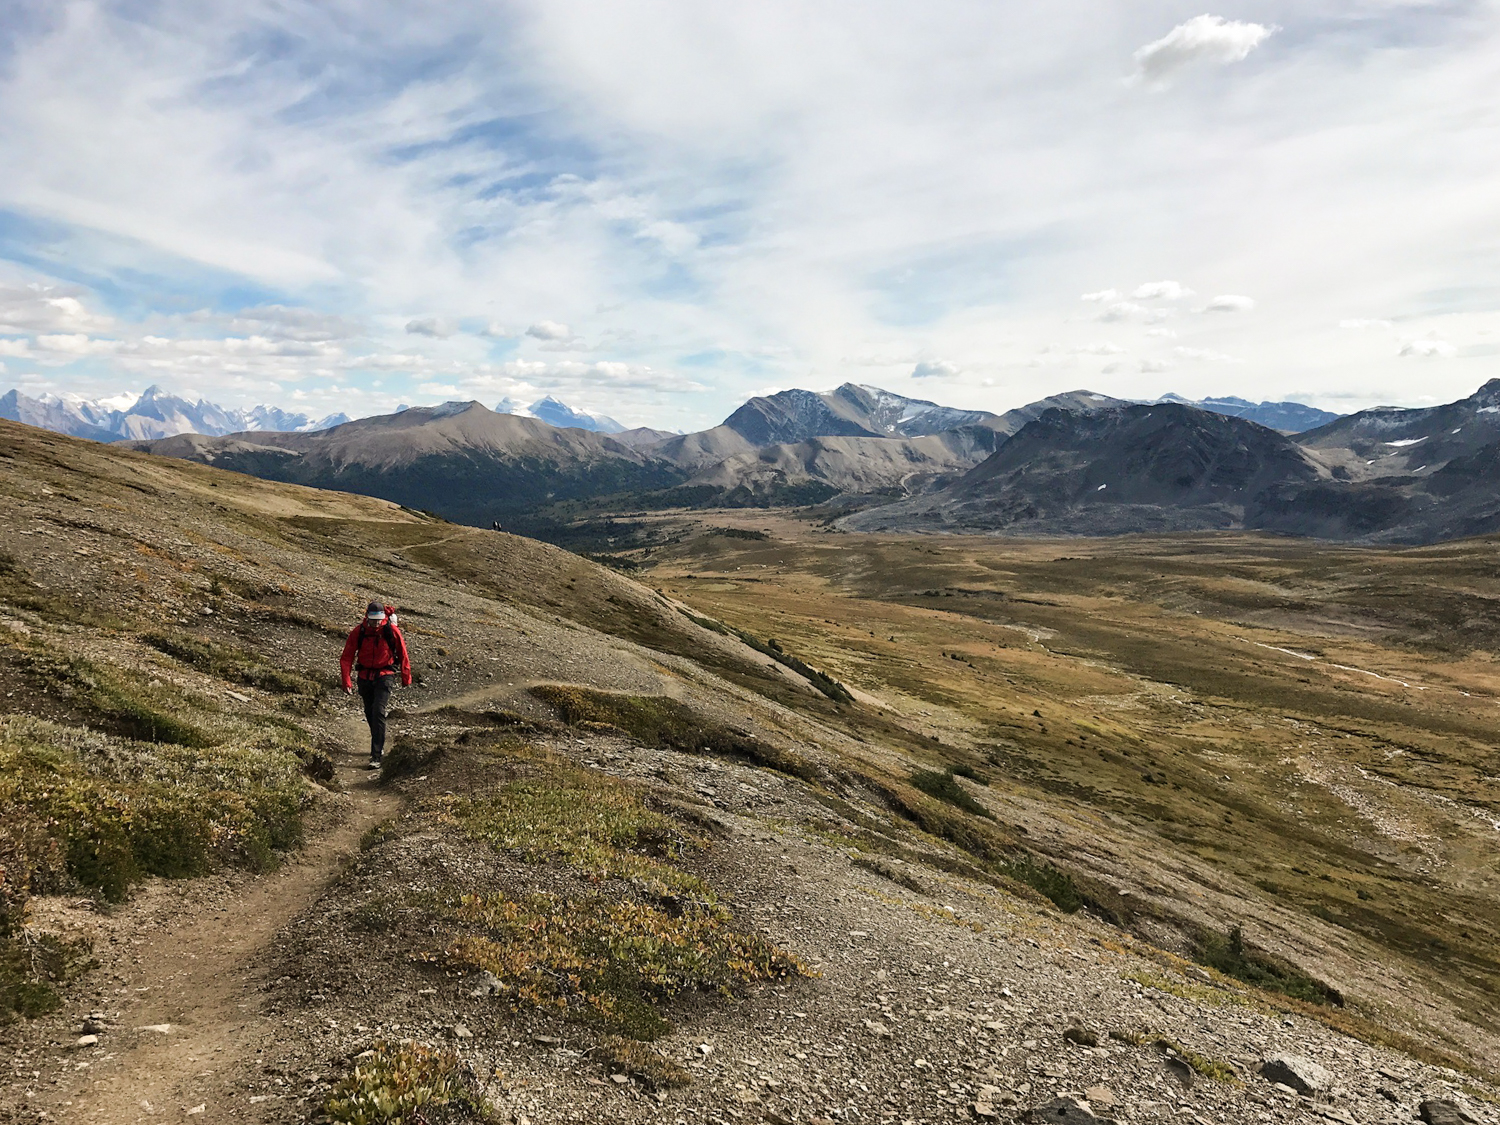
It doesn’t take long for the trail to provide some expansive views. – photo credit: dave collins (Cleverhiker.com)
Cool temps and consistent wind kept our beanies on most of the hike! – dave collins (Cleverhiker.com)

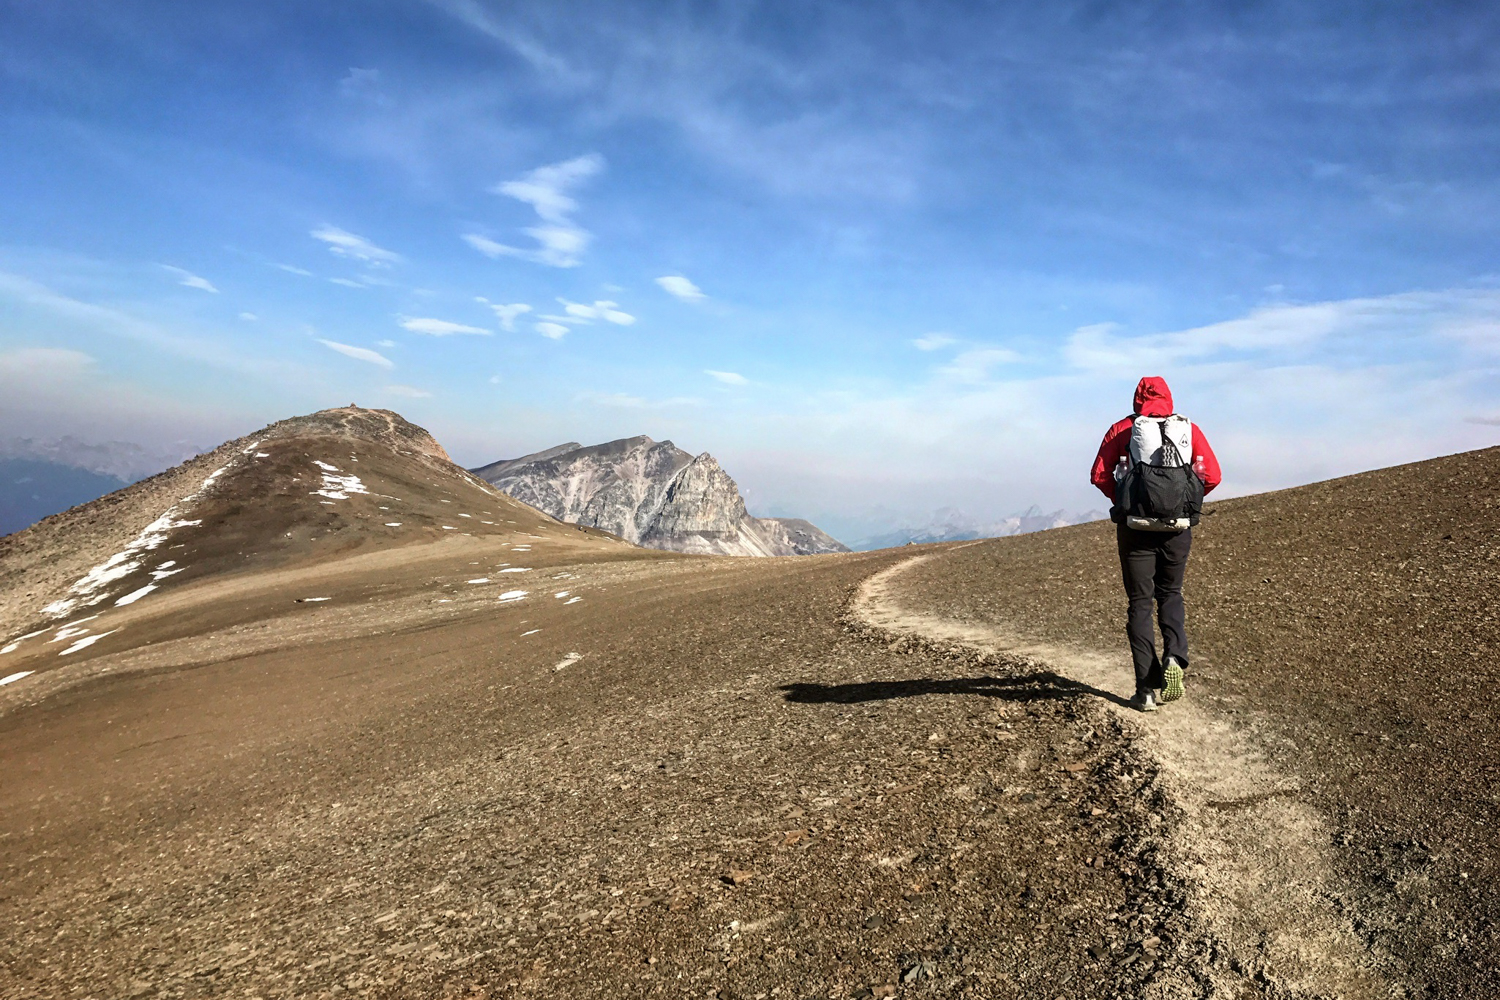
stunning views without any tripping hazards from the notch toward amber mountain. – photo credit: dave collins (cleverhiker.com)
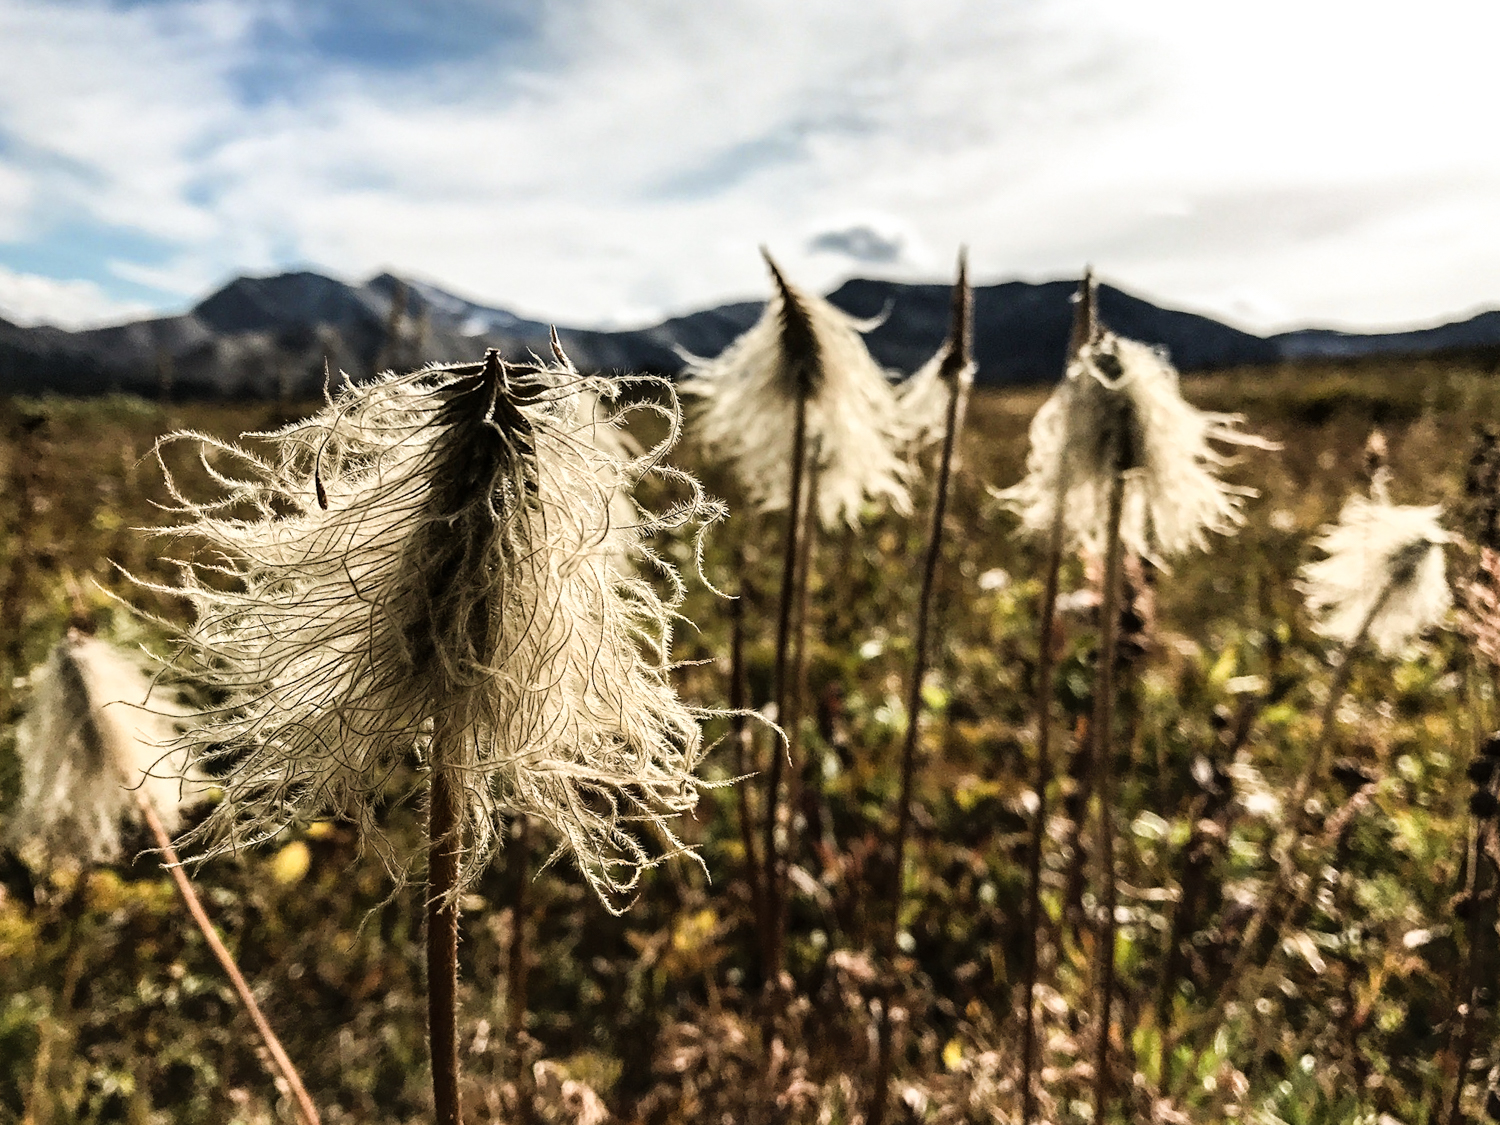
Western pasque flower must have been the inspiration for Dr. Suess’ truffela trees. – photo credit: dave collins (cleverhiker.com)
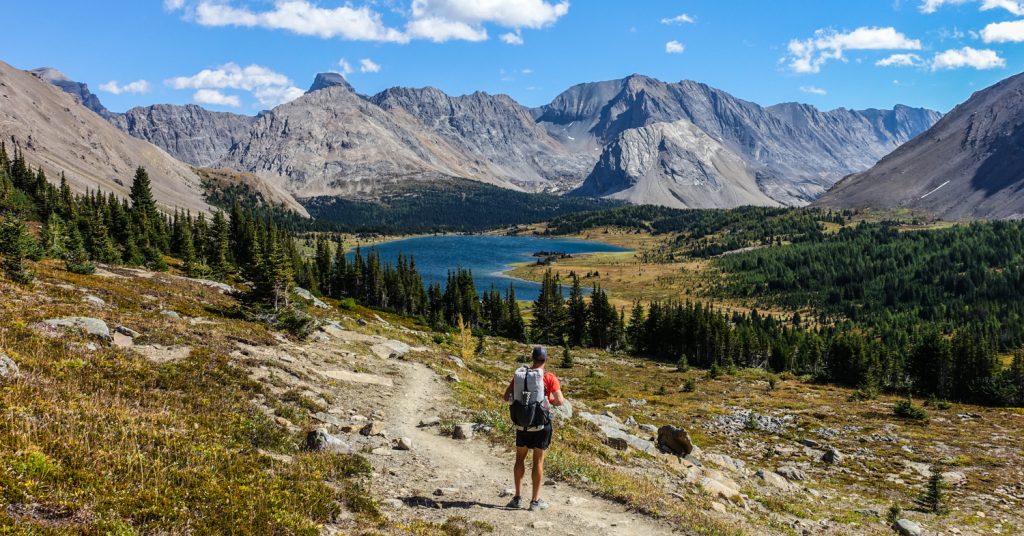
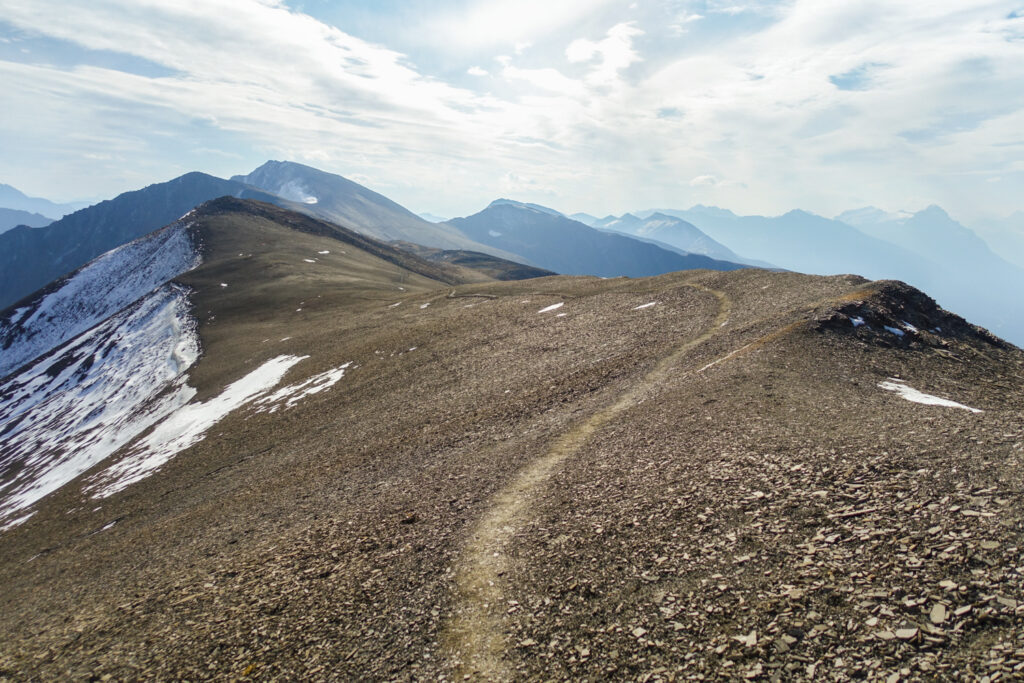
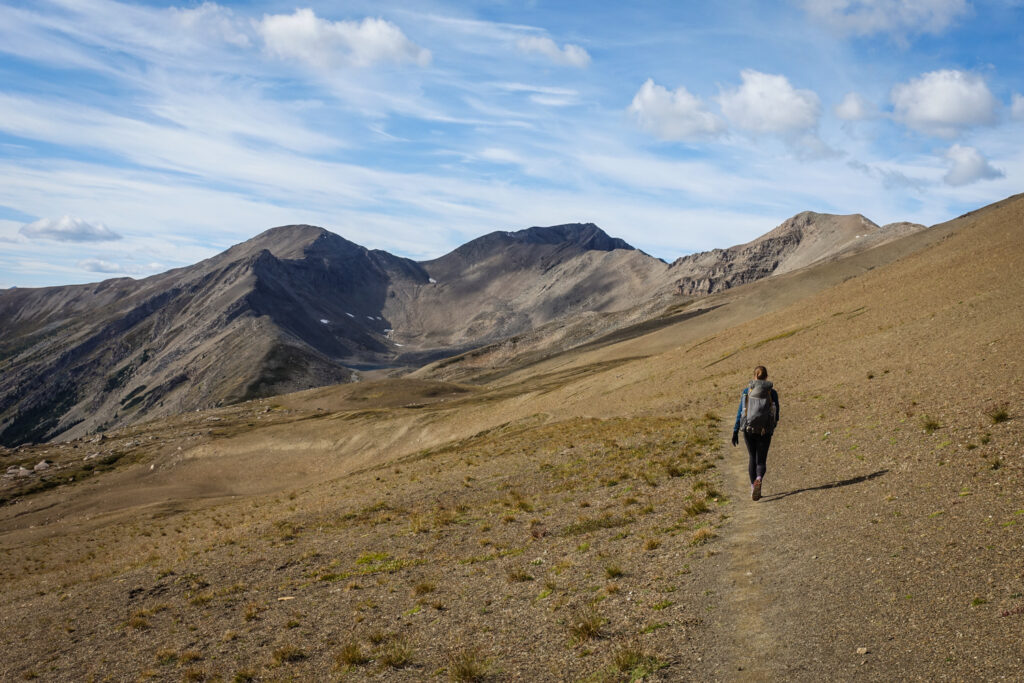
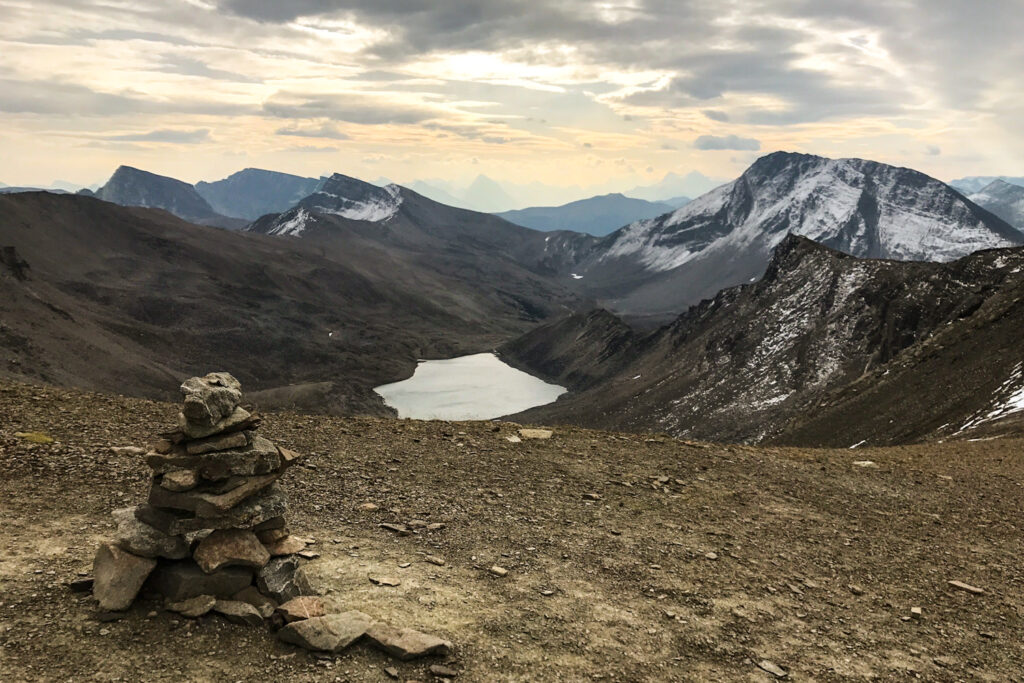
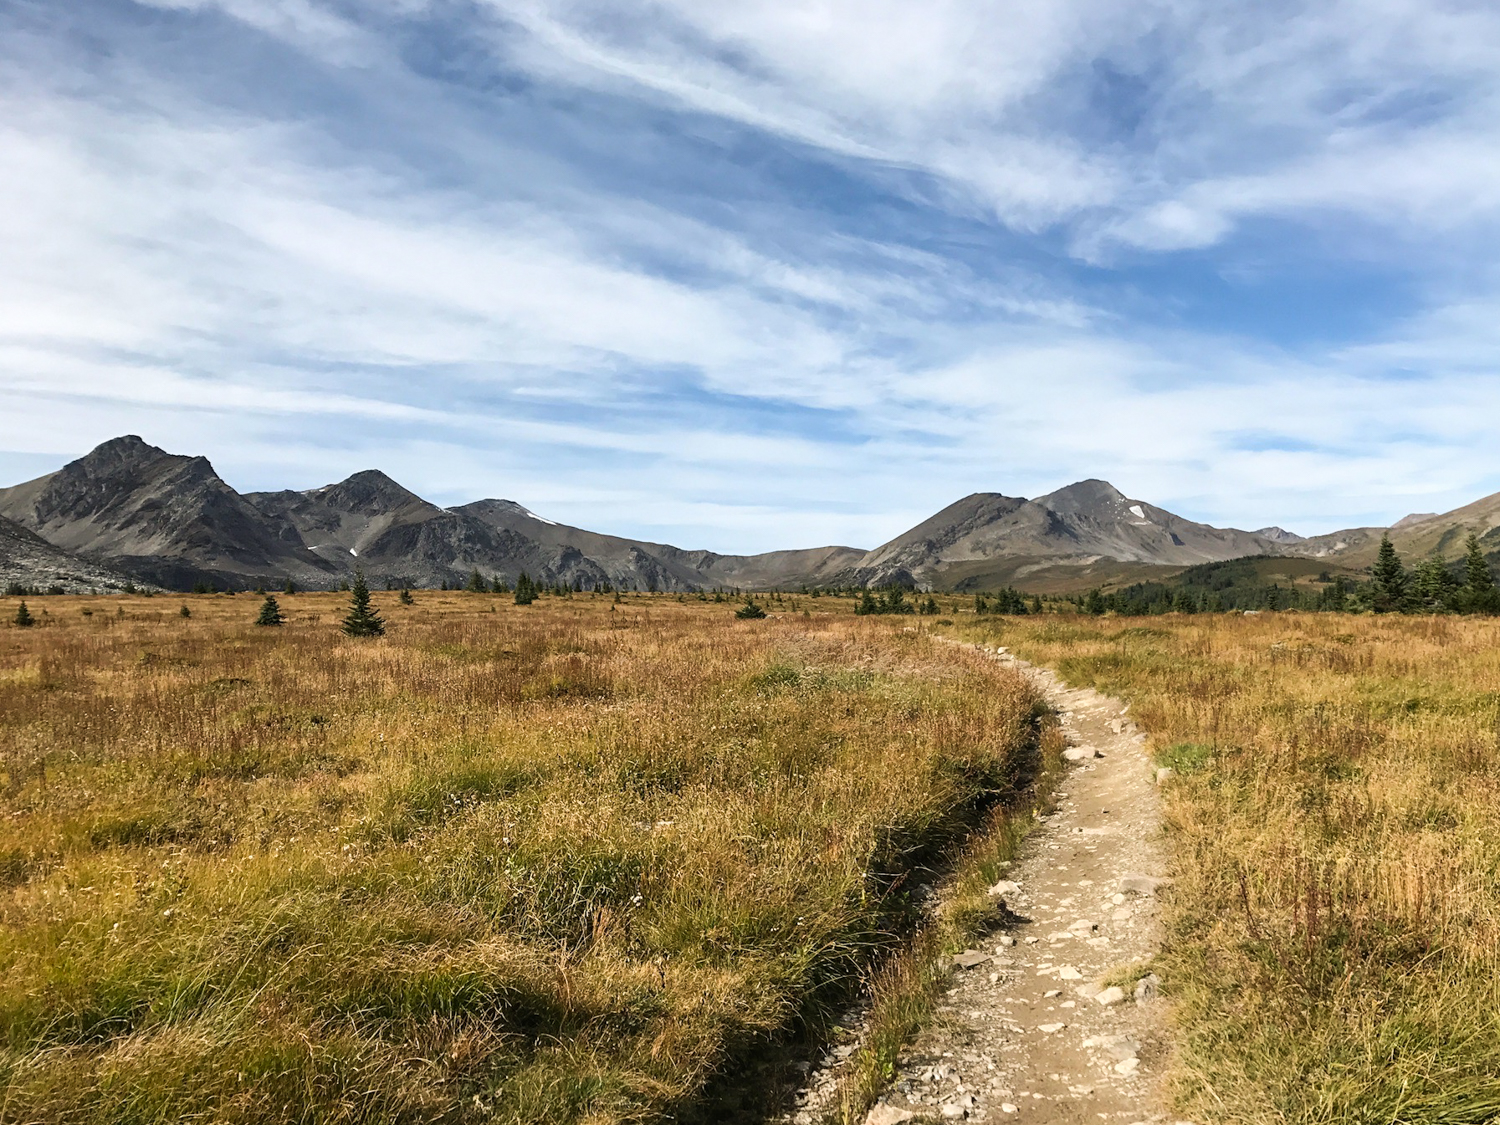
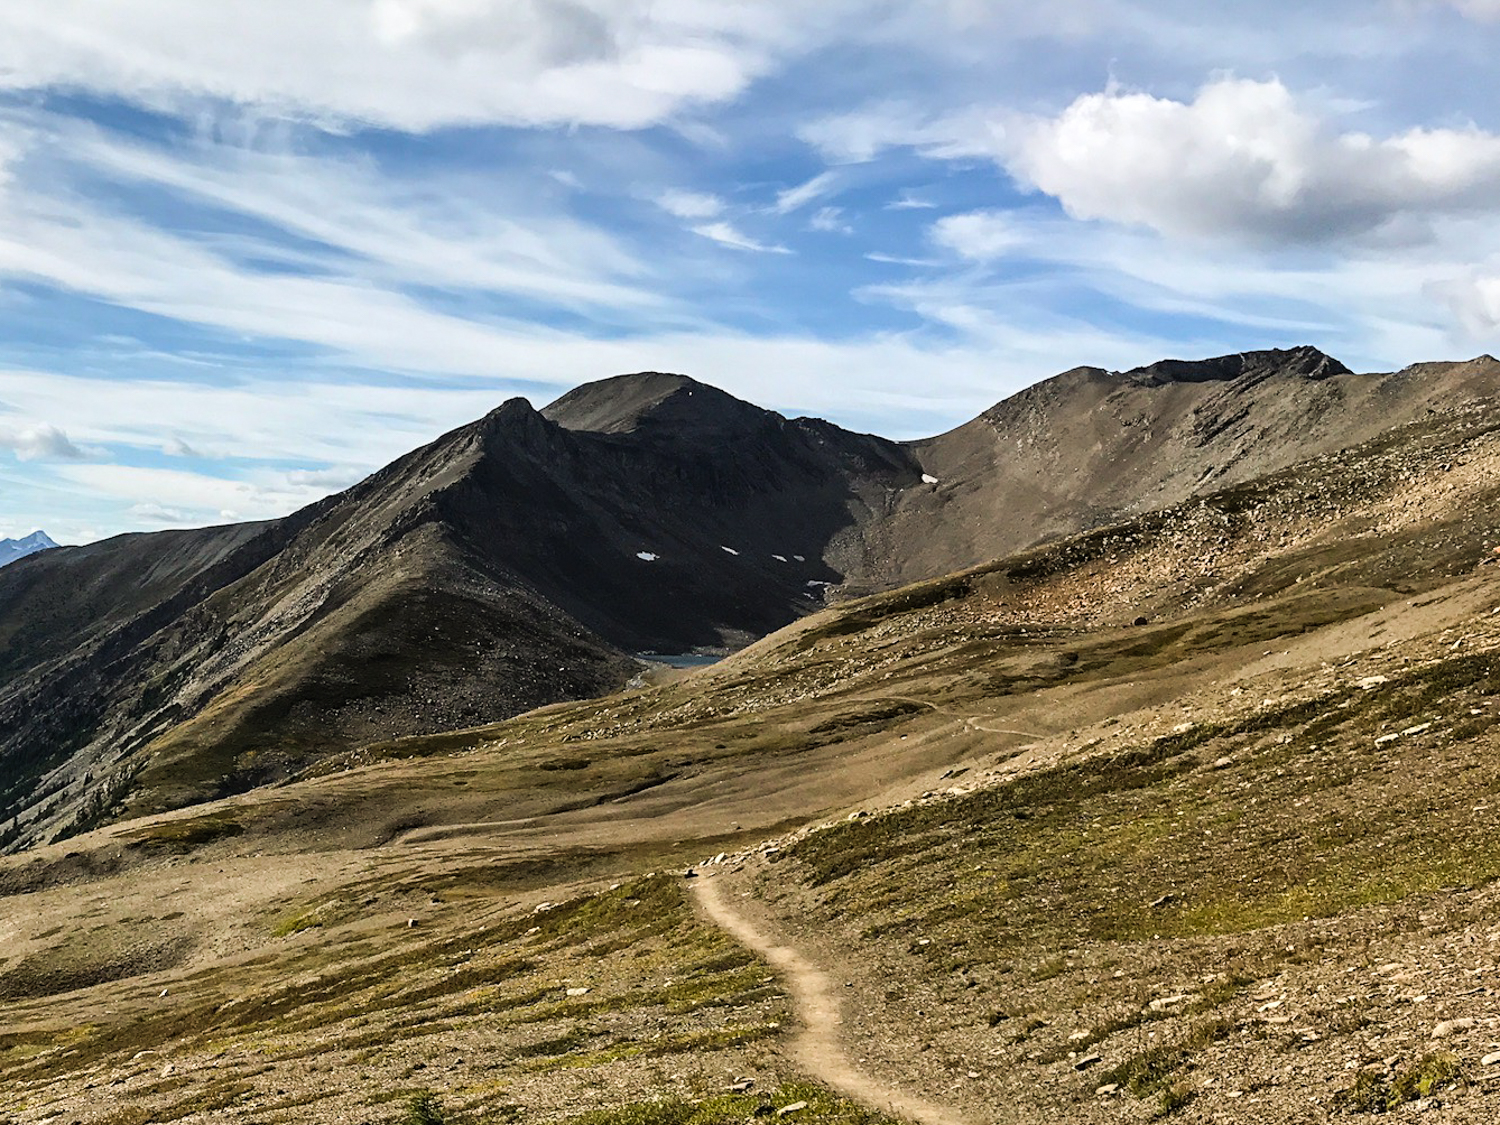
360 degree views for the 25km above treeline. – photo credit: dave collins (cleverhiker.com)
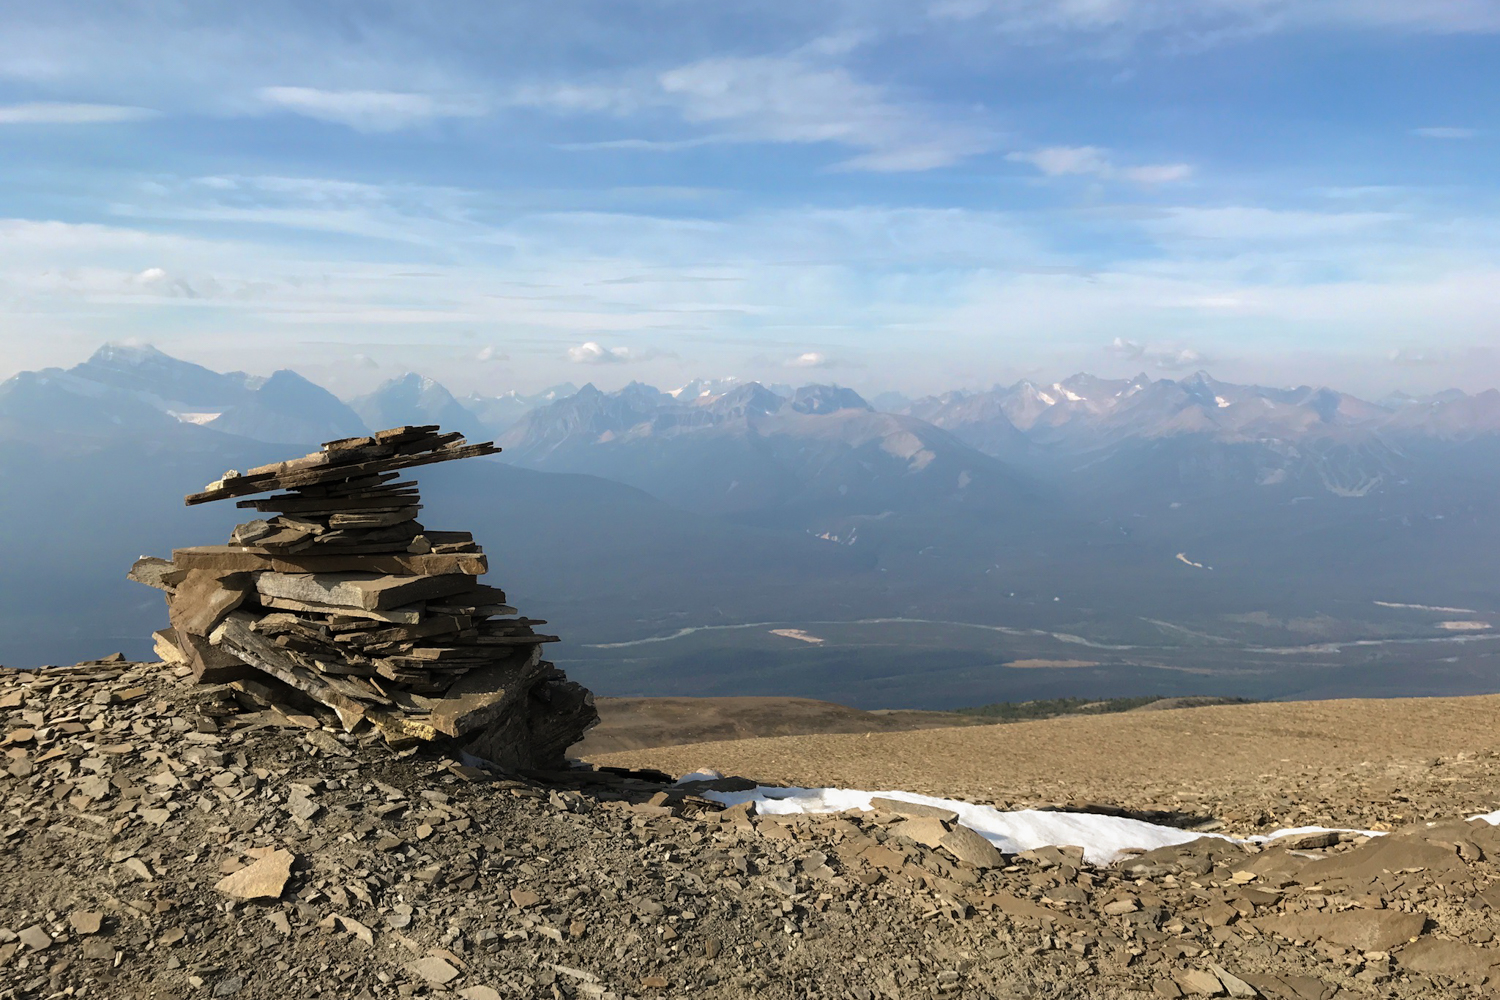
watch the weather, it moves quickly up here! – photo credit: dave collins (Cleverhiker.com)
Big appreciation for the Jasperites, trail crews, and parks canada for working so hard to maintain trails, camps, and trailheads. – photo credit: dave collins (cleverhiker.com)
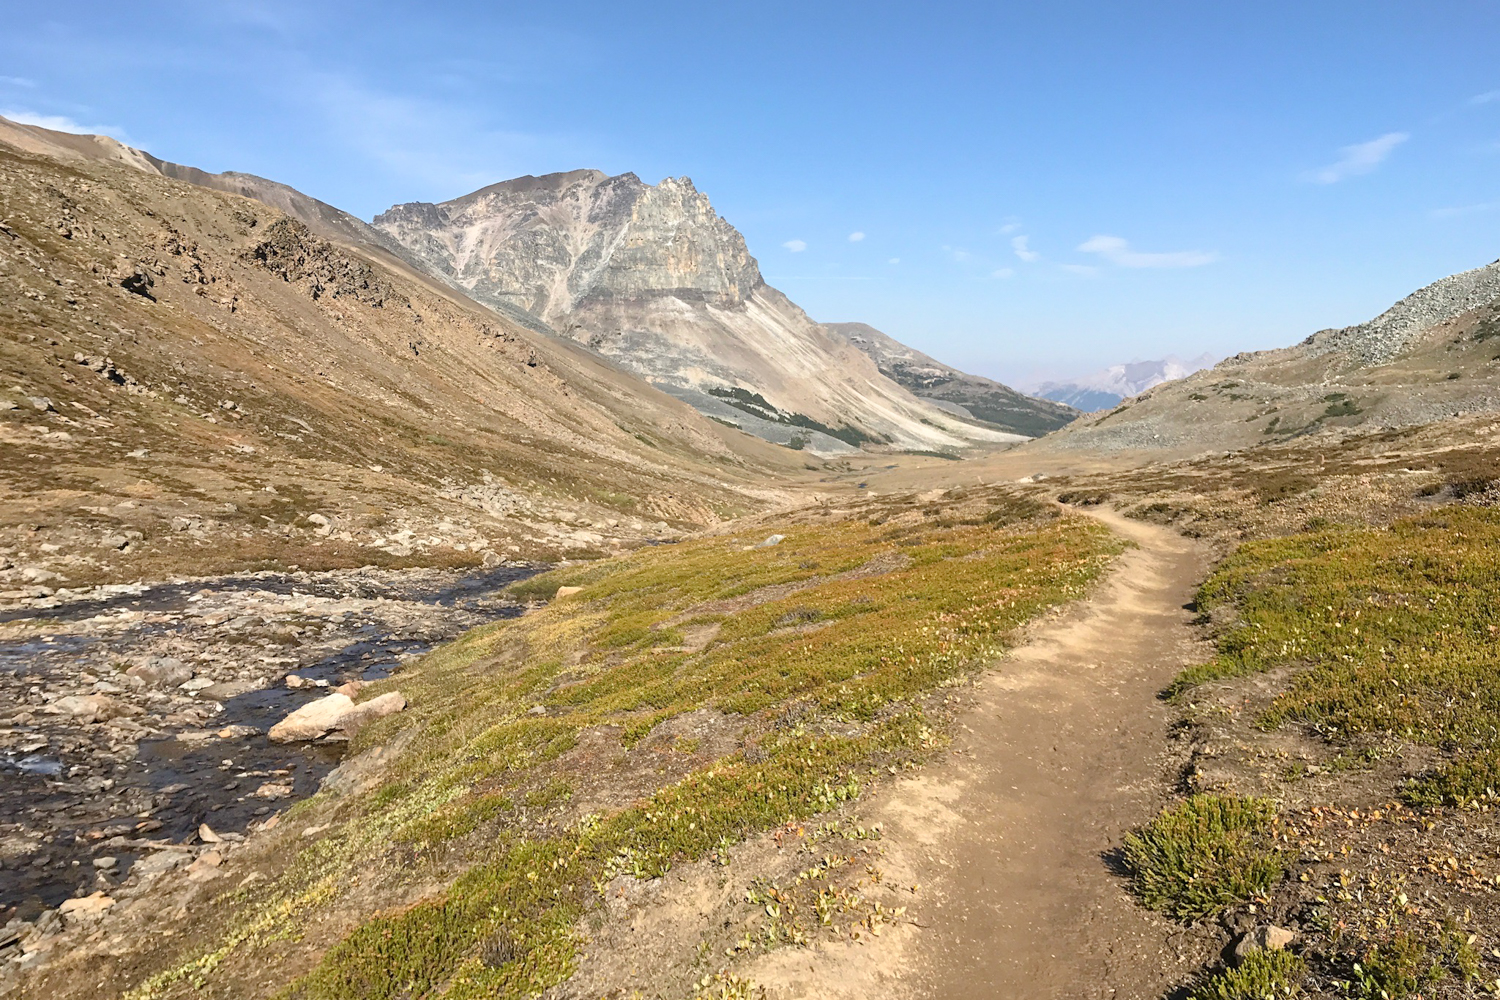
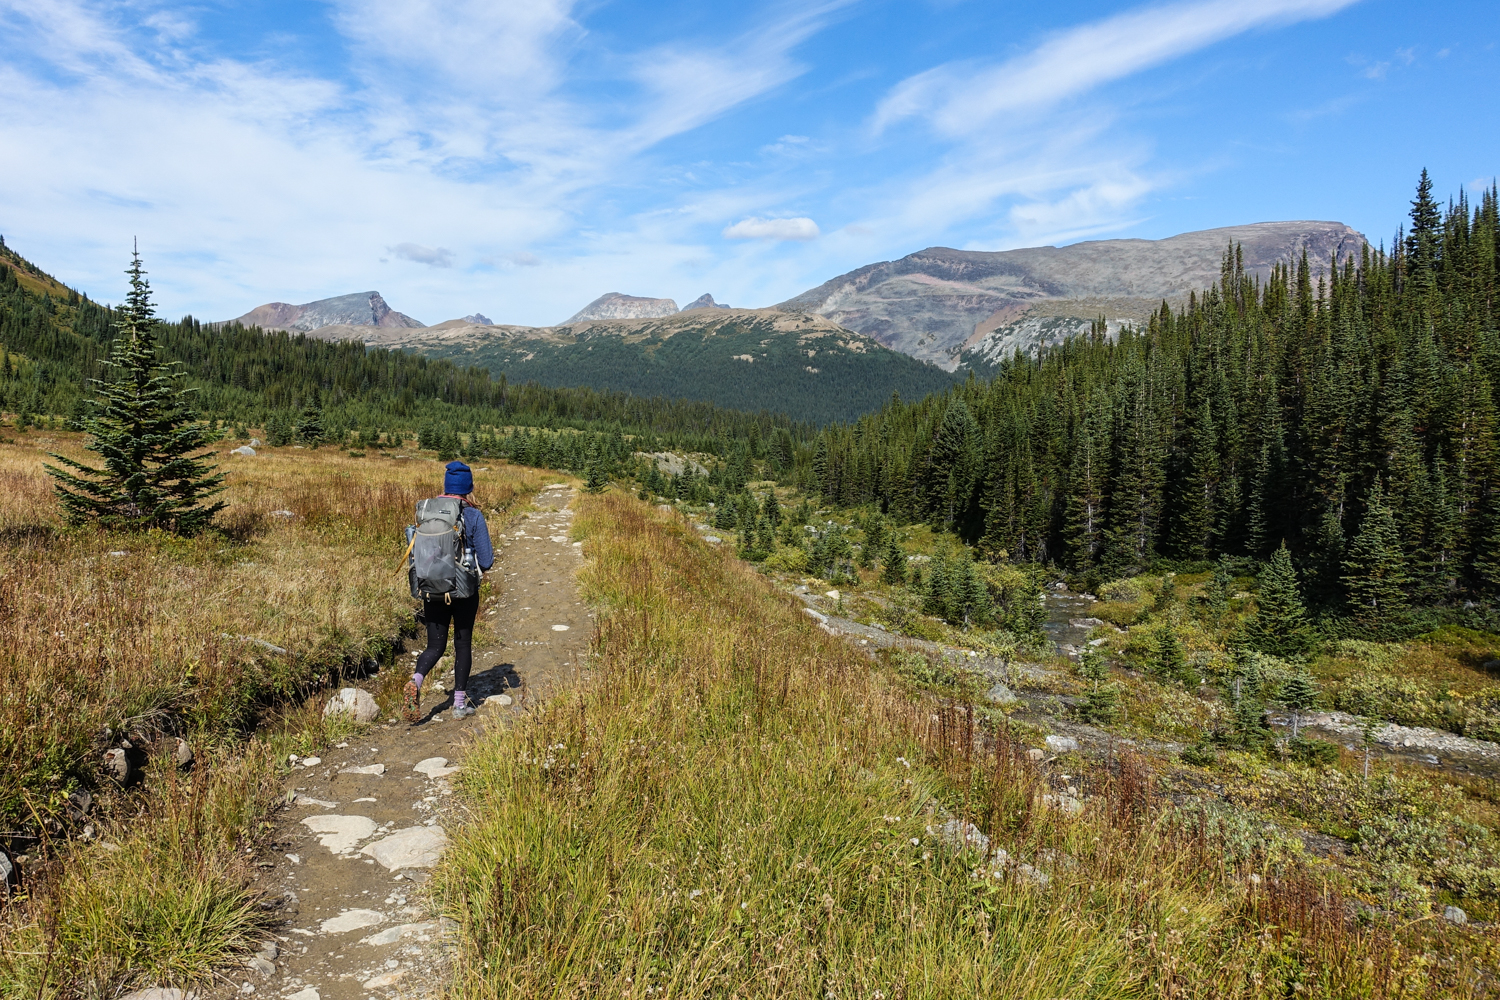
The trail has a number of water sources. – photo credit: dave collins (cleverhiker.com)