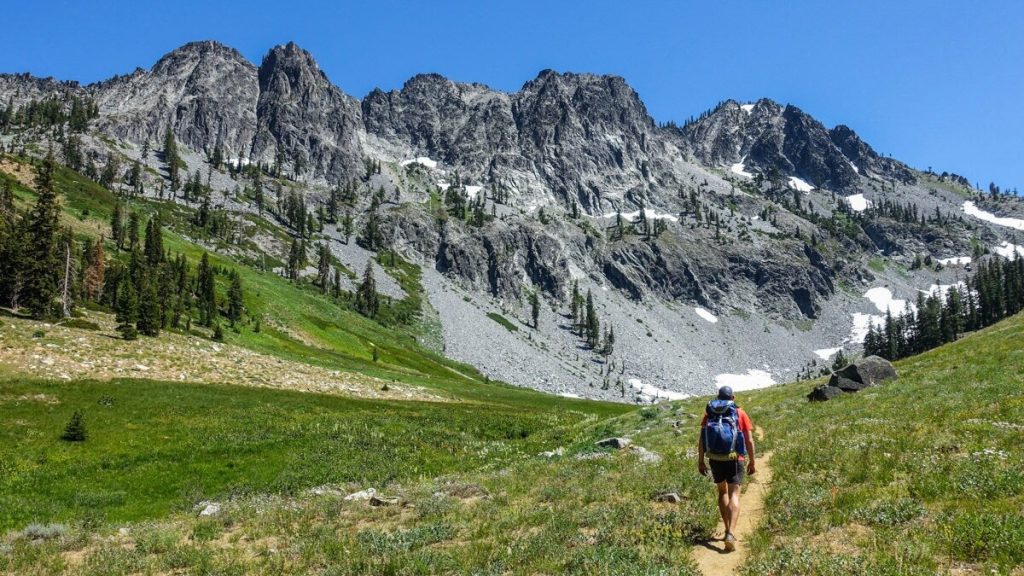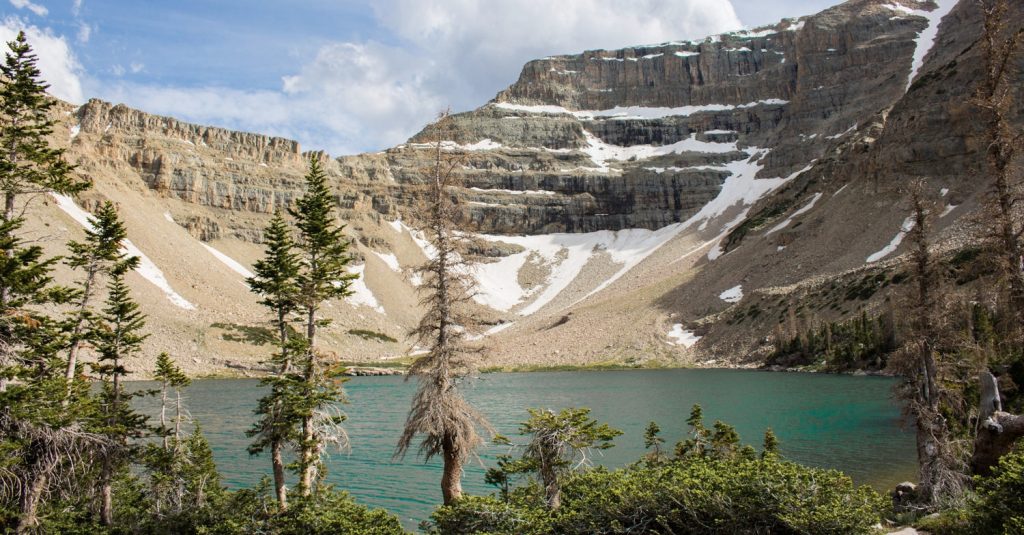
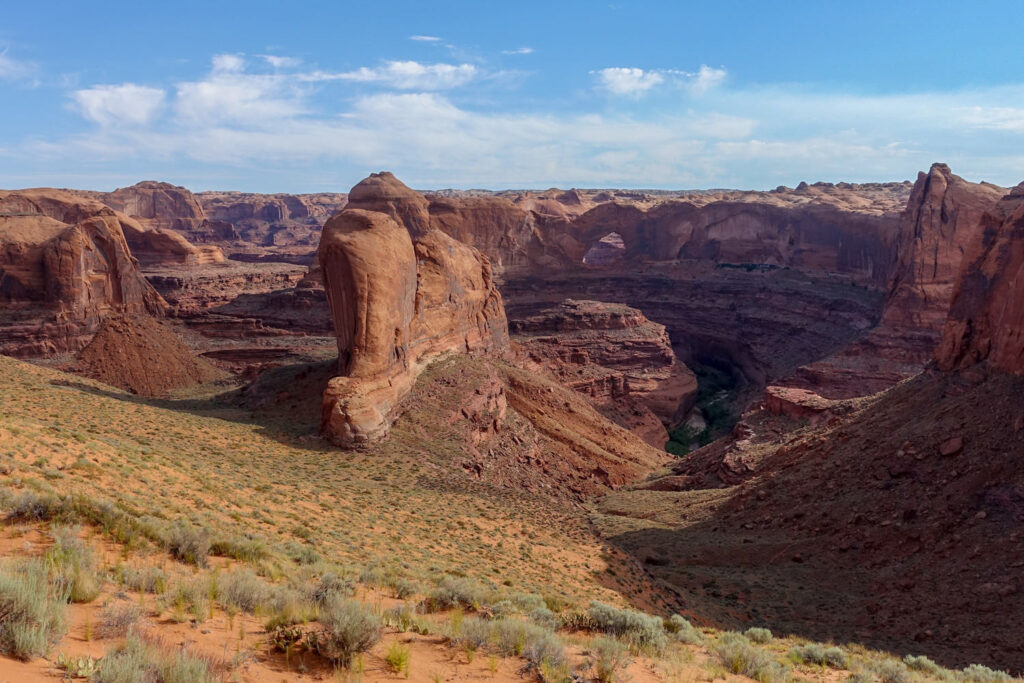
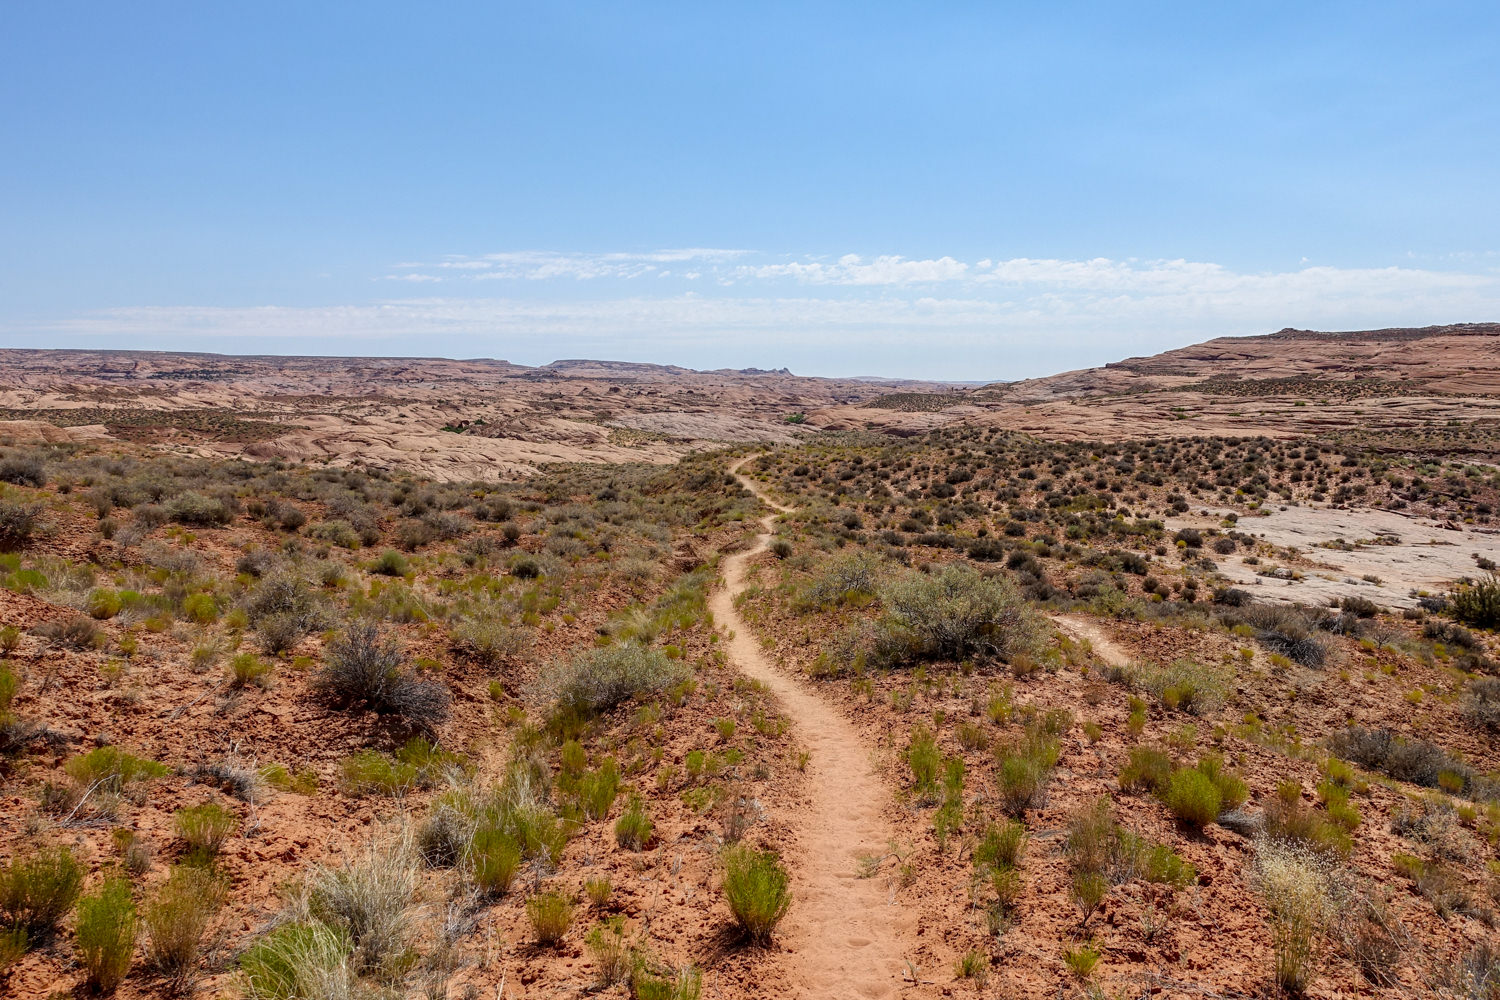
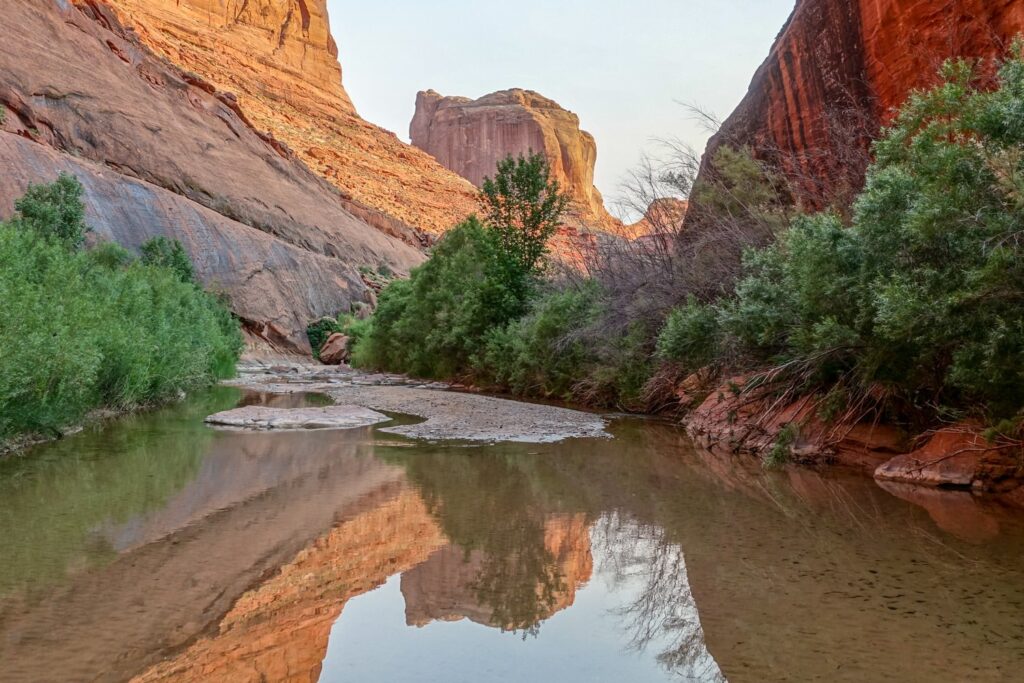
For hikers seeking an adventure in the remote red rock beauty of Utah, Coyote Gulch is a hard-won, bucket-list destination. Access to this magnificent canyon, gained via a remote unpaved byway called Hole-in-the-Rock Road, is on the Grand Staircase-Escalante plateau.
It can be washboard rattling, rough, or tire-sucking slick, depending on the weather and road maintenance. But once you gain a foothold on the canyon, you’ll forget about all the time and patience it takes to get there.
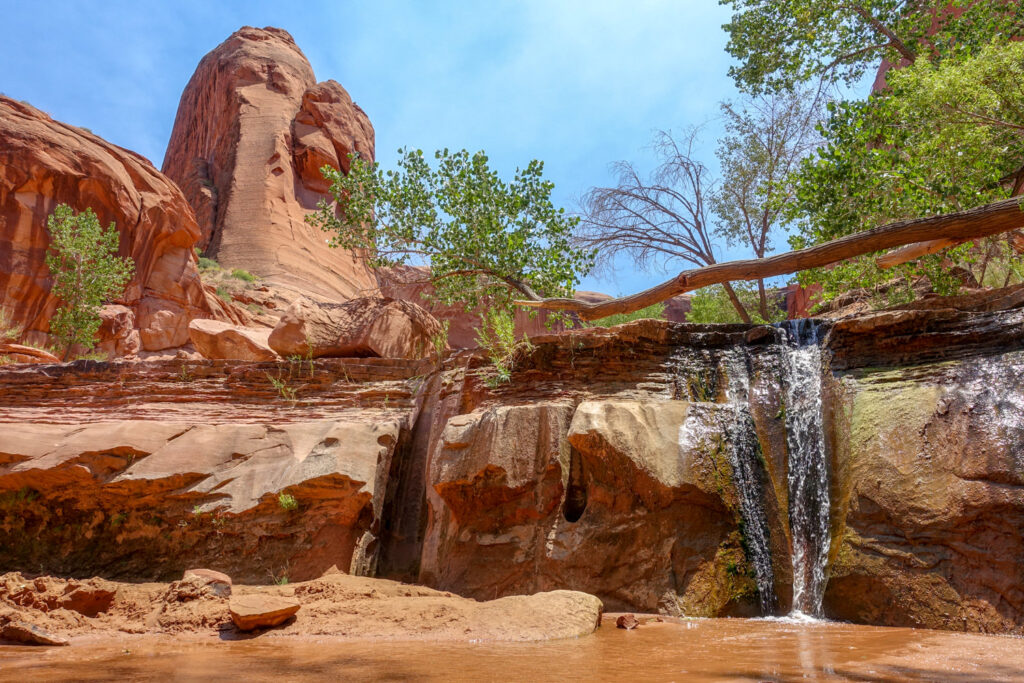
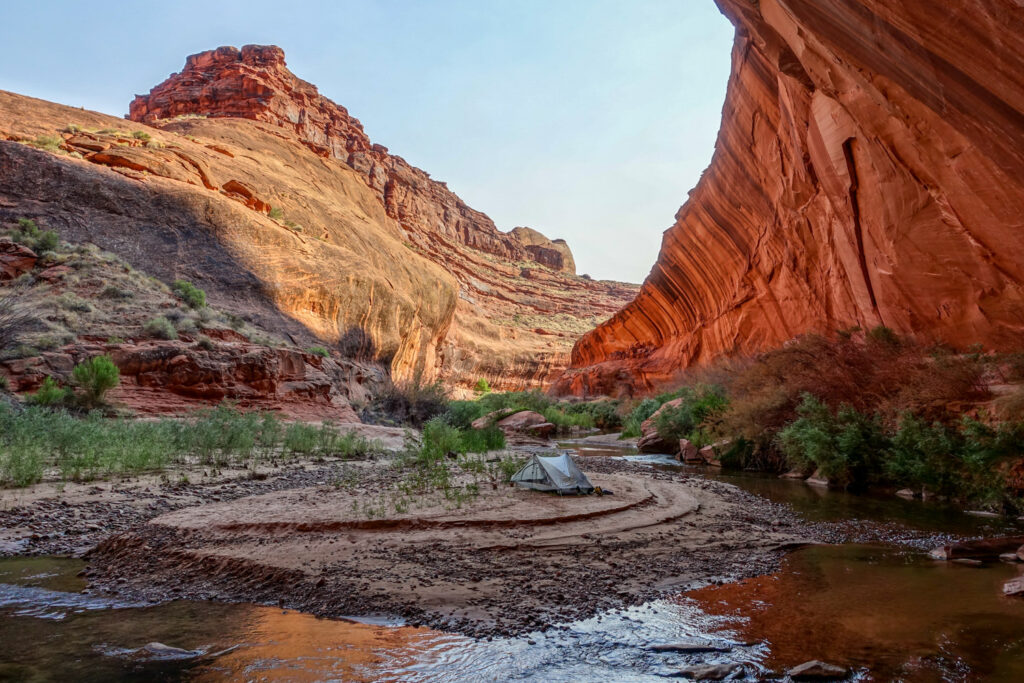
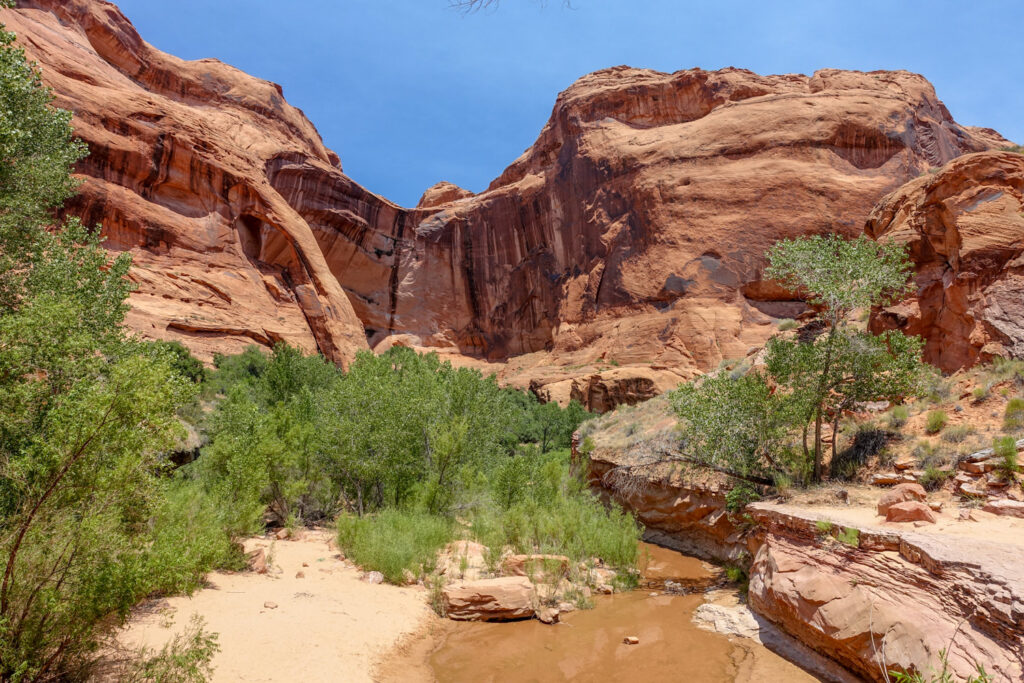
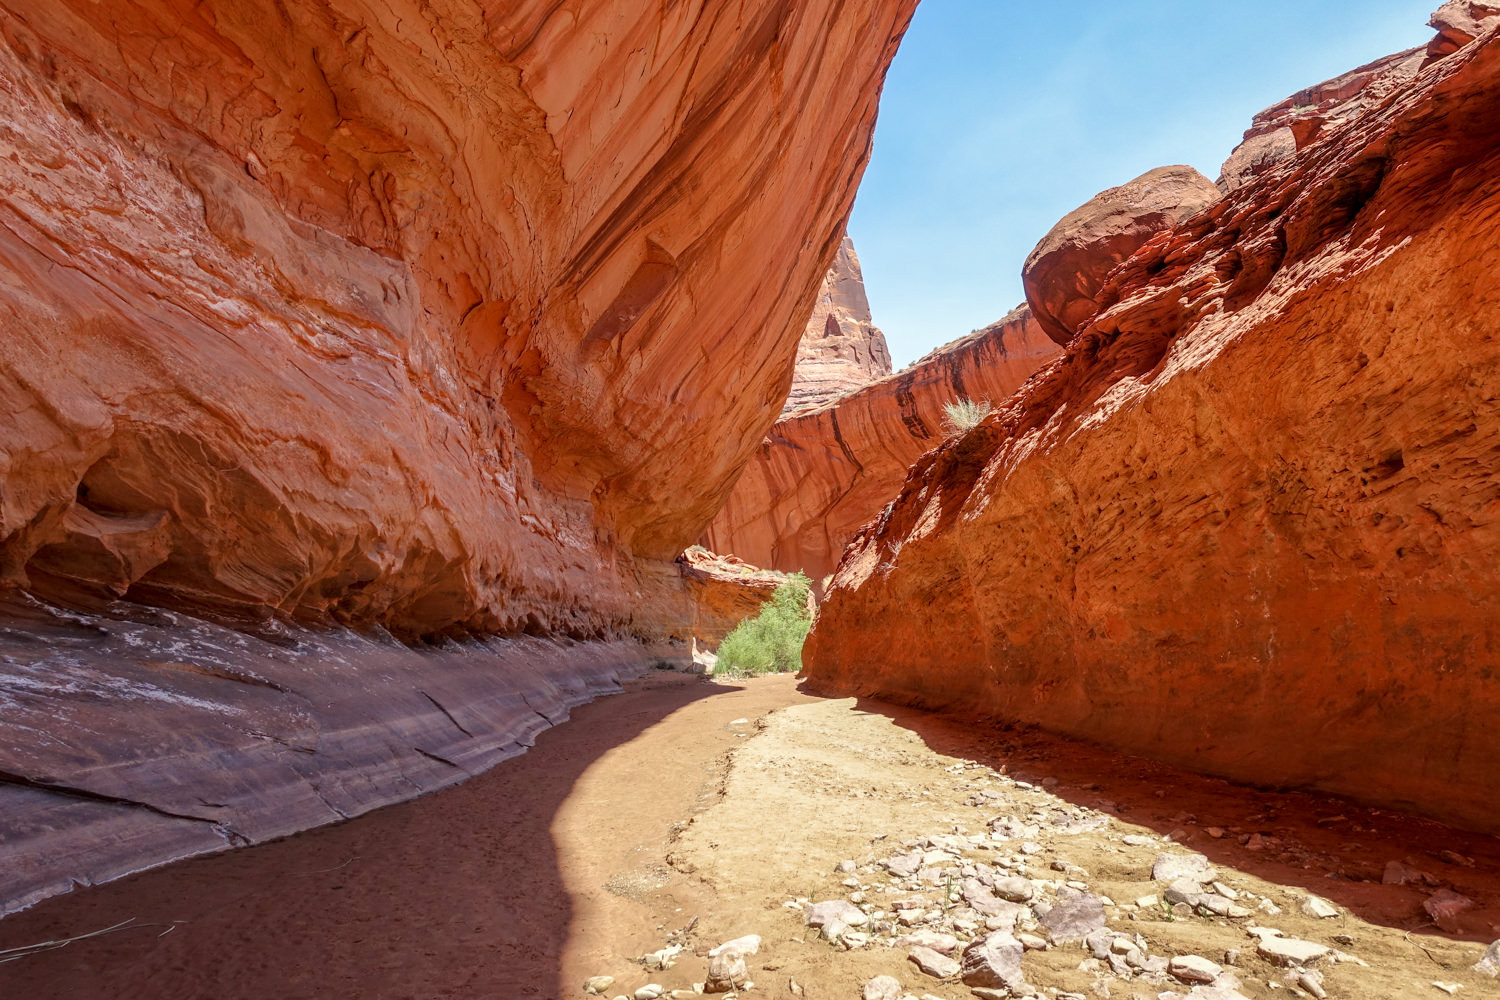
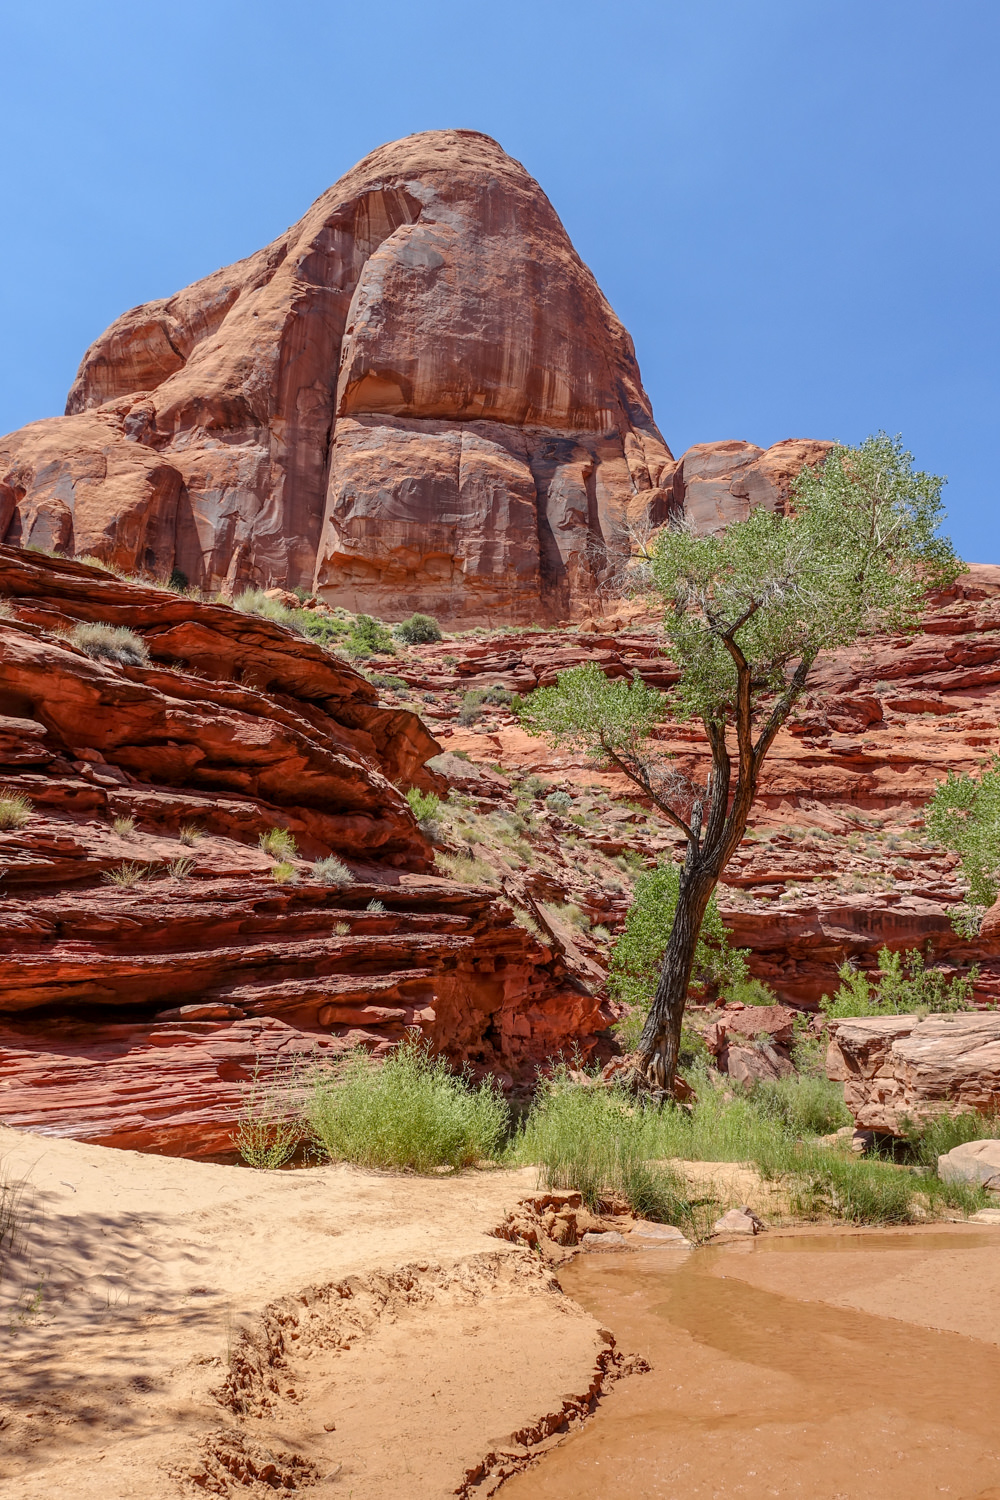
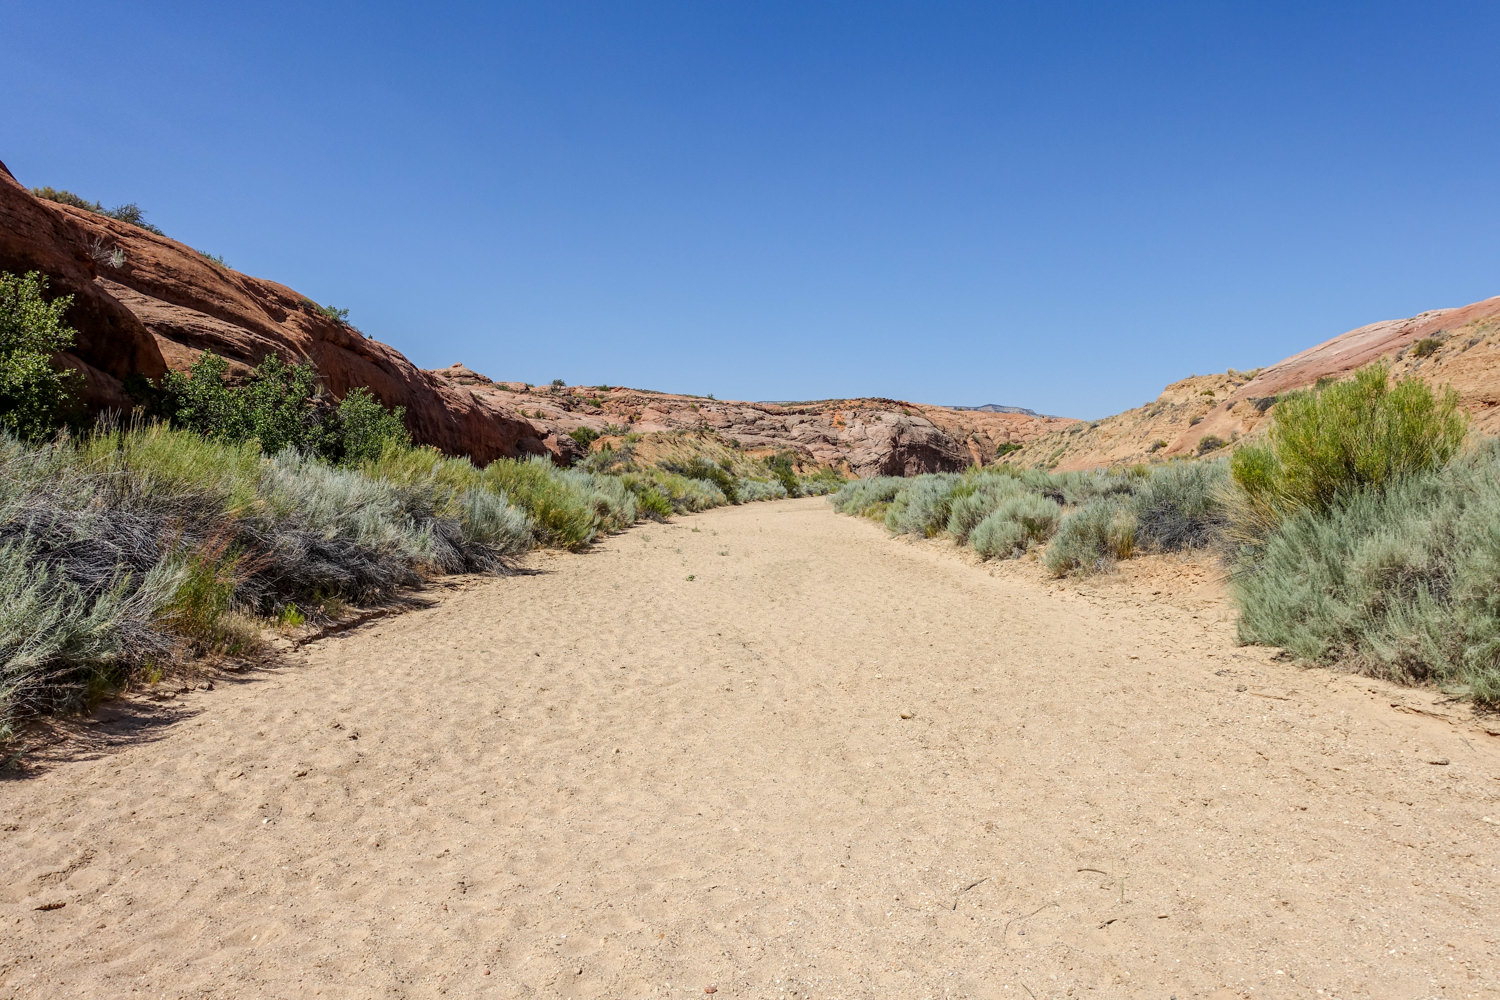
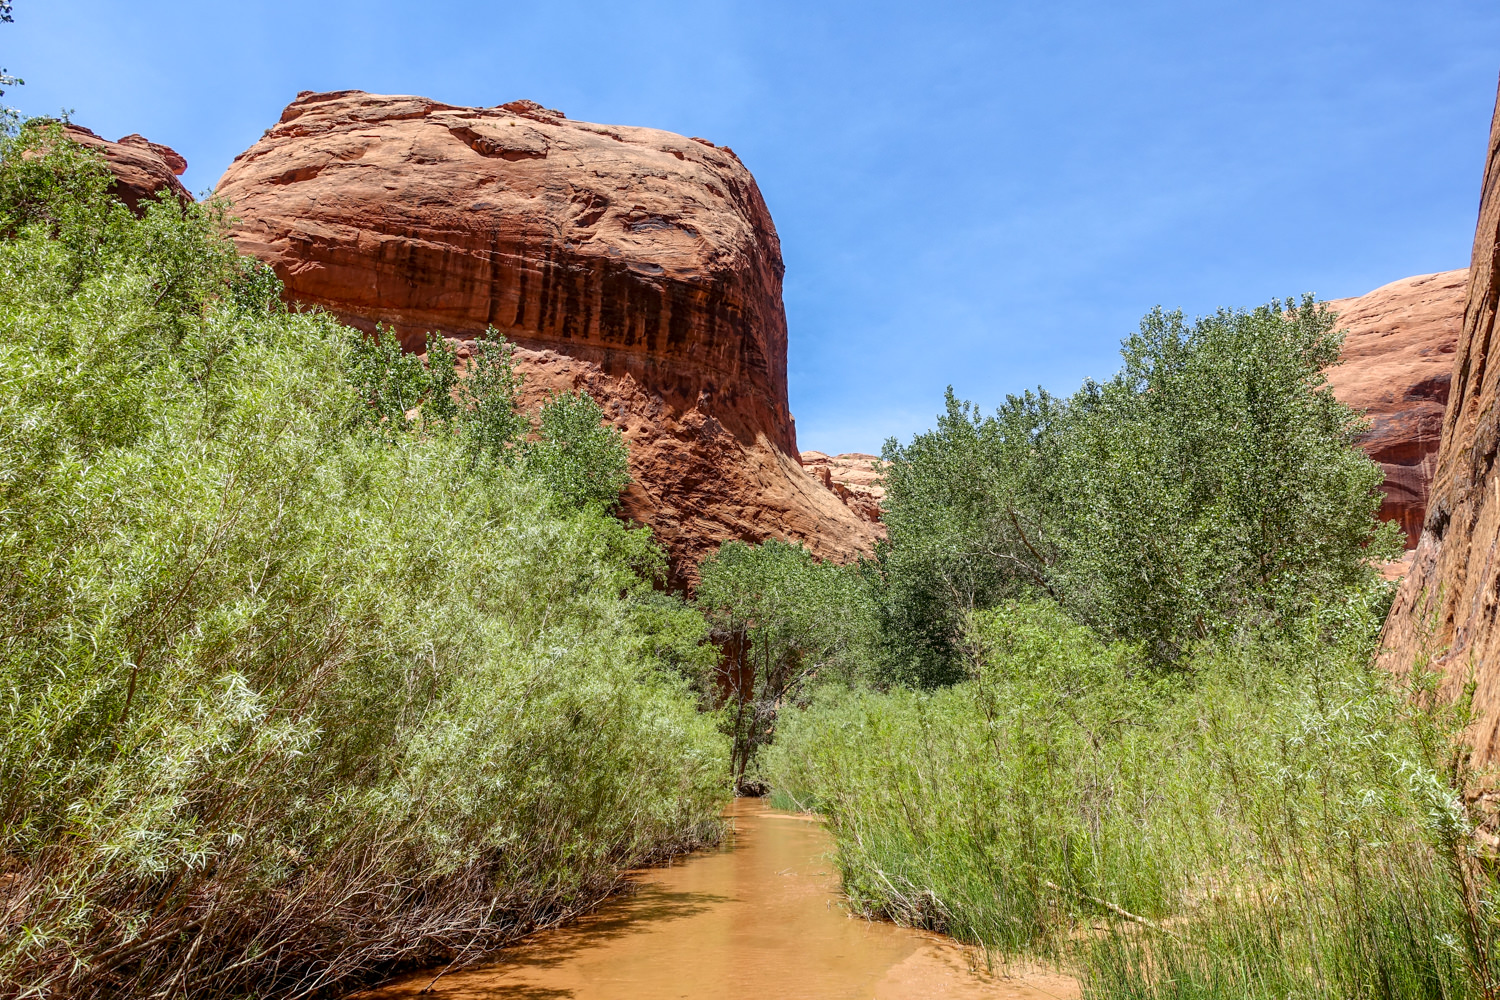
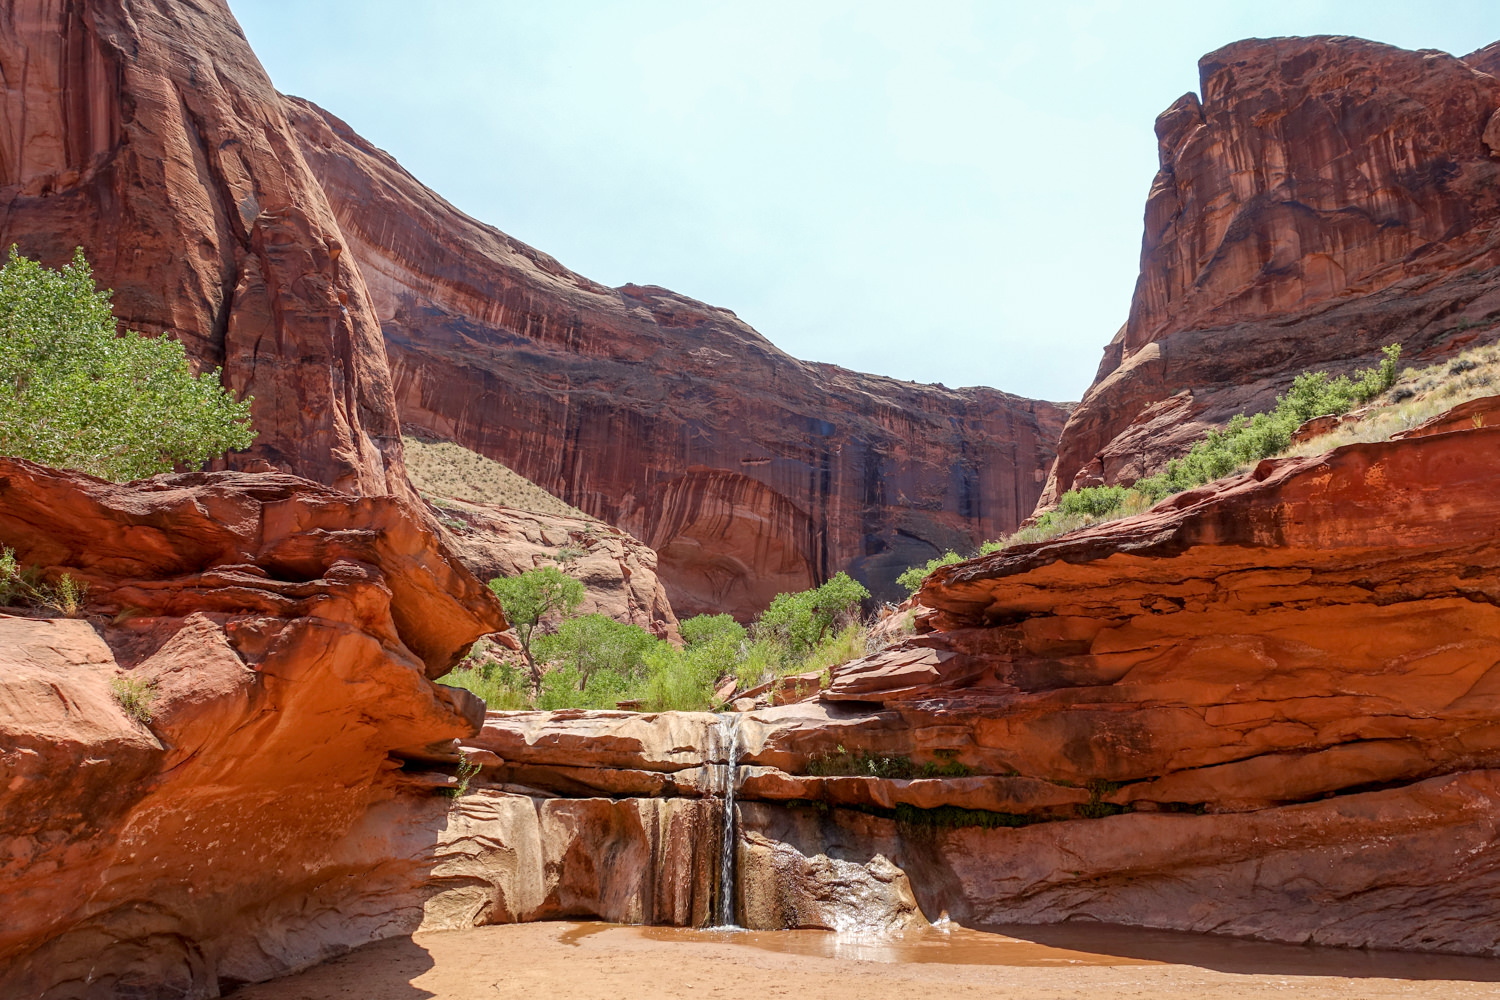
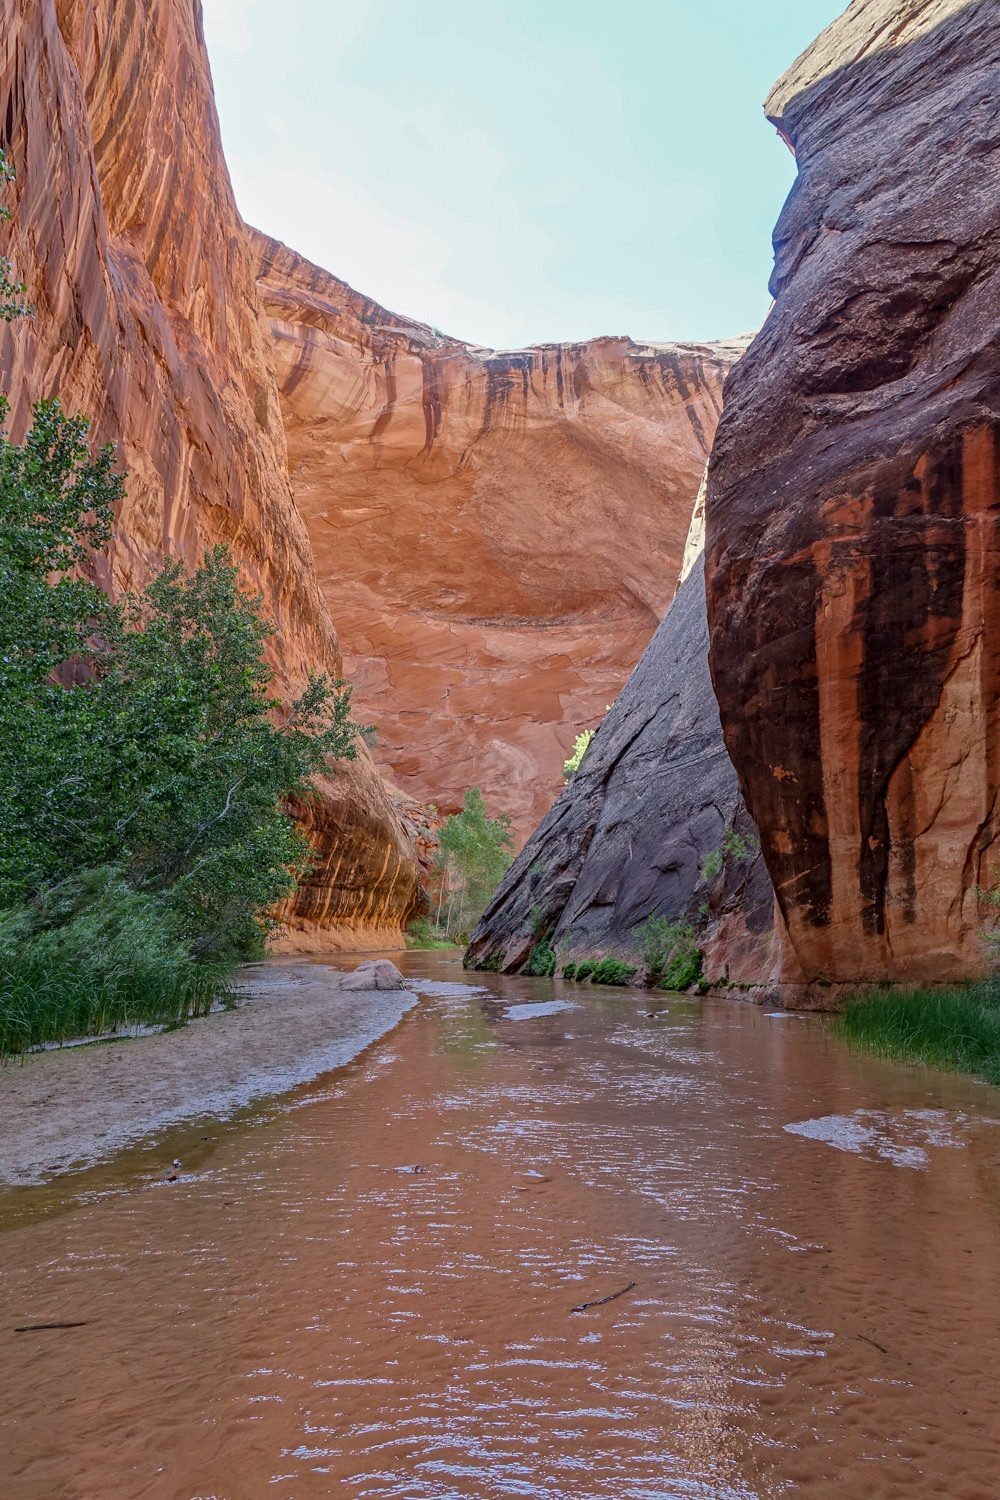
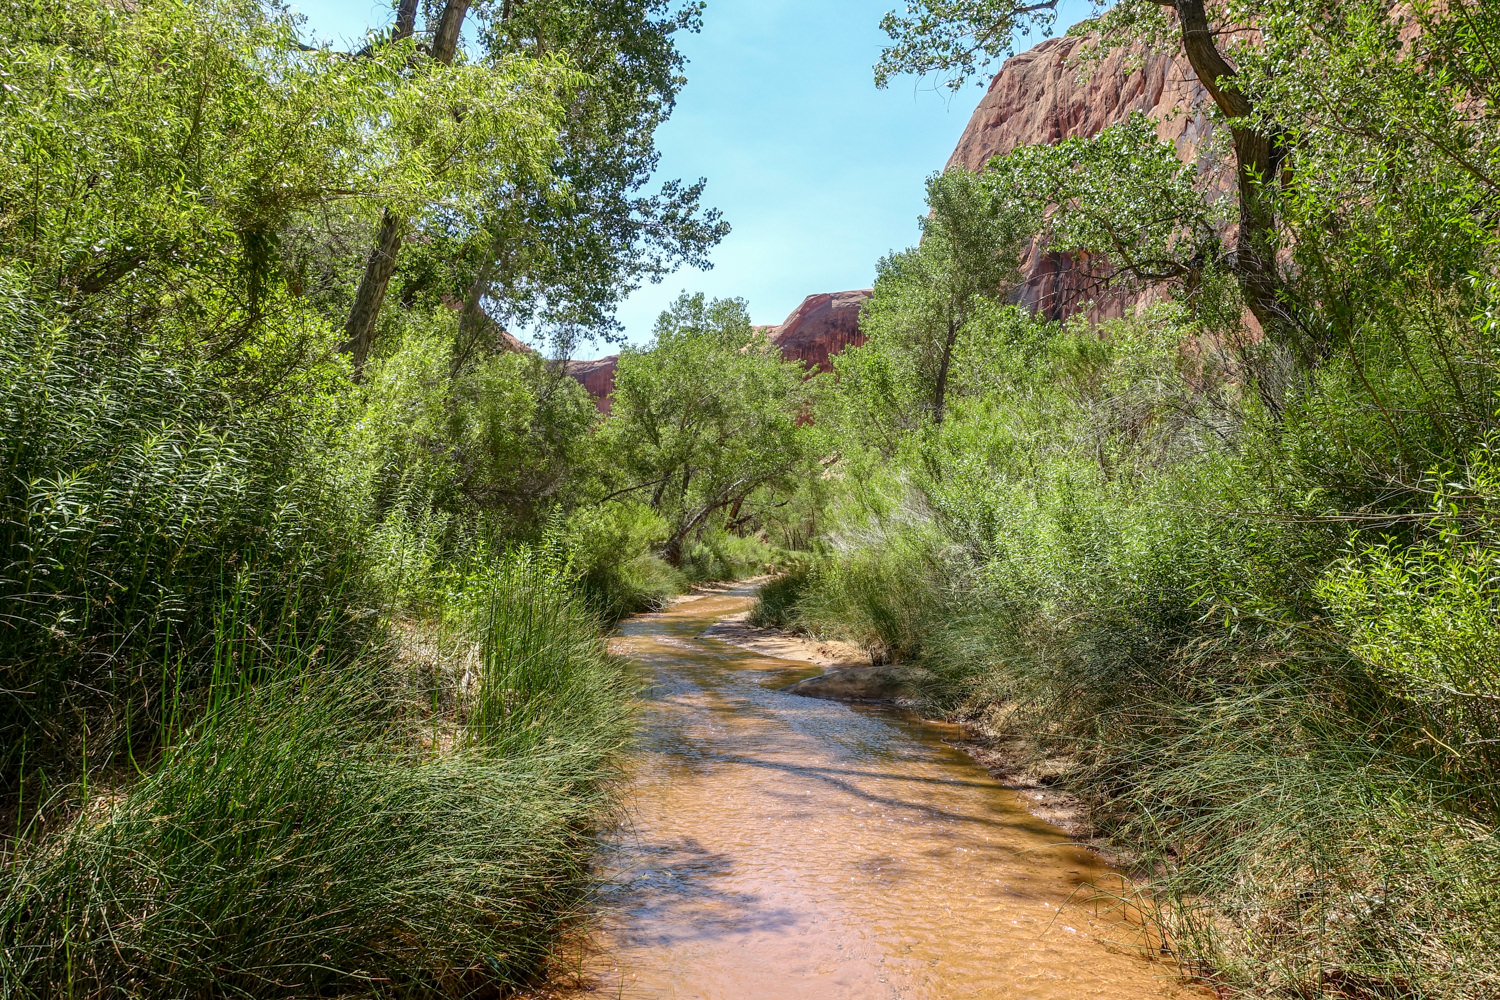
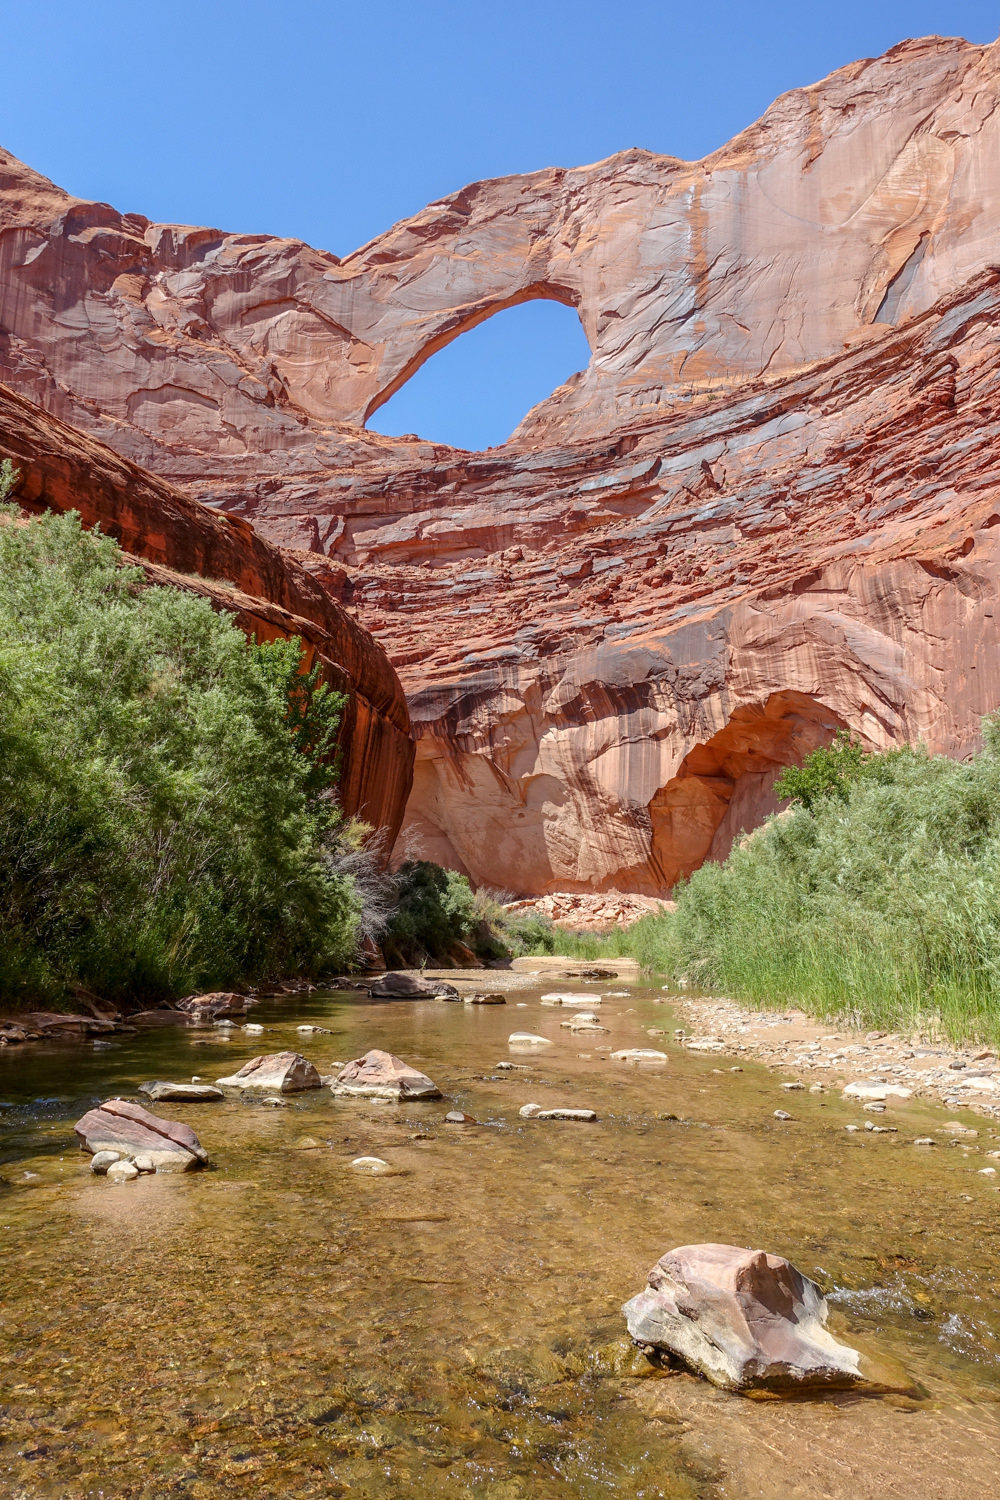
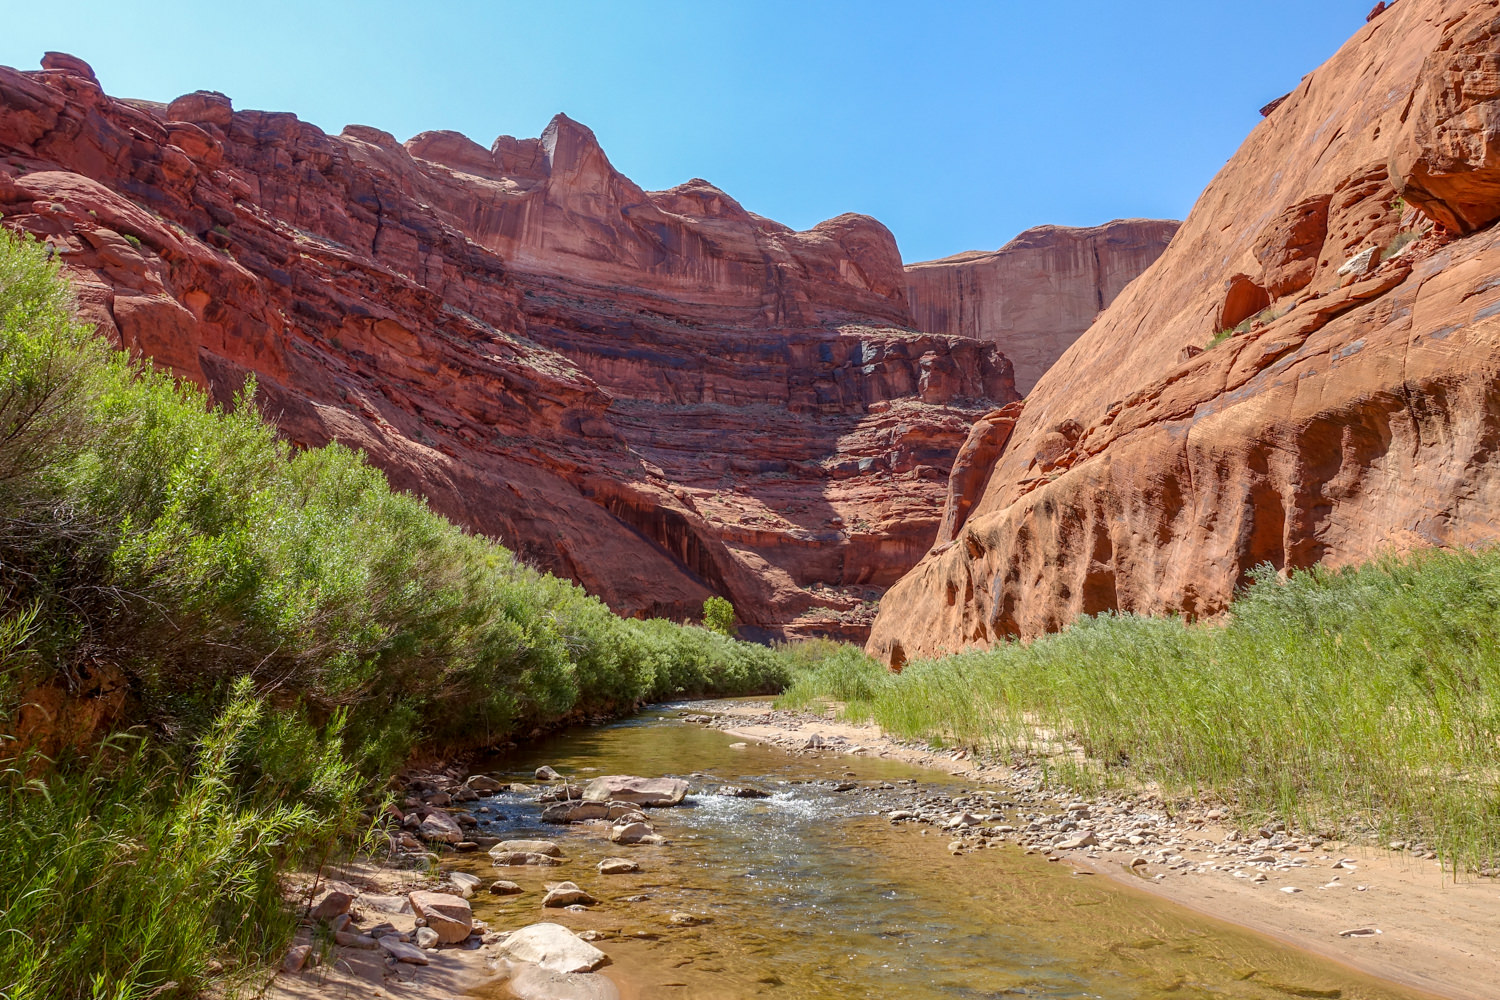
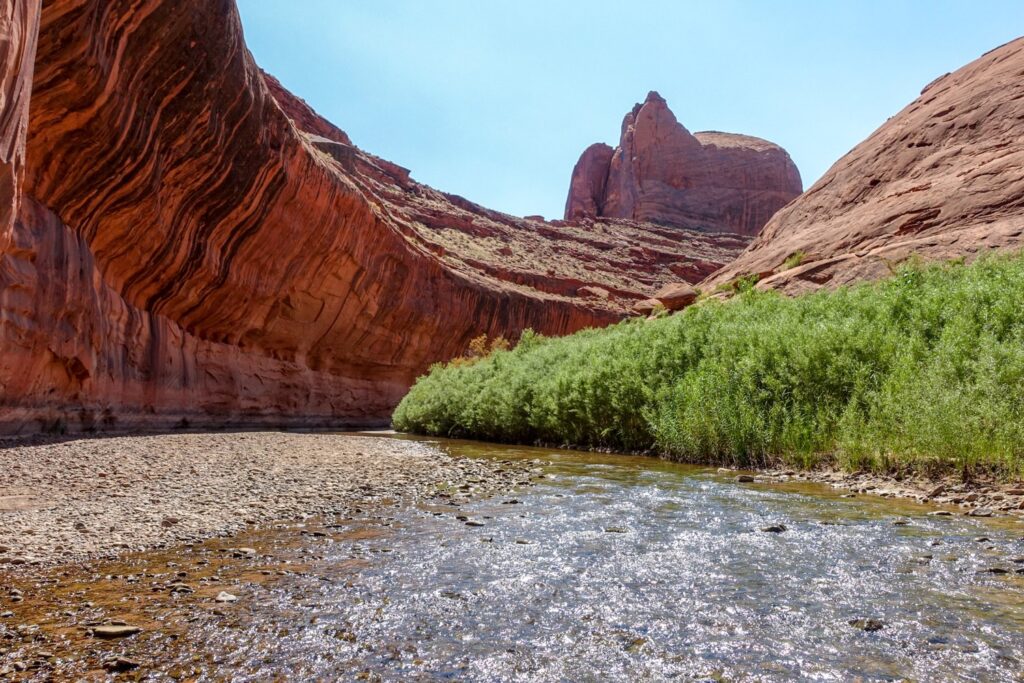
This 25-mile hiking route winds around soaring sandstone walls, dips in and out of a usually shallow stream, and bypasses a litany of gorgeous red rock waterfalls. Most of the trail meanders through a debris-wracked riparian zone that reveals evidence of flash floods, which can occur in the area.
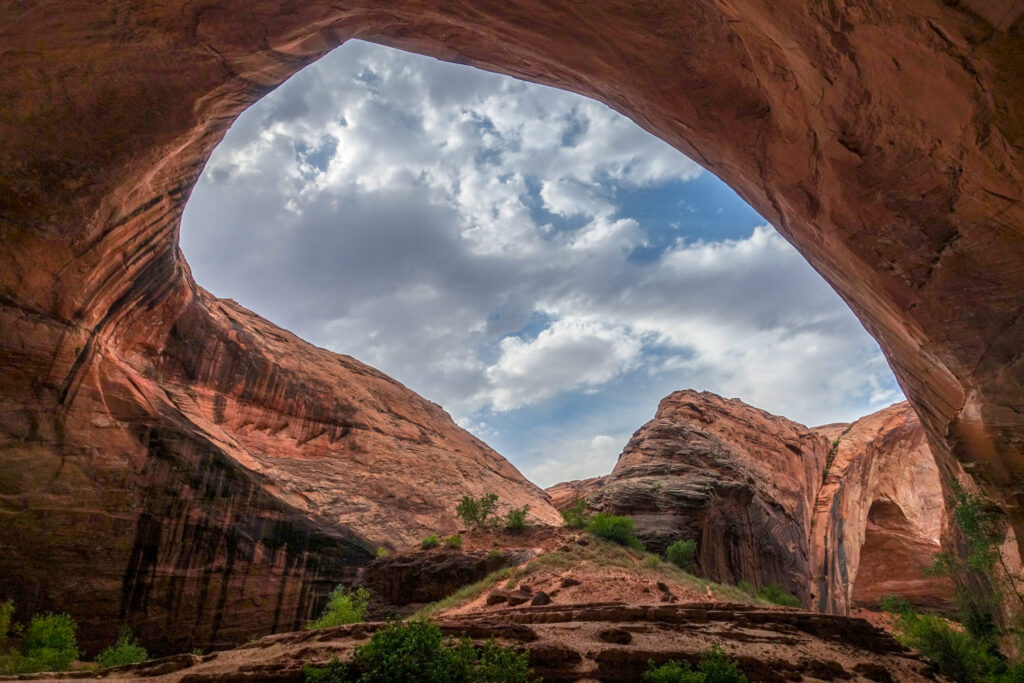
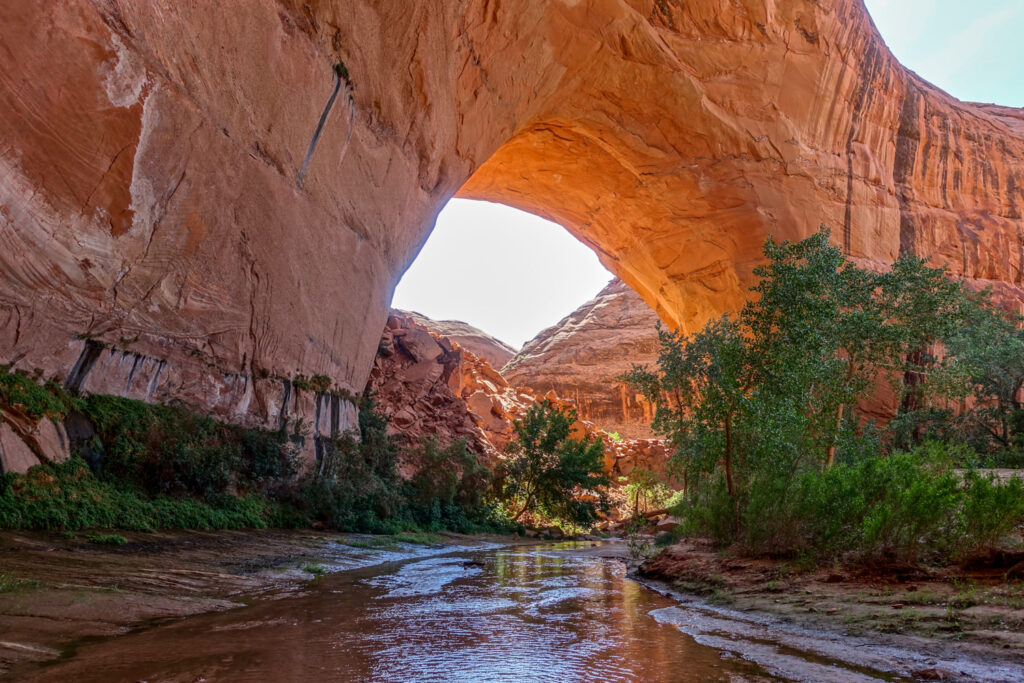
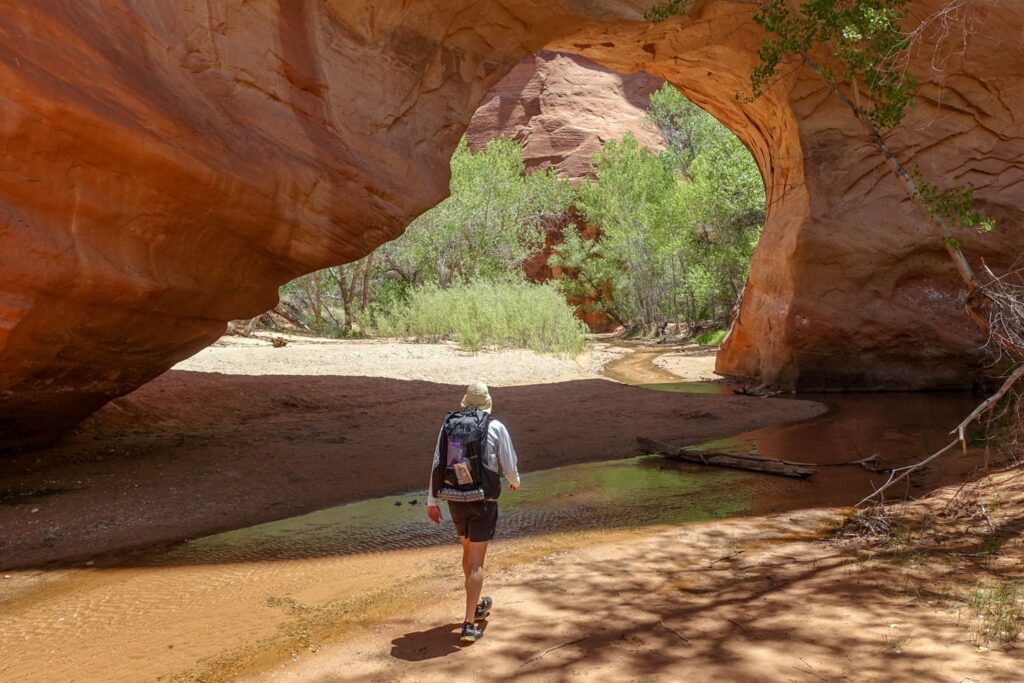
Along the way, you’ll pass green ferns growing out of fissures in sandstone, alcoves and hallways, soaring arches, and a stunning natural bridge — all on your way to the Escalante River. This guide takes you from Red Well Trailhead to the river, out and back.
Quick Facts
Distance: 28.4 miles (45.7 km)
Days Needed: 2-4 days
Peak Elevation: 4,514 feet
Low Elevation: 3,785 feet
Elevation Gain/Loss: 1633’ ascent and -1632’ descent
Best Travel Time: March to May and October to mid-November
Permits: Required (see below)
Difficulty: Moderate
Highlights
- Near vertical walls, waterfalls, stunning arches, natural bridges, and desert varnished alcoves
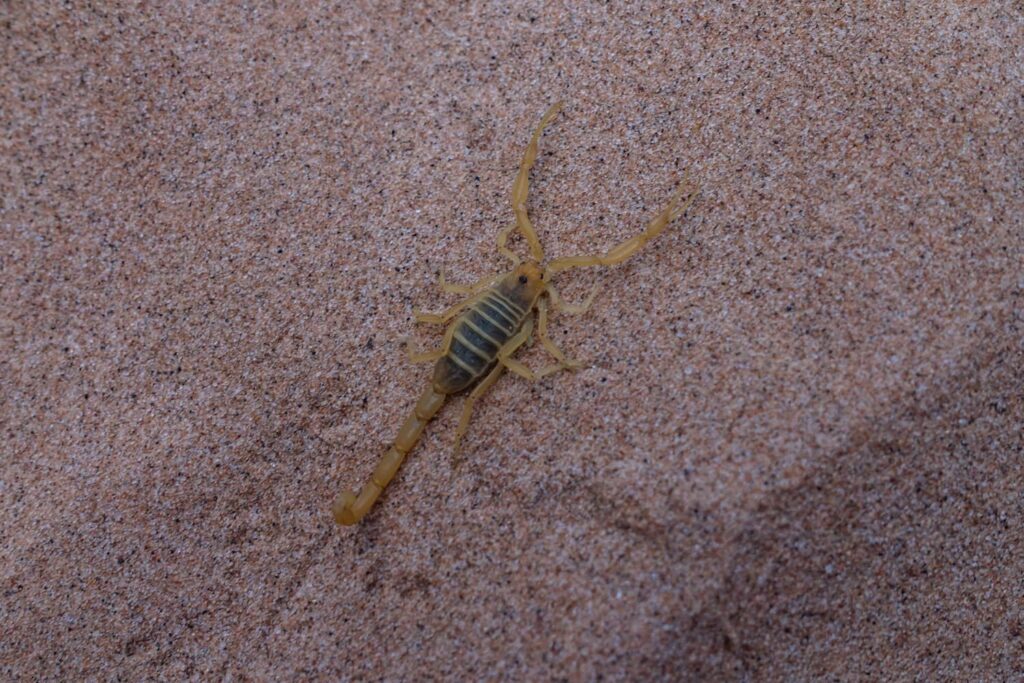
- Deer, jackrabbits, lizards, mice, rats, ravens, sparrows and nighthawks (less seen coyote, cougar, and bobcats).
- The 4th largest arch in the world, Stevens Arch, is 160 feet tall and spans 225 feet.
- Perennial springs provide reliable drinking water
- Pictographs, petroglyphs
- Hanging gardens clinging to seeps in the canyon wall
- Amphitheaters striped with desert varnish
Lowlights
- Very remote location on a rough, sometimes slick gravel and sand road.
- Unreliable cellphone coverage
- Flash floods; susceptible to quickly changing weather
- Campfires and dogs are prohibited
- Must carry human waste out
- In some seasons, particularly those with excessive rainfall and high temperatures, the bugs are particularly vicious.
- Stream fording and quick mud
- Tamarisk and Russian olive thickets slow travel in several places en route
Best Time to Travel
In general, March through the end of May, and October through mid-November offer the best weather. Mid-June through the end of September is a bit sketchy due to oppressive heat with little wind to provide relief; additionally, the creek recedes in mid-summer. Flash-floods are also a risk until early October.
As always, be prepared and diligent in monitoring current conditions, as weather can change quickly in this area and cause flash floods in the canyon. Before heading out, check the National Weather Service for up-to-date conditions.
Difficulty
- Total Distance: 45.7 km (28.4 miles)
- Total Elevation Gain/Loss: 1,633 ft. average 2% grade (1 degree), 9% max (3 degree)
- Overall Difficulty: Moderate
We rate this hike as moderate due to the presence of sand, water, and route impediments. But it really depends on which trailhead you take. From the Red Well Trailhead, you follow the wash downstream and find paths that cut directly between the curves of the stream to avoid extensive detours as well as bushwhacking.
No matter which trailhead you take, route finding isn’t as easy as any of the routes look on a map. We recommend using a phone gps app with the route downloaded to keep you on track and mitigate getting lost.
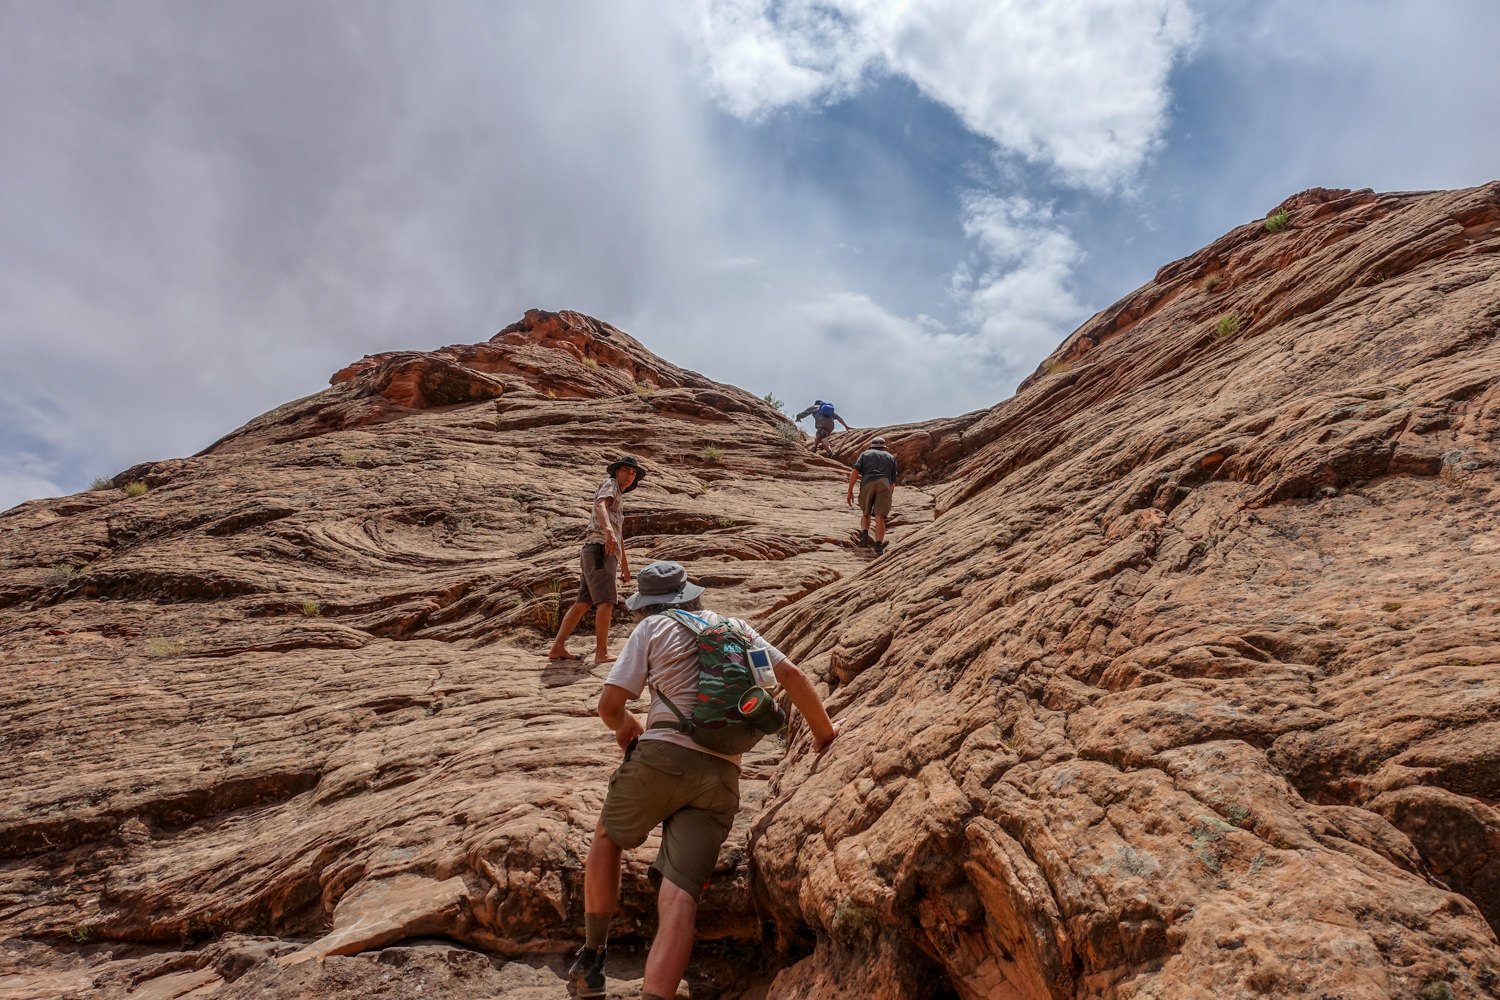
Also, quick mud (think of quick sand made of mud) is a real hazard that will require experiencing it, and then being able to recognize it and avoid it as you proceed. At certain places, you’ll have to route-find around the aggressive shrubs, tamarisk, and Russian olive. There are two semi-technical ascents and descents on alternative routes (more info below).
As always, difficulty ratings depend on your experience, physical fitness, pack weight, and weather conditions. Like any backpacking trip, you should plan accordingly, train properly, know your limitations, brush up on your skills, and dial in your gear. Doing so will make for a safe and enjoyable adventure.

Permits
Free overnight permits are required for entry in Coyote Gulch, as well as all camping outside of developed campgrounds in Grand Staircase Escalante National Monument and the Glen Canyon Recreational Area.
The maximum group size is not to exceed 12 people. Pick up your permit and maps at the Escalante Interagency Visitor Center just outside of Escalante, Utah.
Solitude
During peak spring and fall hiking season, Coyote Gulch can feel crowded, though other campers can be avoided by camping at least a mile west or east of Jacob’s Arch.
Summer is definitely less busy, but the trade-off is high temperatures and deer flies.
Trailhead Options
To reach any of the trailheads for Coyote Gulch, drive on State Highway 12 until you reach the Hole-in-the-Rock Road (officially the Glen Canyon Recreation Area Road) and the “40 Mile Bench” turnoff sign where the road carves a large U-curve.
This is about five miles southeast of the City of Escalante, your last stop for food and water. As you head east out of Escalante, the road makes a big U-turn. At the bottom of the U, exit the highway to the south onto a maintained dirt road.
Keep in mind that this road is typically like a washboard and can be quite rough. Depending on the weather, it’s also sometimes washed out. Be especially mindful of avoiding the shoulders, as the soft sand frequently diverts vehicles into the ditch.
A 4-wheel drive vehicle is recommended after storms or during the wet season. Higher-clearance cars and SUVs can make it to the trailheads during dry weather with careful driving.
You should still build an extra day into your schedule, in case it rains, as the road can quickly turn to a slick, muddy mess that will leave you stranded until it dries out.
The Red Well Trailhead can have sizable ruts (up to 2 feet deep) as that road is not graded. Again, take your time and expect to drive 3 to 4 times as long time-wise from what it would take you for the same mileage on a paved road.
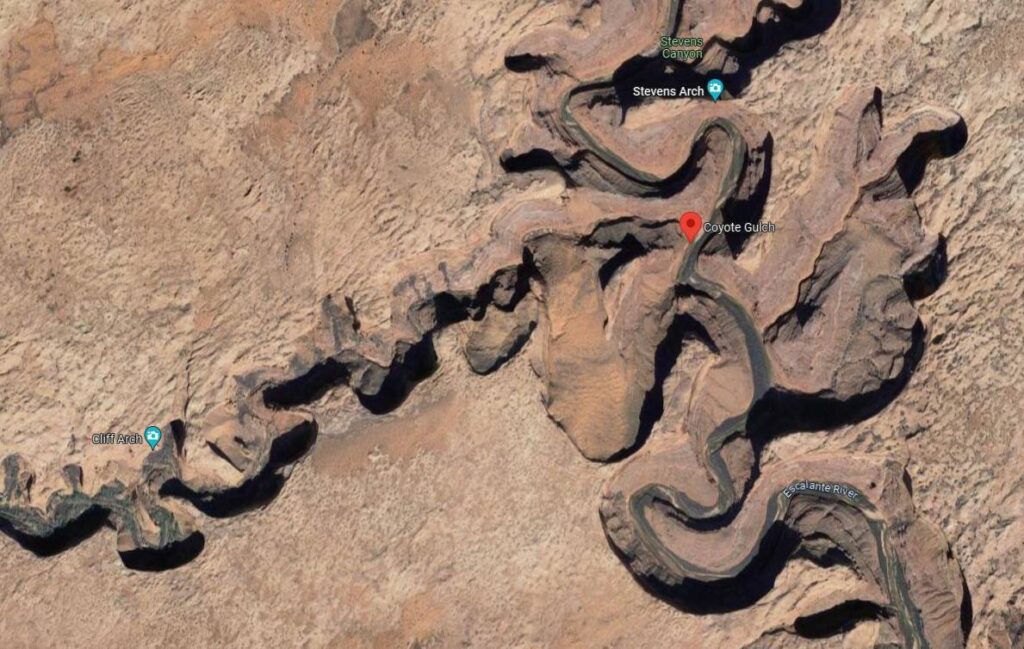
RED WELL TRAILHEAD
Go 30 miles south on Hole-in-the-Rock to a not-so-obviously signed junction with a dirt road heading east. Follow that road, BLM 254, northeast for 1.5 miles (ruts start about a half mile in) to the trailhead.
There’s a big sign indicating you have arrived at Red Well Trailhead. Park, load up and head east over the hill to the south of the sign, following the trail down into upper Coyote Gulch. Google Maps directions to Red Well Trailhead here.
HURRICANE WASH TRAILHEAD
Go 33 miles south on Hole-in-the-Rock Road. Directly off the road to the left, there’s a turnout for a livestock corral. Immediately after that point is another turnout to the right. This is the trailhead for Hurricane Wash.
Begin hiking east in the dry wash toward Coyote Gulch. About 0.2 mile down the wash, you’ll find a hiker registration. Google Maps directions to Hurricane Wash Trailhead here.
JACOB HAMBLIN ARCH TRAILHEAD
Go 36.25 miles south on Hole-in-the-Rock Road. On the left (northeast) is the signed turnoff for FortyMile Ridge. Take it and go 4.3 miles northeast until you reach another very small, short side road on the left leading to a water tank, corral and the Jacob Hamblin Arch Trailhead.
Start hiking north from the sign toward Coyote Gulch. This route, commonly referred to as the Sneaker Route, can be difficult to follow and requires a very steep descent/ascent into the canyon. Google Maps directions to Jacob Hamblin Arch Trailhead here.
FORTYMILE RIDGE TRAILHEAD;
CRACK IN THE WALL
Go 36.25 miles south on Hole-in-the-Rock Road. (You’ll reach this trailhead around 43 miles on your odometer from the start of HITR road.) On the left (northeast) is the signed turnoff for FortyMile Ridge. Travel 6.8 miles northeast (or 2.5 miles past the Jacob Hamblin Arch Trailhead) to reach Fortymile Ridge Trailhead. Stay right of the water tanks (don’t take the spur road that leads up to a parking area). Go left at the next junction and keep heading east. Drive around the cattle guard, and keep your momentum up in sandy stretches, especially the last 2 miles of this road.
The trail is on the north side of the parking lot and splits left and right. Continue northeast and follow the well-worn and cairned trail for about 2 miles until you reach the rim of the Coyote Gulch and a sandstone platform overlooking a huge desert bowl.
Be on the lookout for an 18 to 24-inch wide fissure in the sandstone fin directly below you. Retrace your steps a bit to the east and use a rope to lower your pack to the secondary bench below the long crack passage. Here are Google Maps directions to the Fortymile Ridge Trailhead.

Getting to Trailheads
Most people complete Coyote Gulch in 2-4 days via an out-and-back route with one car. It’s possible to leave a car at one of the first two trailheads and arrange a shuttle to one of the other trailheads.
To leave a car at FortyMile Ridge Trailhead and return via one of the other two trailheads will require a tough hitch or a paid shuttle. It’s too far to plan on walking after a long sandy slog out of Coyote Gulch via Crack in the Wall or Hurricane Wash.
You can also arrange to have your vehicle left at a trailhead for you to pick up after your hike. Instead of hiring someone to shuttle you out, you drive yourself to your trailhead, and they come out and move your car to your exit trailhead.
For example, to exit the Crack in the Wall Trailhead, you get dropped off at the Hurricane Wash Trailhead or vice versa. This is an expensive option:
OUTFITTERS PROVIDING THIS SERVICE
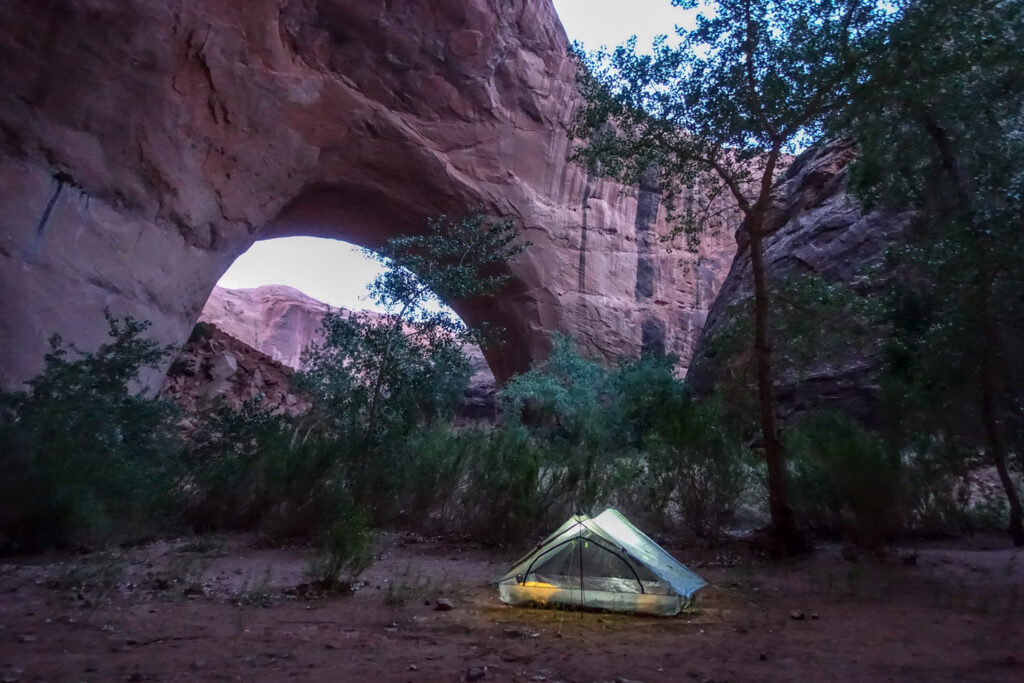
Campsites
Although you can camp anywhere in the canyon, the most reliable sites can be found in the middle section of Coyote Gulch (flash flooding sometimes wipes them out).
Campsites between Jacob Hamblin Arch and the Natural Bridge are the most popular. To protect soil crust, vegetation, and other resources, GSENM/GCRA interagency requests that you re-use existing campsites in Coyote Gulch.
Below are well-established campsites:
- Riparian and alcove area about 5.5 miles in on the Red Well route
- Hurricane Wash confluence with Coyote Creek (about 7 miles in on the Red Well route) and 5.5 miles on Hurricane Wash route. It’s about 1.5 miles to Jacob Hamblin Arch from this spot.
- Under the alcoves or land above the bend before Jacob Hamblin Arch, 7 miles in.
- Between Jacob Hamblin Arch and Coyote Bridge.
- Near the waterfalls area, also called Big Springs.
- There are sites along the Escalante River as well.
- All sites are first-come, first-served.
More Coyote Gulch Photos

Possible Itineraries
ONE NIGHT OPTION
Starting and Ending Trailhead: Red Well Trail
- Camp 1 – Hurricane Wash confluence with Coyote Creek (about 7.5 miles to Stevens Arch from this point.
TWO NIGHT OPTION
Starting Trailhead: Red Well Trail
Ending Trailhead: Hurricane Wash
- Camp 1 – Jacob Hamblin Arch
- Camp 2 – Hurricane Wash Confluence with Coyote Creek
THREE NIGHT OPTION
Starting trailhead: Forty Mile Ridge, Crack in the Wall
Ending trailhead: Red Well or Hurricane Wash
- Camp 1 – Coyote Bridge
- Camp 2 – Jacob Hamblin Arch alcove area
- Camp 3 – Hurricane Wash Confluence

Maps & Guidebooks
You won’t find a specific topo map for Coyote Gulch, but there are several resources that will help you plan a safe and enjoyable trip.
- Hiking Grand Staircase-Escalante & the Glen Canyon Region: A Guide To 59 Of The Best Hiking Adventures In Southern Utah (Regional Hiking Series) – This is the most highly recommended guidebook to this region and Coyote Gulch.
- Best Backpacking Trips in Utah, Arizona, and New Mexico – This book offers detailed trip information for Coyote Gulch, as well as other great backpacking trips in the SW.
- Gaia GPS – We downloaded the topo map from Gaia for this region, and it was super helpful.
- Caltopo – This is a helpful website for building and printing your own topo maps online.
- Topo Maps+ – This Iphone gps app is excellent for backcountry navigation, route planning, and much more.
Water
There are two natural springs in the canyon, which should provide adequate water throughout this hike. You probably don’t need to filter this water, but we recommend always being on the safe side.
This is a good place to use the SteriPEN because, other than purification, this water doesn’t need filtering. You’ll find the first spring east of the Jacob Hamblin Arch on the north wall of the canyon in the hanging gardens. Although it’s perennial, you’ll still need patience. It’s a trickle.
The second spring is on the north wall of the canyon. Check the map, and when you’re just under one mile from the Escalante River, look for the cascade on the left side as you head east.
We carried the SteriPEN Ultra and we were happy with its performance. A lightweight water filter or chlorine dioxide drops or pills would work as well. Check out our best water purifiers’ list for our top recommendations.
Food Storage: Ravens & Squirrels
First, do not feed any wildlife. It may be tempting, but it has led to the existing problem in Coyote Gulch. The primary area you need to worry about ravens is near Jacob Hamblin Arch. They’ve become extremely habituated to robbing unattended packs. They will peck through most pack material and can even unzip backpacks. Even if you seal your food in critter-proof storage, they’ll still attempt to get to it.
Squirrels are less of a problem, but still likely to plunder unsecured food stashes in other frequently used campsites throughout the gulch. Consider suspending your food bag from some paracord where you can.

Waste Disposal
The pit toilet by Jacob Hamblin Arch is closed after being set on fire. The composting toilet by Big Spring Alcove is currently open, according to the EGSM, but at last look it was full. Please don’t count on it.
No matter how tempting, do not leave human waste in Coyote Gulch. It’s a very sensitive riparian area and with the increased use, the National Park Service now requires human waste disposal systems to be used in the Escalante River corridor and its tributaries within Glen Canyon National Recreation Area.
Policy states that: All human body waste solids shall be contained and carried out using a portable toilet or a specifically engineered bag waste containment system in Coyote Gulch.
You also cannot use a plastic or paper bag as a receptacle for solid human waste and/or for disposal unless it’s part of a specifically engineered bag waste containment system containing enzymes and polymers to break the waste down. It also must be securely sealable to be state-approved for disposal in ordinary trash receptacles.
When you pick up your permit at the Escalante Interagency Visitor Center, just west of the city of Escalante, you’ll be asked if you have a “portable” toilet in your possession. These bags can and should be purchased ahead of time from major outfitters. They’re called Wag Bags, Restop II, or Biffy Bags. If you don’t have one, they may provide you with one (depending on their supplies). Considering how underfunded this agency is, please do your part and purchase one in advance.
Bugs
This tends to be an intermittent problem, often becoming quite bad after a particularly wet winter or spring. In July and August, the mosquitoes and deer flies are almost always vicious.
October offers the least contact with bugs. Use a combination of permethrin on your clothing and a small amount of picaridin on exposed skin for full protection.
Gear List
Make sure to check out our Ultimate Backpacking Checklist, so you don’t forget something important.
Below you’ll find our current favorite backpacking gear. If you want to see additional options, our curated gear guides are the result of many years of extensive research and hands-on testing by our team of outdoor experts.
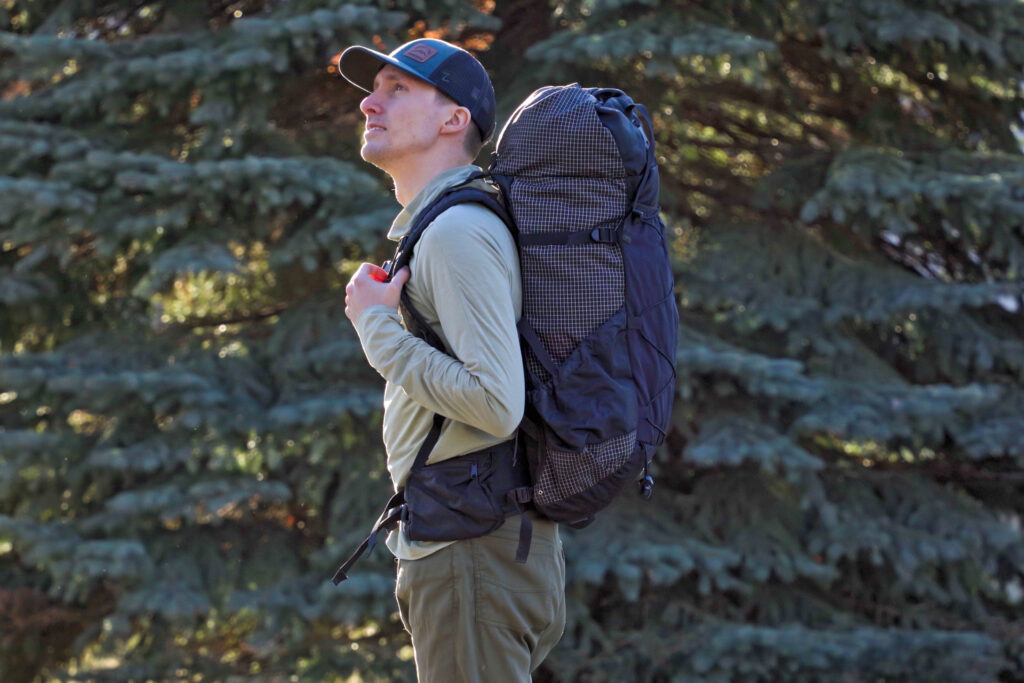
BACKPACK
- Best Backpacking Pack Overall: Gregory Paragon 58 – Men’s / Gregory Maven 58 – Women’s
- Best Ultralight Backpacking Backpack: Hyperlite Mountain Gear Unbound 40
- More: Check out our best backpacking backpacks guide for ultralight and trekking options
TENT
- Best Backpacking Tent Overall: Big Agnes Copper Spur HV UL2
- Best Ultralight Tent: Zpacks Duplex
- Best Budget Tent: REI Half Dome 2
- Best Tent Stakes Overall: All One Tech Aluminum Stakes
- More: Check out our best backpacking tents guide for more options
SLEEPING BAG/QUILT
- Best Sleeping Bag Overall: Men’s Feathered Friends Swallow YF 20 / Women’s Feathered Friends Egret YF 20
- Best Quilt Overall: Enlightened Equipment Revelation 20
- More: Check out our best backpacking sleeping bags guide and best backpacking quilts guide for more options
SLEEPING PAD
- Best Sleeping Pad Overall: NEMO Tensor All-Season
- Best Foam Sleeping Pad: NEMO Switchback
- More: Check out our best backpacking sleeping pads guide for ultralight and trekking options
CAMP KITCHEN
- Best Backpacking Stove Overall: MSR PocketRocket 2
- Best Backpacking Cookware Overall: TOAKS Titanium 750ml
- Best Backpacking Coffee Overall: Starbucks VIA
- More: Check out our best backpacking stoves guide and best backpacking cookware guide for ultralight and large group options
WATER & FILTRATION
- Best Water Filter Overall: Sawyer Squeeze
- Best Hydration Bladder Overall: Gregory 3D Hydro
- Best Backpacking Water Bottles: Smartwater Bottles
- More: Check out our best backpacking water filters guide and best backpacking water bottles guide for ultralight and large group options
CLOTHING
- Best Hiking Pants Overall: Men’s Outdoor Research Ferrosi / Women’s The North Face Aphrodite 2.0
- Best Hiking Shorts Overall: Men’s Patagonia Quandary / Women’s Outdoor Research Ferrosi
- Best Women’s Hiking Leggings: Fjallraven Abisko Trekking Tights HD
- Best Rain Jacket Overall: Men’s Patagonia Torrentshell 3L / Women’s Patagonia Torrentshell 3L
- Best Rain Pants: Men’s Patagonia Torrentshell 3L / Women’s Patagonia Torrentshell 3L
- Best Down Jacket Overall: Men’s Patagonia Down Sweater Hoodie / Women’s Patagonia Down Sweater Hoodie
- Best Fleece Jacket Overall: Men’s Patagonia Better Sweater / Women’s Patagonia Better Sweater
- Best Sunshirt Overall: Men’s Outdoor Research Echo / Women’s Outdoor Research Echo
- Best Socks Overall: Men’s Darn Tough Light Hiker Micro Crew / Women’s Darn Tough Light Hiker Micro Crew
- Beste Ultralight Liner Glove: Patagonia Capilene Midweight Liner
- More: Check out our best backpacking apparel lists for more options
FOOTWEAR & TRACTION
- Best Hiking Shoes Overall: Men’s HOKA Speedgoat 6 / Women’s HOKA Speedgoat 6
- Best Hiking Boots Overall: Men’s Salomon X Ultra 5 GTX / Women’s Lowa Renegade Evo GTX
- Best Hiking Sandals Overall: Men’s Chaco Z/1 Classic / Women’s Chaco Z/1 Classic
- Best Camp Shoes Overall: Crocs Classic Clogs
- Best Traction Device for Hiking Overall: Kahtoola MICROspikes
- More: Check out our best backpacking footwear lists for more options
NAVIGATION
- Best GPS Watch Overall: Garmin Instinct 2 Solar
- Best Personal Locator Beacon (PLB): Garmin inReach Mini 2
- More: Check out our article How to Use Your Phone as a GPS Device for Backpacking & Hiking to learn more
FOOD
FIRST-AID & TOOLS
- Best First-Aid Kit Overall: Adventure Medical Kits Ultralight/Watertight .7
- Best Pocket Knife Overall: Kershaw Leek
- Best Multitool Overall: Leatherman Wave+
- Best Headlamp Overall: Black Diamond Spot 400-R
- Best Power Bank Overall: Nitecore NB 10000 Gen 3
- More: Check out our best first-aid kit guide, best pocket knife guide, best multitool guide, best backpacking headlamps guide, and best power banks guide for more options
MISCELLANEOUS
- Best Trekking Poles Overall: Black Diamond Pursuit
- Best Backpacking Chair Overall: REI Flexlite Air
- Best Backpacking Stuff Sack Overall: Hyperlite Mountain Gear Drawstring
- More: Check out our best trekking poles guide, best backpacking chairs guide, and best stuff sacks guide for more options