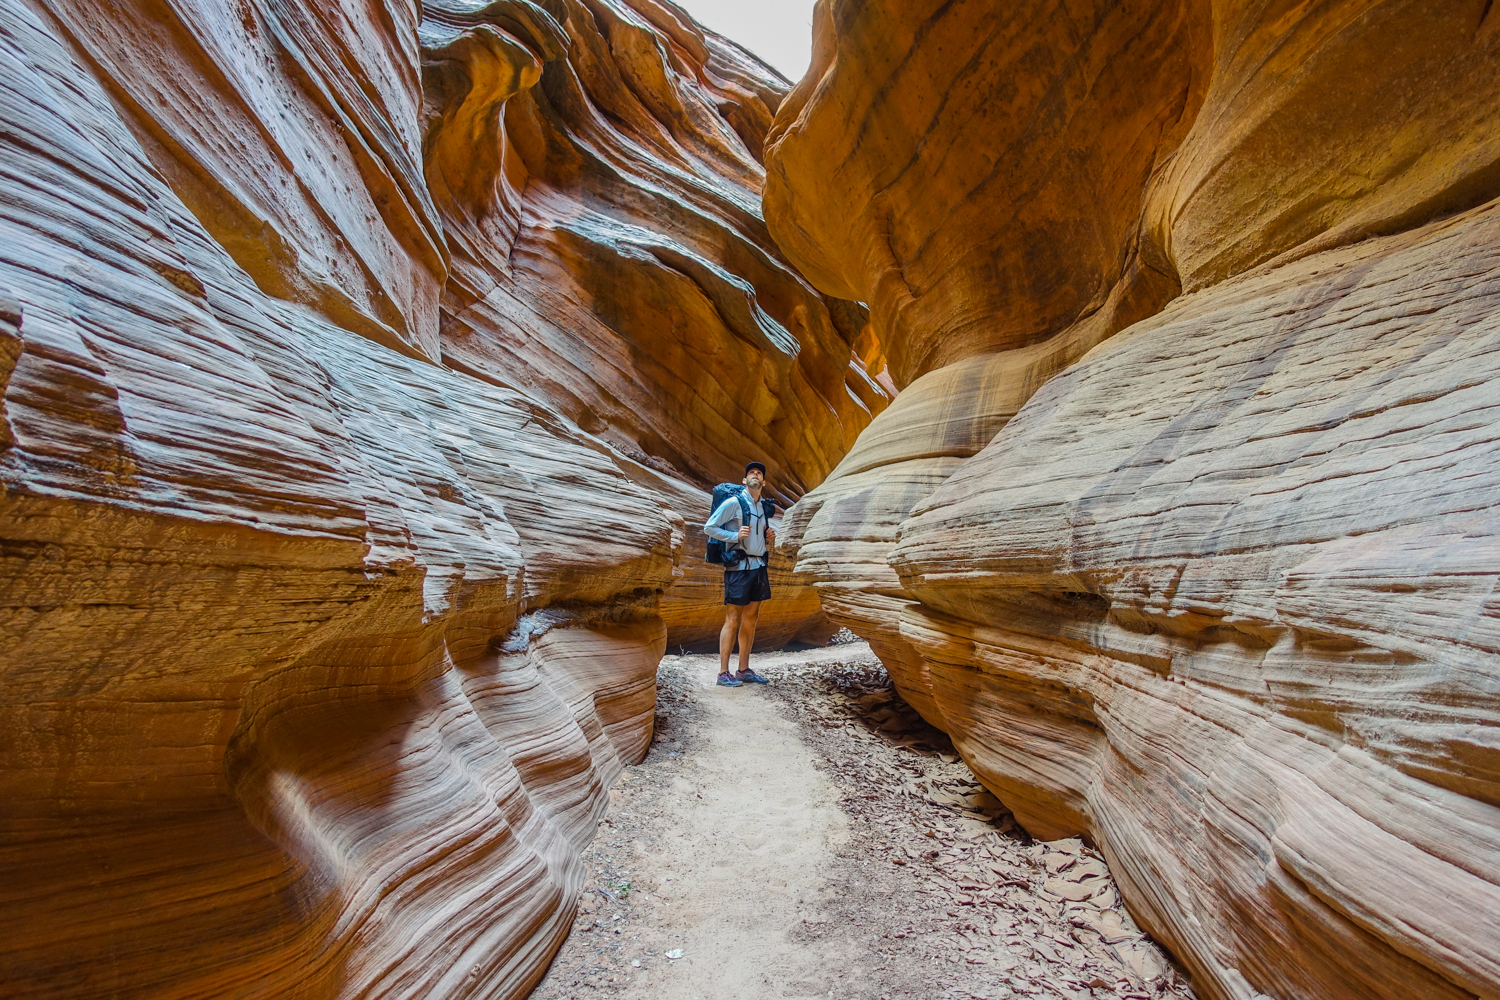
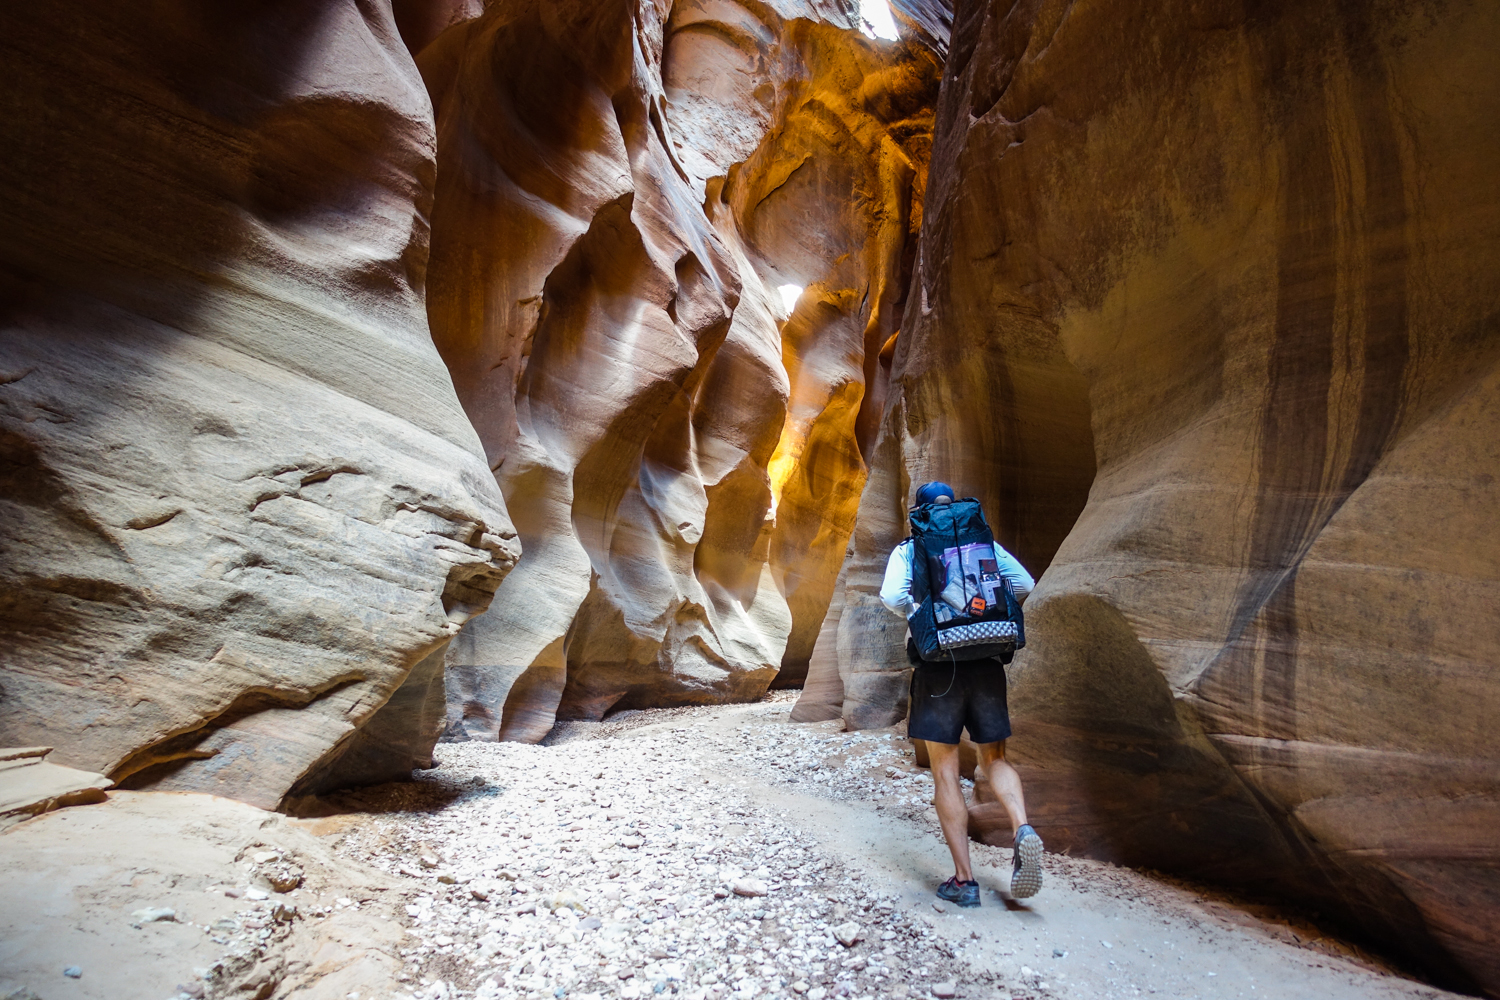
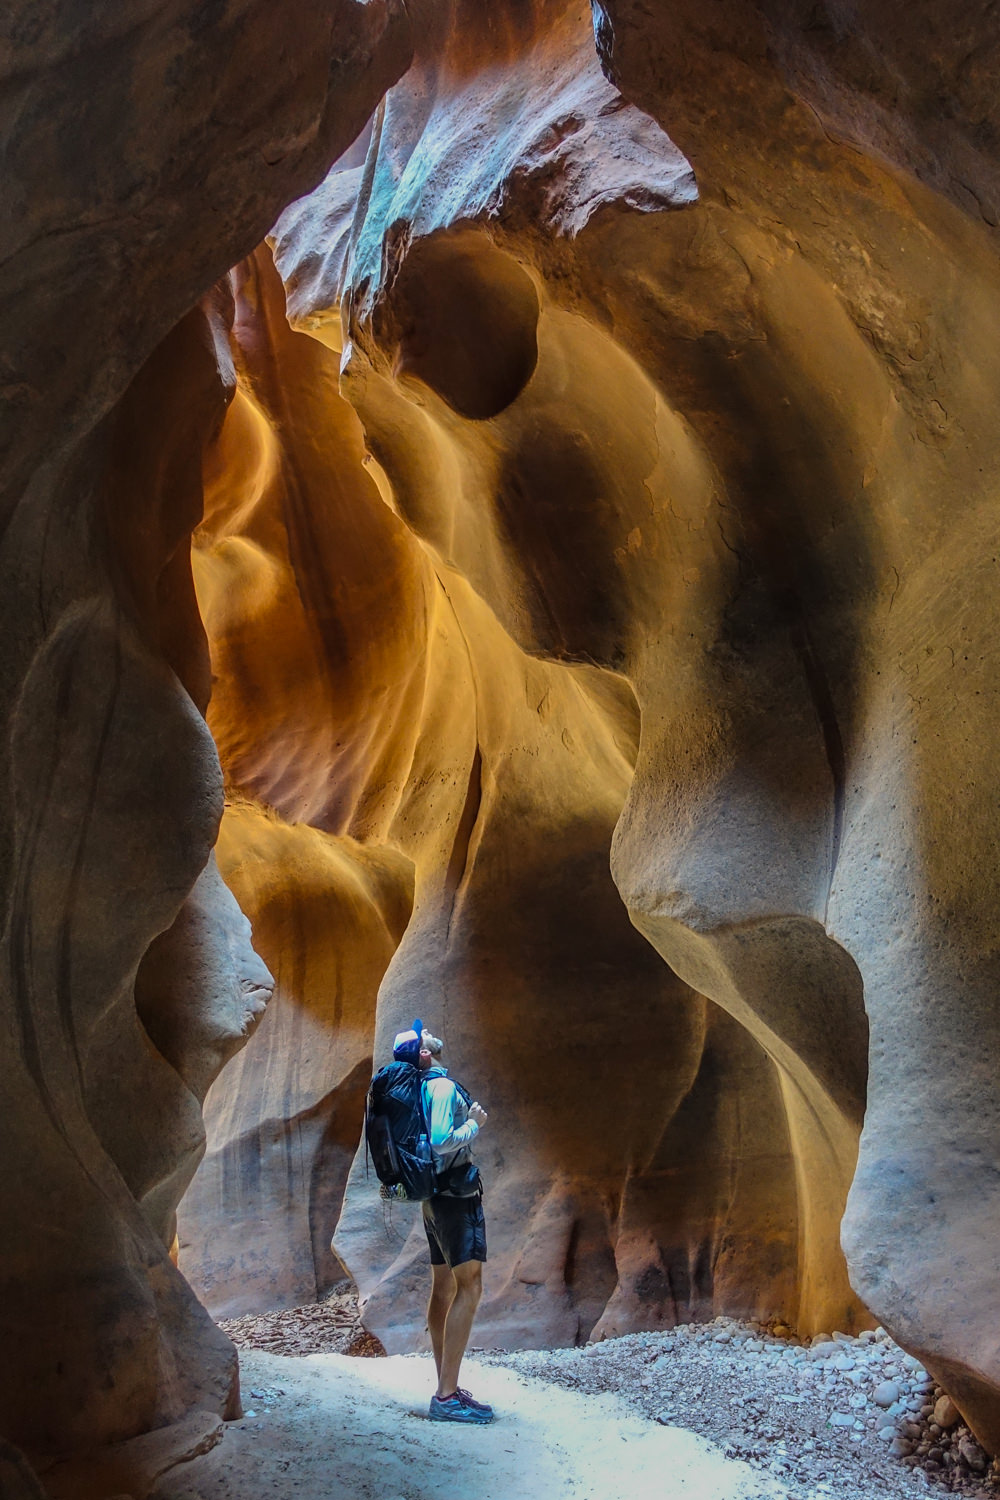
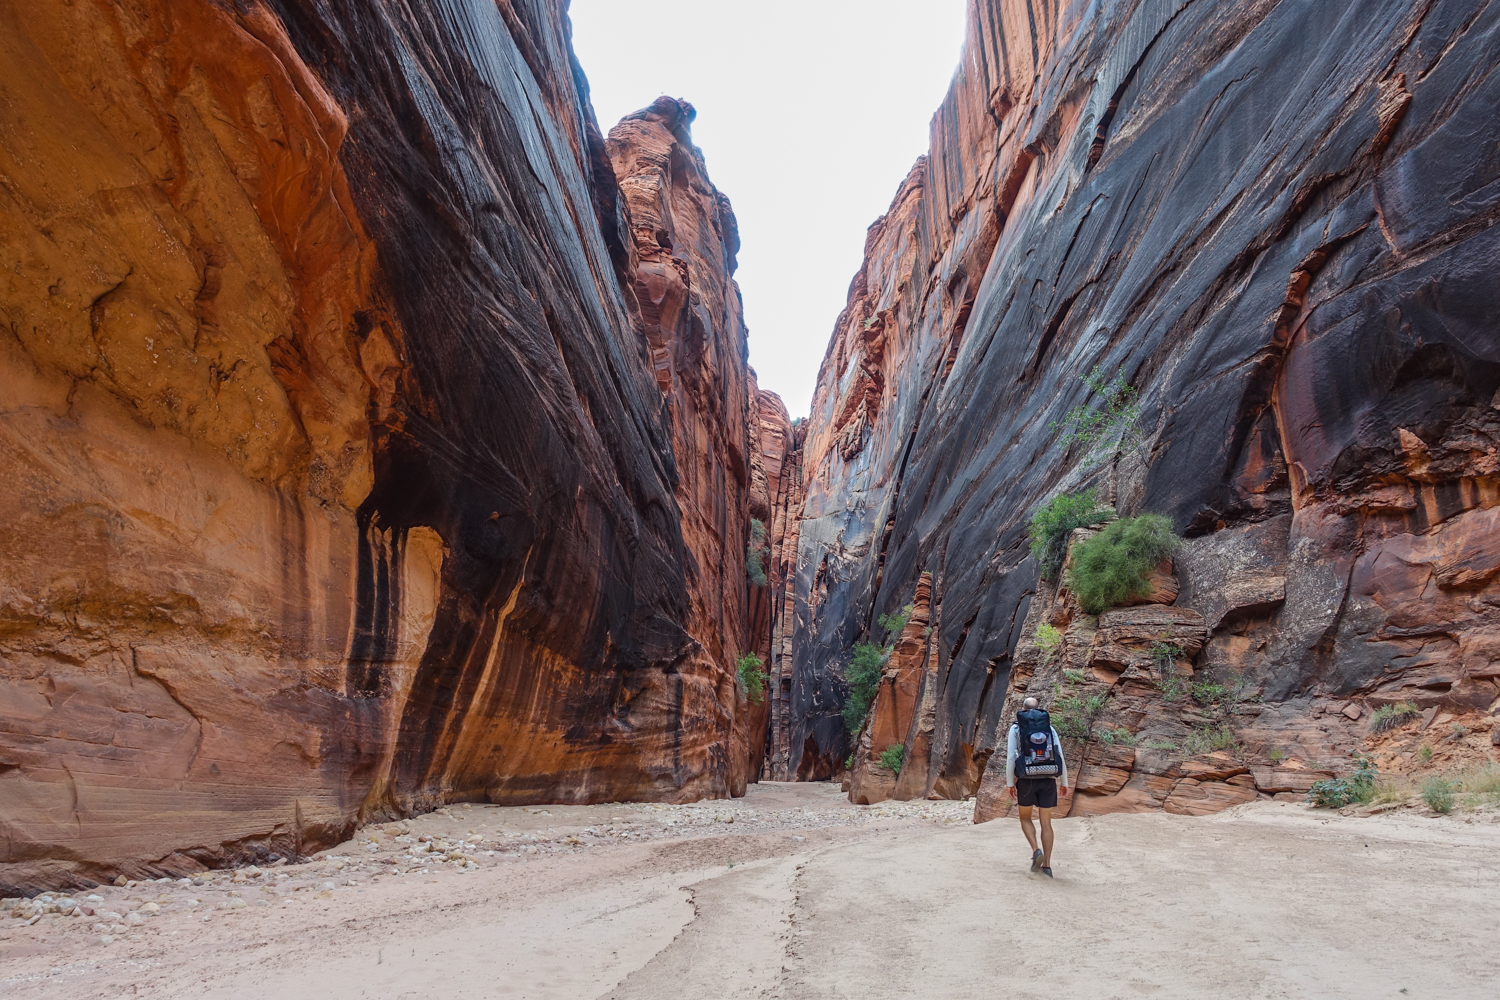
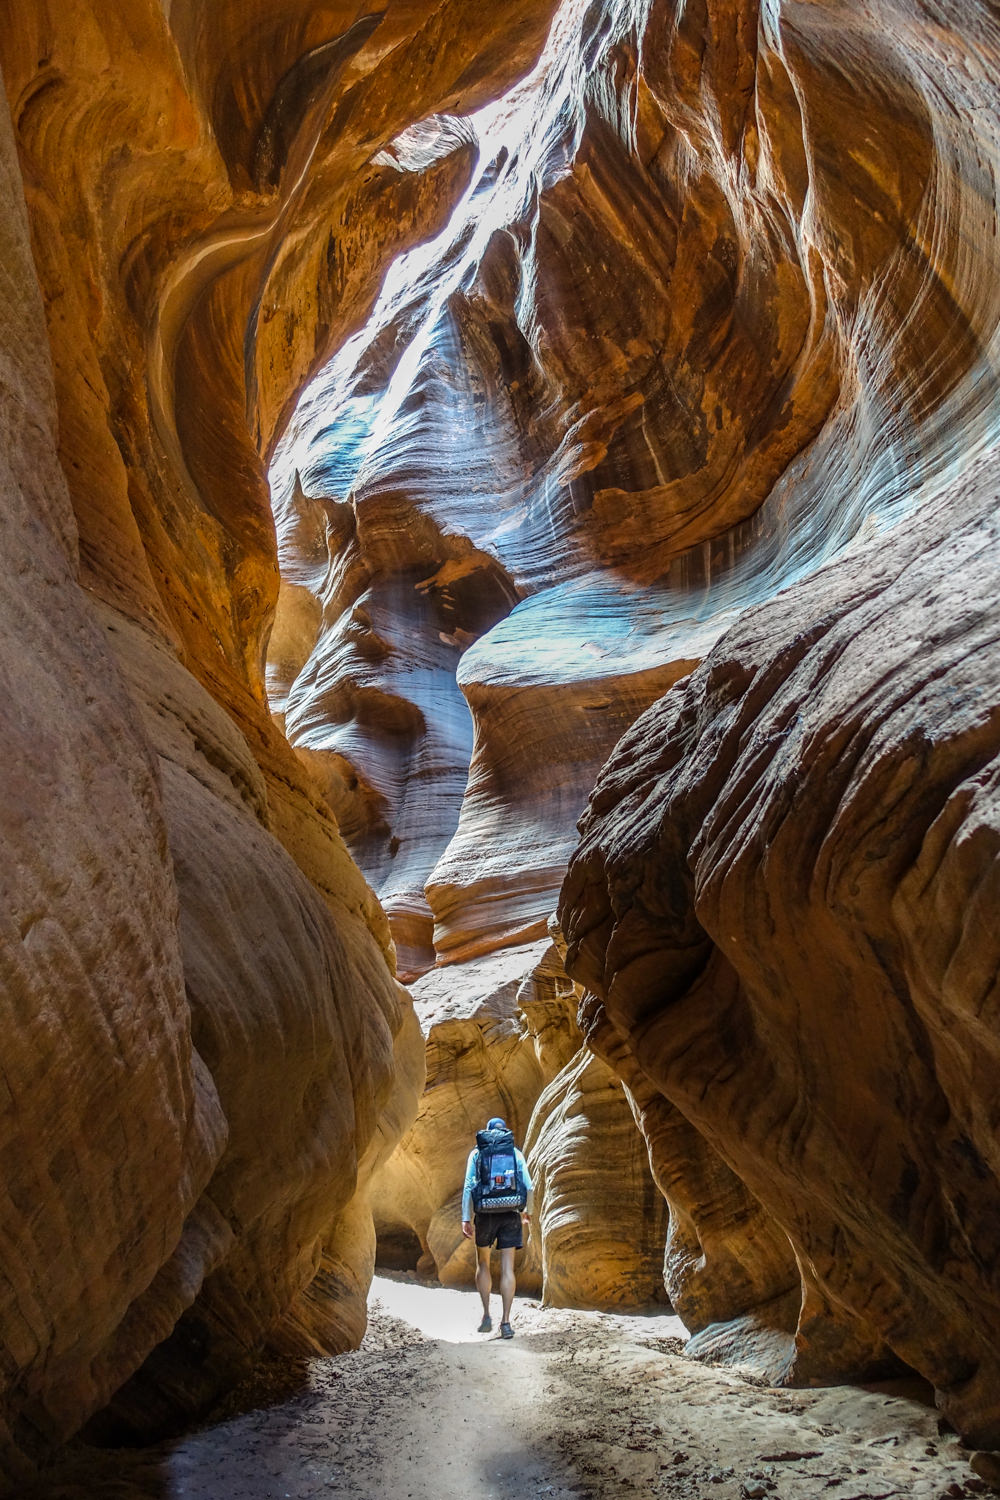
Located in the Paria Canyon-Vermilion Cliffs Wilderness of Utah and Arizona, Buckskin Gulch truly is an amazing place. Backpackers will appreciate the stunning beauty of one of the world’s longest continuous slot canyons.
But it takes plenty of planning to backpack Buckskin Gulch and Paria Canyon. Permits are tough to come by – due to its popularity – and flash floods pose plenty of risk, too. That’s why we pulled together this backpacking guide to Buckskin Gulch and Paria Canyon – which is based on our personal experience hiking this amazing landscape.
Quick Facts
- Distance: 21-51 miles (varies by trip)
- Days Needed: 2-5 days
- Elevation Gain/Loss: 500-1500 ft (varies by trip)
- Best Travel Time: April-June or September-November
- Permits: Yes, very competitive
- Difficulty: Moderate to Difficult
- Shuttle: Yes, unless doing an out-and-back hike
Highlights
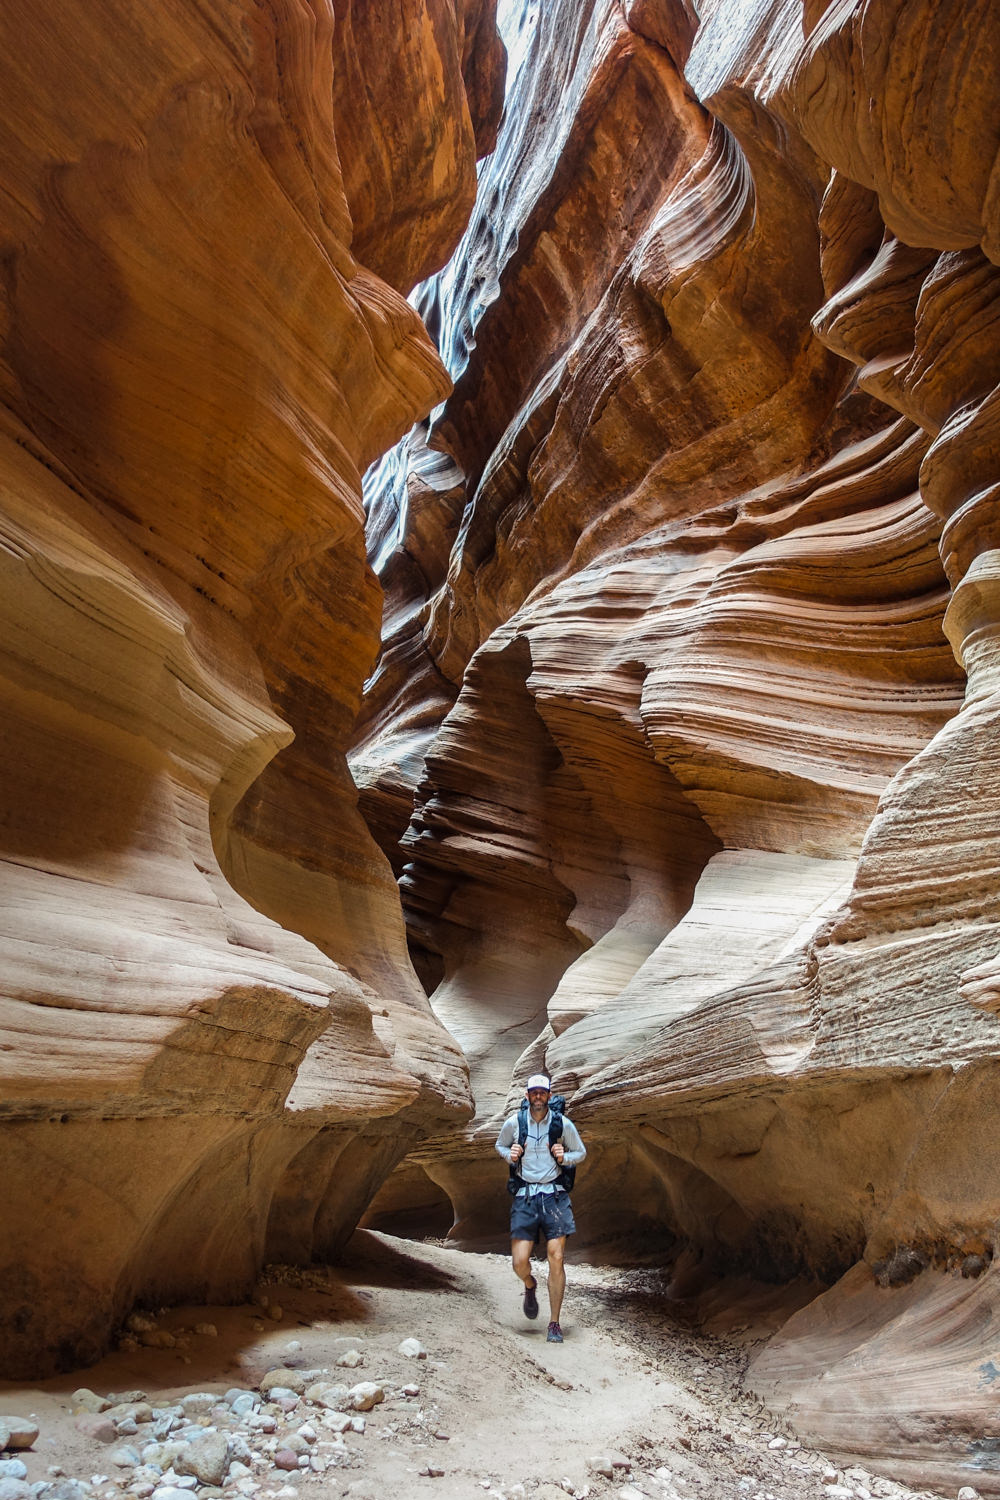
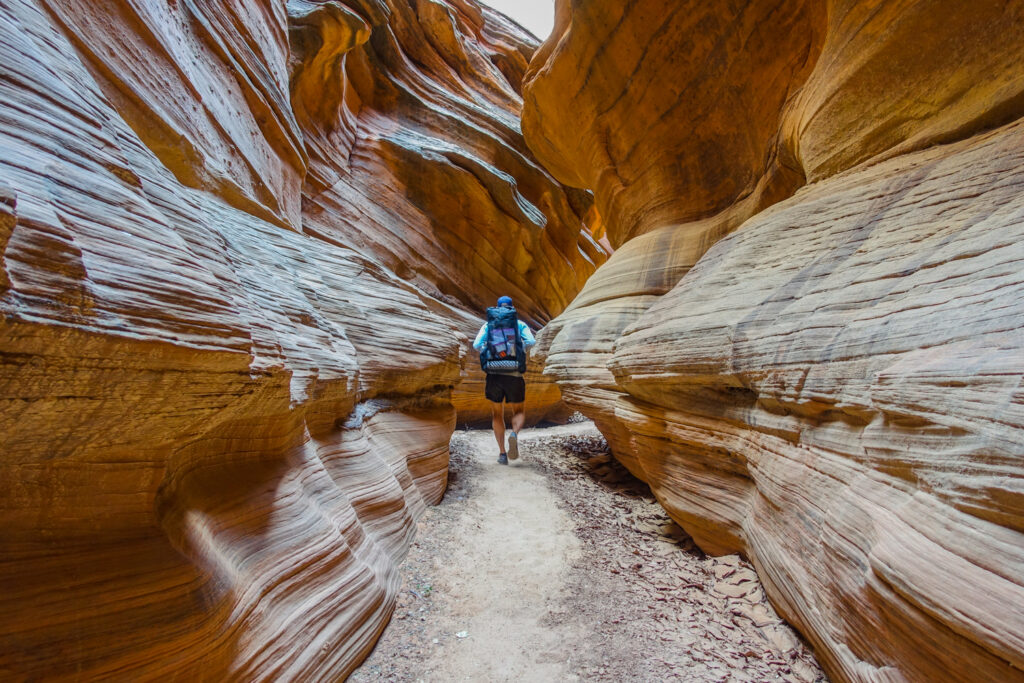
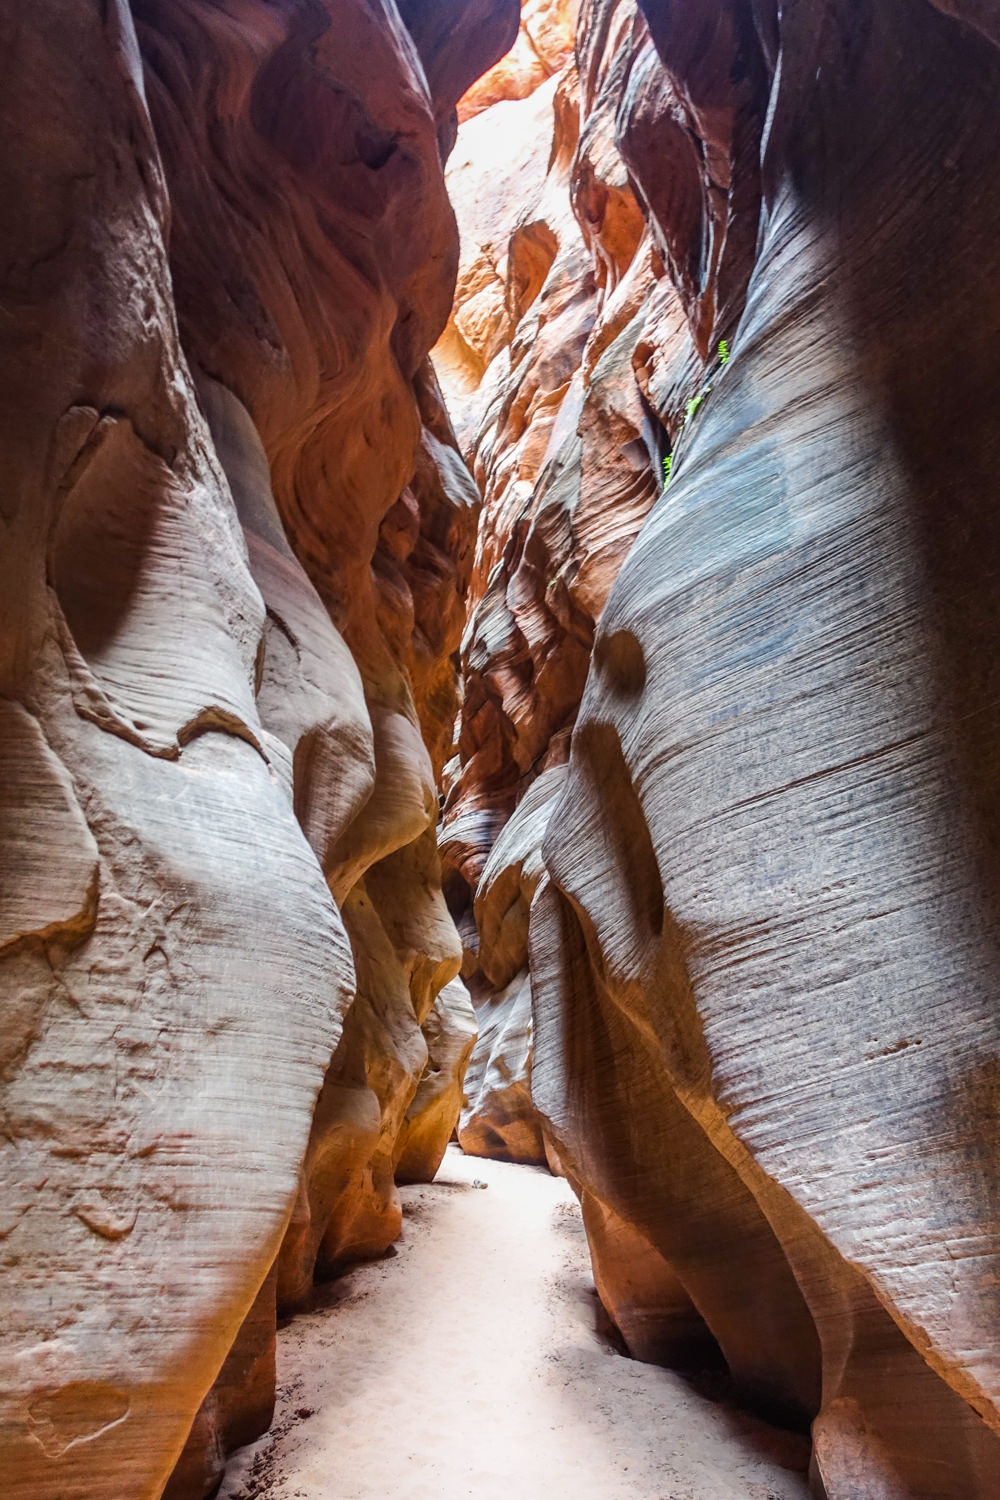
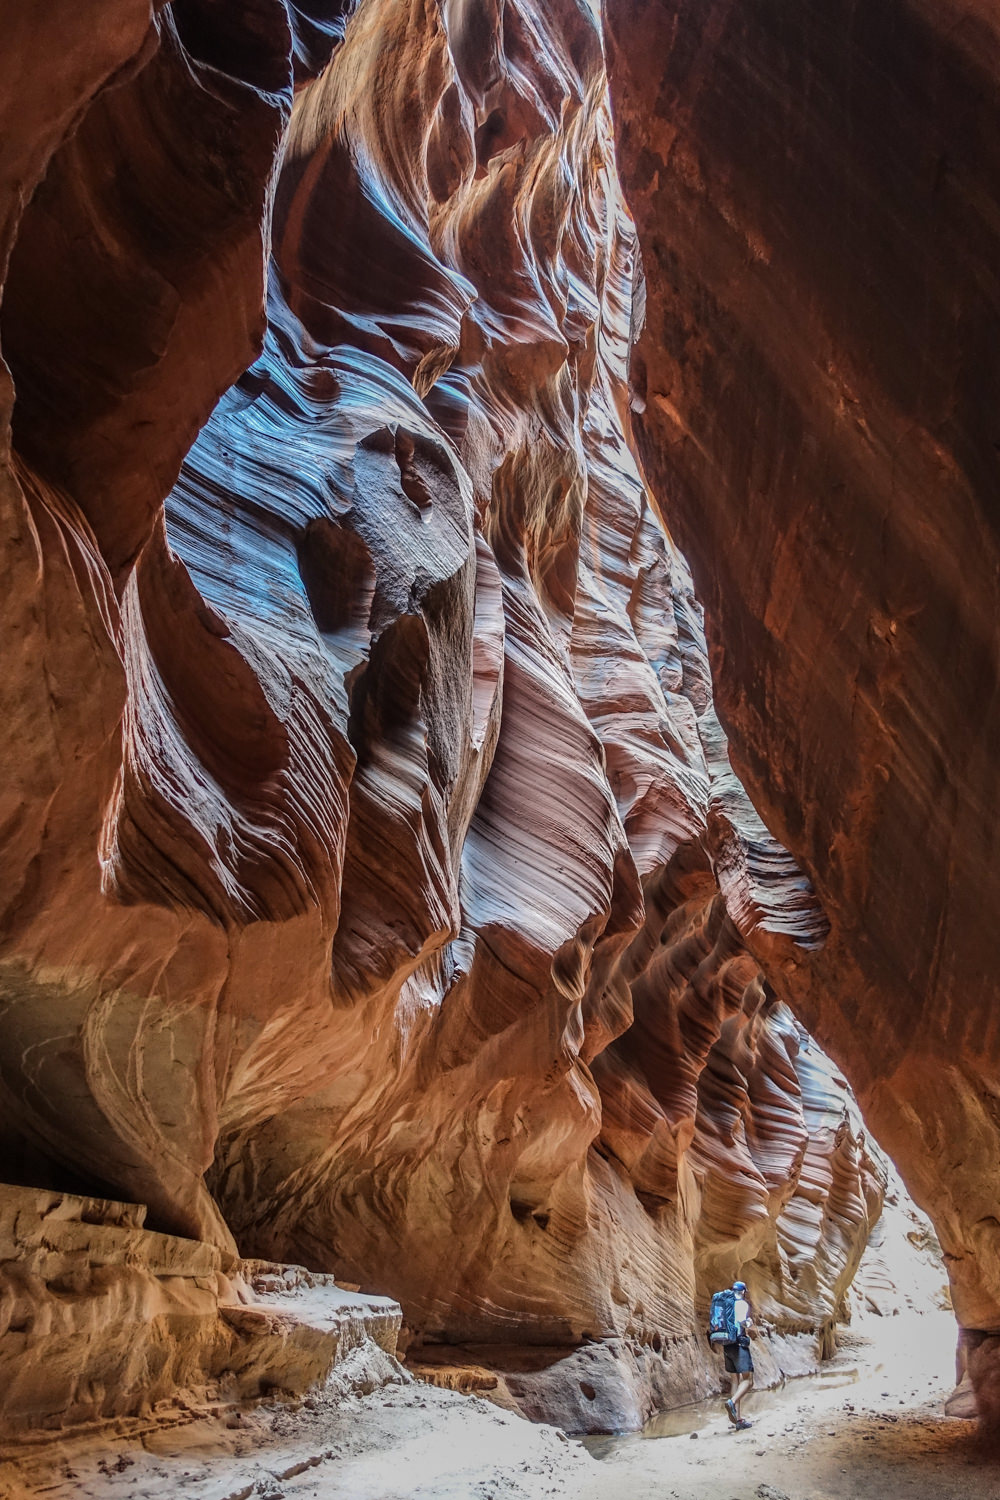
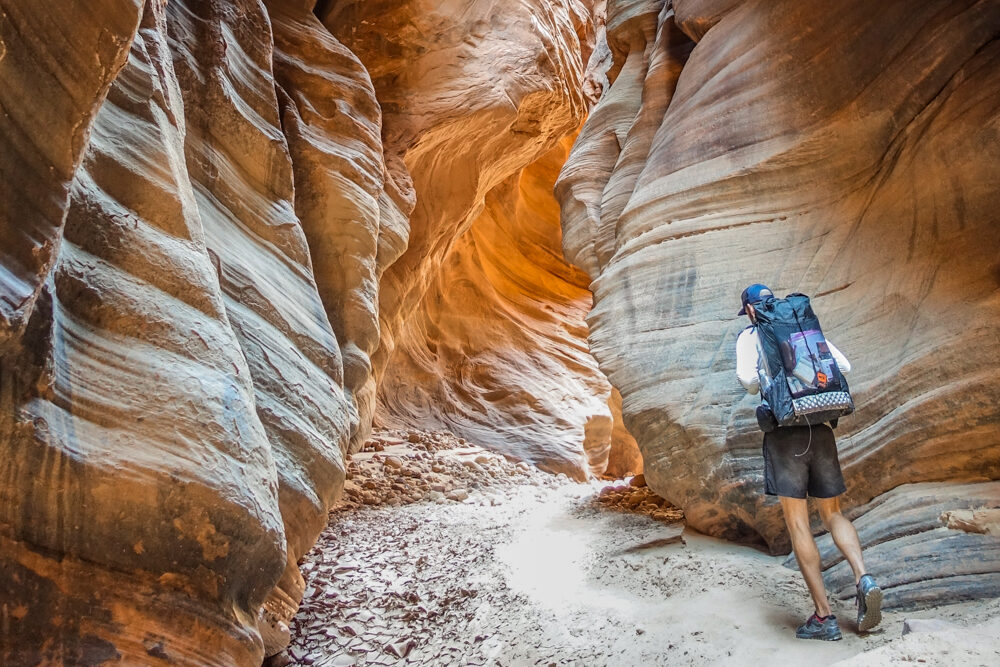
- Stunning slot canyon scenery
- Less sun exposure and slightly cooler temperatures than nearby locations
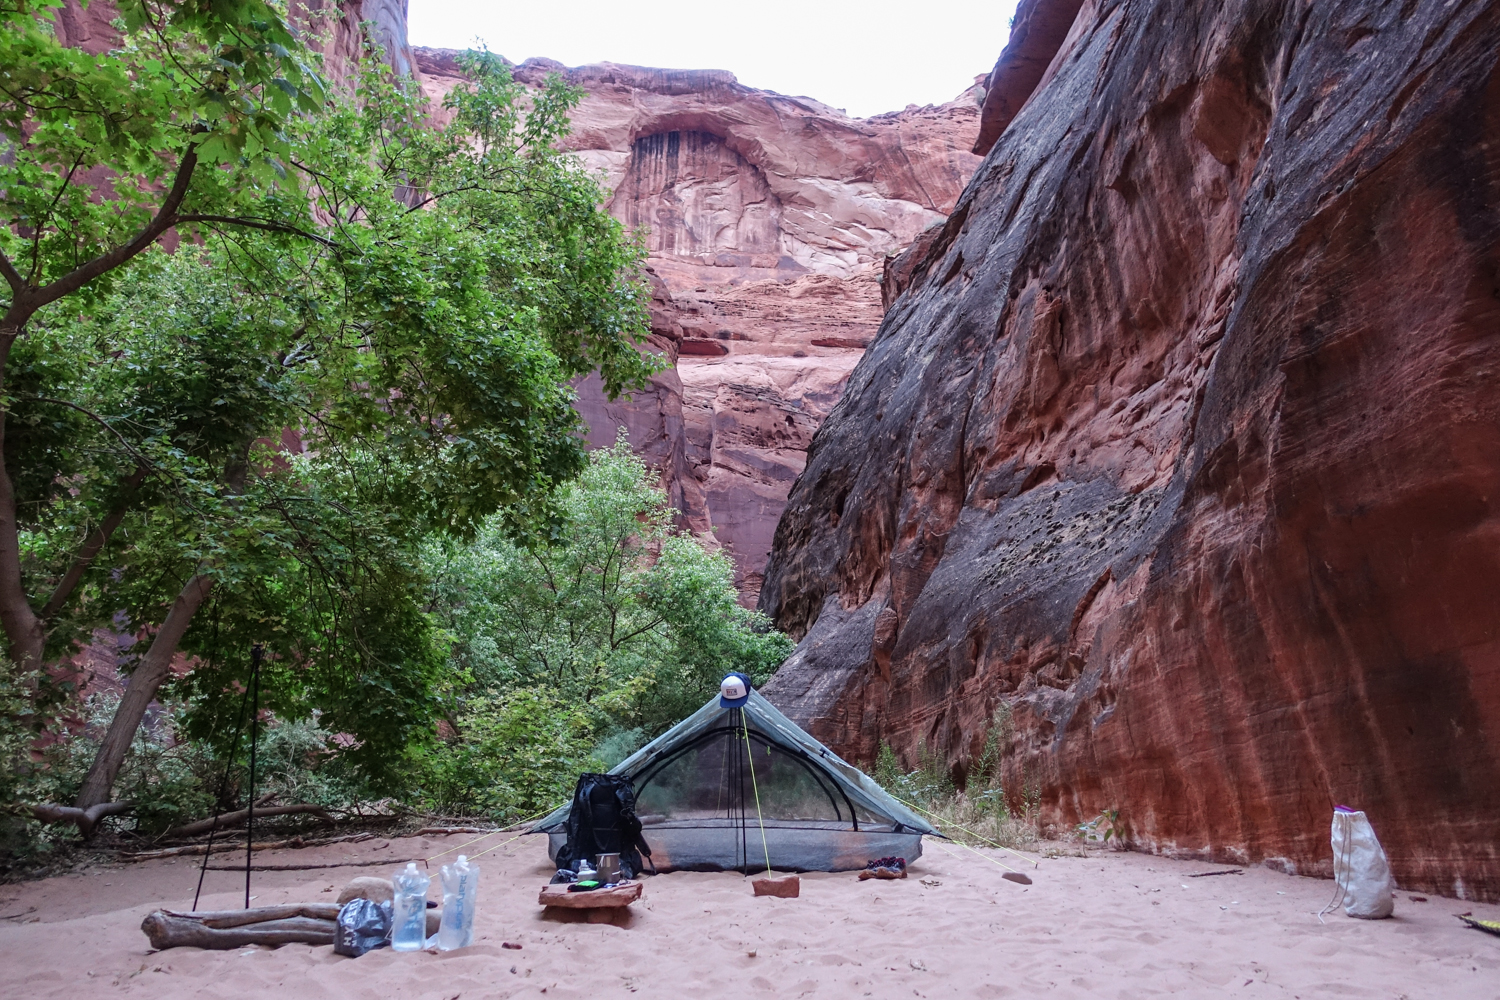
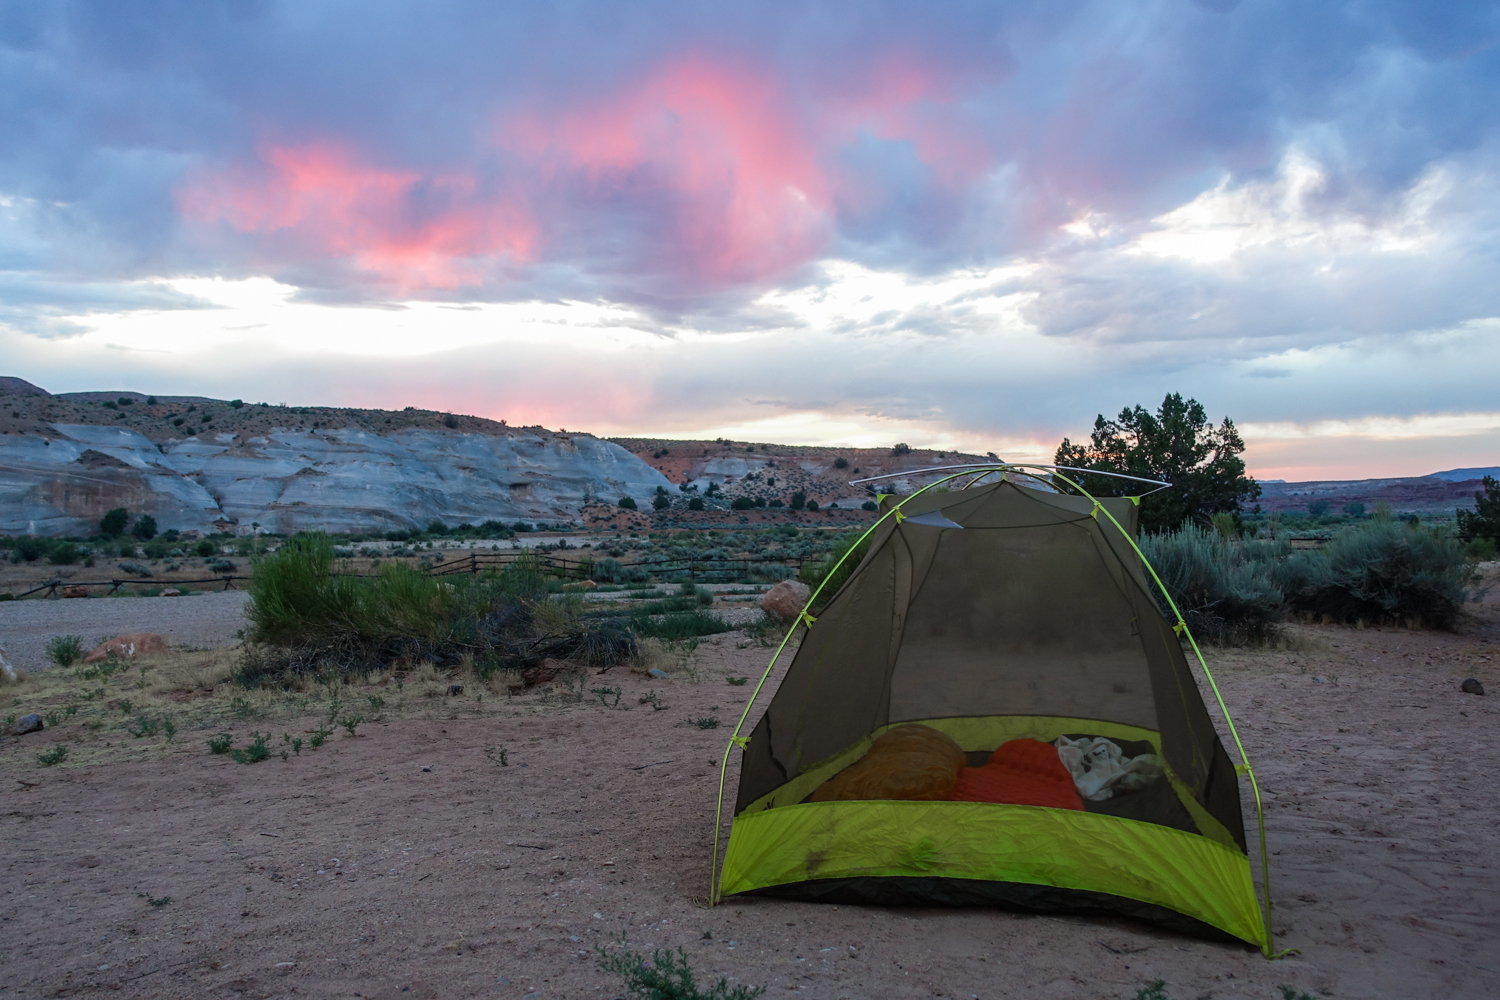
- Nice campsites, especially in Paria Canyon
- Lower congestion due to limited permits
Lowlights
- Possibility of dangerous flash floods
- Highly competitive permit system
- Limited water sources
- Two boulder jams require moderate scrambling
- Muddy pools require wading, sometimes waist-deep
- Rattlesnakes live in this area
Best Time to Travel
Officially, the hike through Buckskin Gulch and Paria Canyon is open year-round. But backpacking in this harsh, desert environment can be a risky proposition for much of the year.
The best times to visit are either April-June or September-November. These times are when the temperatures are cooler, and the risk of flash floods is lower.
Hiking in the summer months can be dangerously hot, and the risk of flash floods is higher. If you hike in the winter, be prepared for very cold temperatures. Also, keep in mind that fires are prohibited in this area.
Flash floods are a serious threat in Buckskin Gulch and Paria Canyon, especially in the summer. Diligently monitor the weather before your trip because conditions can change quickly. Call the Paria Contact Station at 435-689-0801 before your trip to check current conditions. Be willing and ready to change plans if there is a slight chance of rain in the forecast.
Difficulty
- Total Distance: 20-50 miles, depending on route
- Total Elevation Gain/Loss: ~1500 feet
- Overall Difficulty: Moderate to Difficult
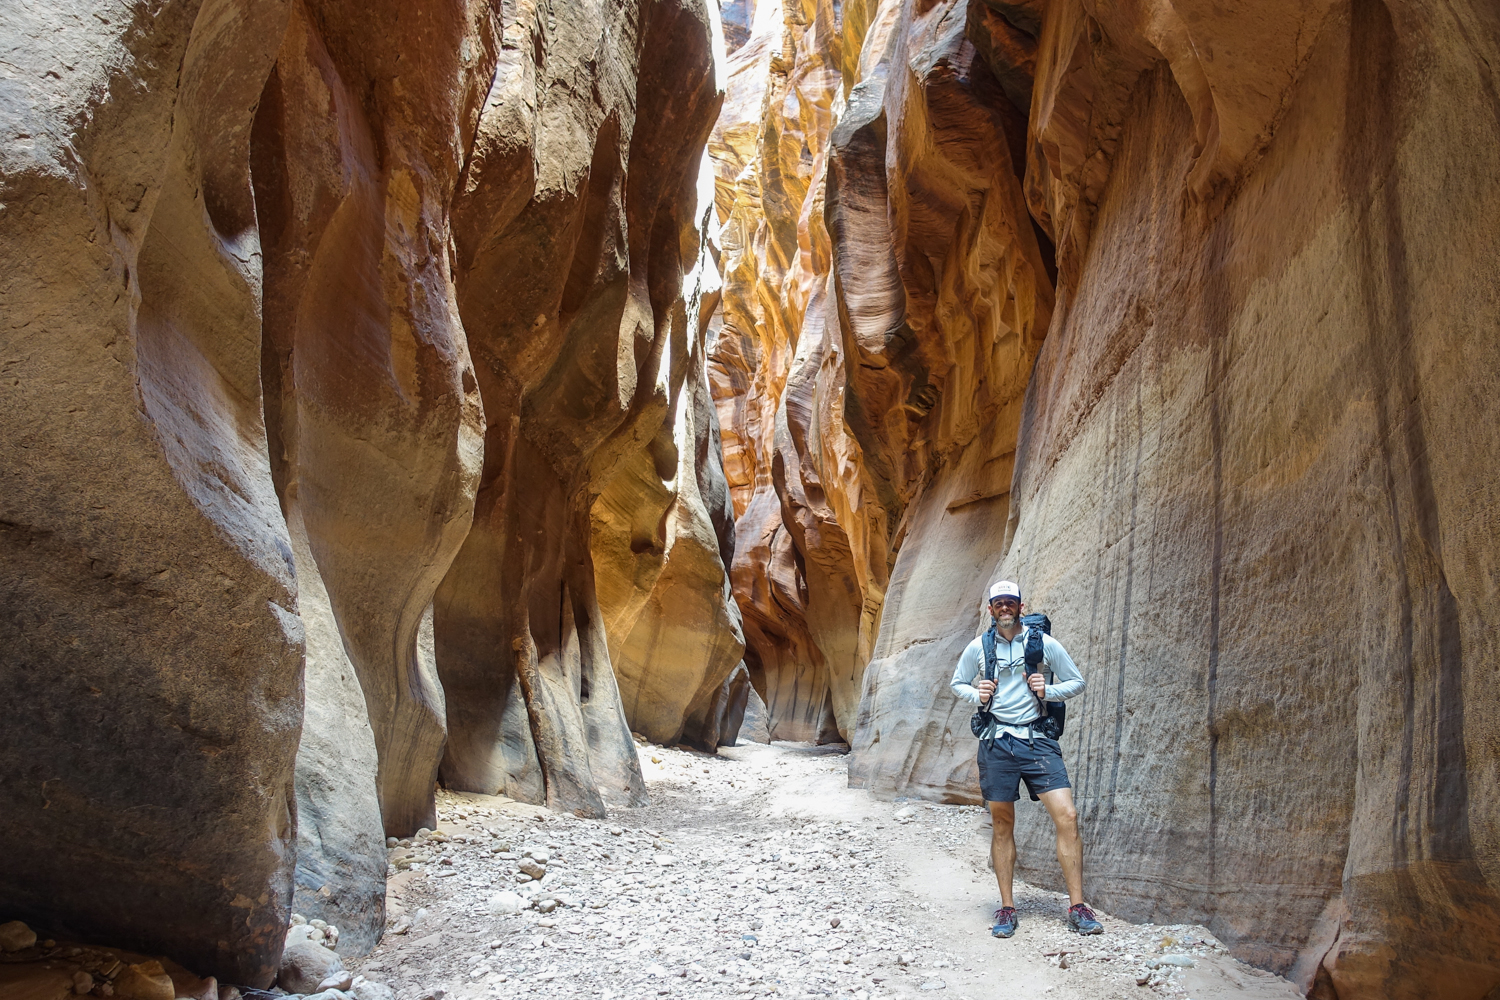
As always, difficulty ratings depend on your experience, physical fitness, pack weight, & weather conditions. There is not much elevation gain or loss along this route, but you’ll likely have a long day of hiking through sand and loose rock to get through Buckskin Gulch to an area where you can camp.
Along the route, you’ll encounter two boulder jams that require moderate scrambling ability, balance, strength, and confidence. You will also encounter several pools of muddy water, resulting in wet and muddy shoes/feet.
As always, “know thyself” and set yourself up for success by reviewing essential backpacking skills and streamlining your lightweight gear. We want you to have a safe and enjoyable adventure!

Permits
Advance permits are required for overnight stays in the Paria Canyon. They are limited to 20 people per day, making them highly competitive. But this permit process ensures users have a true wilderness experience.
Overnight reservations can be made up to four months in advance of your departure date through good ol’ Recreation.gov. There is a $6.00 reservation fee and $5.00 per person, per day for overnight trips. Once you’ve applied, obtained, and paid, you can pick up your permit in person within 10 days of the start date of your trip. Check the BLM.gov Paria website for more info.
You can obtain day-use permits for Paria Canyon using your smartphone to scan a QR Code at each trailhead. Although there are no visitor use limits for day use for Paria Canyon, this does not include Coyote Buttes North (The Wave) or Coyote Buttes South day-use areas, which use a separate permit system. These permits are available through an advance lottery and a daily lottery.
Solitude
Because there are such tight regulations on the number of overnight visitors to Buckskin Gulch and Paria Canyon, there’s a decent amount of solitude on this trip. You may see day hikers closer to trailheads, but things should quiet down later in the day if you’re staying overnight.
Possible Itineraries
Wire Pass to White House Trailhead (2d/1n)
The most common way to explore this area is a one-night trip beginning at the Wire Pass Trailhead and ending at the White House Trailhead. Over the course of two days you will hike just under 21 miles. Make sure you get an early start on your first day as you will hike through the most spectacular portion of Buckskin Gulch and camp near the confluence with the Paria River.
There is not a dependable, year-round water source along this route, so make sure to carry enough water for your entire trip (more water info below). After camping near the confluence, you’ll hike north through the Paria Canyon to the White House Trailhead on your second day.
Wire Pass to White House Trailhead (3d/2n)
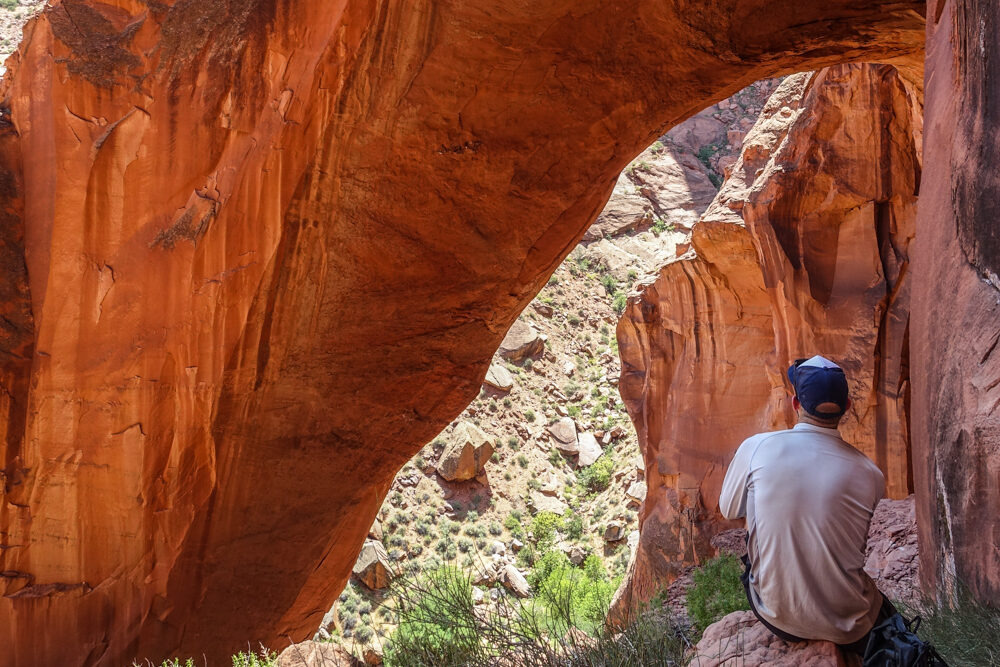
If you have more time, we recommend spending an extra day exploring the Paria Canyon south of the confluence. Big Springs is an excellent water source located about five miles south of the confluence with good camping options nearby. There are many more camping options in Paria Canyon, although many of them are dry camps. On day 2 you could do an out-and-back hike to Wrather Arch and camp around Big Springs again.
Another option would be to camp farther south at Shower Springs in the Paria Canyon. Shower Springs is another good water source located about 1.5 miles past Wrather Canyon. End this trek by hiking out to the White House Trailhead.
Wire Pass Trailhead to Lee’s Ferry Trailhead (3-5 days)
This option is the longest and most challenging of our suggested itineraries. It’s also quite rewarding.
Begin at the Wire Pass Trailhead, hike through Buckskin Gulch, and continue south at the confluence down Paria Canyon all the way to Lee’s Ferry. This trip should take 3-5 days one way.
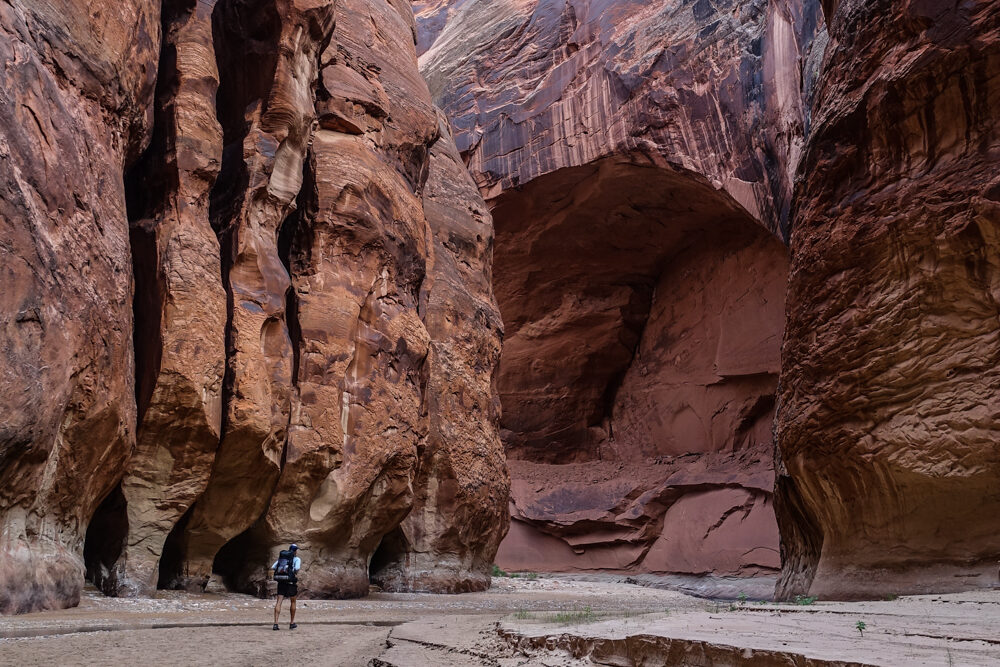
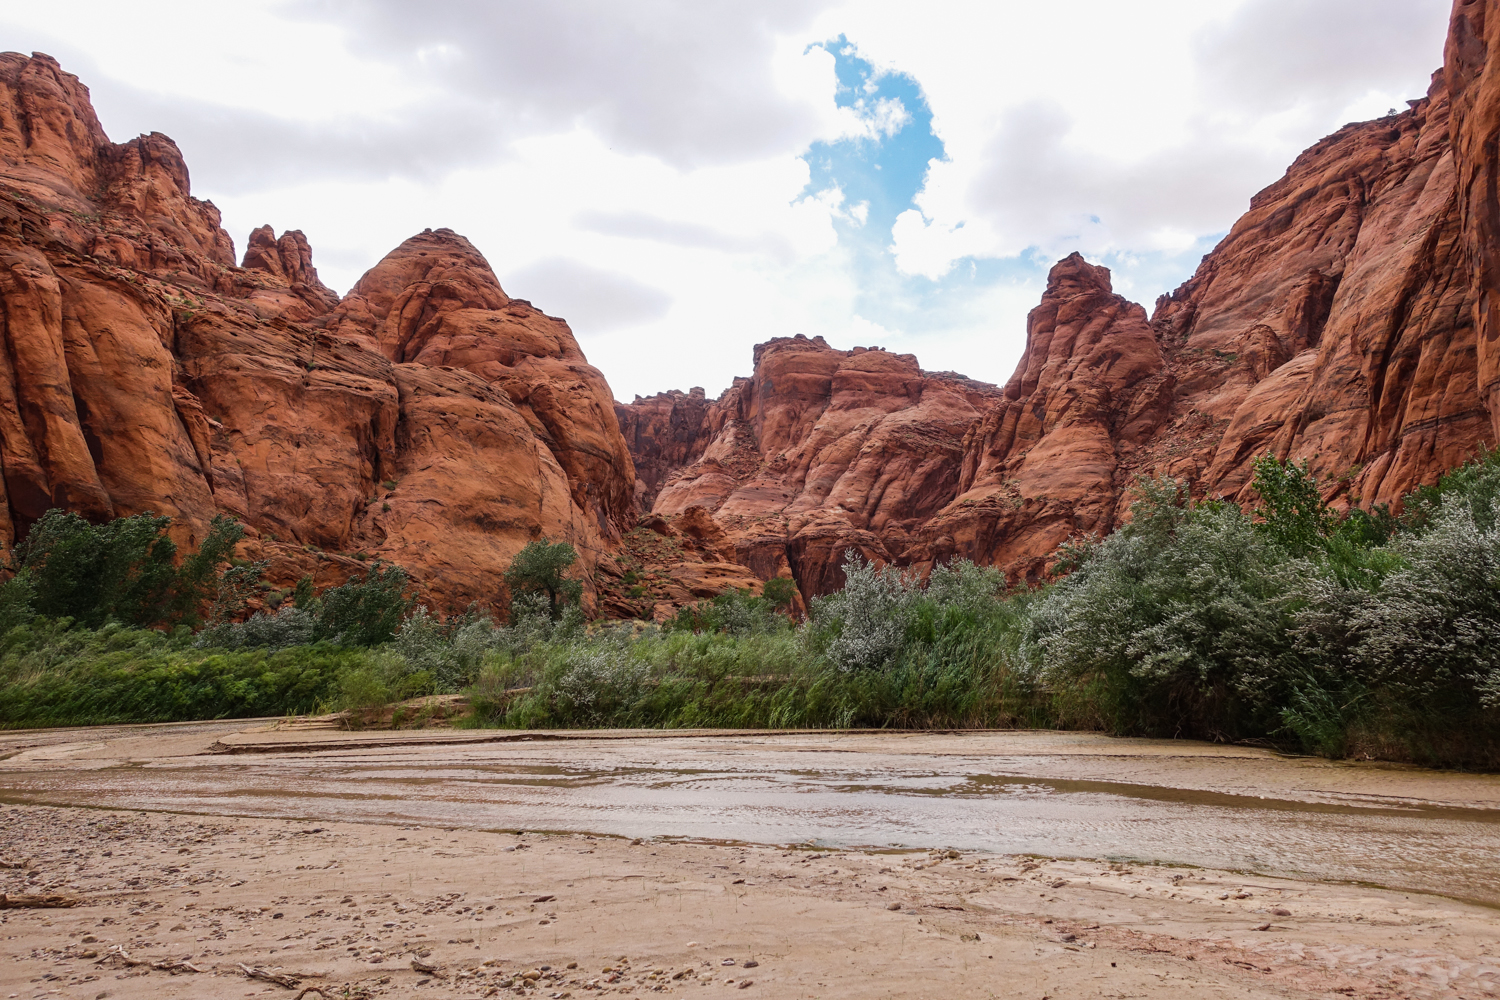
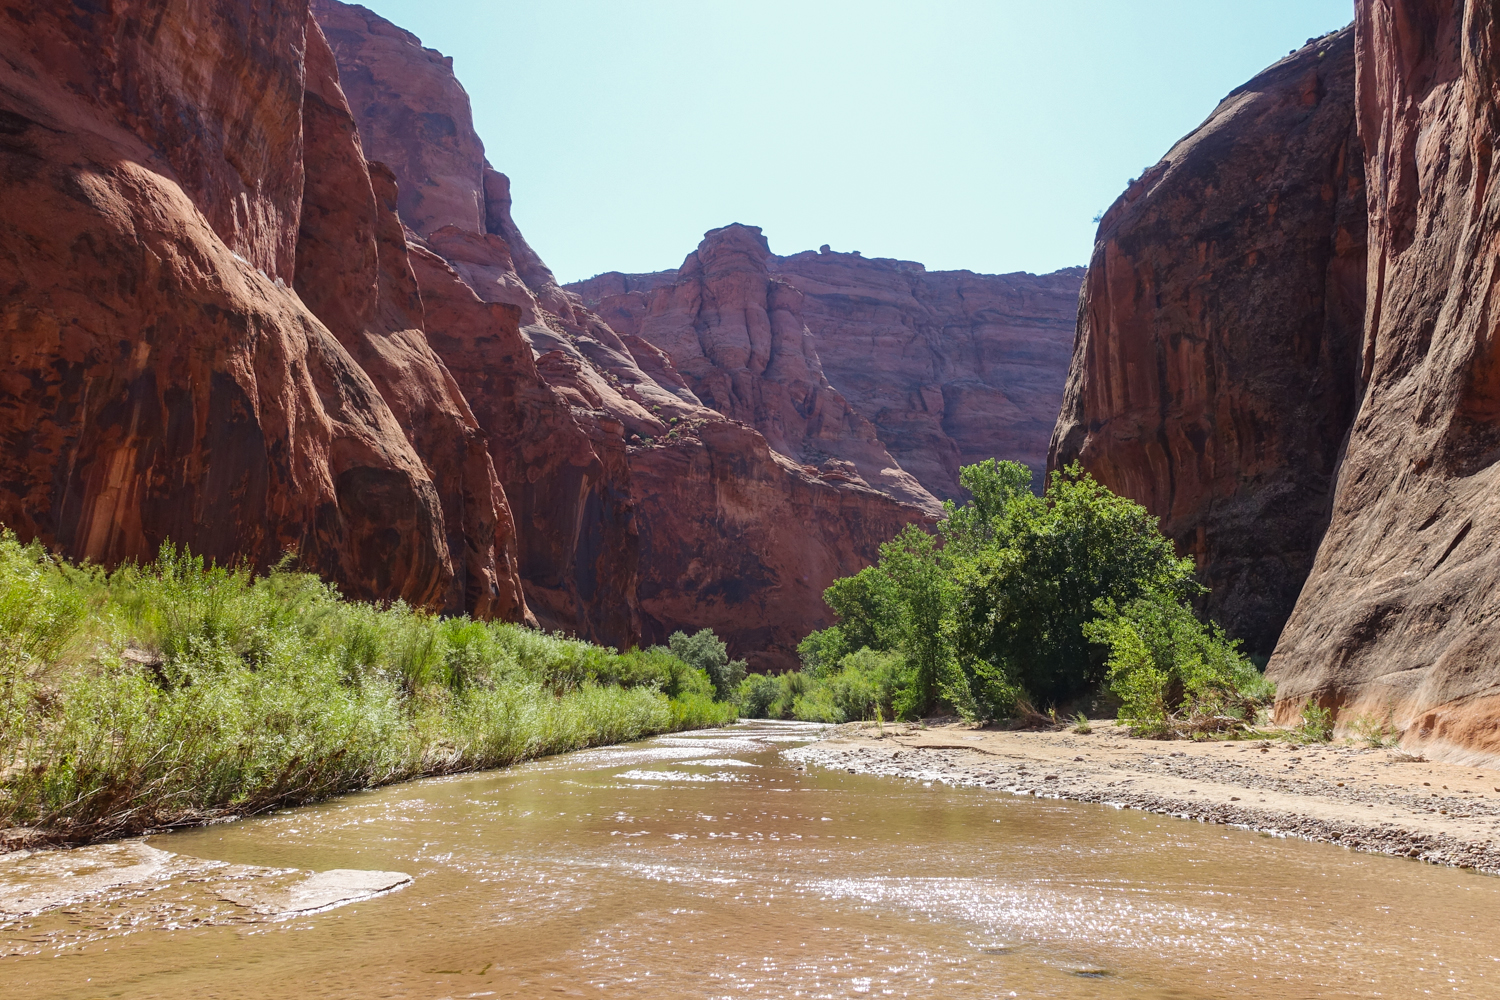
You’ll notice the farther southeast you travel, the more the canyon will open up – becoming wider, hotter, and more exposed. There are plenty of campsites in Paria Canyon to choose from, but water planning is critical. This itinerary will require a longer shuttle (roughly 2 hours by car).
Buckskin Gulch Trailhead to White House Trailhead
You could choose this option if you wanted to hike the entire length of Buckskin Gulch. When people begin at Wire Pass Trailhead, they cut off about three miles of Buckskin Gulch. We generally recommend beginning at Wire Pass because you’ll still experience the most impressive parts of Buckskin and it’s a quicker access point.
Middle-Out Route
The narrows of Buckskin Gulch run for about fifteen miles with only one access point – the Middle-Out Escape Route. This the only way out of Buckskin when bad weather hits.
This route can also be used for day hikers and backpackers. However, it requires some steep rock scrambling and route finding, so we do not recommend it for beginners or those afraid of heights.
Day Hiking Options
If you are planning on day hiking in this area, there are a couple options. Our top recommendation is an out-and-back hike from Wire Pass Trailhead into Buckskin Gulch. From the trailhead you’ll hike 1.7 miles to reach Buckskin Gulch, then explore the gulch as far as you like and turn around when you’re ready.
Know your limitations, carry water for the entire day (more water info below), pay close attention to the time, and turn back with plenty of energy to reach your car. Ambitious and fit hikers can still explore a good portion of Buckskin Gulch this way.
Another option is to hike from White House Trailhead south into Paria Canyon towards Buckskin Gulch. This is far less ideal for exploring Buckskin Gulch because most of your day will be spent in a sandy and exposed section of Paria Canyon (roughly seven miles one way) before reaching the confluence with Buckskin Gulch.
Getting To the Trailheads
- Wire Pass Trailhead: From Kanab, head south on US-89 for 38 miles. Turn right onto House Rock Valley Road and continue for 8.4 miles. Wire Pass Trailhead will be on your right.
- White House Trailhead: From Kanab, head south on US-89 for 43 miles. Turn right onto White House Trailhead Road. About 2 miles down this road you will arrive at the White House Trailhead and Campground.
- Lee’s Ferry Trailhead: From Kanab, head south on US-89 for 78 miles. You will cross over into Arizona on this route. Turn right onto Lee’s Ferry Road and follow this for 4.4 miles, then turn left onto Lee’s Ferry Campground.
- Buckskin Gulch Trailhead: From Kanab, head south on US-89 for 38 miles. Turn right onto House Rock Valley Road for 4.5 miles to the Buckskin Gulch Trailhead.
Shuttle Options
In order to complete many of the backpacking routes listed above, you’ll need to use a shuttle service or drive two cars and shuttle yourself. Using two cars is the most economical, but it’s also more time-consuming.
For a more convenient option, you could hire a shuttle service instead. You could call the ranger station for shuttle service recommendations before your trip – or compare prices and tour options with these outfitters:
Maps & Guidebooks
- Best Backpacking Trips in Utah, Arizona, and New Mexico – This book is a fantastic resource for backpacking Buckskin Gulch and the Paria Canyon. It has in-depth information on the itineraries listed above and it also covers other excellent trips in the area.
- Paria Canyon, Kanab National Geographic Map – A good topo map is essential for any backpacking trip, and this one is detailed and reliable. It has information on trailheads, campsites, mileage, and water sources.
- We use Caltopo to research trips, plan routes, and print maps for many of our backpacking adventures. Learning the tool takes a little time, but it’s an excellent resource.
- On most of our backpacking trips, we use Gaia GPS for on-trail navigation. We always bring a topo map and compass, but Gaia is an excellent tool in the field.
- BLM-Buckskin Gulch Website – This website offers a good overview of information you’ll need to hike in the Buckskin Gulch area.
- BLM-Paria Canyon Website – This is where you will apply for permits and find up-to-date information on the Paria Canyon conditions and regulations.
Water
Buckskin Gulch and Paria Canyon have limited and, at times, unreliable water sources. To be safe, you’ll want to carry 4-6 liters of water per person per day. If it’s hot out, you’ll likely want to drink 5-6L per day, though you could survive less comfortably on 4.
Big Springs is the first year-round, reliable, and clean water source in this area. It’s ocated 5 miles south of the Paria/Buckskin confluence. Many hikers head north at the confluence towards White House Trailhead, so they’ll never pass a year-round reliable source.
In an emergency or when water is plentiful, there is usually water in Paria Canyon and near the Buckskin confluence. However, the water in Paria Canyon is generally not considered clean and should be avoided if possible.
For water treatment, we often use the SteriPEN Ultra when backpacking, but in the desert, we prefer chemical treatments. The lightest and most foolproof method is chlorine dioxide tablets or drops. If you prefer to filter your water, our top choice is the Sawyer Squeeze.
Human Waste
Human waste bags are mandatory for Buckskin and Paria Canyons. “Wag bags” are easy to use and improve everyone’s experience in this beautiful area.
In the desert, it takes more than a year for human waste to decompose. Plus, harmful bacteria found in feces – such as salmonella and E. Coli – may pose health threats for humans for several years in the desert. There’s just not enough moisture or micro-organisms in desert soil to break down human and pet waste – which then concentrates in desert water sources when there is run-off.
Just think about how many visitors hike in these canyons every year. When people don’t use wag bags, campsites smell awful, and water sources become contaminated. You obviously want to enjoy a pristine wilderness, clean campsite, and safe water for your trip, so do your part not to shit on this special place – literally and figuratively.
Human waste bags are provided with overnight permits at the Paria Ranger Station, Kanab Field Office, and Arizona Strip District Office. However, you may need more than one depending on the length of your trip (and you don’t want to be without one in an emergency).
Gear List
Make sure to check out our Ultimate Backpacking Checklist, so you don’t forget something important.
Below you’ll find our current favorite backpacking gear. If you want to see additional options, our curated gear guides are the result of many years of extensive research and hands-on testing by our team of outdoor experts.
BACKPACK
- Best Backpacking Pack Overall: Gregory Paragon 58 – Men’s / Gregory Maven 58 – Women’s
- Best Ultralight Backpacking Backpack: Hyperlite Mountain Gear Unbound 40
- More: Check out our best backpacking backpacks guide for ultralight and trekking options
TENT
- Best Backpacking Tent Overall: Big Agnes Copper Spur HV UL2
- Best Ultralight Tent: Zpacks Duplex
- Best Budget Tent: REI Half Dome 2
- Best Tent Stakes Overall: All One Tech Aluminum Stakes
- More: Check out our best backpacking tents guide for more options
SLEEPING BAG/QUILT
- Best Sleeping Bag Overall: Men’s Feathered Friends Swallow YF 20 / Women’s Feathered Friends Egret YF 20
- Best Quilt Overall: Enlightened Equipment Revelation 20
- More: Check out our best backpacking sleeping bags guide and best backpacking quilts guide for more options
SLEEPING PAD
- Best Sleeping Pad Overall: NEMO Tensor All-Season
- Best Foam Sleeping Pad: NEMO Switchback
- More: Check out our best backpacking sleeping pads guide for ultralight and trekking options
CAMP KITCHEN
- Best Backpacking Stove Overall: MSR PocketRocket 2
- Best Backpacking Cookware Overall: TOAKS Titanium 750ml
- Best Backpacking Coffee Overall: Starbucks VIA
- More: Check out our best backpacking stoves guide and best backpacking cookware guide for ultralight and large group options
WATER & FILTRATION
- Best Water Filter Overall: Sawyer Squeeze
- Best Hydration Bladder Overall: Gregory 3D Hydro
- Best Backpacking Water Bottles: Smartwater Bottles
- More: Check out our best backpacking water filters guide and best backpacking water bottles guide for ultralight and large group options
CLOTHING
- Best Hiking Pants Overall: Men’s Outdoor Research Ferrosi / Women’s The North Face Aphrodite 2.0
- Best Hiking Shorts Overall: Men’s Patagonia Quandary / Women’s Outdoor Research Ferrosi
- Best Women’s Hiking Leggings: Fjallraven Abisko Trekking Tights HD
- Best Rain Jacket Overall: Men’s Patagonia Torrentshell 3L / Women’s Patagonia Torrentshell 3L
- Best Rain Pants: Men’s Patagonia Torrentshell 3L / Women’s Patagonia Torrentshell 3L
- Best Down Jacket Overall: Men’s Patagonia Down Sweater Hoodie / Women’s Patagonia Down Sweater Hoodie
- Best Fleece Jacket Overall: Men’s Patagonia Better Sweater / Women’s Patagonia Better Sweater
- Best Sunshirt Overall: Men’s Outdoor Research Echo / Women’s Outdoor Research Echo
- Best Socks Overall: Men’s Darn Tough Light Hiker Micro Crew / Women’s Darn Tough Light Hiker Micro Crew
- Beste Ultralight Liner Glove: Patagonia Capilene Midweight Liner
- More: Check out our best backpacking apparel lists for more options
FOOTWEAR & TRACTION
- Best Hiking Shoes Overall: Men’s HOKA Speedgoat 6 / Women’s HOKA Speedgoat 6
- Best Hiking Boots Overall: Men’s Salomon X Ultra 5 GTX / Women’s Lowa Renegade Evo GTX
- Best Hiking Sandals Overall: Men’s Chaco Z/1 Classic / Women’s Chaco Z/1 Classic
- Best Camp Shoes Overall: Crocs Classic Clogs
- Best Traction Device for Hiking Overall: Kahtoola MICROspikes
- More: Check out our best backpacking footwear lists for more options
NAVIGATION
- Best GPS Watch Overall: Garmin Instinct 2 Solar
- Best Personal Locator Beacon (PLB): Garmin inReach Mini 2
- More: Check out our article How to Use Your Phone as a GPS Device for Backpacking & Hiking to learn more
FOOD
FIRST-AID & TOOLS
- Best First-Aid Kit Overall: Adventure Medical Kits Ultralight/Watertight .7
- Best Pocket Knife Overall: Kershaw Leek
- Best Multitool Overall: Leatherman Wave+
- Best Headlamp Overall: Black Diamond Spot 400-R
- Best Power Bank Overall: Nitecore NB 10000 Gen 3
- More: Check out our best first-aid kit guide, best pocket knife guide, best multitool guide, best backpacking headlamps guide, and best power banks guide for more options
MISCELLANEOUS
- Best Trekking Poles Overall: Black Diamond Pursuit
- Best Backpacking Chair Overall: REI Flexlite Air
- Best Backpacking Stuff Sack Overall: Hyperlite Mountain Gear Drawstring
- More: Check out our best trekking poles guide, best backpacking chairs guide, and best stuff sacks guide for more options
More Information
We love the outdoors, and if you’re here, so do you! Your knowledge and practice of leave-no-trace principles ensure that wild places like Buckskin Gulch and Paria Canyon remain pristine.
For more desert adventures, see our full collection of backpacking trip guides and read up on our tips for backpacking in the desert. We hope these guides help you plan an unforgettable adventure. For more help on what to pack, check out the following links:
Buckskin & Paria Photo Gallery
something new around every corner. – photo credit: dave collins (cleverhiker.com)
It’s hard to describe the soundscape of this hike, you’ll have to experience it for yourself. – photo credit: dave collins (cleverhiker.com)
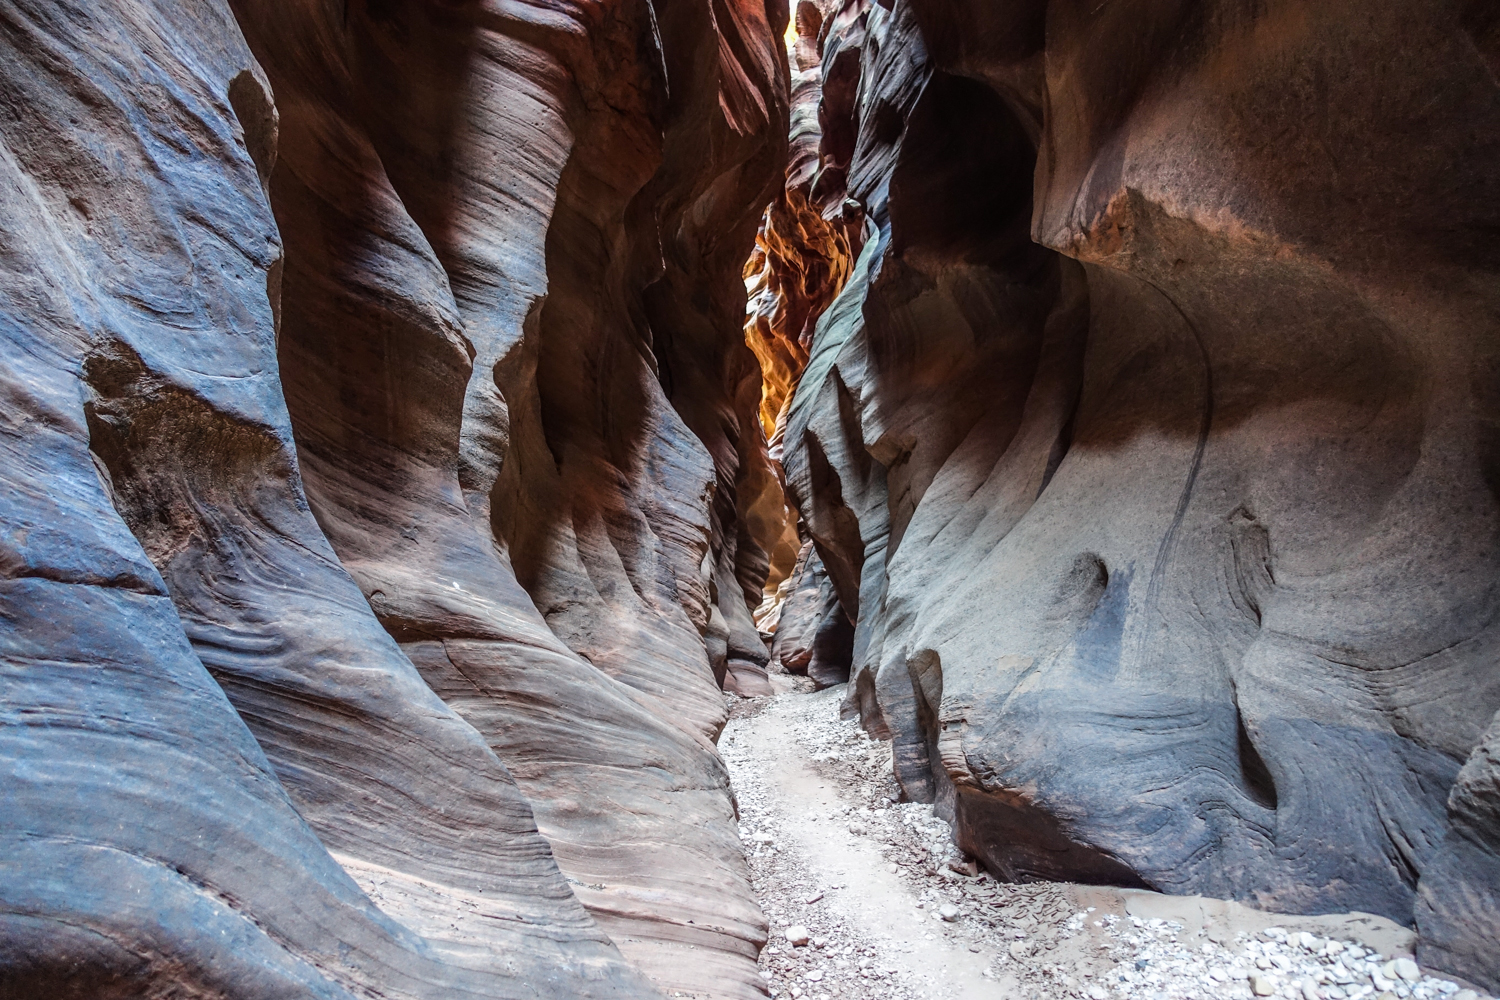
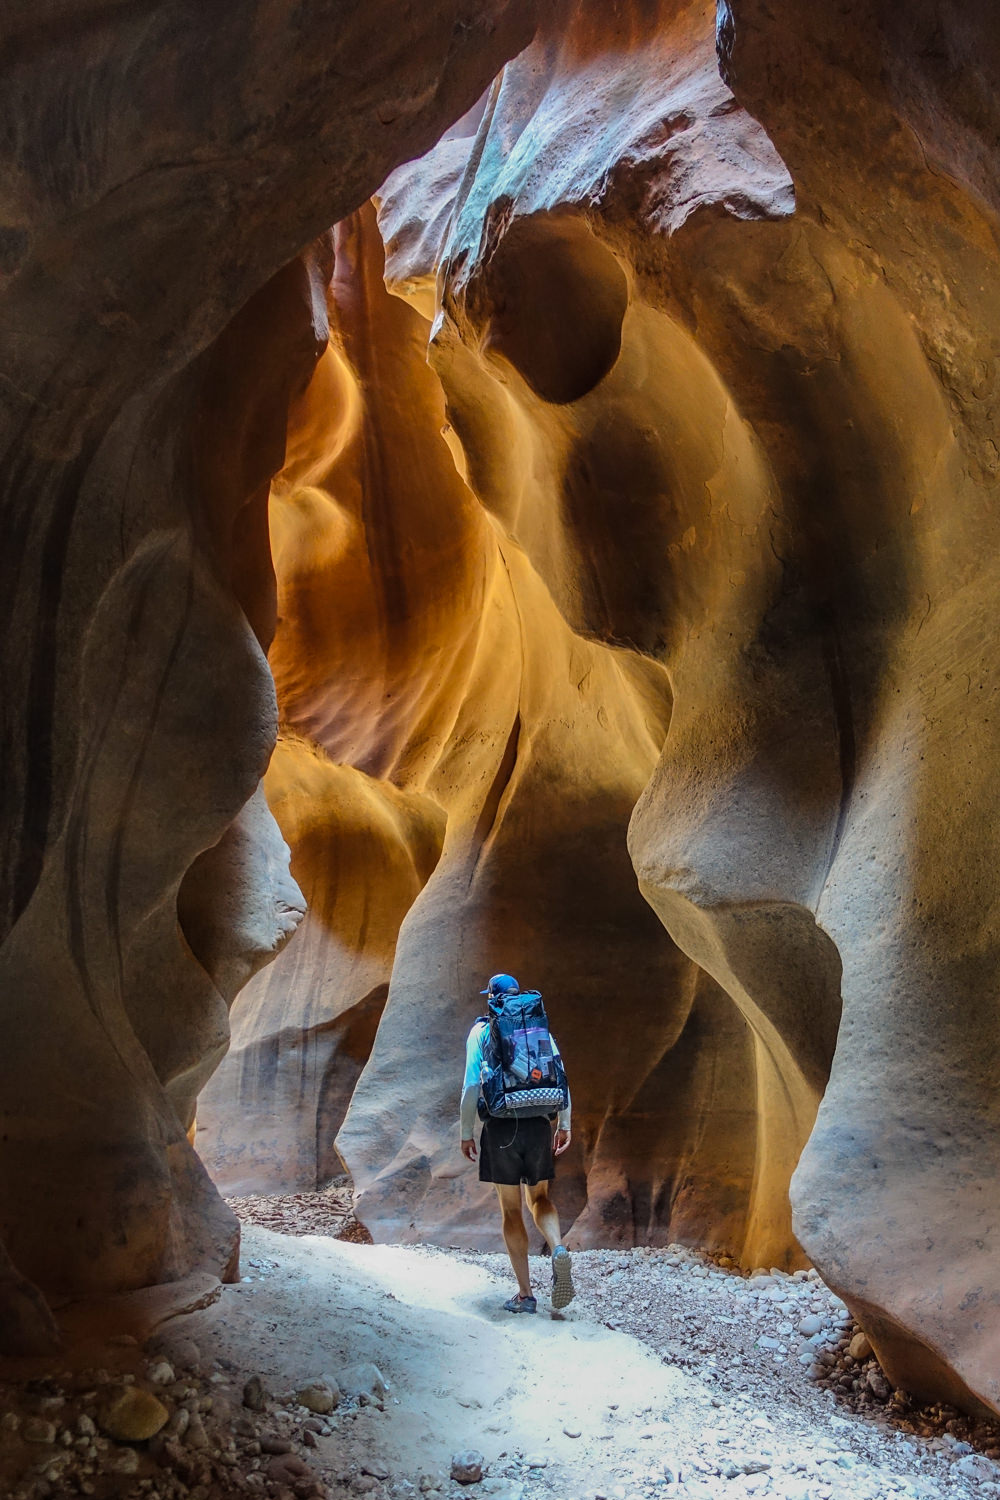
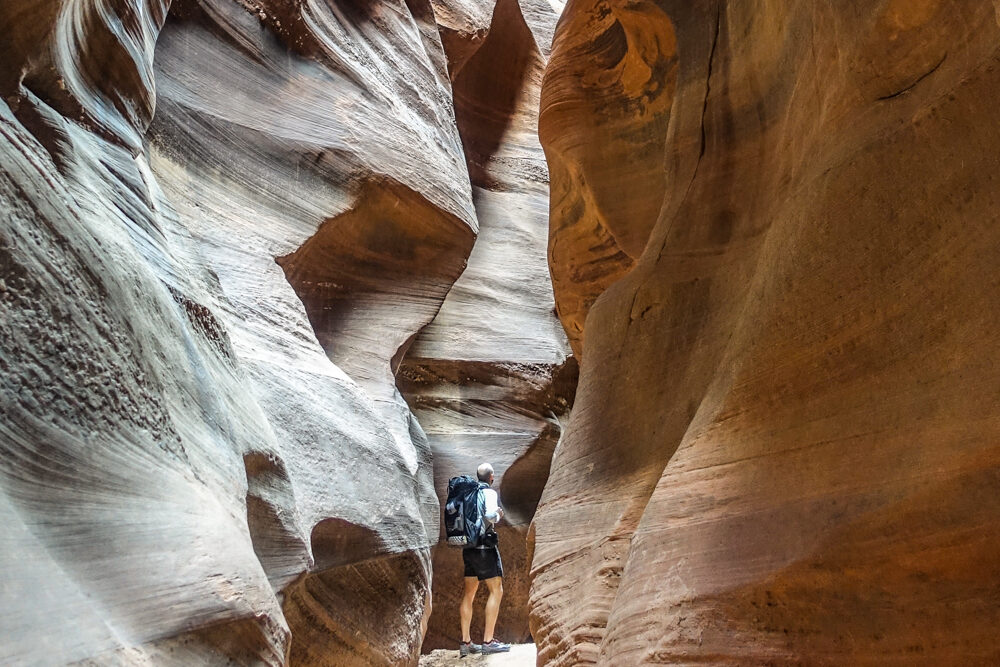
if you have a sensitivity to being in small spaces, parts of this hike might be difficult., – photo credit: dave collins (cleverhiker.com)

The sandstone holes, shelves, pockets are such a geological trip. – photo credit: dave collins (cleverhiker.com)

one of our campsites. – photo credit: dave collins (cleverhiker.com)
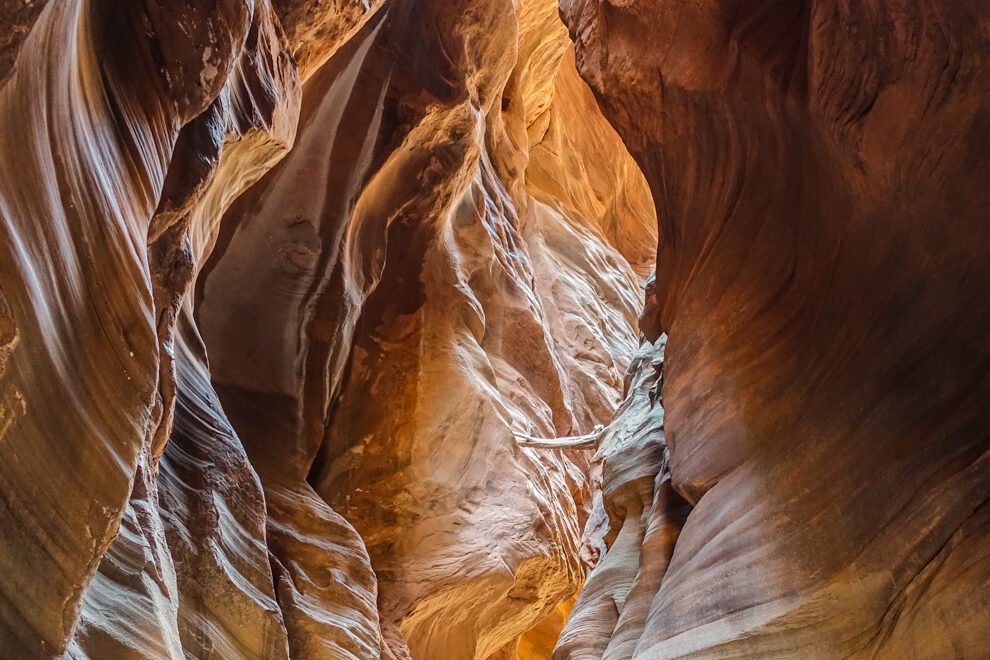
suspended driftwood reminds how high the water line once was (and could be). – photo credit: dave collins (cleverhiker.com)

fellow rock jocks will “ooo” and “ah” their way through this hike. – photo credit: dave collins (Cleverhiker.com)

evidence of a powerful and violent past. – photo credit: dave collins (cleverhiker.com)
incredible displays of erosion from incomprehensible amounts of time. – photo credit: dave collins (cleverhiker.com)

it can get very, very muddy. – photo credit: dave collins (cleverhiker.com)
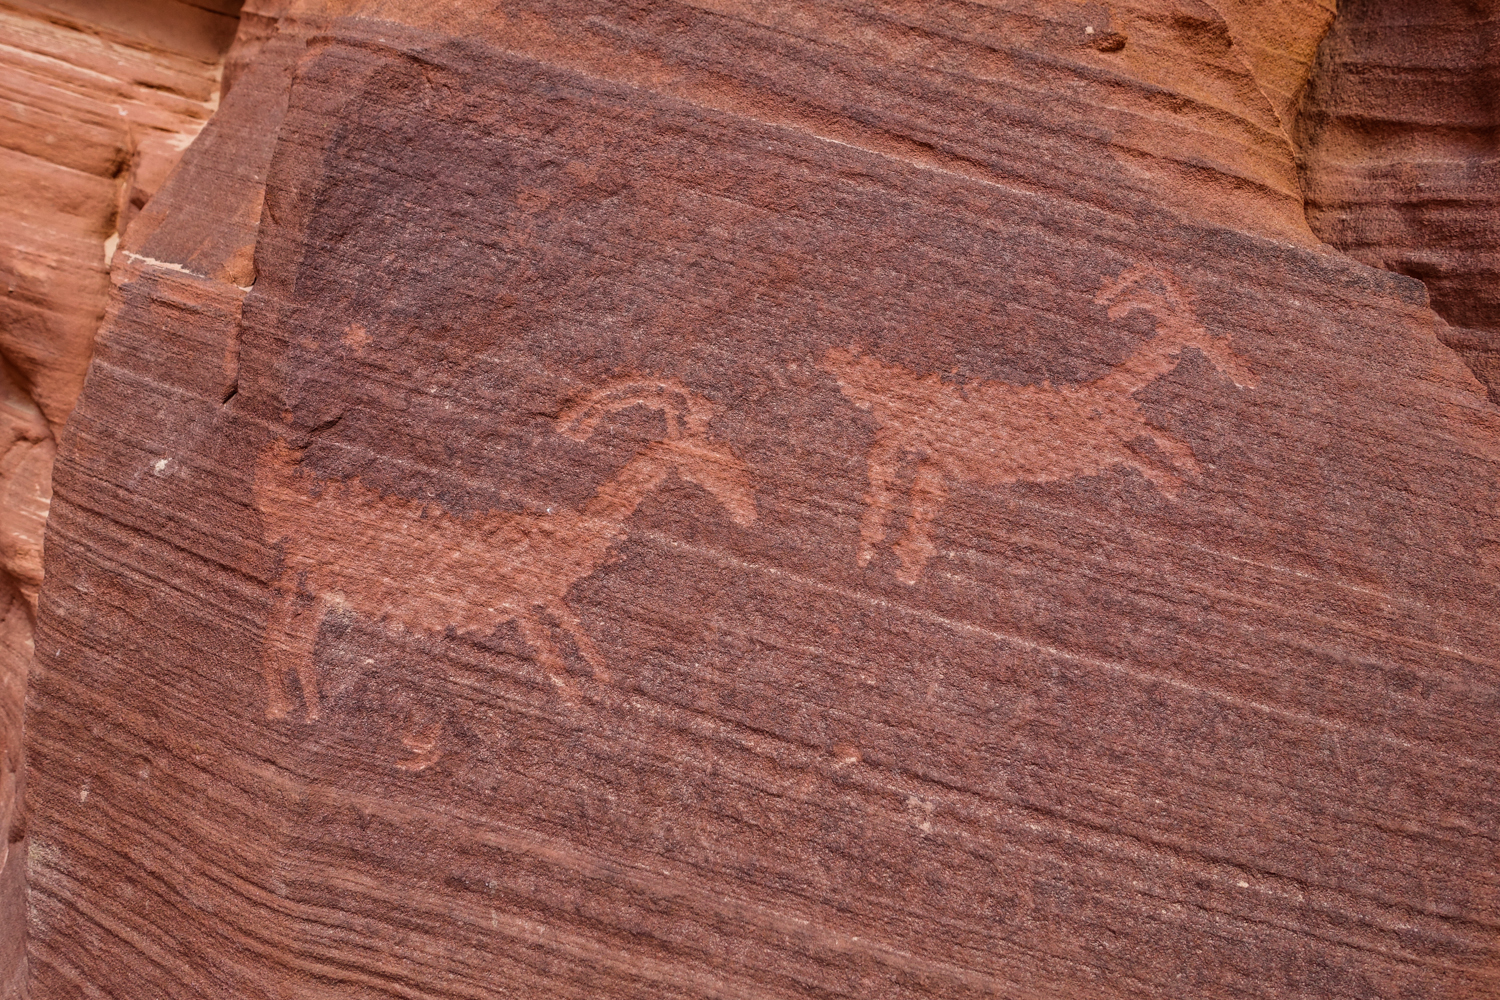
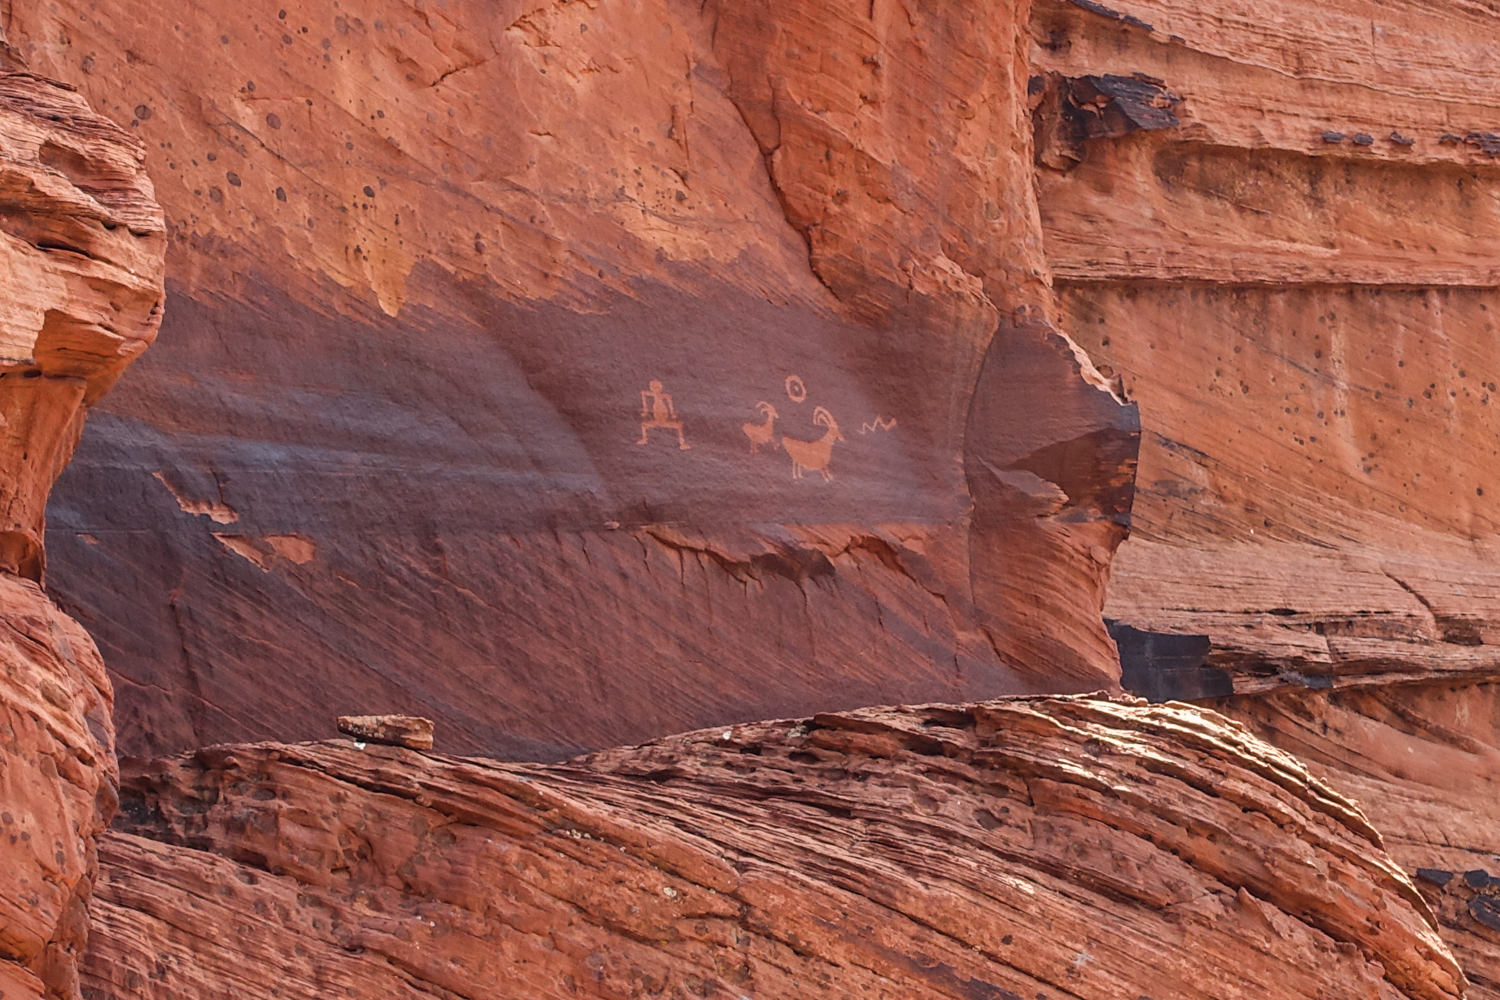
keep your eyes peeled for petroglyphs. – photo credit: dave collins (cleverhiker.com)