
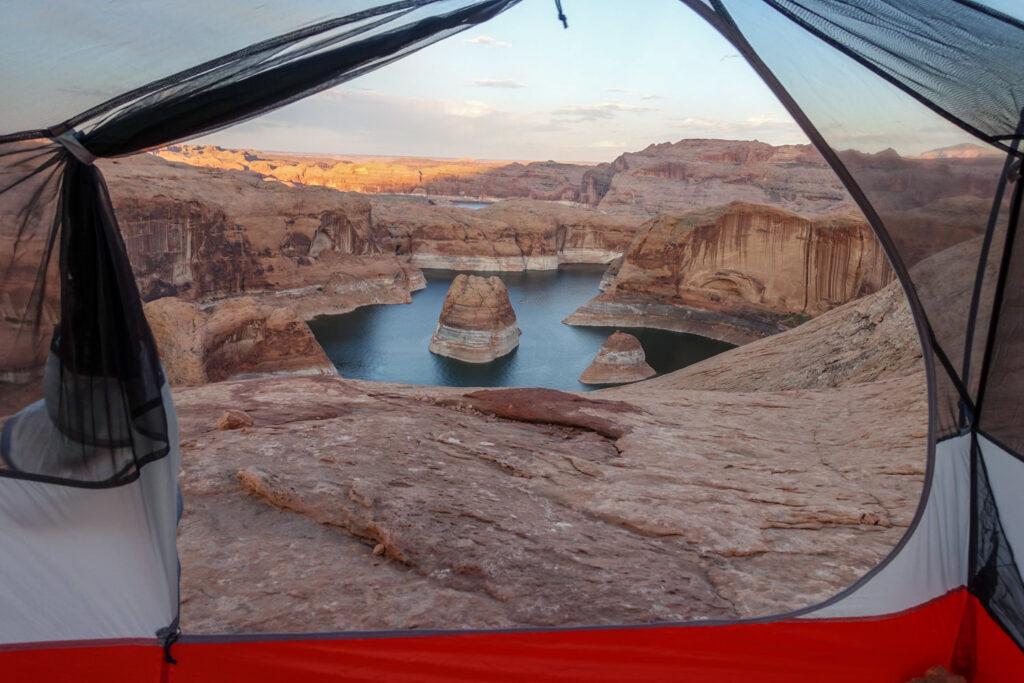
A place made iconic by a National Geographic photographer (and subsequently, a screen saver), Reflection Canyon, located on the Escalante arm of Lake Powell, perennially entices hikers far and wide.
One of the things that makes Reflection Canyon a bucket lister is the fact that you can’t just drive up or drive by. The route is long, rough, and remote — the trailhead from Escalante, Utah, takes 2 to 3 hours to reach during periods of good weather — and you still have to navigate 8-9 miles off-trail through fully exposed sand and sagebrush, across slickrock, and up and down rutted desert ravines.
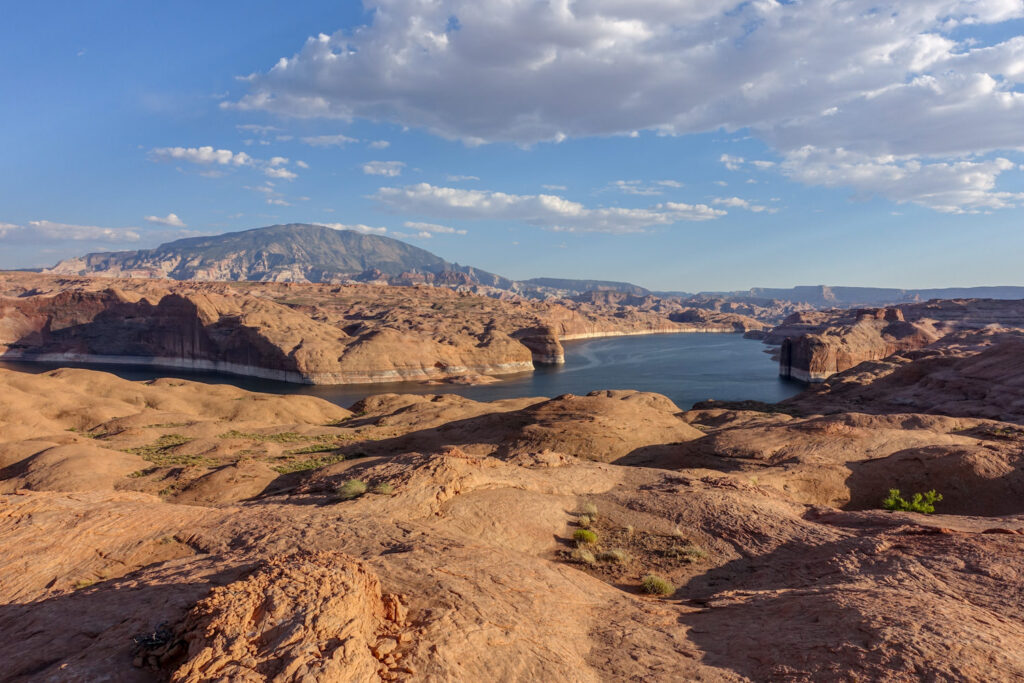
Don’t be fooled by the name either. This long, exposed hike is not really through a canyon or to a canyon in the usual sense of the term. But the effort nonetheless delivers you to a fantastic gooseneck bay bordered by Navajo sandstone cliffs with alcoves the size of symphony halls cradling overflow from nearby Lake Powell.
Though stunningly beautiful, we only recommend this hike to experienced backpackers with expert off-trail navigation skills.
Quick Facts
Distance: 16-18 miles out-and-back (26-29 km)
Days Needed: 2 days
Peak Elevation: 4,466 ft.
Elevation Gain/Loss: 1,234 ft.
Best Travel Time: Late March to May and September to October
Permits: Required (see below)
Difficulty: Moderate-Difficult
Highlights
- A stunning final vista
- Beautiful sunrises and sunsets
- Fabulous photo ops
- Solitude, expect to see few other backpackers
- Star-studded night sky
- You can take your dog
Lowlights
- No water en route, must carry in all water
- Very exposed. No shade along the entire route
- No trail, off-trail navigation skills required
- Can be susceptible to quickly changing weather
- Campfires not permitted and impossible anyway (no wood fuel)
- Remote, no cell service
- You must carry all human and pet waste out. You’re not permitted to bury it.

Best Time to Travel
In general, March to May and September to October are the best times to hike to Reflection Canyon. Rain can significantly impact the road and is a key factor to consider when planning a trip in this area. Summer monsoons can make the access road – Hole-in-the-Wall Road – impassable.
Freezing nighttime temperatures are the most significant limitations in early spring and late fall. The wind can be ferocious in this area from March to April and during the winter. In summer months, temperatures can easily reach above 100°F during the day and may be uncomfortably hot for sleeping at night, too.
As always, be prepared and diligent in monitoring current conditions, as weather can change quickly. Be sure to check both weather and road conditions at the Escalante Interagency Visitor Center before you head out. Fast-moving storms that dump significant rainfall can quickly wash out portions of the road, creating sections that are muddy, slippery, and tire-sucking. Alternatively, check the National Weather Service information before you head out.
Also, keep in mind that in high-water years, Lake Powell will backfill Reflection Canyon and reduce the photographic drama. The iconic S-shaped course of the canyon will not be quite as pronounced in these circumstances. The sandstone rocks will be further submerged, leaving only a few domes peeking out of the watercourse. The view is still amazing, though.
Difficulty
- Total Distance: 16-18 miles out-and-back (26-29 km)
- Total Elevation Gain/Loss: 1,234′ (average 3% grade)
- Overall Difficulty: Moderate-Difficult
We rate this hike as moderate to difficult due to the lack of an official trail as well as its remote, exposed nature. As always, difficulty ratings depend on your experience, physical fitness, pack weight, and weather conditions.
Although not a technically demanding hike, this route requires expert navigation skills and careful planning for hydration. Consider leaving desert-inexperienced dogs (and humans) at home. Like any backpacking trip, you should plan accordingly, train properly, know your limitations, brush up on your skills, and dial in your gear. Doing so will make for a safe and enjoyable adventure.
Permits
Backcountry permits are required for all overnight trips within and around the Glen Canyon Recreational Area and Grand Staircase-Escalante National Monument. Pick up a free walk-in permit at the Escalante Interagency Visitor Center just east of Escalante, Utah, before your trip.
Getting to the Trailhead
To reach the trailhead for Reflection Canyon, drive on State Highway 12 until you reach Hole-in-the-Rock Road and the “40 Mile Bench” turnoff sign where the road carves a large U-curve. This is about five miles southeast of the City of Escalante, your last stop for food and water. At the bottom of the U, exit the highway to the south onto the maintained dirt road. Drive 50 miles south and look for a small parking area on the right.
Keep in mind that Hole-in-the-Rock road is typically washboard-like and can be very rough on sedan tires. It’s also sometimes washed out after heavy rain. Be especially mindful to avoid the shoulders as soft sand can divert vehicles into the ditch.
A 4-wheel drive vehicle is recommended after storms or during the wet season, but you should still build an extra day into your schedule, should it rain, as the road can quickly turn to a slick, muddy mess that will leave you stranded until it dries out. Higher clearance cars and SUVs can make it out to the trailhead during dry weather with careful driving.
Campsites
With no designated campsites, you’re free to camp wherever you like. There’s a good spot to camp on the rock shelf near the overlook to Reflection Canyon. Setting up a non-freestanding tent will require patience and creativity on this rocky terrain, so we recommend bringing a freestanding tent, or cowboy camping in good conditions (more info in gear section below).
Possible Itineraries
Most people complete this hike in two days with one night spent near the Reflection Canyon overlook. Because this area has no water, shade, or trails, longer trips are more logistically challenging to plan. That said, there are plenty of other fantastic hiking opportunities around this area to complete before or after this hike.
ONE NIGHT OPTION
- Starting Trailhead: Reflection Canyon
- Day 1 – Camp near the Reflection Canyon overlook
- Day 2 – Return to the trailhead
Route Details
The off-trail route to Reflection Canyon follows a faintly established path that often gets swept free of footsteps after high winds blow through. The risk of getting lost in this area is high if you aren’t well-equipped for route finding and navigation. It goes without saying that getting lost in an exposed, waterless area like this could easily lead to dire consequences, so we highly recommend proper planning before this trip.
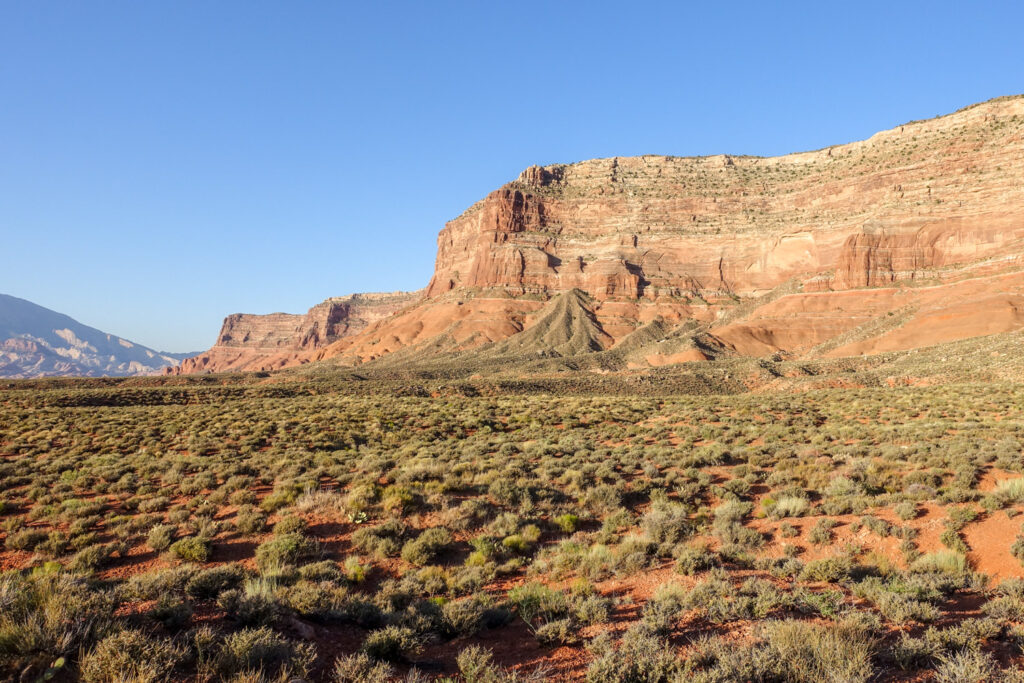
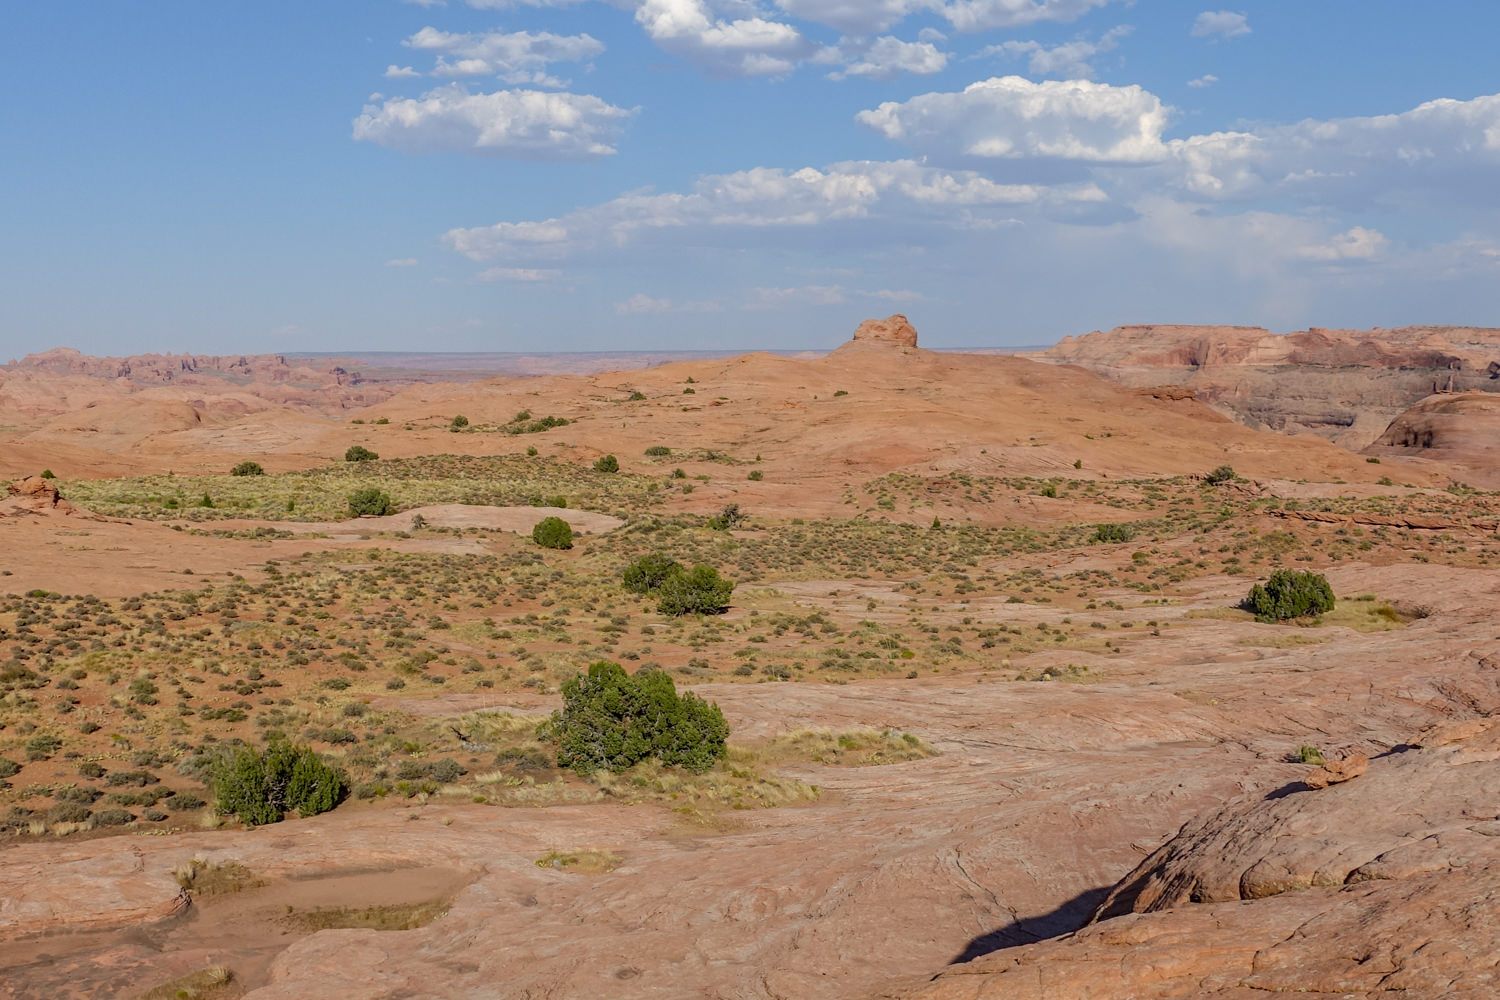
The key feature to focus on for navigating this route is Fifty Mile Point Mountain. When facing south (to start your hike, for example), these straight-edge cliffs (pictured above) should always remain on your right side and serve as your guardian route marker.
You’ll want to keep relatively close to the base of these cliffs, because a maze of 50-100-foot slot canyons awaits you if you stray too far to the east.
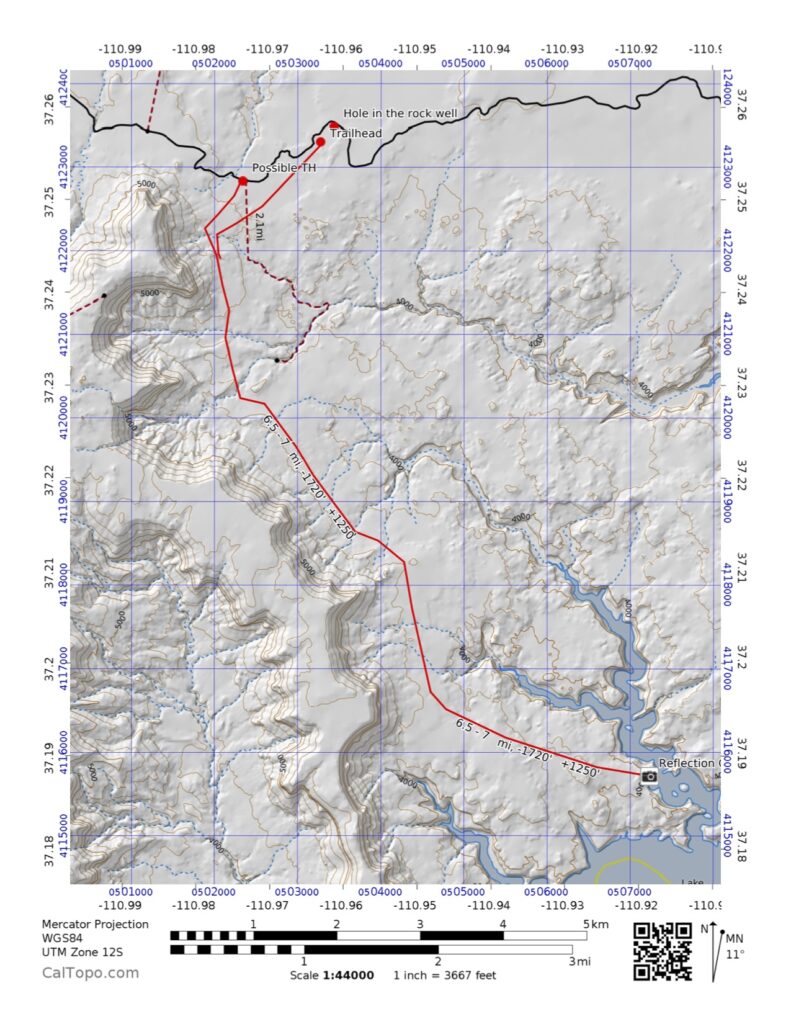
After hiking along the base of these cliffs for around 5-7 miles (see basic map photo above), you’ll see a key navigation feature for this route. A “squared off” section of the cliff (four pictures of this feature are below, from different angles) denotes the place where you’ll leave the cliffs and head southeast towards the Reflection Canyon viewpoint. From this point, you have about two more miles of trailless, slickrock, up and down, hiking.
Navigation is a bit trickier from this point on without the cliffs as your guide, but there is one tall butte (also pictured below) that will help guide you. Head generally towards this high point, but traverse around it to the left (north) so as not to get stuck high up on the surrounding steep cliffs. Shortly after you pass the butte, you’ll reach the overlook and your eyeballs will rejoice.
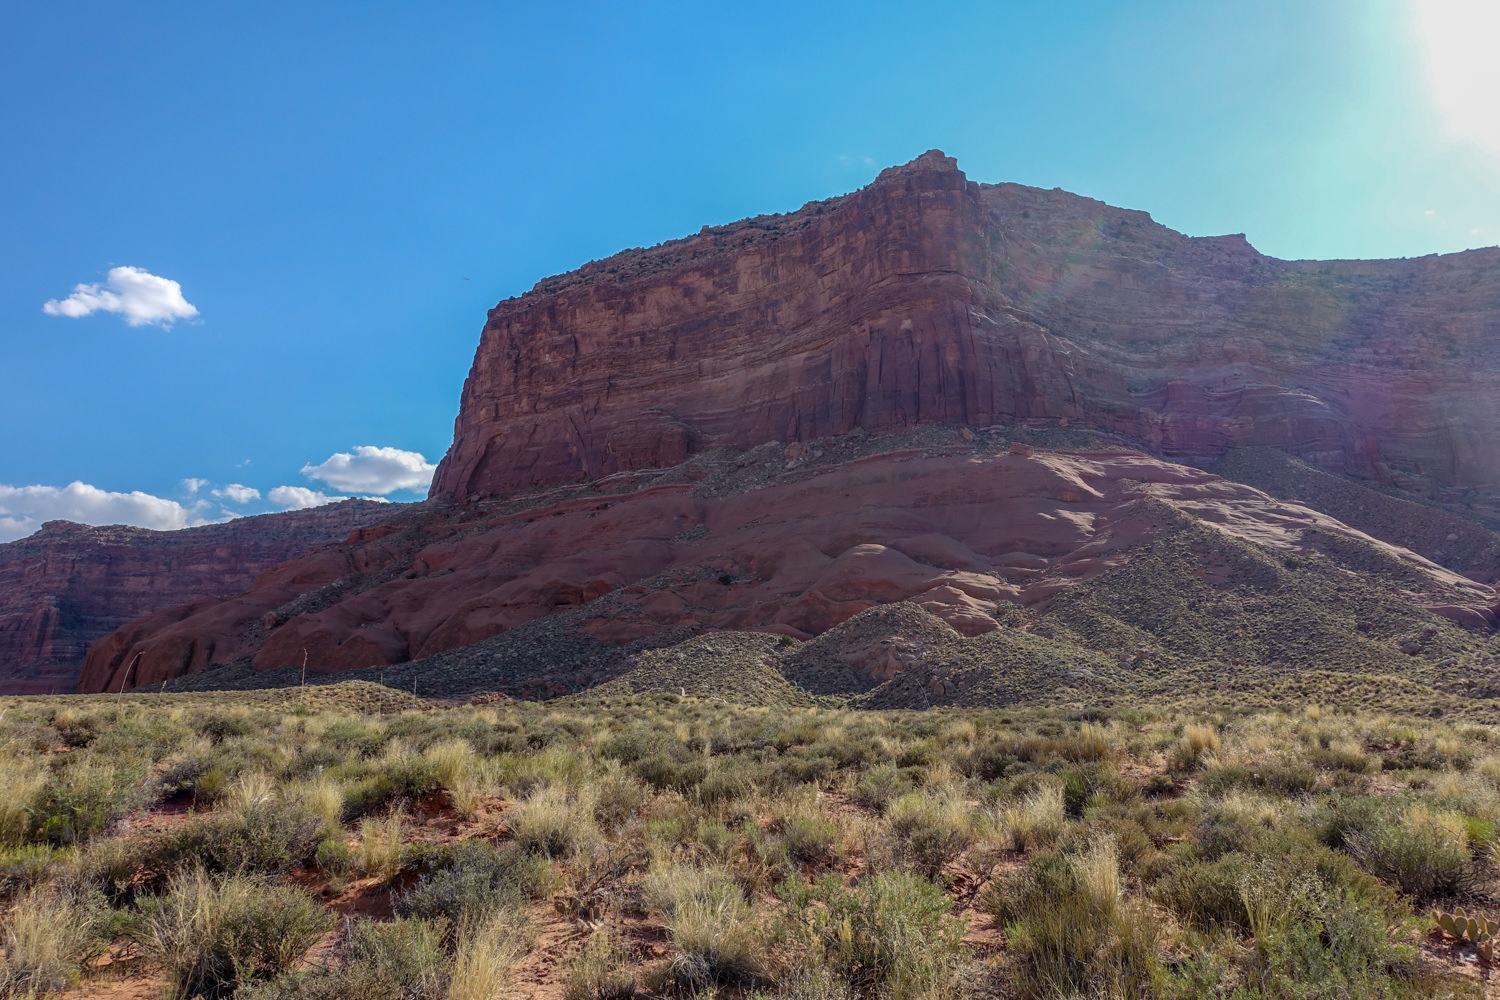
This “squared off” section of cliff is a key navigation feature (read above).
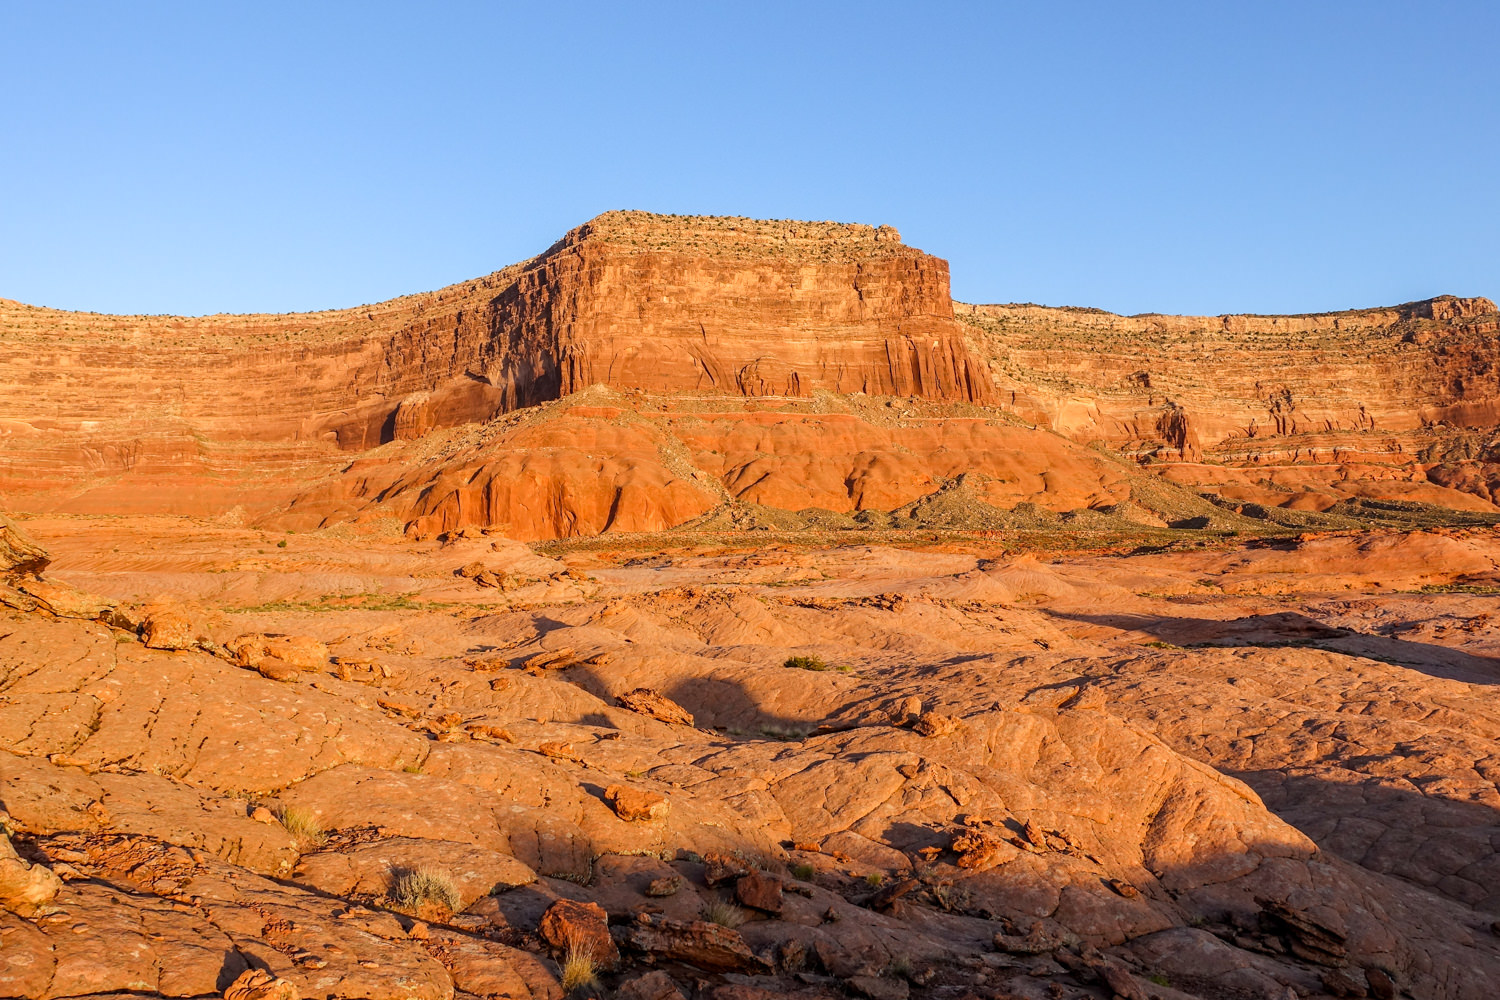
This “squared off” section of cliff is a key navigation feature (read above).
This high point can serve as a navigation feature after you leave the cliffs (read above)
Maps & Guidebooks
Always carry a topo map, compass, and GPS in the wilderness, and know how to use them. If you need to brush up on your skills, check out these navigation videos we made on staying found and map & compass navigation.
Below are some helpful resources for planning your trip.
- We used Gaia GPS for planning and navigation on this trip. We highly recommend plotting the exact location of the Reflection Canyon overlook in a GPS device to make routefinding easier on this hike.
- We also use Caltopo to research trips, plan routes, and print maps for many of our backpacking adventures. It takes a little time to learn the tool, but it’s an excellent resource.
- Non-Technical Canyon Hiking Guide to the Colorado Plateau, 6th Edition Perfect Paperback by Mike Kelsey. This book is considered the bible to this region, full of good advice and insight into this off-the-beaten path adventure land.
- Canyons of the Escalante [Grand Staircase-Escalante National Monument] from National Geographic Maps – Trails Illustrated – This waterproof, tear-resistant topographic map provides terrain details for hiking across the GSENM. Keep in mind that you won’t find a detailed map of the route to Reflection Canyon, but rather a mapped overview of the terrain you’ll encounter to help you reach your destination.
Water
There is no water available on this trail, so you’ll need to carry your own water. You also can’t get any water from Lake Powell because the Reflection Canyon viewpoint is too high and steep to descend.
Plan on packing 1 gallon (4 liters) per person, per day at a minimum. In hot weather, you’ll probably want to carry 1.5 gallons (6 liters) per person per day. Carrying this much water will feel very heavy in your pack, but not having enough water would be way worse. We recommend using sturdy yet light Platy Bottles for toting water in the desert. Also, check out our backpacking water purification guide for water tips and gear recommendations.
Critters & Food Storage
Ravens and mice are opportunists in this area. Leaving your gear untended and unprotected is never a good idea, though the risk of aggressive critters is very low. Rattlesnakes live out here as well, so watch where you put your hands and feet.
Bugs
The only insect you really need to worry about on this hike is the rare scorpion. We’ve seen them in the area, so watch where you put your hands and feet (especially at night) and check your shoes or boots before putting your feet in them.
Gear List
Make sure to check out our Ultimate Backpacking Checklist, so you don’t forget something important.
Below you’ll find our current favorite backpacking gear. If you want to see additional options, our curated gear guides are the result of many years of extensive research and hands-on testing by our team of outdoor experts.
BACKPACK
- Best Backpacking Pack Overall: Gregory Paragon 58 – Men’s / Gregory Maven 58 – Women’s
- Best Ultralight Backpacking Backpack: Hyperlite Mountain Gear Unbound 40
- More: Check out our best backpacking backpacks guide for ultralight and trekking options
TENT
- Best Backpacking Tent Overall: Big Agnes Copper Spur HV UL2
- Best Ultralight Tent: Zpacks Duplex
- Best Budget Tent: REI Half Dome 2
- Best Tent Stakes Overall: All One Tech Aluminum Stakes
- More: Check out our best backpacking tents guide for more options
SLEEPING BAG/QUILT
- Best Sleeping Bag Overall: Men’s Feathered Friends Swallow YF 20 / Women’s Feathered Friends Egret YF 20
- Best Quilt Overall: Enlightened Equipment Revelation 20
- More: Check out our best backpacking sleeping bags guide and best backpacking quilts guide for more options
SLEEPING PAD
- Best Sleeping Pad Overall: NEMO Tensor All-Season
- Best Foam Sleeping Pad: NEMO Switchback
- More: Check out our best backpacking sleeping pads guide for ultralight and trekking options
CAMP KITCHEN
- Best Backpacking Stove Overall: MSR PocketRocket 2
- Best Backpacking Cookware Overall: TOAKS Titanium 750ml
- Best Backpacking Coffee Overall: Starbucks VIA
- More: Check out our best backpacking stoves guide and best backpacking cookware guide for ultralight and large group options
WATER & FILTRATION
- Best Water Filter Overall: Sawyer Squeeze
- Best Hydration Bladder Overall: Gregory 3D Hydro
- Best Backpacking Water Bottles: Smartwater Bottles
- More: Check out our best backpacking water filters guide and best backpacking water bottles guide for ultralight and large group options
CLOTHING
- Best Hiking Pants Overall: Men’s Outdoor Research Ferrosi / Women’s The North Face Aphrodite 2.0
- Best Hiking Shorts Overall: Men’s Patagonia Quandary / Women’s Outdoor Research Ferrosi
- Best Women’s Hiking Leggings: Fjallraven Abisko Trekking Tights HD
- Best Rain Jacket Overall: Men’s Patagonia Torrentshell 3L / Women’s Patagonia Torrentshell 3L
- Best Rain Pants: Men’s Patagonia Torrentshell 3L / Women’s Patagonia Torrentshell 3L
- Best Down Jacket Overall: Men’s Patagonia Down Sweater Hoodie / Women’s Patagonia Down Sweater Hoodie
- Best Fleece Jacket Overall: Men’s Patagonia Better Sweater / Women’s Patagonia Better Sweater
- Best Sunshirt Overall: Men’s Outdoor Research Echo / Women’s Outdoor Research Echo
- Best Socks Overall: Men’s Darn Tough Light Hiker Micro Crew / Women’s Darn Tough Light Hiker Micro Crew
- Beste Ultralight Liner Glove: Patagonia Capilene Midweight Liner
- More: Check out our best backpacking apparel lists for more options
FOOTWEAR & TRACTION
- Best Hiking Shoes Overall: Men’s HOKA Speedgoat 6 / Women’s HOKA Speedgoat 6
- Best Hiking Boots Overall: Men’s Salomon X Ultra 5 GTX / Women’s Lowa Renegade Evo GTX
- Best Hiking Sandals Overall: Men’s Chaco Z/1 Classic / Women’s Chaco Z/1 Classic
- Best Camp Shoes Overall: Crocs Classic Clogs
- Best Traction Device for Hiking Overall: Kahtoola MICROspikes
- More: Check out our best backpacking footwear lists for more options
NAVIGATION
- Best GPS Watch Overall: Garmin Instinct 2 Solar
- Best Personal Locator Beacon (PLB): Garmin inReach Mini 2
- More: Check out our article How to Use Your Phone as a GPS Device for Backpacking & Hiking to learn more
FOOD
FIRST-AID & TOOLS
- Best First-Aid Kit Overall: Adventure Medical Kits Ultralight/Watertight .7
- Best Pocket Knife Overall: Kershaw Leek
- Best Multitool Overall: Leatherman Wave+
- Best Headlamp Overall: Black Diamond Spot 400-R
- Best Power Bank Overall: Nitecore NB 10000 Gen 3
- More: Check out our best first-aid kit guide, best pocket knife guide, best multitool guide, best backpacking headlamps guide, and best power banks guide for more options
MISCELLANEOUS
- Best Trekking Poles Overall: Black Diamond Pursuit
- Best Backpacking Chair Overall: REI Flexlite Air
- Best Backpacking Stuff Sack Overall: Hyperlite Mountain Gear Drawstring
- More: Check out our best trekking poles guide, best backpacking chairs guide, and best stuff sacks guide for more options