The Sawback Trail in Banff National Park is a 74 km (46-mile) traverse through the rugged and beautiful Sawback Mountain Range. Along the route, hikers climb over three spectacular passes and wind through meadows dotted with stunning alpine lakes. This trail spans a good portion of Banff National Park, stretching from the Lake Louise area to the town of Banff. With most people flocking to crowded trails on the west side of the Trans Canada Highway, this trek provides a true backcountry feel in a stunningly beautiful wilderness.
Quick Facts
Distance: 74 km (46 miles)
Days Needed: 4-6 days
Elevation Gain/Loss: 734 meters (2,408 feet)
Best Travel Time: Late July – September
Permits: Required, see below
Difficulty: Moderate to Difficult

Highlights
- Beautiful mountain passes and high alpine scenery
- Relative solitude, less crowded than other trails in Banff
- Good side trips (Badger Pass, Ink Pots, etc.)
- Good shuttle/hitchhike options with trailheads in popular areas
Lowlights
- Competitive permit process
- Can be susceptible to quickly changing weather
- Seasonal bugs and snow
- Campfires prohibited
- Heavy horse travel from Cascade Amphitheatre Trailhead to Mystic Junction
- Route finding required from Baker Lake to Wildflower Creek
Best Time to Travel
In general, July through September is the best time to hike the Sawback Trail. Snowpack and wildfires are key factors for trip planning in this area. Snow can linger on passes until late in the year. Wildfires and prescribed burns pose limitations to any backpacking trip as early as May and as late as October. Rain and snow can fall at any time of year here, and freezing temperatures are possible as well, even in the summer months.
As always, be prepared and diligent in monitoring current conditions, as weather can change quickly in the mountains. Before heading out, check the Banff National Park trail reports for up-to-date conditions. Parks Canada staff are very friendly and helpful for up-to-date information.
Difficulty
- Total Distance: 74 km (46 miles)
- Total Elevation Gain/Loss: 734 meters (2,408 feet)
- Overall Difficulty: Moderate – Difficult
We rate this hike as moderate to difficult due to some big climbs and occasional route finding.
As always, difficulty ratings depend on your experience, physical fitness, pack weight, & weather conditions. This is not a technically demanding hike for a relatively active hiker/backpacker. However, like any backpacking trip, you should plan a trip that falls well within your comfort level and train earnestly.
It’s good practice to be honest about your limitations with your hiking partners, refresh your wilderness skills, and update your gear before heading out. It’s a major buzzkill to bring a busted tent or pad with you. Doing so will make for a safe and enjoyable adventure.
Permits
According to the Parks Canada site, a backcountry permit and campsite reservations are mandatory for anyone planning an overnight trip into the backcountry of Banff National Park.
When making a reservation, you must specify the campgrounds you wish to book, as well as the number of people and tents in your group. Our section on campsites shares the ones we went with and some alternatives.
Permits can be obtained online at reservation.pc.gc.ca or by calling 1-877-737-3783. Reservations are available beginning in January for visits throughout the calendar year.
Getting to Trailheads
The Sawback Trail spans from the Lake Louise Ski Resort (Fish Creek Trailhead) to the Mount Norquay Ski Resort (Cascade Amphitheatre Trailhead) just outside of Banff. You are able to hike this trail in either direction. Parking lots can fill up quickly, so try to get an early start or use the public transit or a shuttle.
Fish Creek Trailhead: If you are traveling from Lake Louise to Banff, you will begin at the Fish Creek Trailhead near the Lake Louise Ski Resort. To get here from Lake Louise, head southeast on Lake Louise Drive. Continue on Fairview Rd. Take Pinnacle Drive to Lake Louise Drive. Take Bow Valley Pkwy/AB-1A E to Whitehorn Drive. Follow Whitehorn Drive until you see your destination. There is also a free shuttle service which connects Lake Louise Village to the Lake Louise Ski Area.
Cascade Amphitheatre Trailhead: If you are traveling from Banff to Lake Louise, you begin at the Cascade Amphitheatre Trailhead near the Mount Norquay Ski Resort, which is located 6 kilometres (4 miles) from the town of Banff. If driving from Banff, head west on Wolf St toward Banff Ave. Turn right onto Lynx St and continue onto Mt Norquay Rd. After continuing onto Mt Norquay Scenic Dr, the ski area will be on your left. There is also a free shuttle service which connects Banff to the Mount Norquay Ski Area.
Campsites
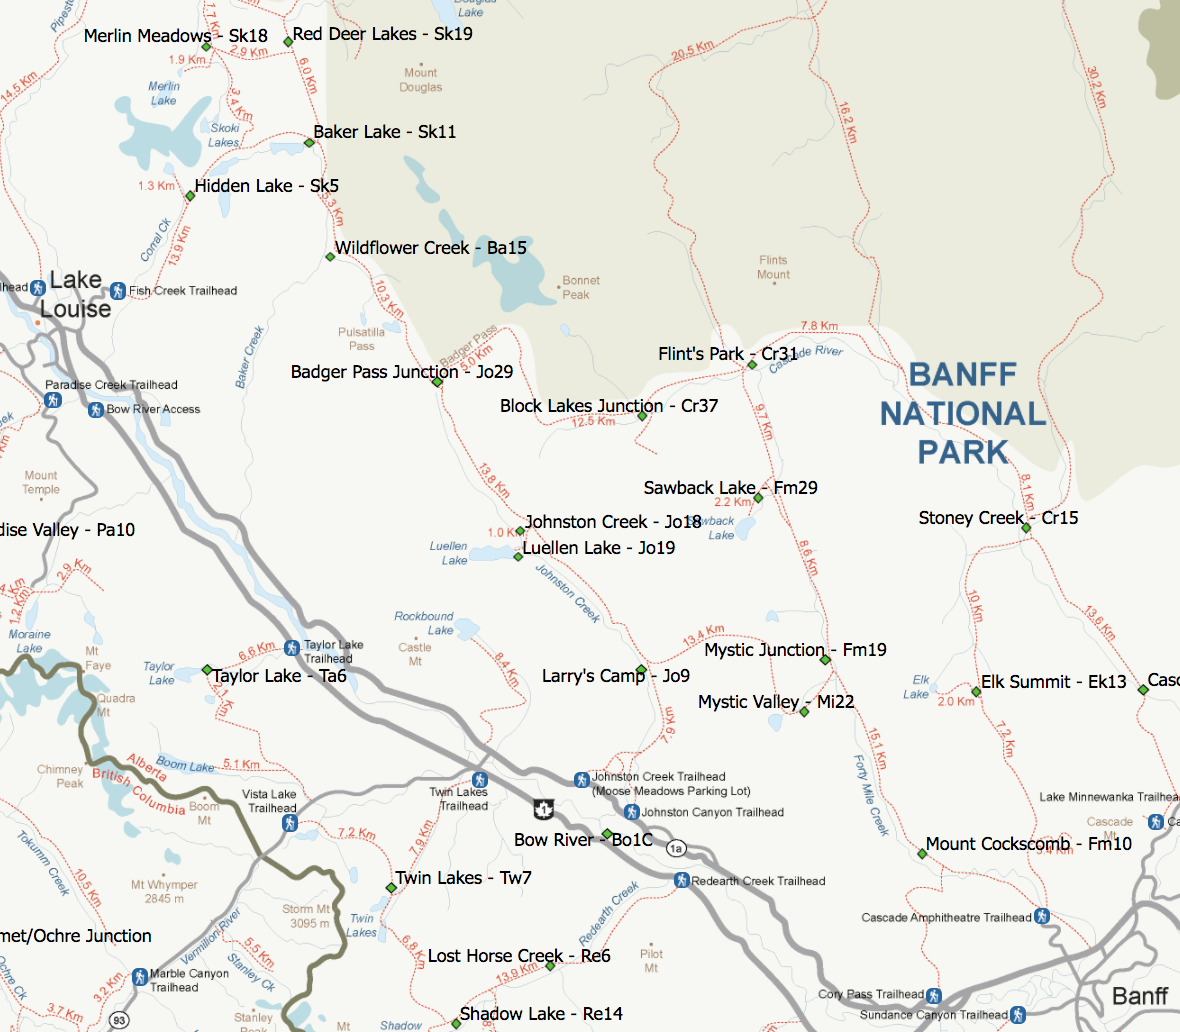
There are nine campsites along the Sawback Trail with an additional two campsites (Merlin Meadows and Red Deer Lake) if you choose to explore the beautiful Skoki Lakes region. When planning your trip, you will need to have your route established and book each individual campsite. For more information on campsites, visit Parks Canada Reservation website. Below are the campsites from the Lake Louise Ski Area/Fish Creek Trailhead.
- Hidden Lake
- Baker Lake
- Wildflower Creek
- Badger Pass Junction
- Johnston Creek
- Luellen Lake
- Larry’s Camp
- Mystic Valley
- Mount Cockscomb
Below is a map showing mileage, campsites, and the general route of Sawback Trail. Follow the red trail lines from Lake Louise in the upper left to Banff in the lower right. The green dots are the campsites.
Possible Itineraries
Most people complete the Sawback Trail in 4-6 days. Below are a few sample itineraries, but there are many different ways to trek this route. For more information on mileage between campsites, please refer to the Parks Canada Reservation website.
Three Night Option
- Starting Trailhead: Fish Creek/Lake Louise Ski Area
- Camp 1 – Wildflower Creek
- Camp 2 – Luellen Lake or Johnston Creek
- Camp 3 – Mystic Valley
Four Night Option
- Starting Trailhead: Fish Creek/Lake Louise Ski Area
- Camp 1 – Hidden Lake
- Camp 2 – Wildflower Creek
- Camp 3 – Luellen Lake or Johnston Creek
- Camp 4 – Mystic Valley
Five Night Option
This trip itinerary allows for extra time to explore the spectacular Skoki Lakes region and take a side trip to Badger Pass.
- Starting Trailhead: Fish Creek/Lake Louise Ski Area
- Camp 1 – Merlin Meadows
- Camp 2 – Baker Lake
- Camp 3 – Badger Pass Junction
- Camp 4 – Luellen Lake or Johnston Creek
- Camp 5 – Mystic Valley
Maps & Guidebooks
Lonely Planet: Banff, Jasper, and Glacier National Parks – We used this book for planning all our trips in this region. Although it provided a good overview, it did not give all the specifics needed to complete the Sawback Trail. Still a good resource though.
Banff & Mount Assiniboine Map – This topographical map provided all the details we needed on campsites, water sources, and mileage for the Sawback Trail.
Parks Canada Banff Park Website – We’ve been continually impressed with Parks Canada information on various trails. Their reservation system is straightforward and easy to use.
Note: At the time of this posting, basic route-finding skills are required to follow the trail from Baker Lake to Wildflower Creek. The trail is sometimes easy to follow, but can quickly be lost in wetland areas around Baker Creek. We recommend using a GPS device (we like the Gaia GPS phone app), carrying a map/compass, and brushing up on your navigation skills (Navigation #1 – Staying Found, Navigation #2 – Map, Compass & GPS) before your trip.
Water
Water is plentiful along this trail and easily accessible from small streams and lakes. Carry enough water to get from one source to the next and use a lightweight water purifier. We carried the SteriPEN Ultra, and we were very happy with its performance. Another one of our lightweight favorites is the Sawyer Squeeze. Check out our best water filter gear guide for our other top recommendations.
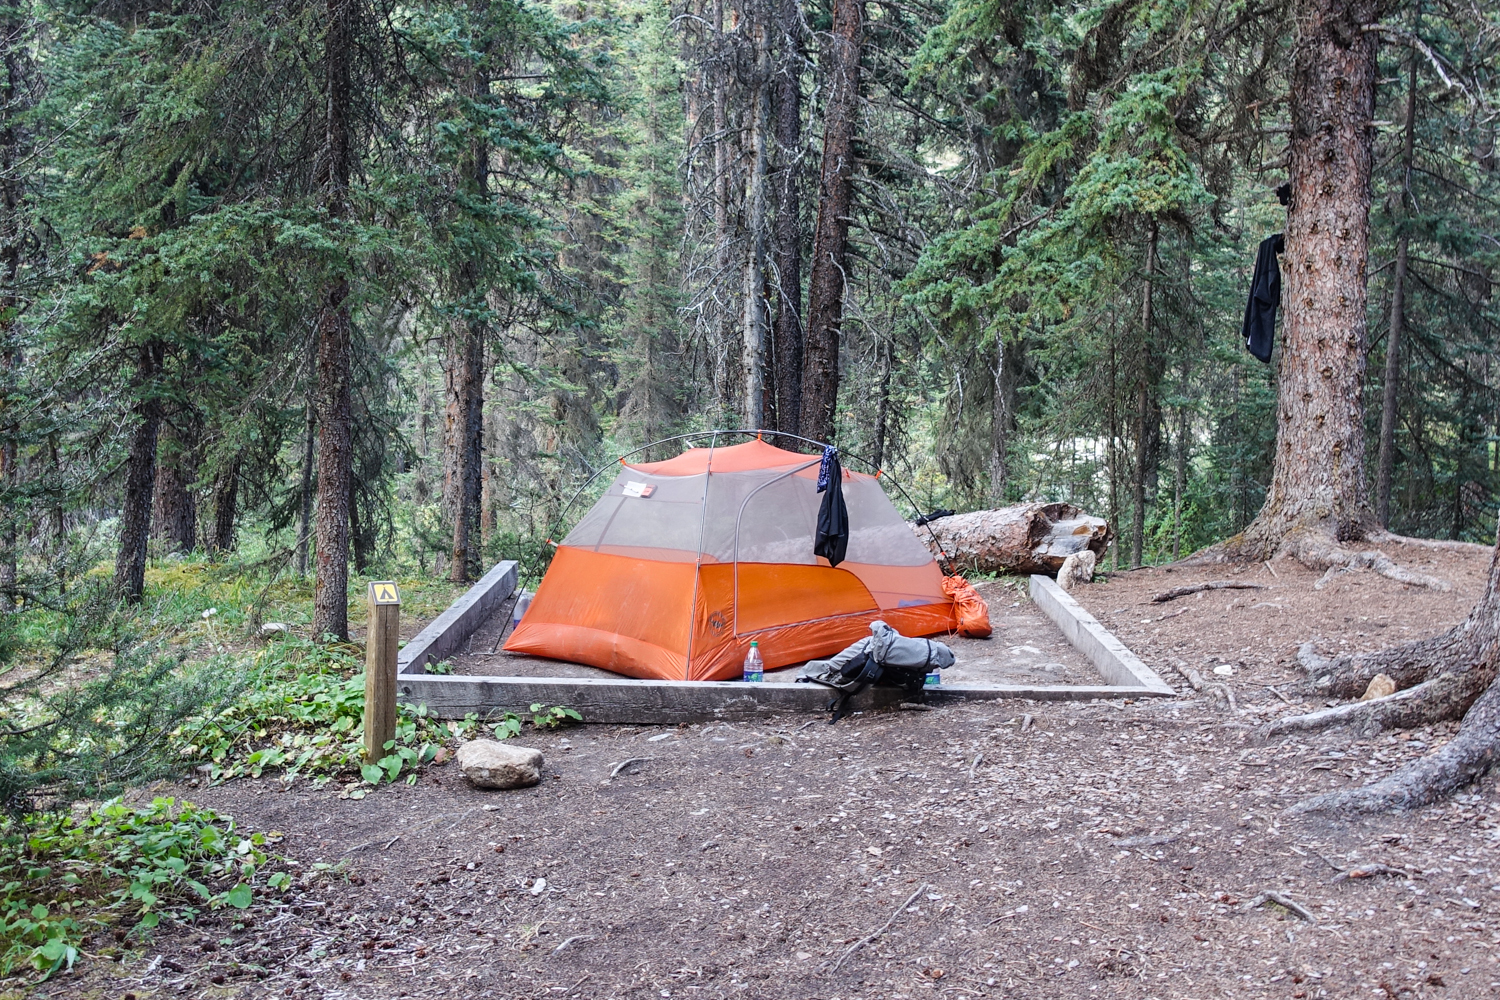
Bears & Food Storage
Banff National Park is home to a healthy grizzly and black bear population. At each campsite, there are food storage facilities such as bear boxes or food storage cables. You will need to bring a small carabiner to attach your stuff sack to the storage cables. Please remember to stow away all food, garbage, toiletries, and cooking supplies in a dry stuff sack overnight. Abide by these regulations to limit bear-human interactions, which ultimately saves bears’ lives.
Bugs
Mosquitoes are seasonally present along the Sawback Trail, especially earlier in the season and at lower elevations. Hiking in September is often bug-free. Use a combination of permethrin on your clothing and a small amount of DEET on exposed skin for full protection.
Gear List
Make sure to check out our Ultimate Backpacking Checklist, so you don’t forget something important.
Below you’ll find our current favorite backpacking gear. If you want to see additional options, our curated gear guides are the result of many years of extensive research and hands-on testing by our team of outdoor experts.
BACKPACK
- Best Backpacking Pack Overall: Gregory Paragon 58 – Men’s / Gregory Maven 58 – Women’s
- Best Ultralight Backpacking Backpack: Hyperlite Mountain Gear Unbound 40
- More: Check out our best backpacking backpacks guide for ultralight and trekking options
TENT
- Best Backpacking Tent Overall: Big Agnes Copper Spur HV UL2
- Best Ultralight Tent: Zpacks Duplex
- Best Budget Tent: REI Half Dome 2
- Best Tent Stakes Overall: All One Tech Aluminum Stakes
- More: Check out our best backpacking tents guide for more options
SLEEPING BAG/QUILT
- Best Sleeping Bag Overall: Men’s Feathered Friends Swallow YF 20 / Women’s Feathered Friends Egret YF 20
- Best Quilt Overall: Enlightened Equipment Revelation 20
- More: Check out our best backpacking sleeping bags guide and best backpacking quilts guide for more options
SLEEPING PAD
- Best Sleeping Pad Overall: NEMO Tensor All-Season
- Best Foam Sleeping Pad: NEMO Switchback
- More: Check out our best backpacking sleeping pads guide for ultralight and trekking options
CAMP KITCHEN
- Best Backpacking Stove Overall: MSR PocketRocket 2
- Best Backpacking Cookware Overall: TOAKS Titanium 750ml
- Best Backpacking Coffee Overall: Starbucks VIA
- More: Check out our best backpacking stoves guide and best backpacking cookware guide for ultralight and large group options
WATER & FILTRATION
- Best Water Filter Overall: Sawyer Squeeze
- Best Hydration Bladder Overall: Gregory 3D Hydro
- Best Backpacking Water Bottles: Smartwater Bottles
- More: Check out our best backpacking water filters guide and best backpacking water bottles guide for ultralight and large group options
CLOTHING
- Best Hiking Pants Overall: Men’s Outdoor Research Ferrosi / Women’s The North Face Aphrodite 2.0
- Best Hiking Shorts Overall: Men’s Patagonia Quandary / Women’s Outdoor Research Ferrosi
- Best Women’s Hiking Leggings: Fjallraven Abisko Trekking Tights HD
- Best Rain Jacket Overall: Men’s Patagonia Torrentshell 3L / Women’s Patagonia Torrentshell 3L
- Best Rain Pants: Men’s Patagonia Torrentshell 3L / Women’s Patagonia Torrentshell 3L
- Best Down Jacket Overall: Men’s Patagonia Down Sweater Hoodie / Women’s Patagonia Down Sweater Hoodie
- Best Fleece Jacket Overall: Men’s Patagonia Better Sweater / Women’s Patagonia Better Sweater
- Best Sunshirt Overall: Men’s Outdoor Research Echo / Women’s Outdoor Research Echo
- Best Socks Overall: Men’s Darn Tough Light Hiker Micro Crew / Women’s Darn Tough Light Hiker Micro Crew
- Beste Ultralight Liner Glove: Patagonia Capilene Midweight Liner
- More: Check out our best backpacking apparel lists for more options
FOOTWEAR & TRACTION
- Best Hiking Shoes Overall: Men’s HOKA Speedgoat 6 / Women’s HOKA Speedgoat 6
- Best Hiking Boots Overall: Men’s Salomon X Ultra 5 GTX / Women’s Lowa Renegade Evo GTX
- Best Hiking Sandals Overall: Men’s Chaco Z/1 Classic / Women’s Chaco Z/1 Classic
- Best Camp Shoes Overall: Crocs Classic Clogs
- Best Traction Device for Hiking Overall: Kahtoola MICROspikes
- More: Check out our best backpacking footwear lists for more options
NAVIGATION
- Best GPS Watch Overall: Garmin Instinct 2 Solar
- Best Personal Locator Beacon (PLB): Garmin inReach Mini 2
- More: Check out our article How to Use Your Phone as a GPS Device for Backpacking & Hiking to learn more
FOOD
FIRST-AID & TOOLS
- Best First-Aid Kit Overall: Adventure Medical Kits Ultralight/Watertight .7
- Best Pocket Knife Overall: Kershaw Leek
- Best Multitool Overall: Leatherman Wave+
- Best Headlamp Overall: Black Diamond Spot 400-R
- Best Power Bank Overall: Nitecore NB 10000 Gen 3
- More: Check out our best first-aid kit guide, best pocket knife guide, best multitool guide, best backpacking headlamps guide, and best power banks guide for more options
MISCELLANEOUS
- Best Trekking Poles Overall: Black Diamond Pursuit
- Best Backpacking Chair Overall: REI Flexlite Air
- Best Backpacking Stuff Sack Overall: Hyperlite Mountain Gear Drawstring
- More: Check out our best trekking poles guide, best backpacking chairs guide, and best stuff sacks guide for more options
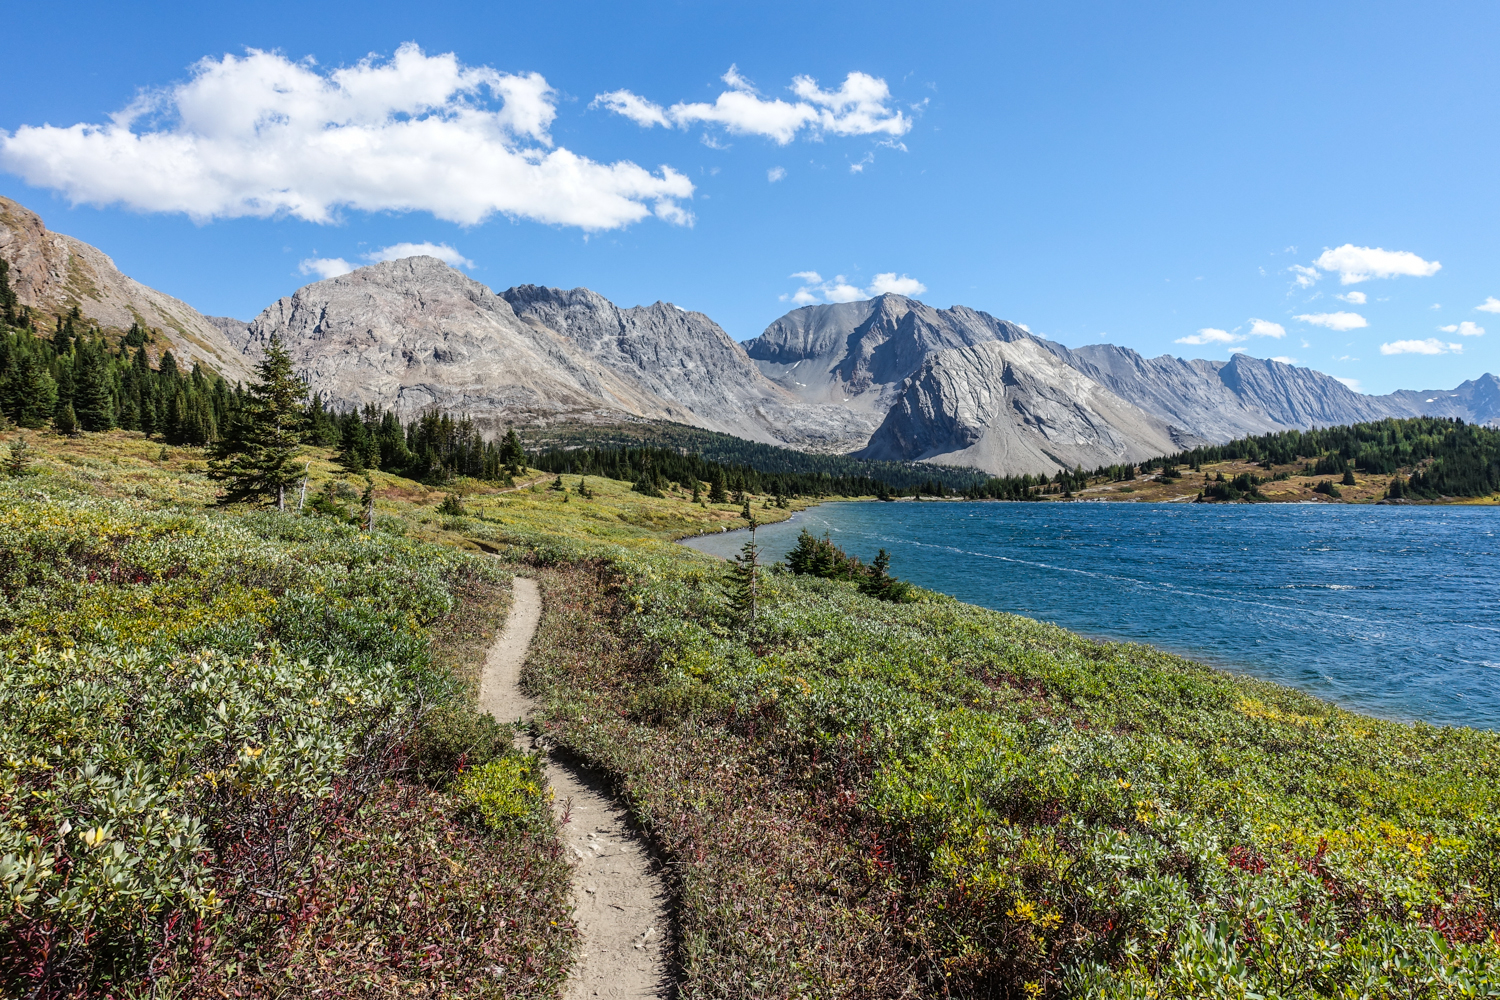
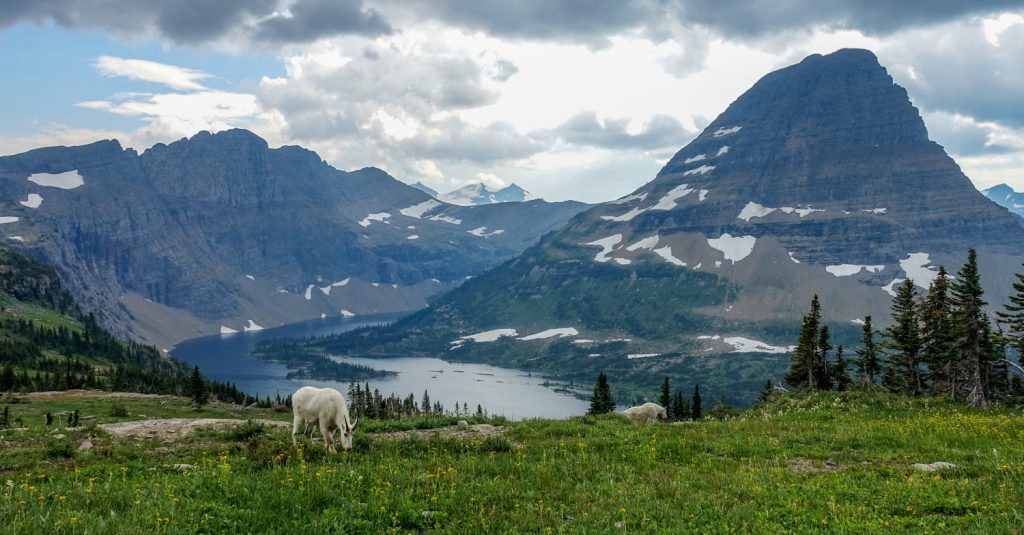
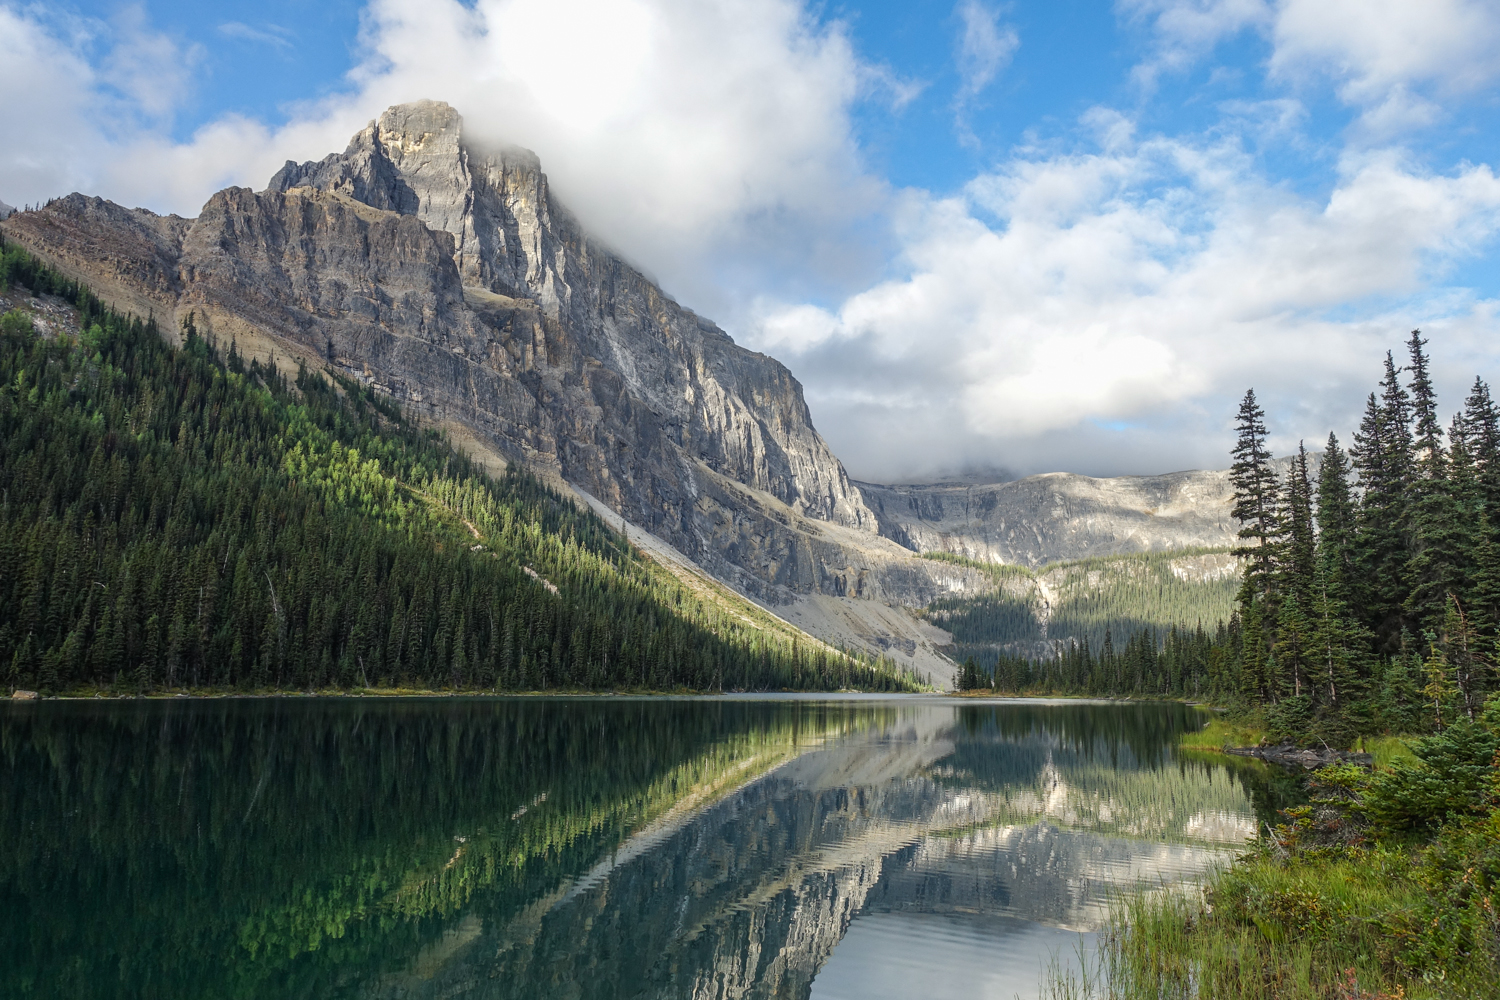
lakes, granite, and well maintained trails are the highlights of the sawback. – photo credit: marshall lee (cleverhiker.com)
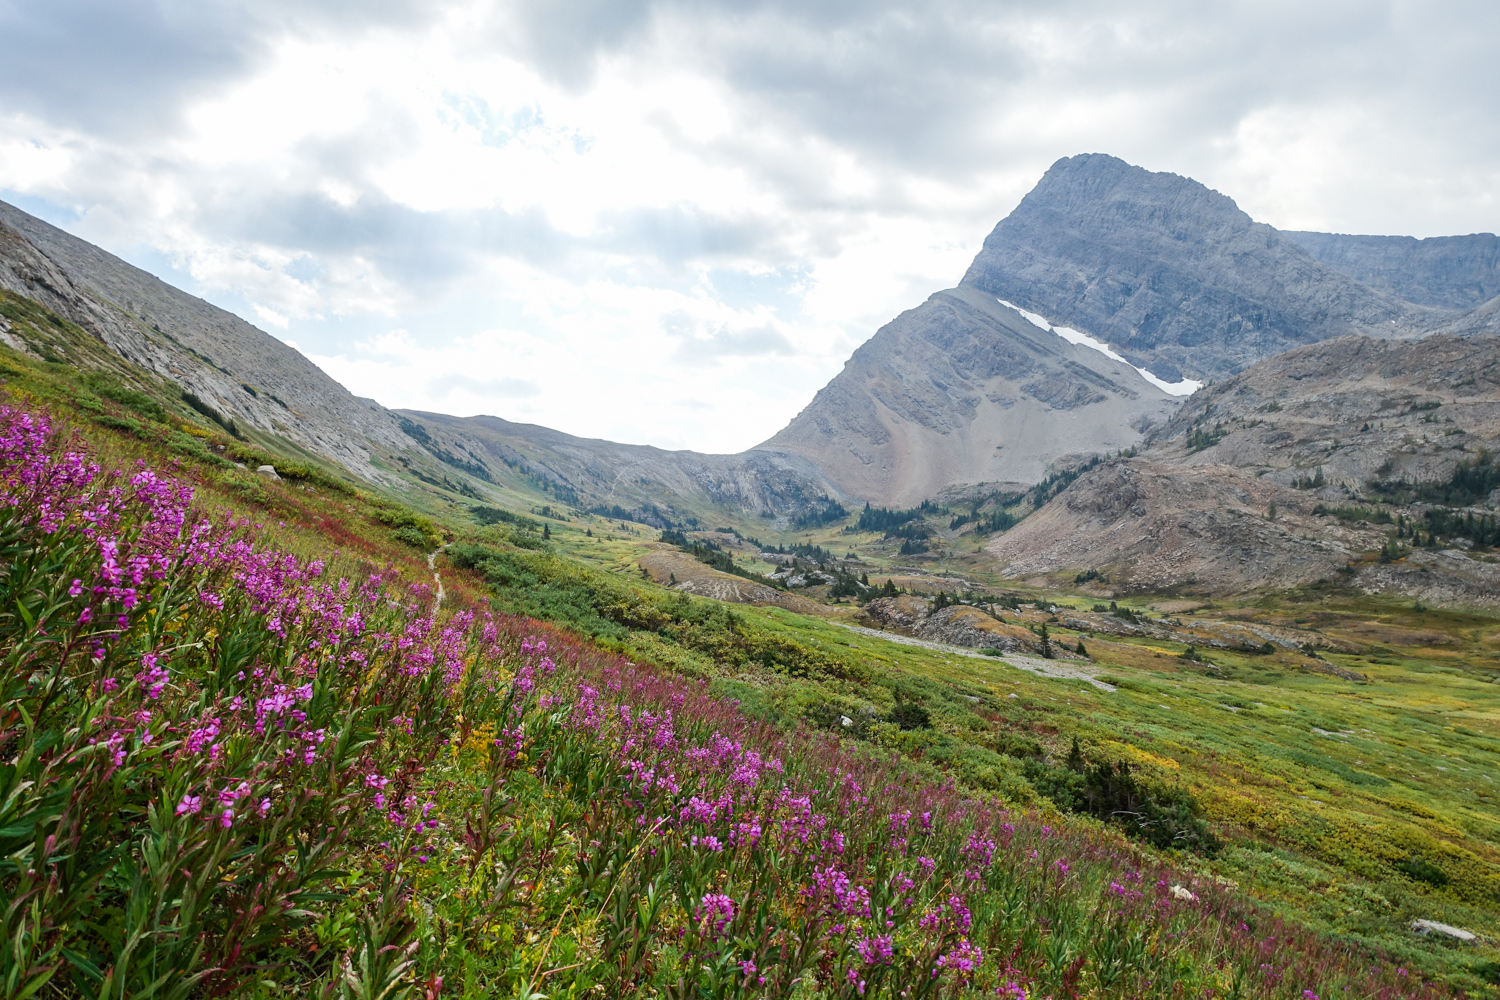
wildflowers color the trek in the summer. – photo credit: marshall lee (cleverhiker.com)
fall is a great time to see the brush turn to blazing autumn colors. – photo credit: marshall lee (cleverhiker.com)

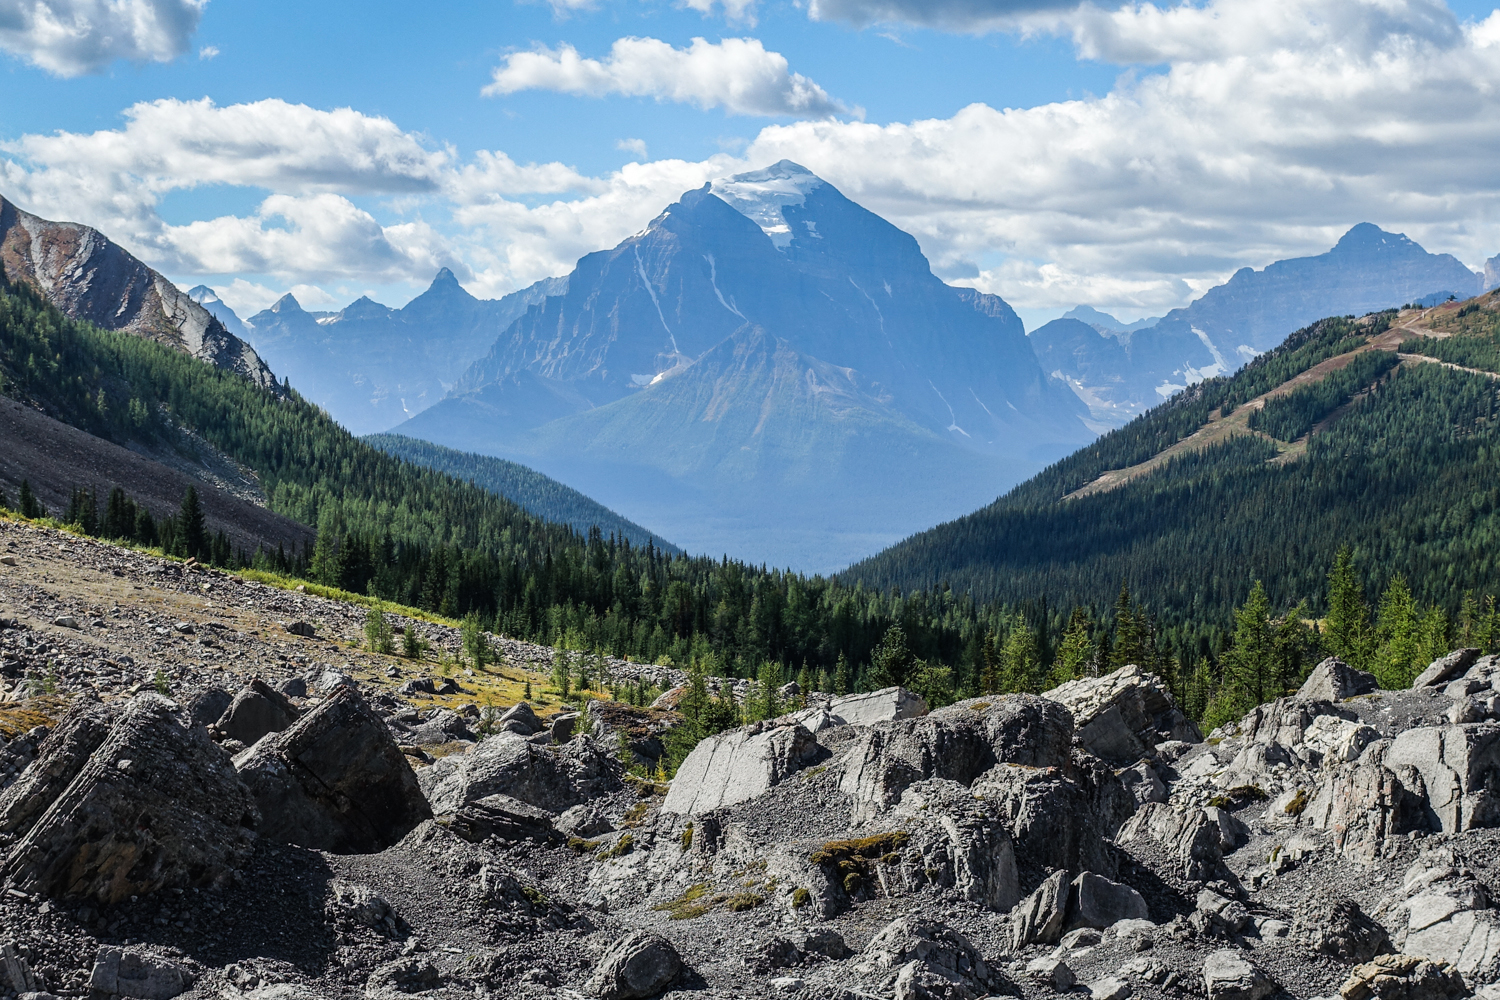
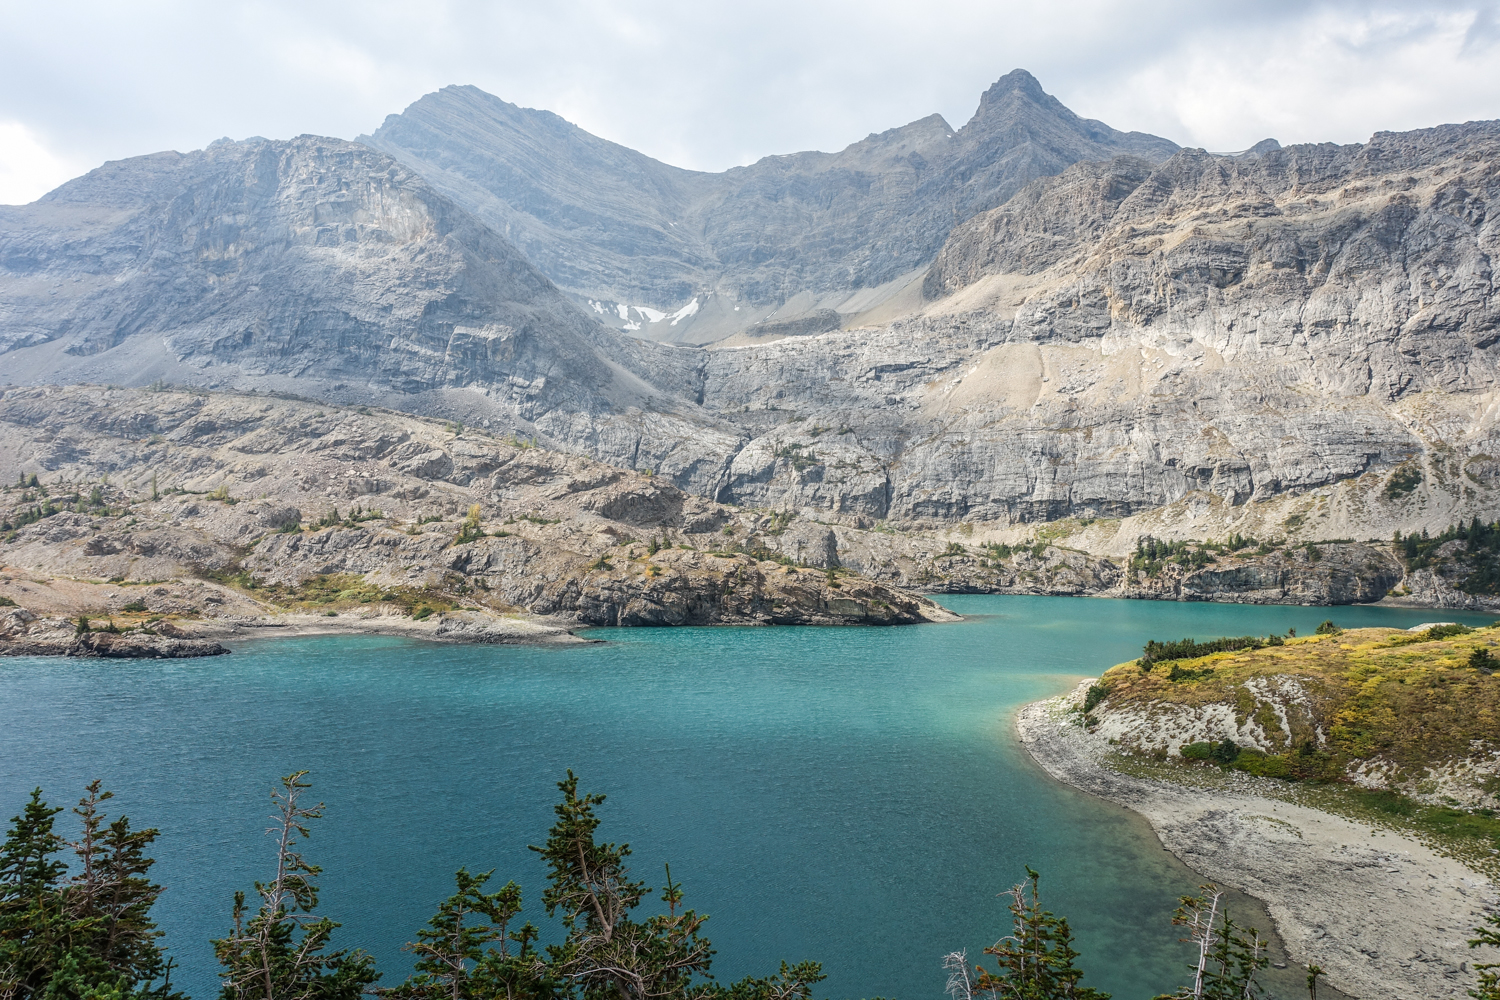
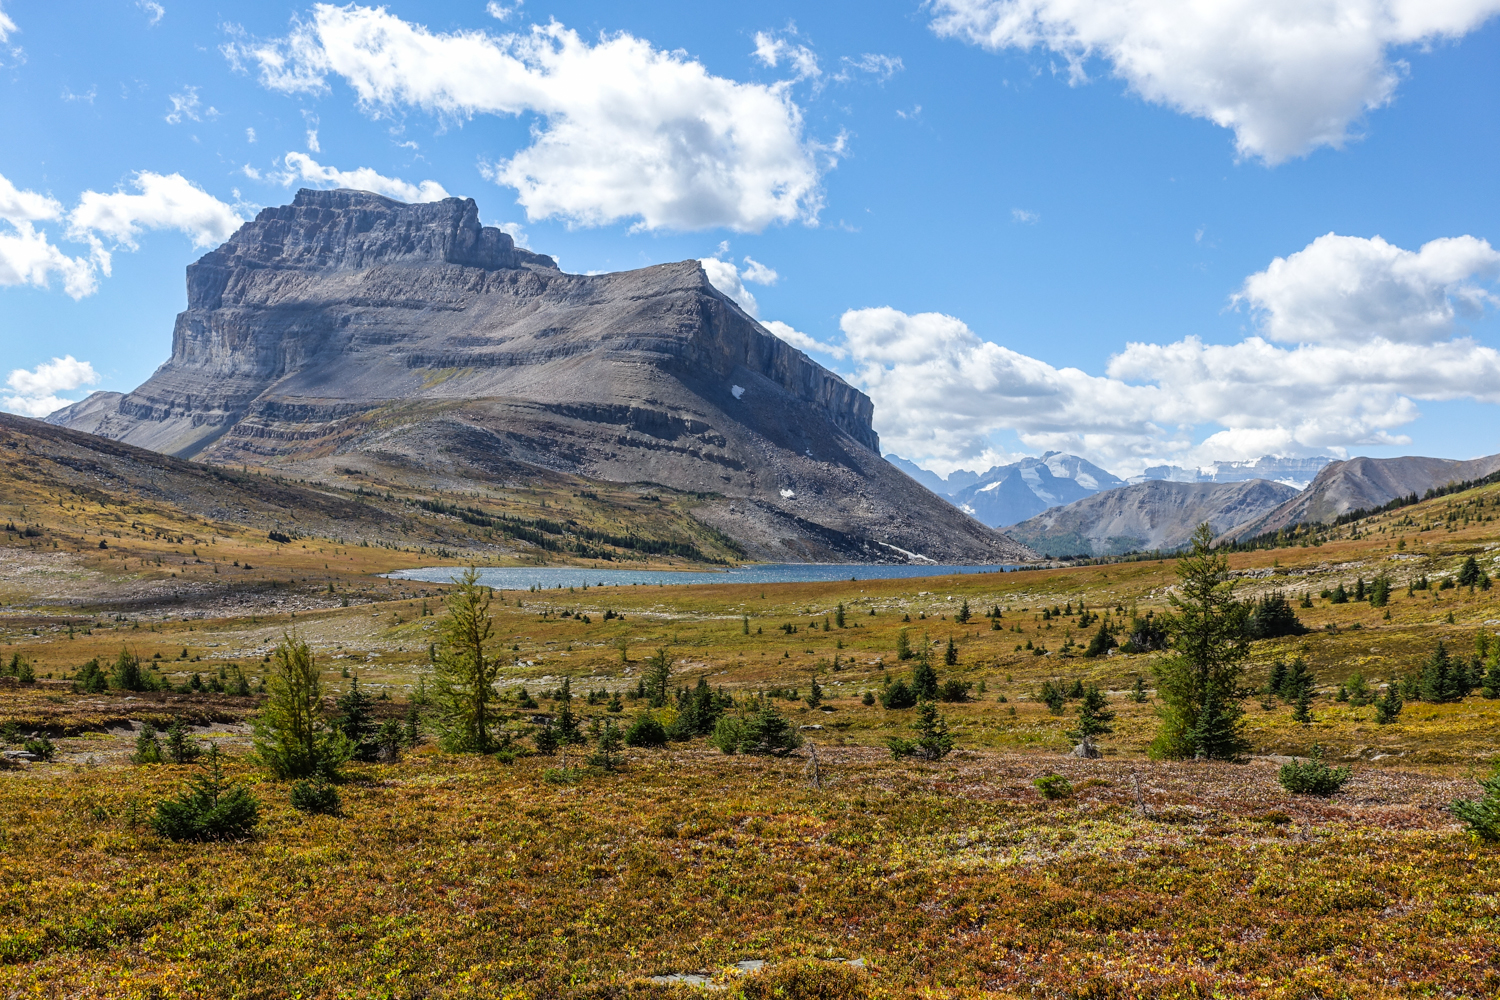
glaciated valleys are a signature of the canadian rockies. – photo credit: marshall lee (cleverhiker.com)
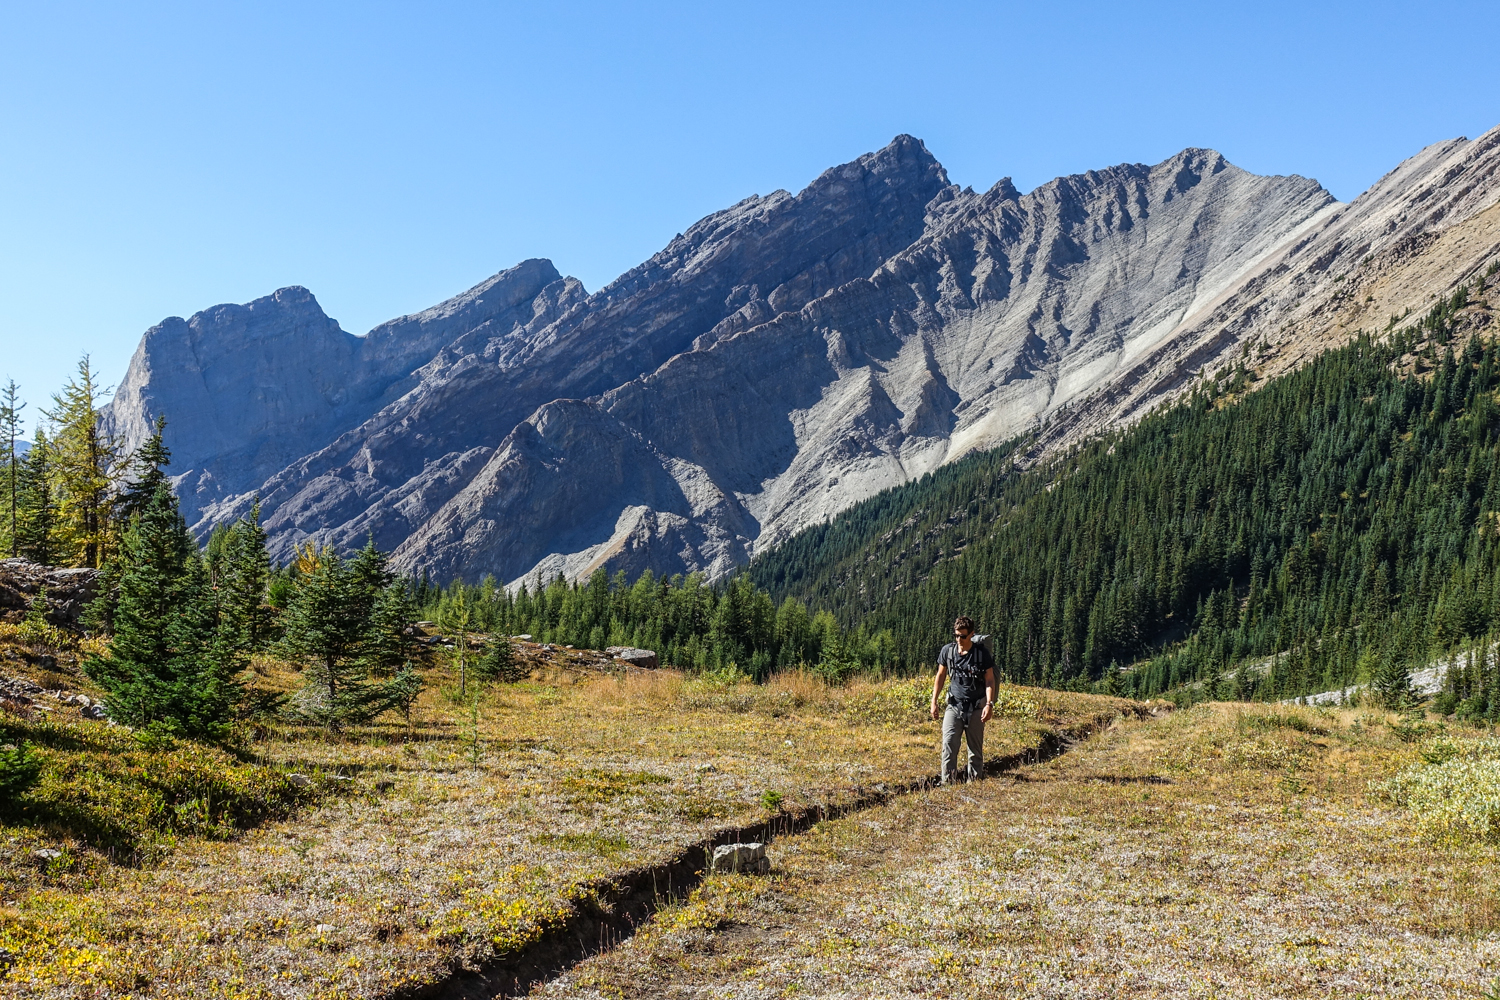
the elevation gain and loss isn’t massive because you start so high. – photo credit: marshall lee (cleverhiker.com)
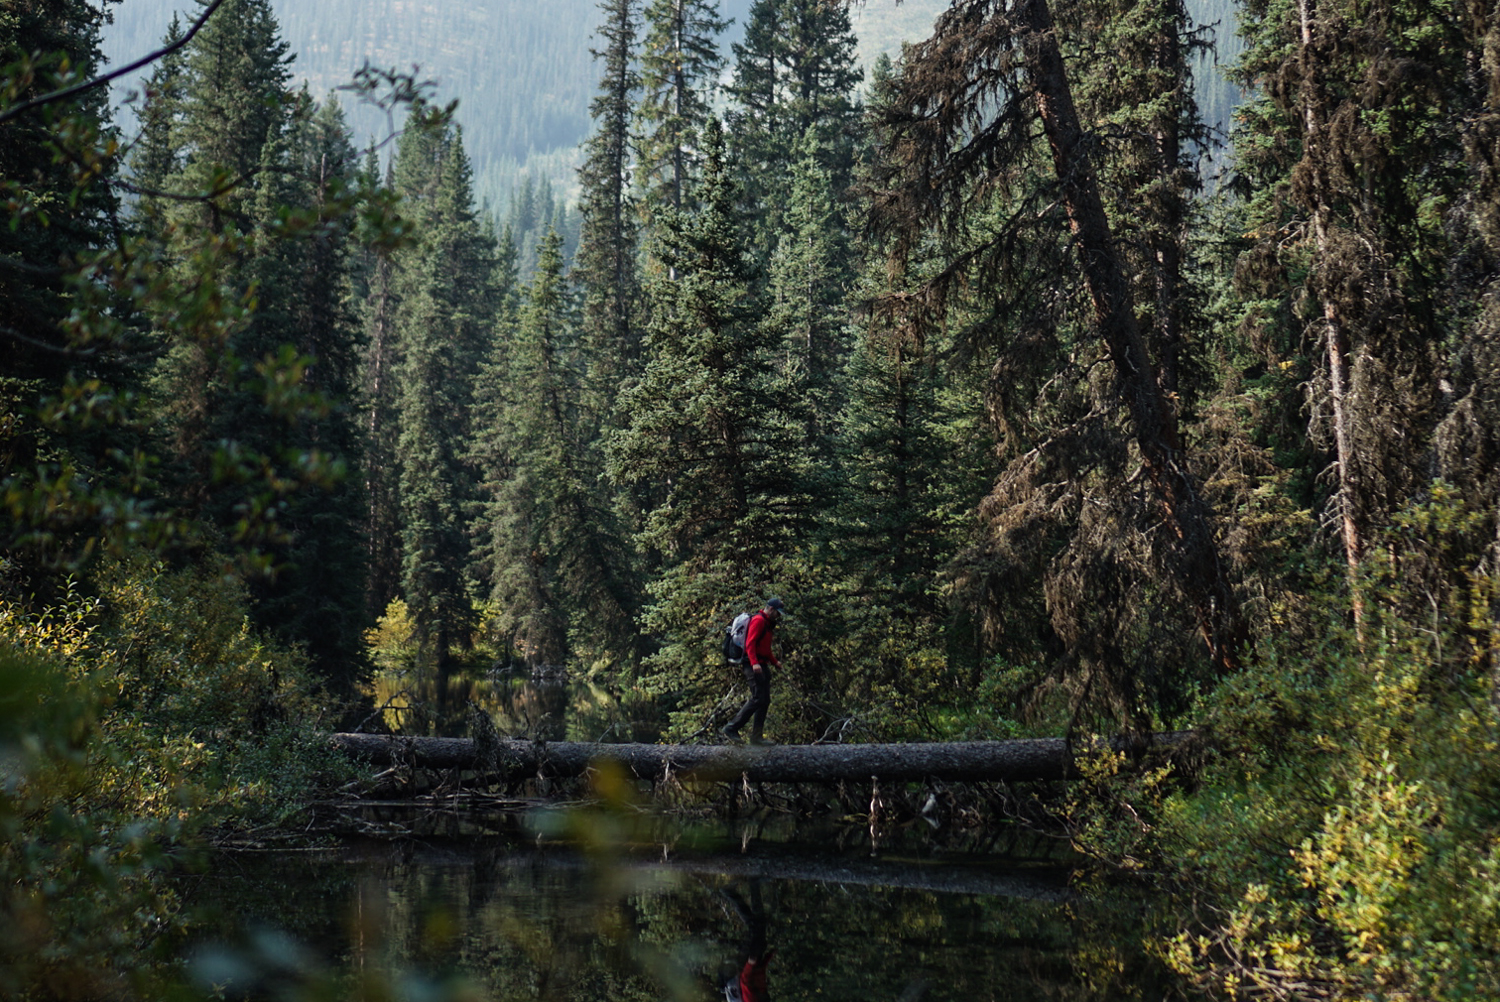
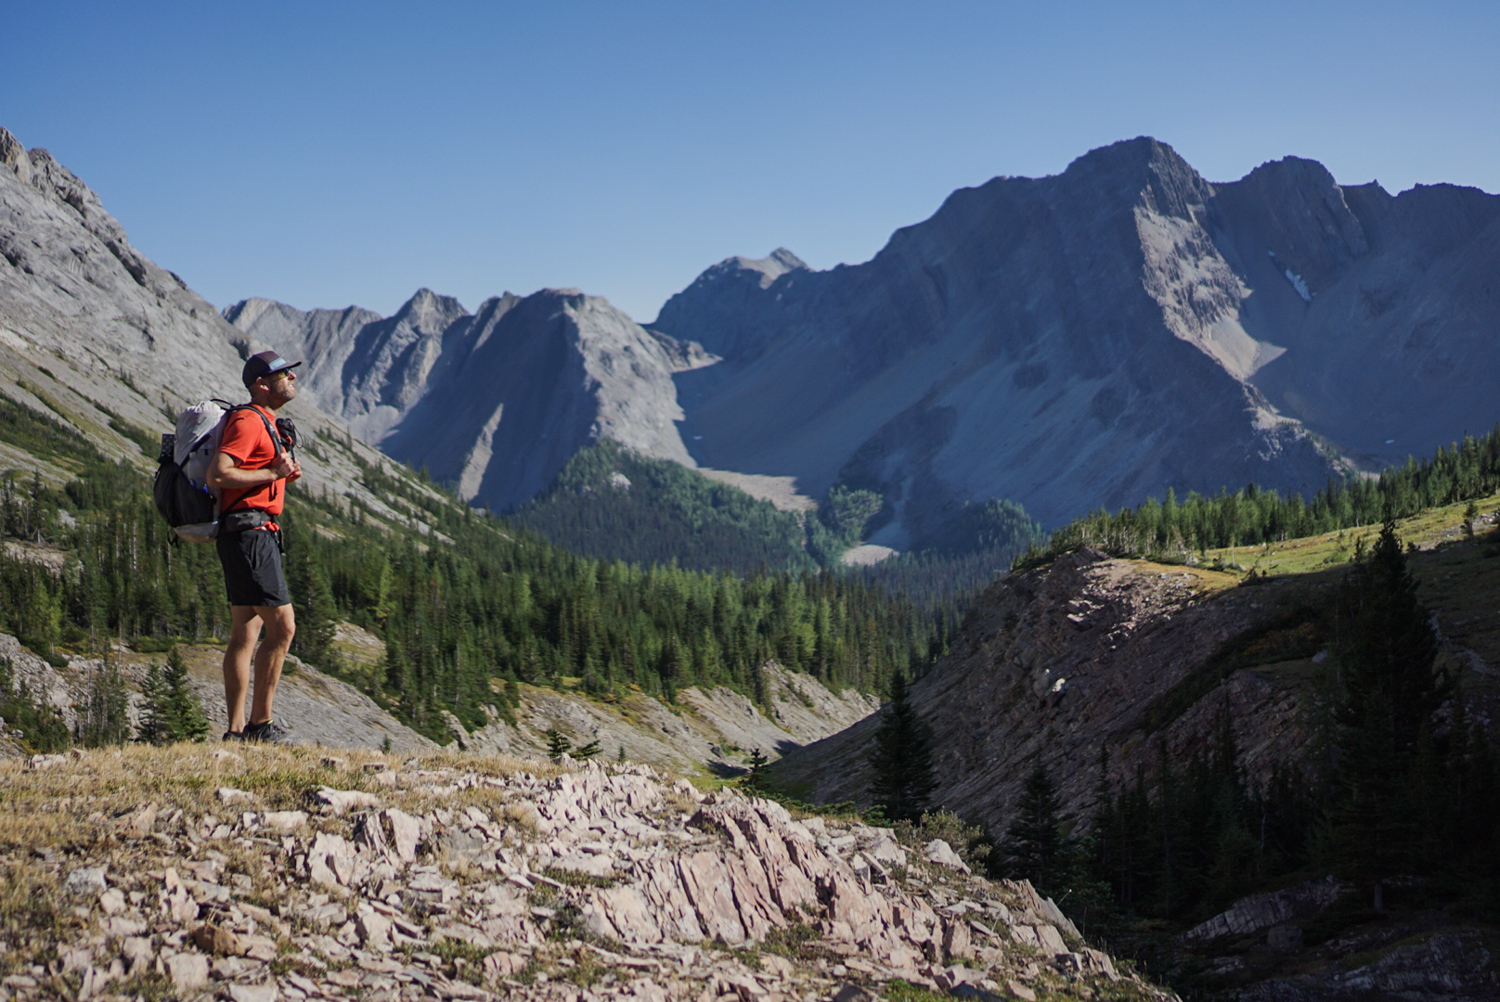
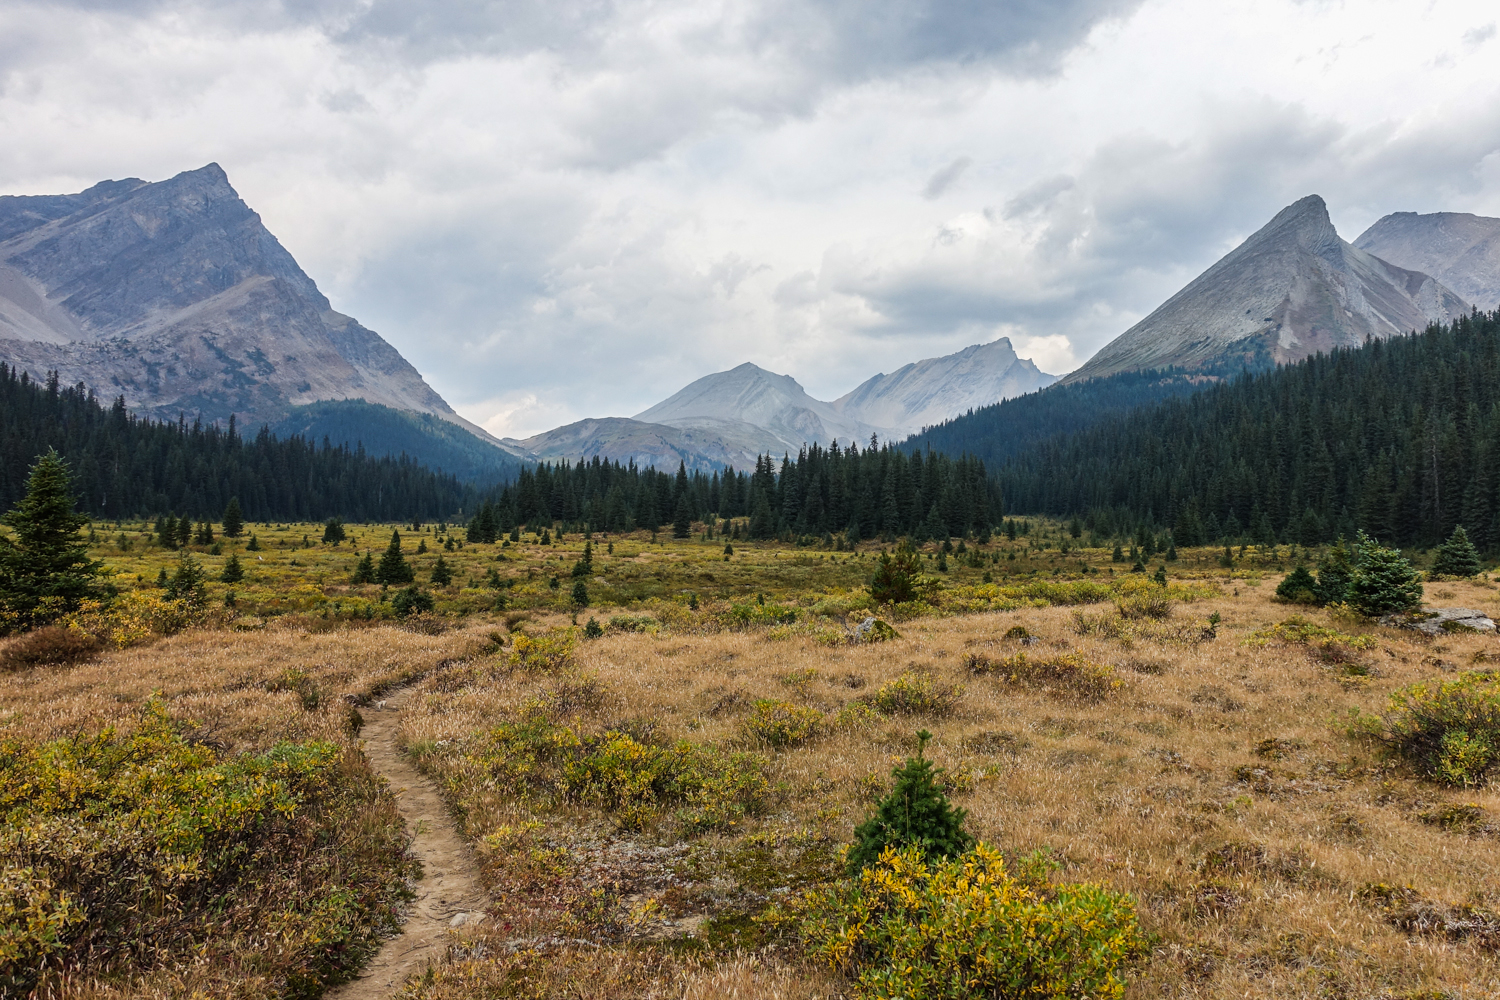
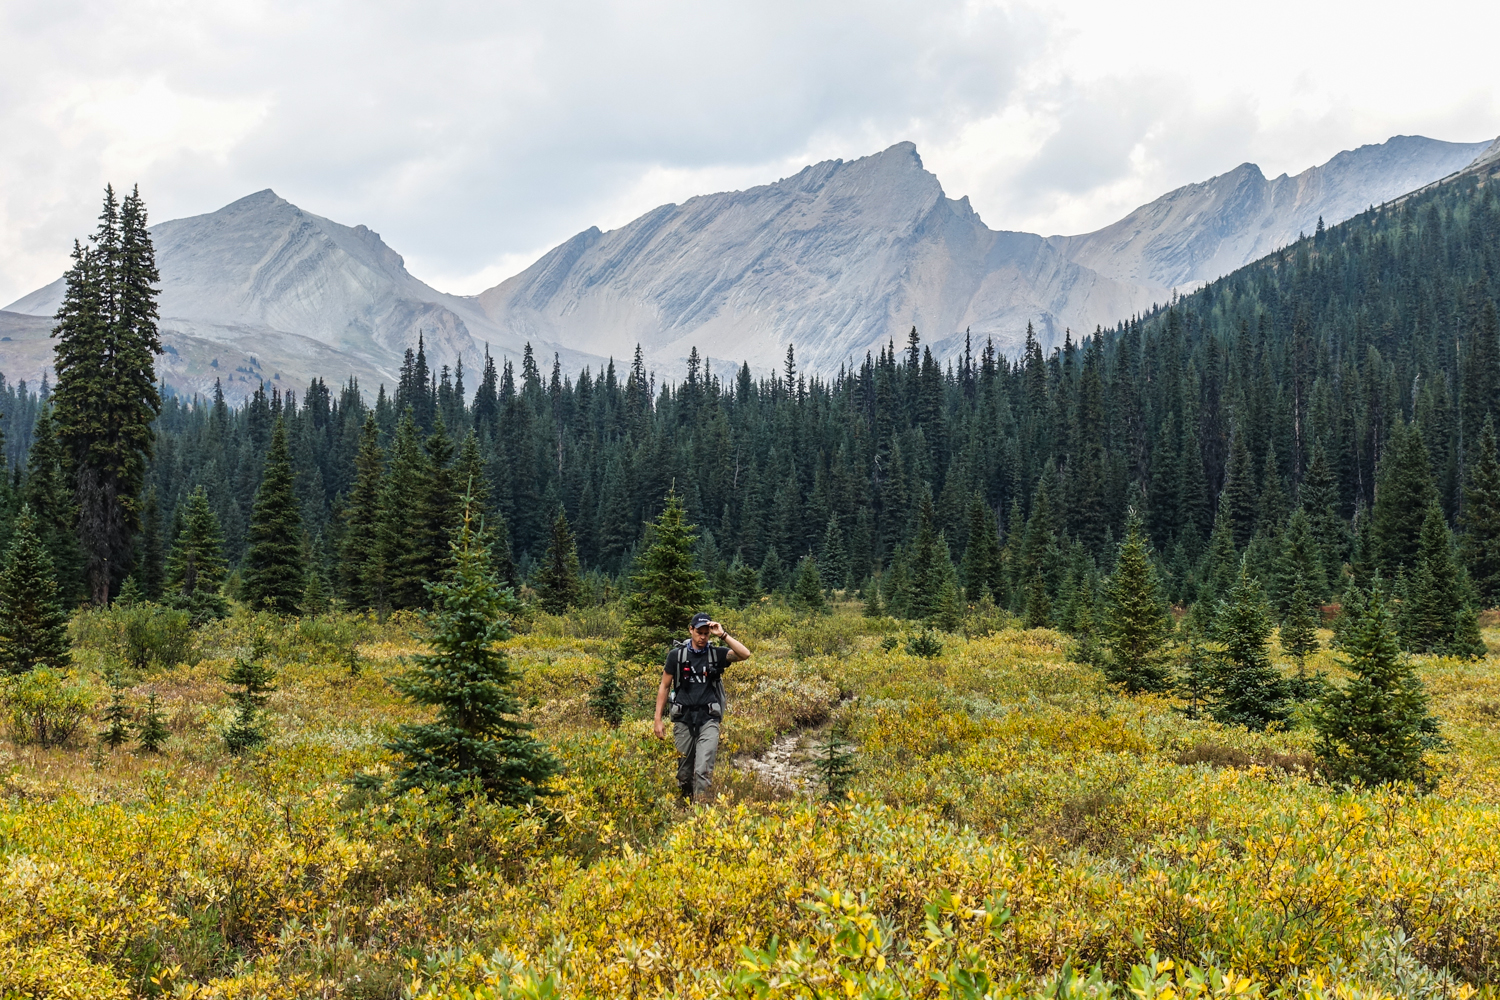
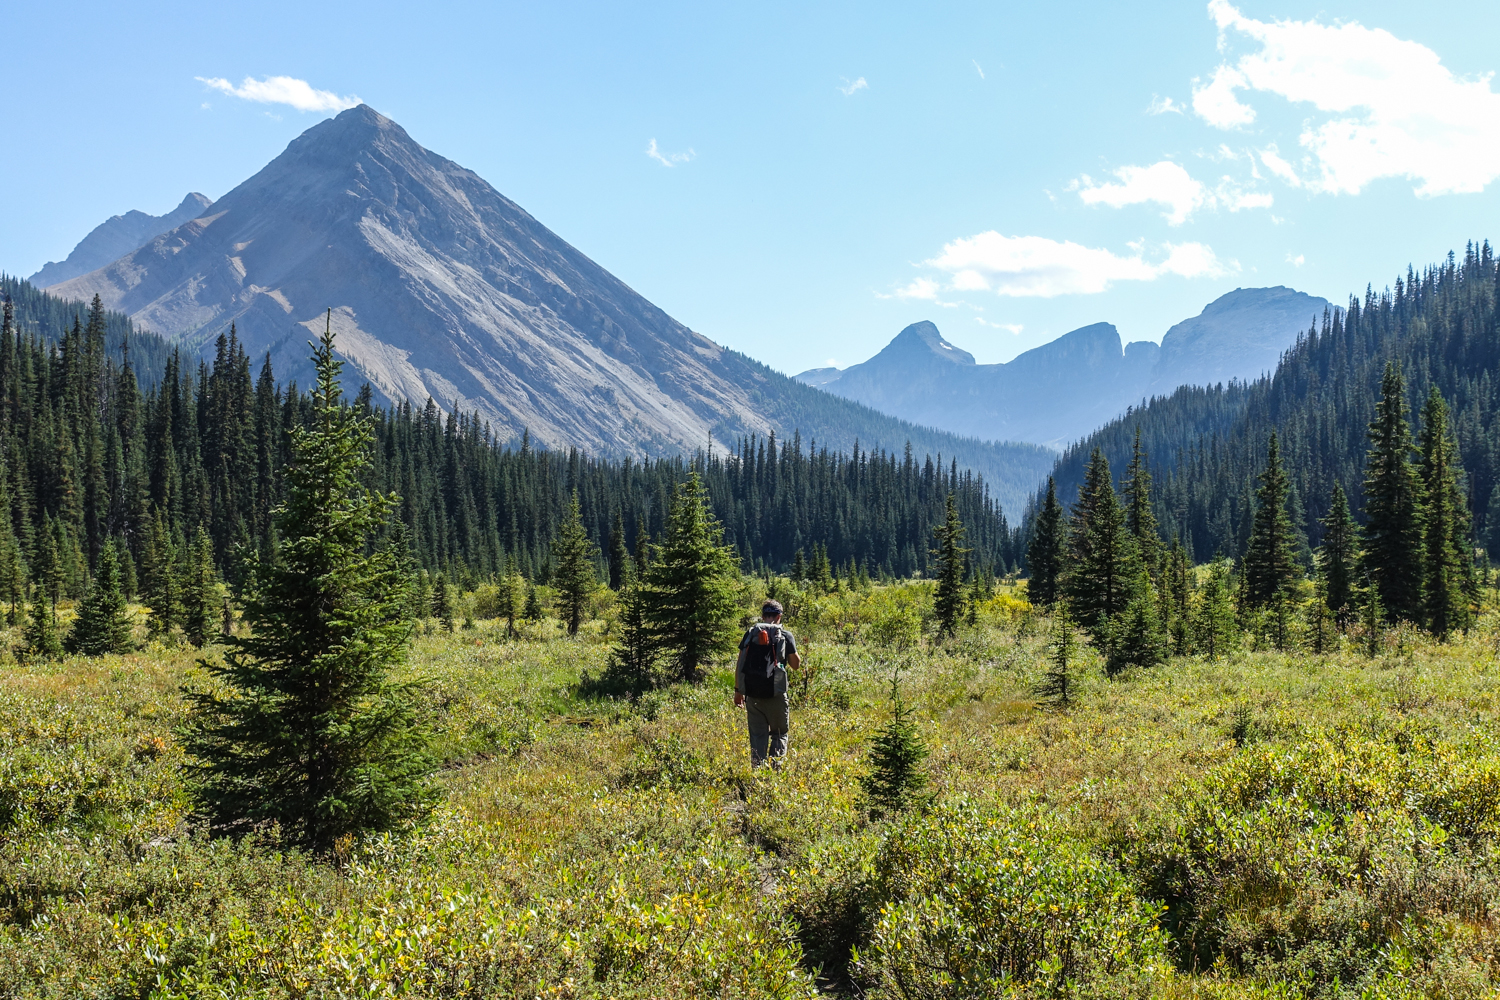
while the alpine views and dramatic peaks dominate this hike, there’s no shortage of impressive forests as well. – photo credit: marshall lee (cleverhiker.com)
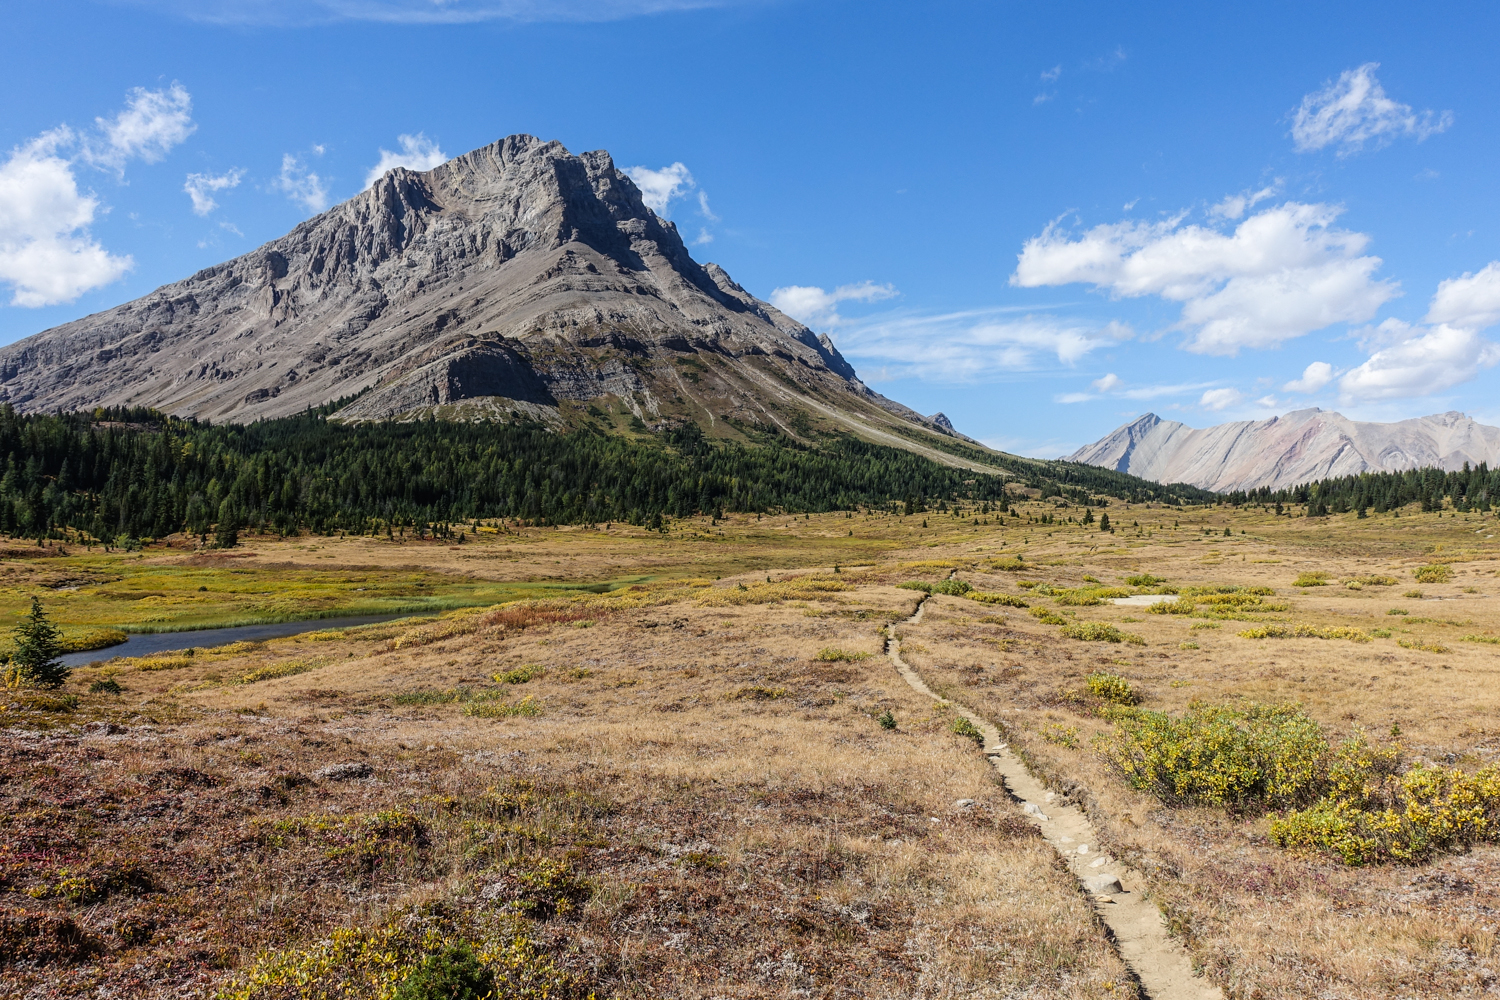
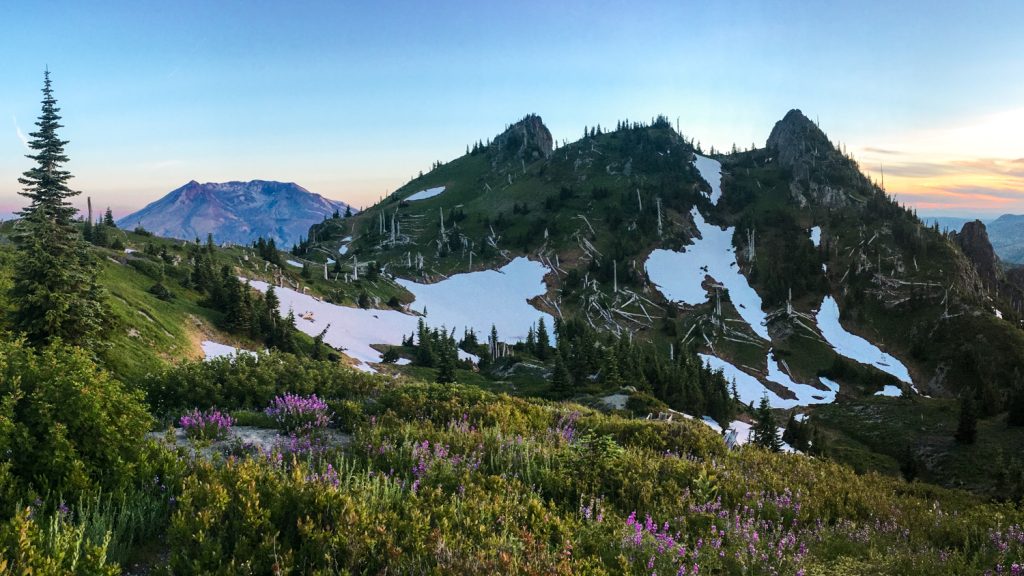
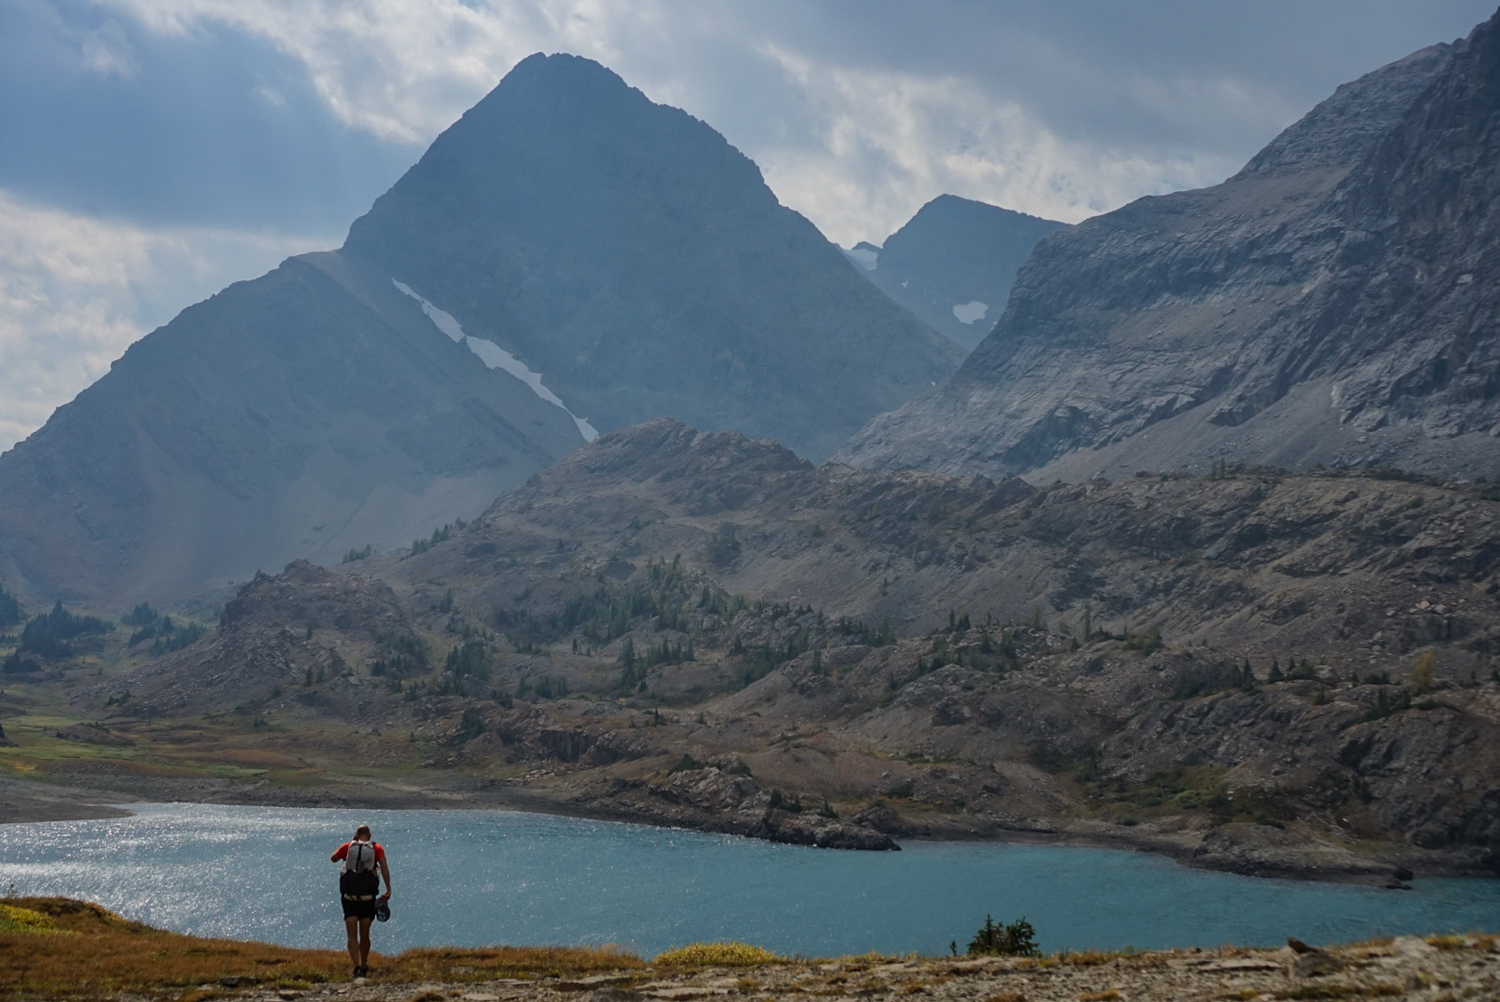
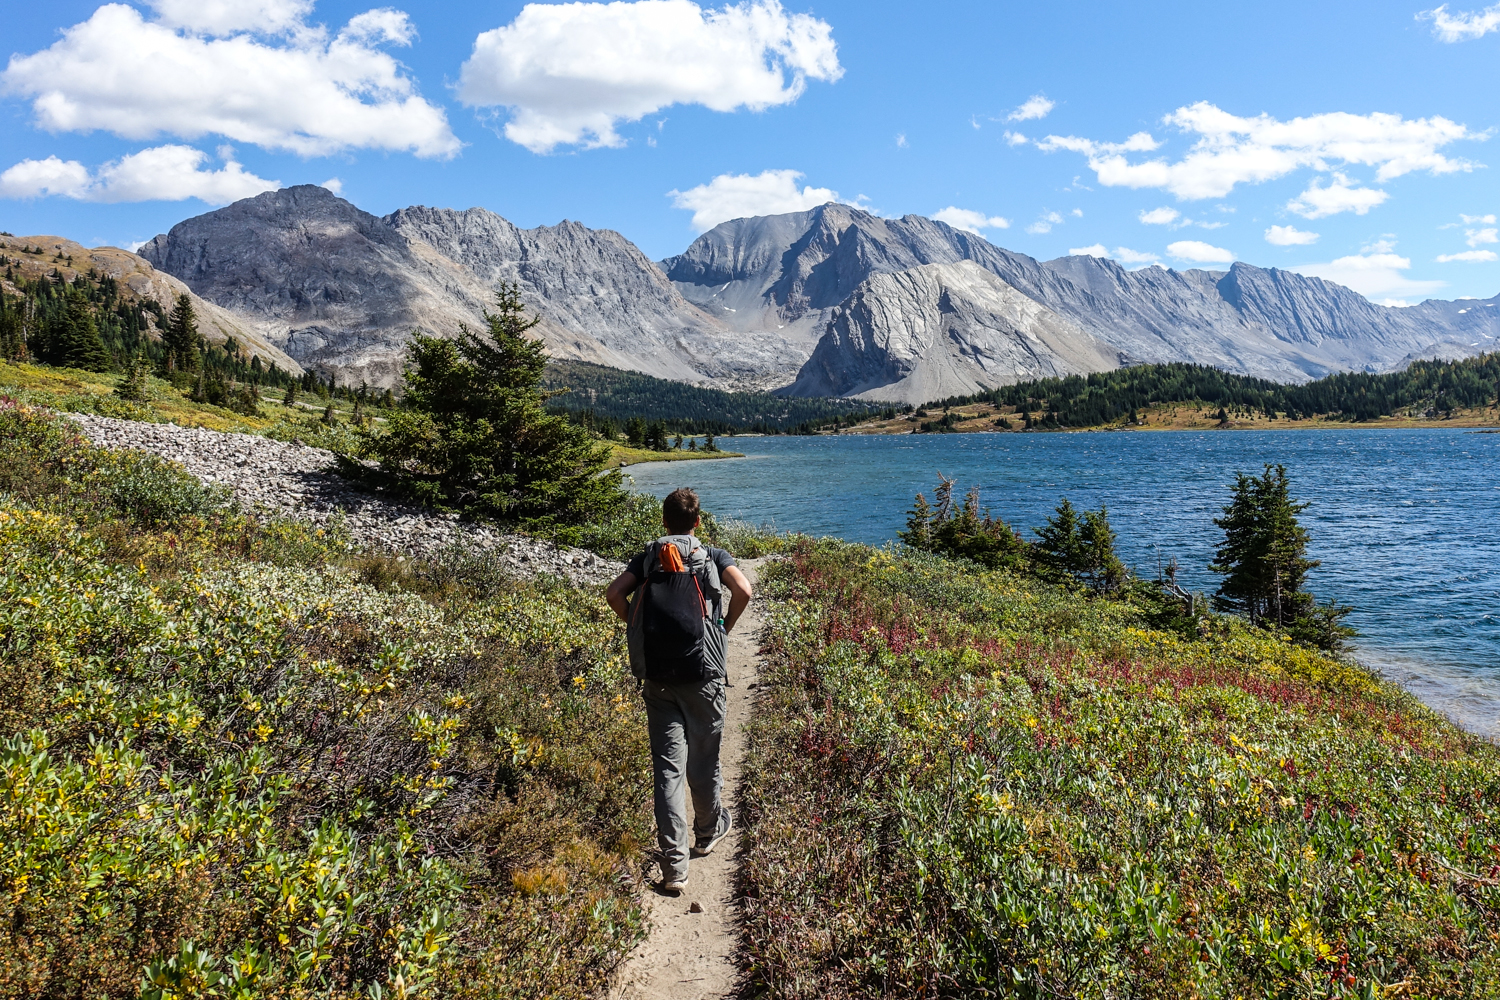
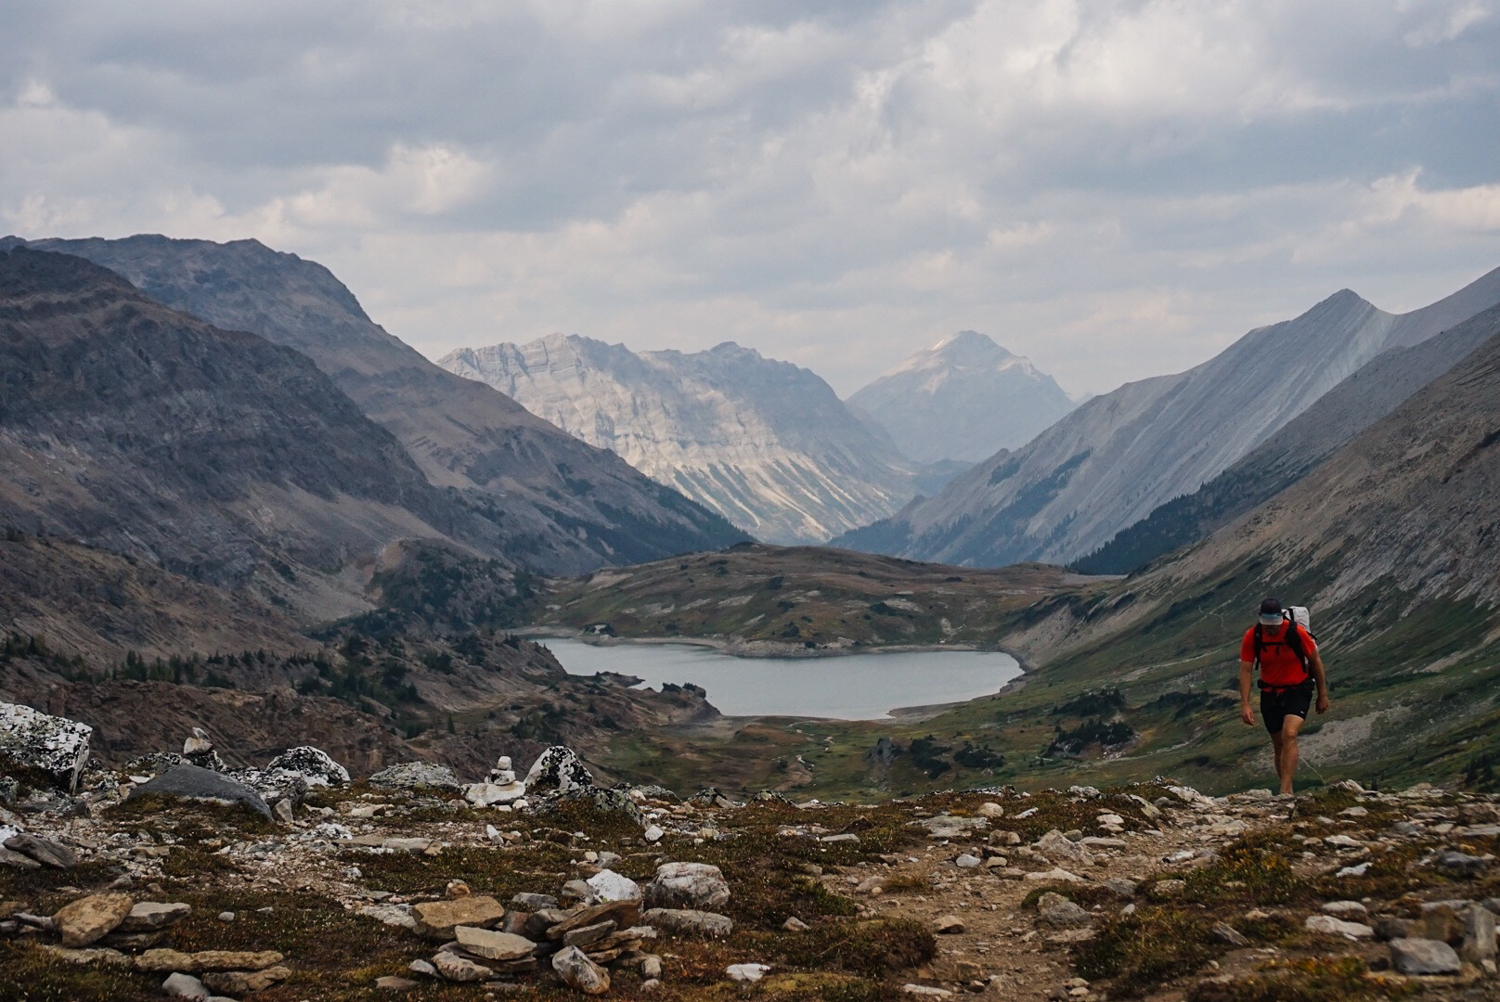
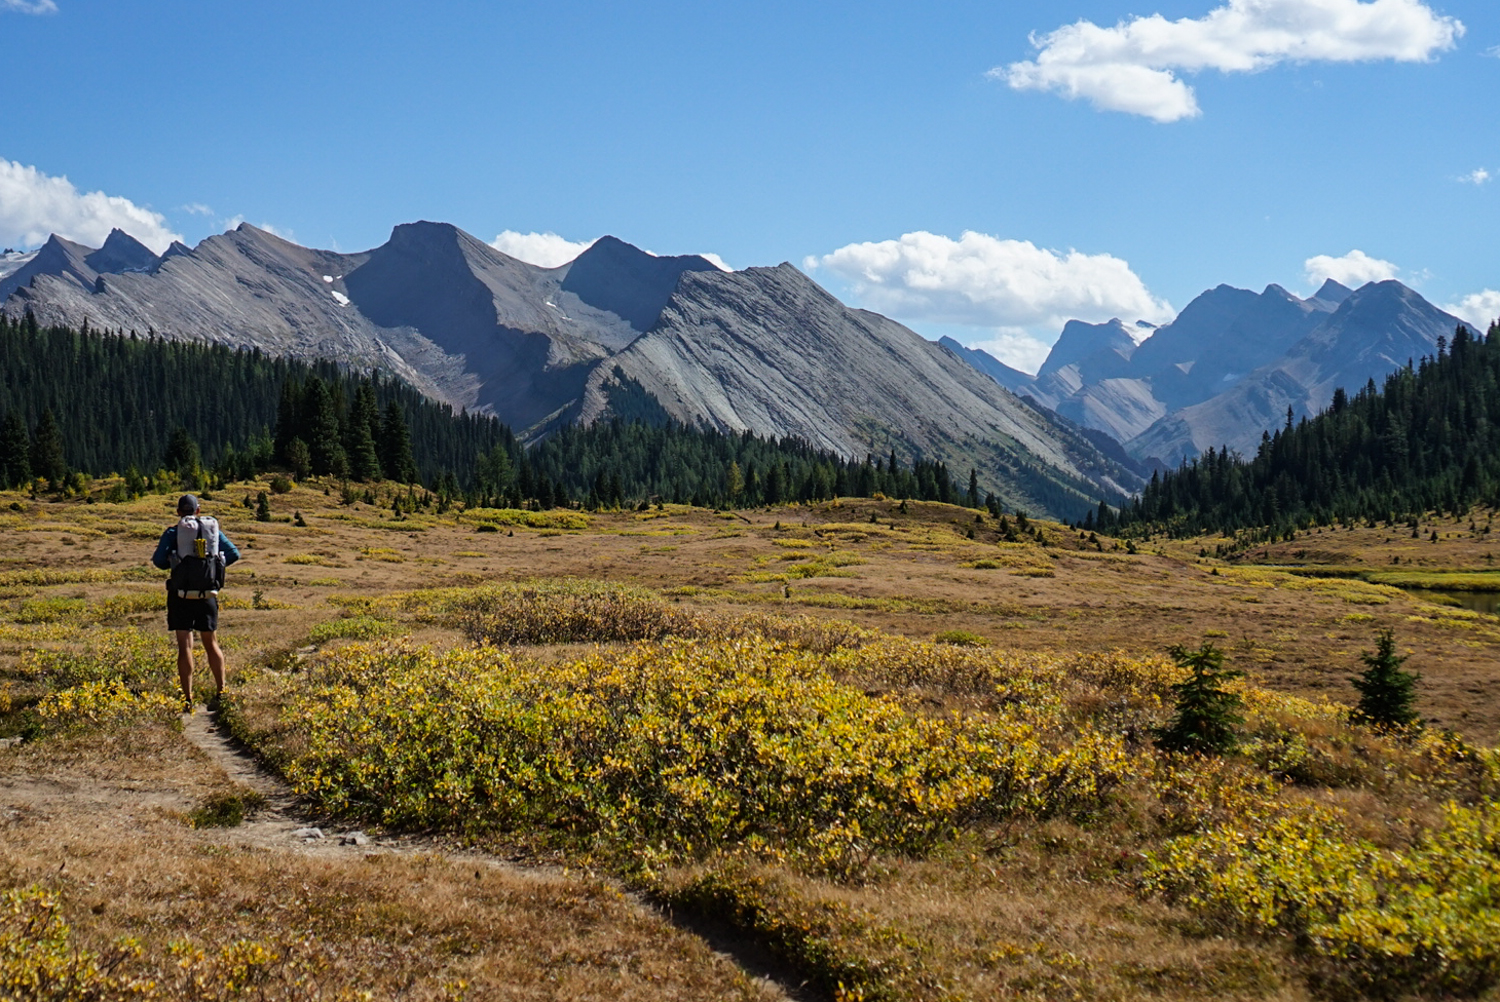
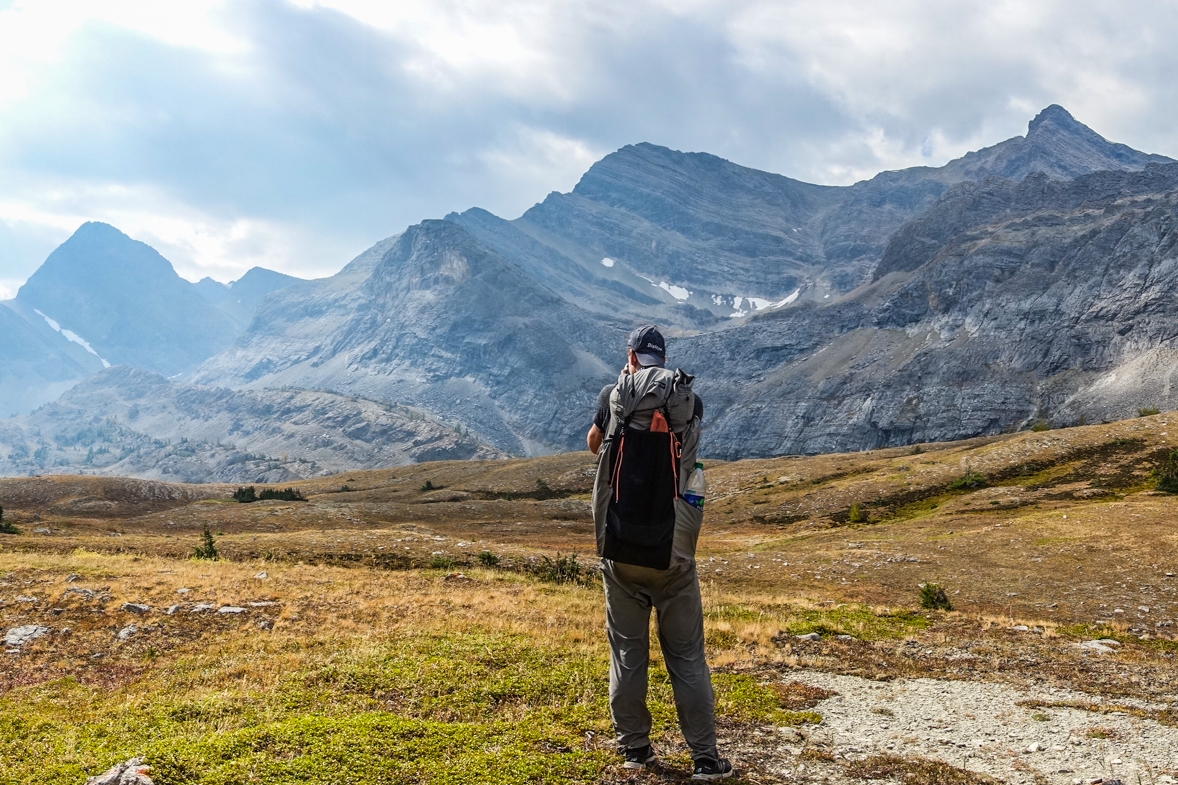
the trail gets into the alpine and its just endless views (and often wind). – photo credit: marshall lee (cleverhiker.com)
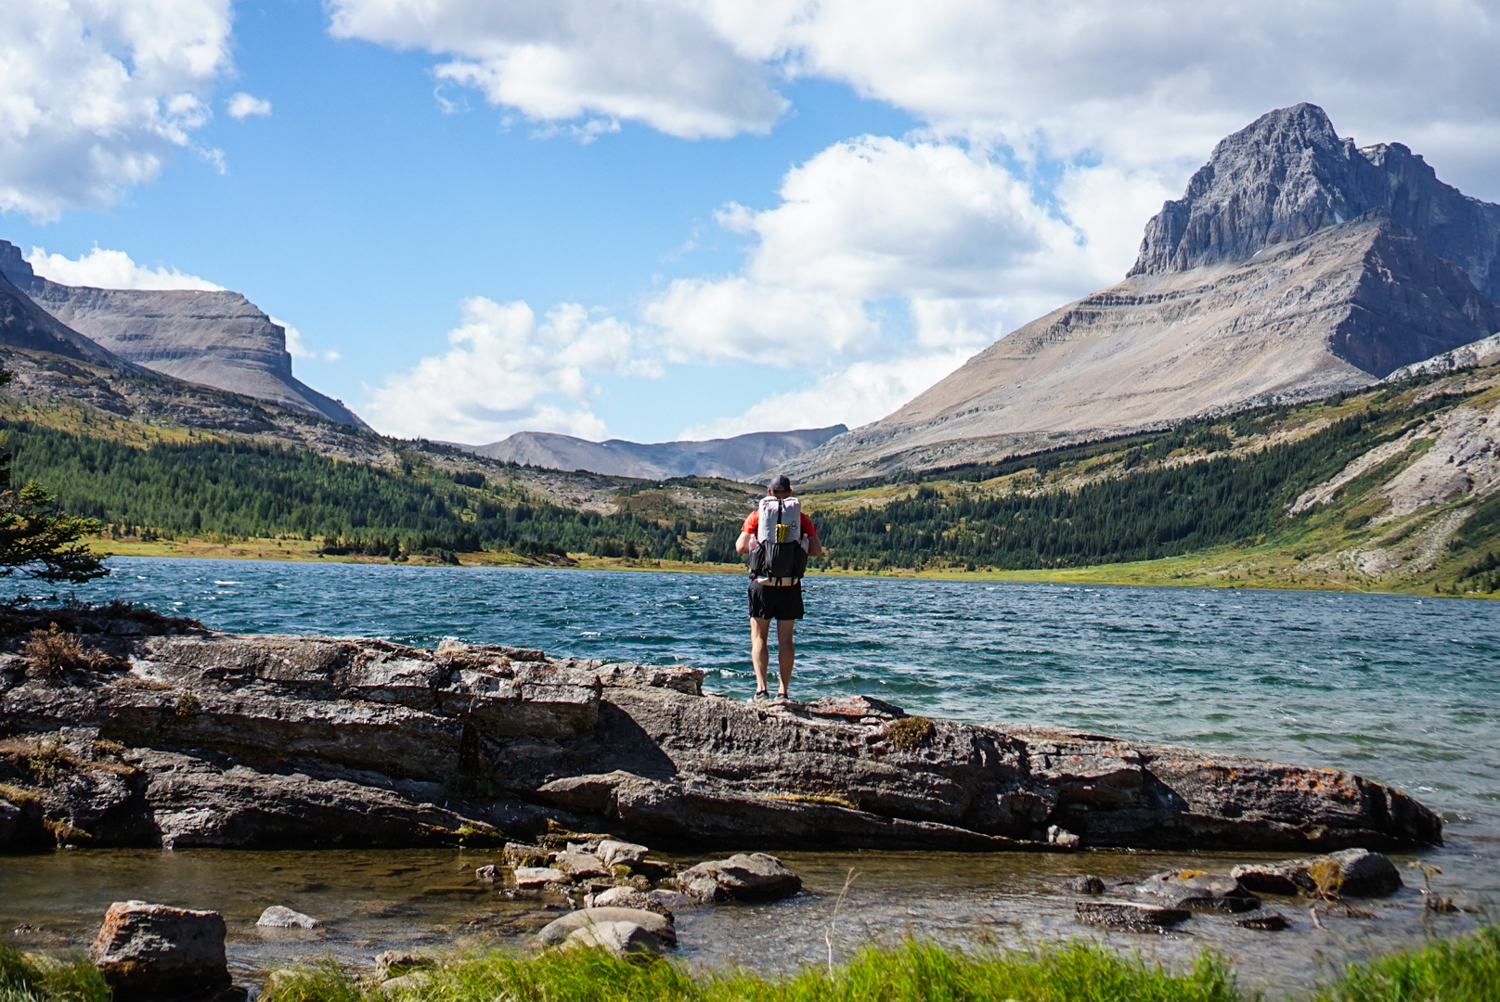
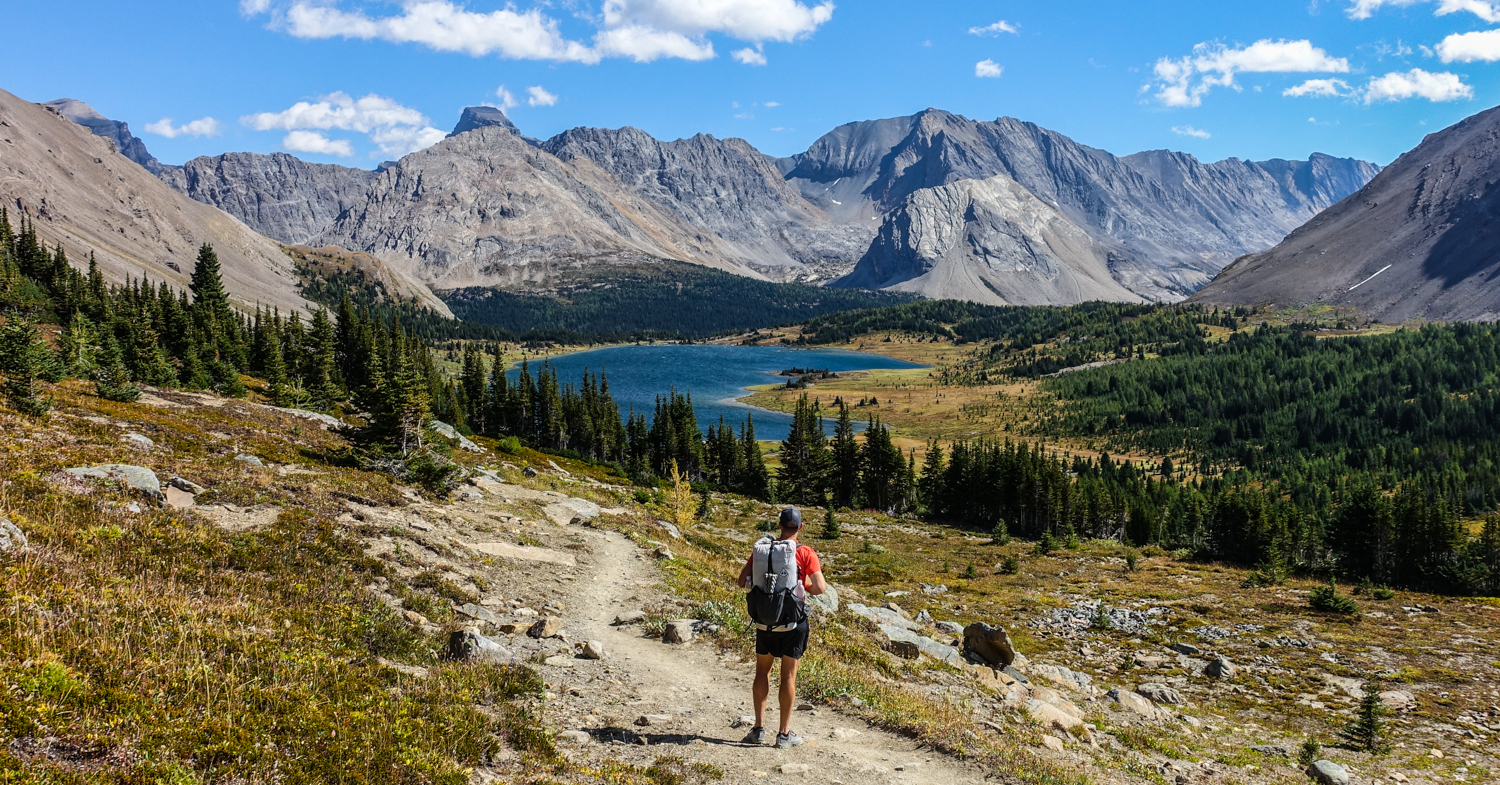
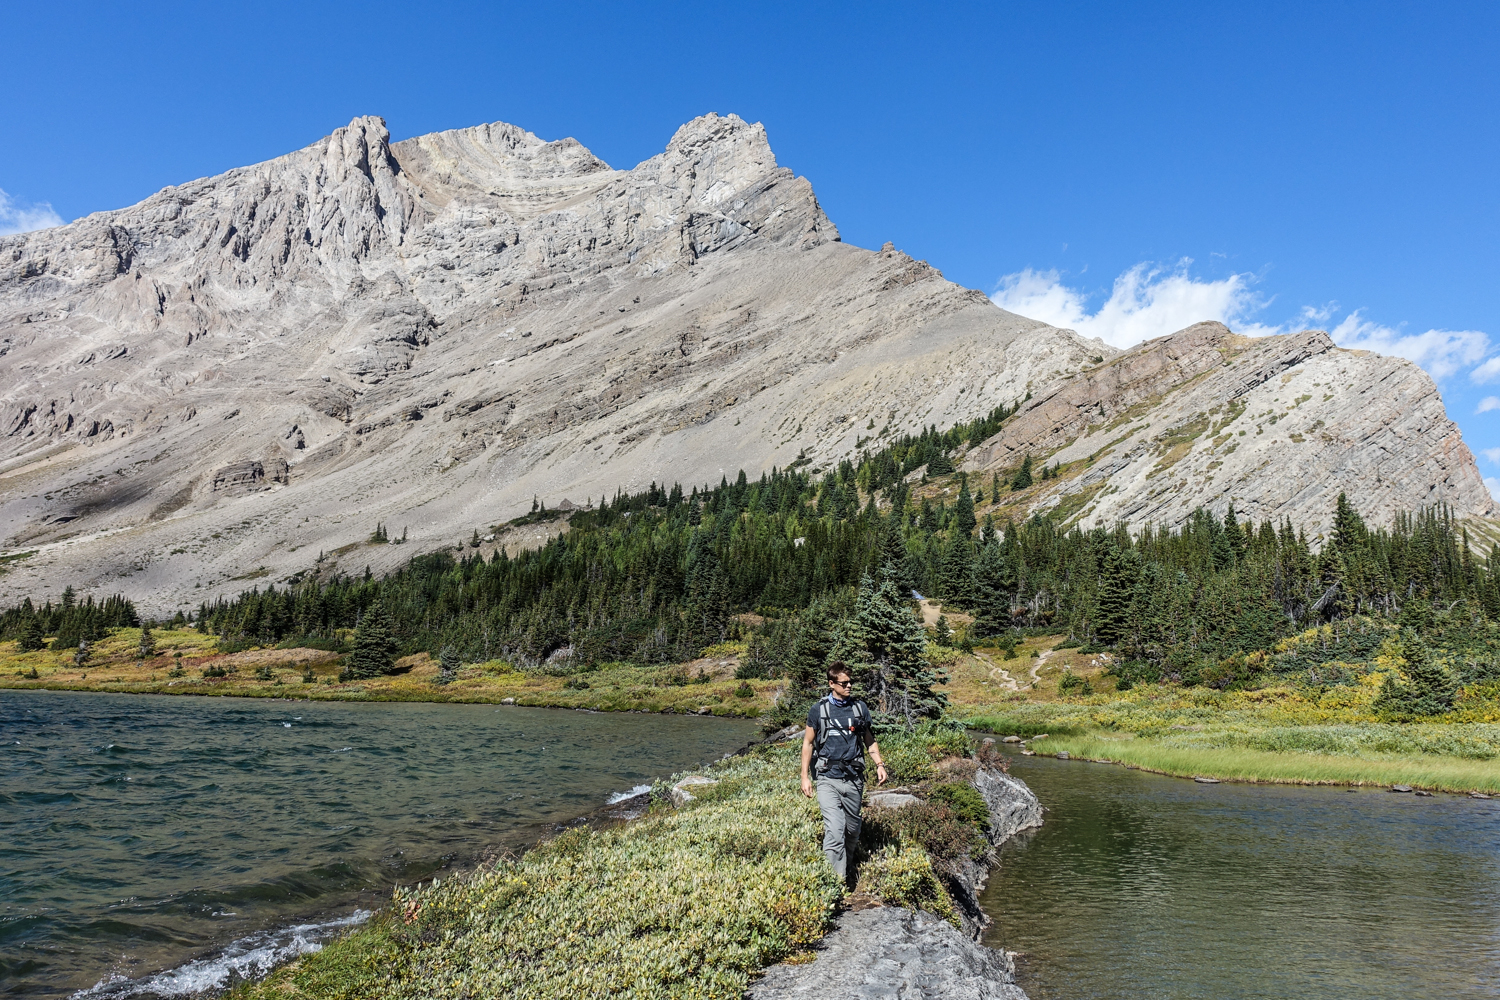
the canadian rockies never disappoint. – photo credit: marshall lee (cleverhiker.com)
Even if you don’t make it to the sawback trail, banff will not dissapoint. – photo credit: marshall lee (cleverhiker.com)
bring a battery bank because we drained our batteries taking pictures. – photo credit: dave collins (cleverhiker.com)