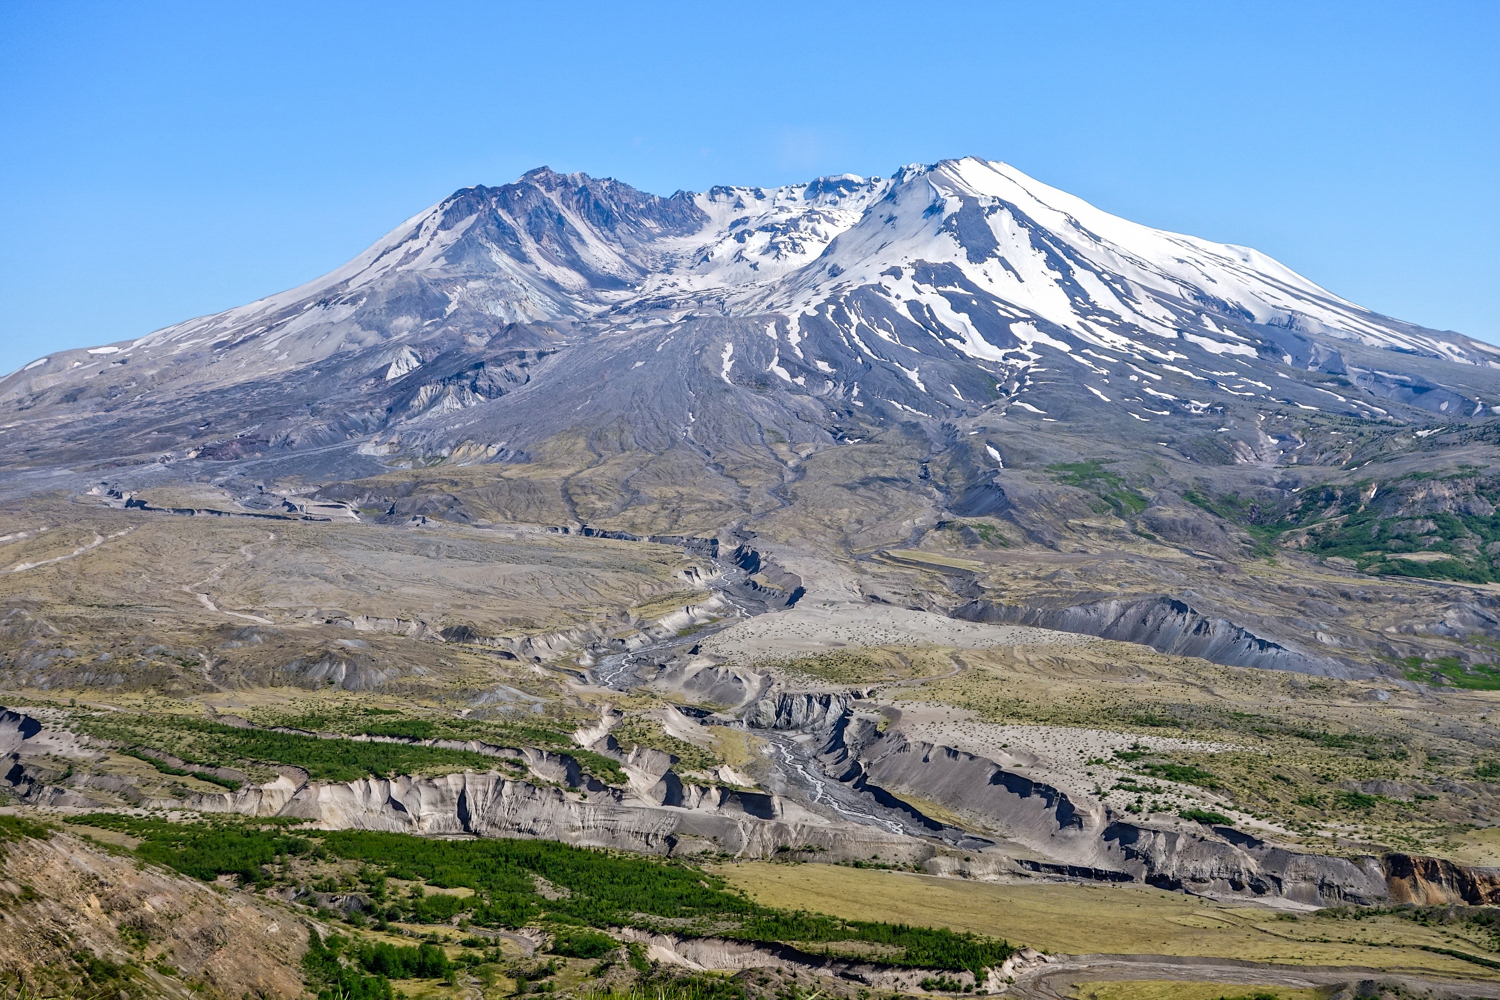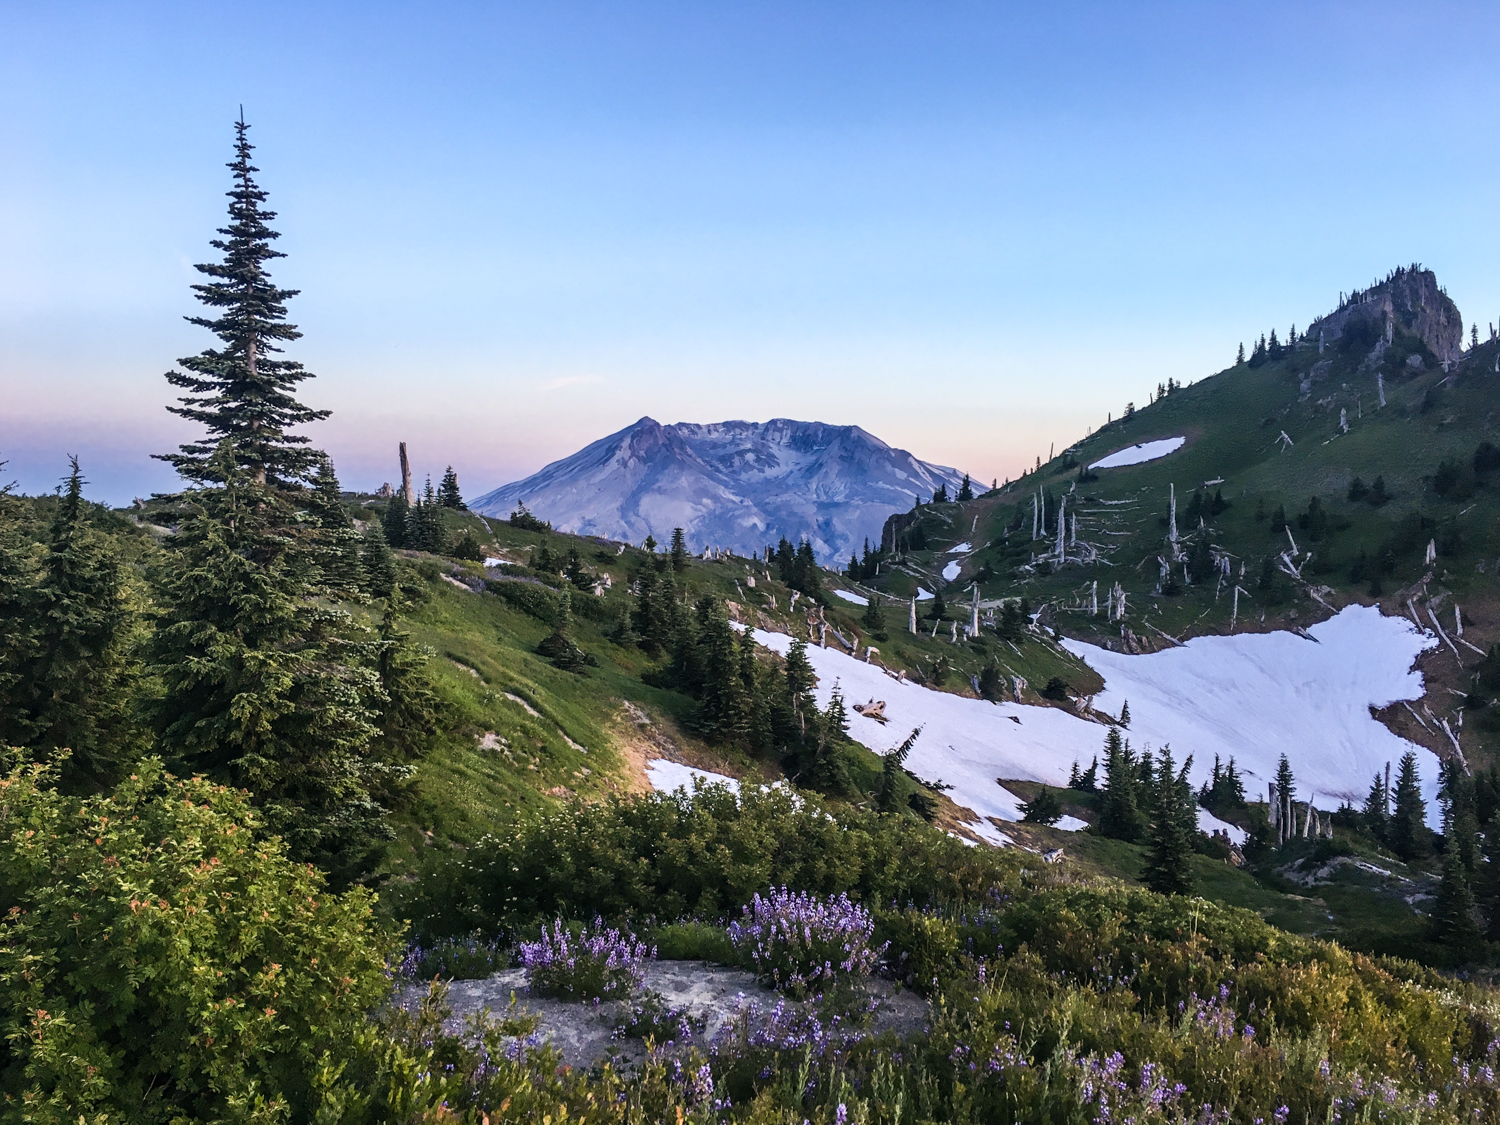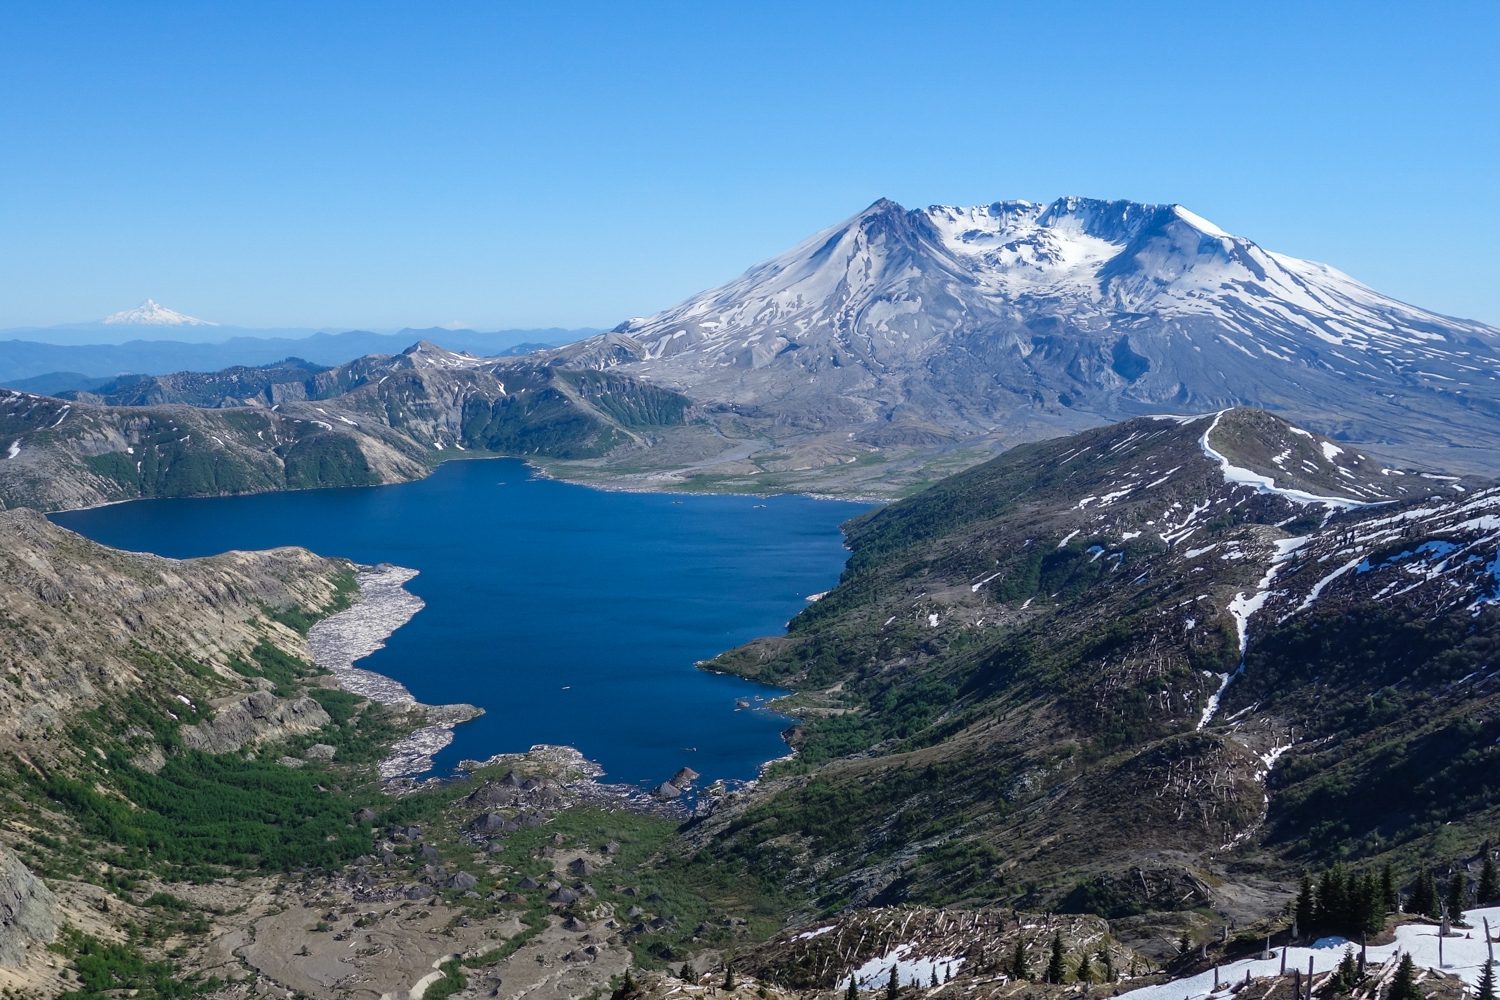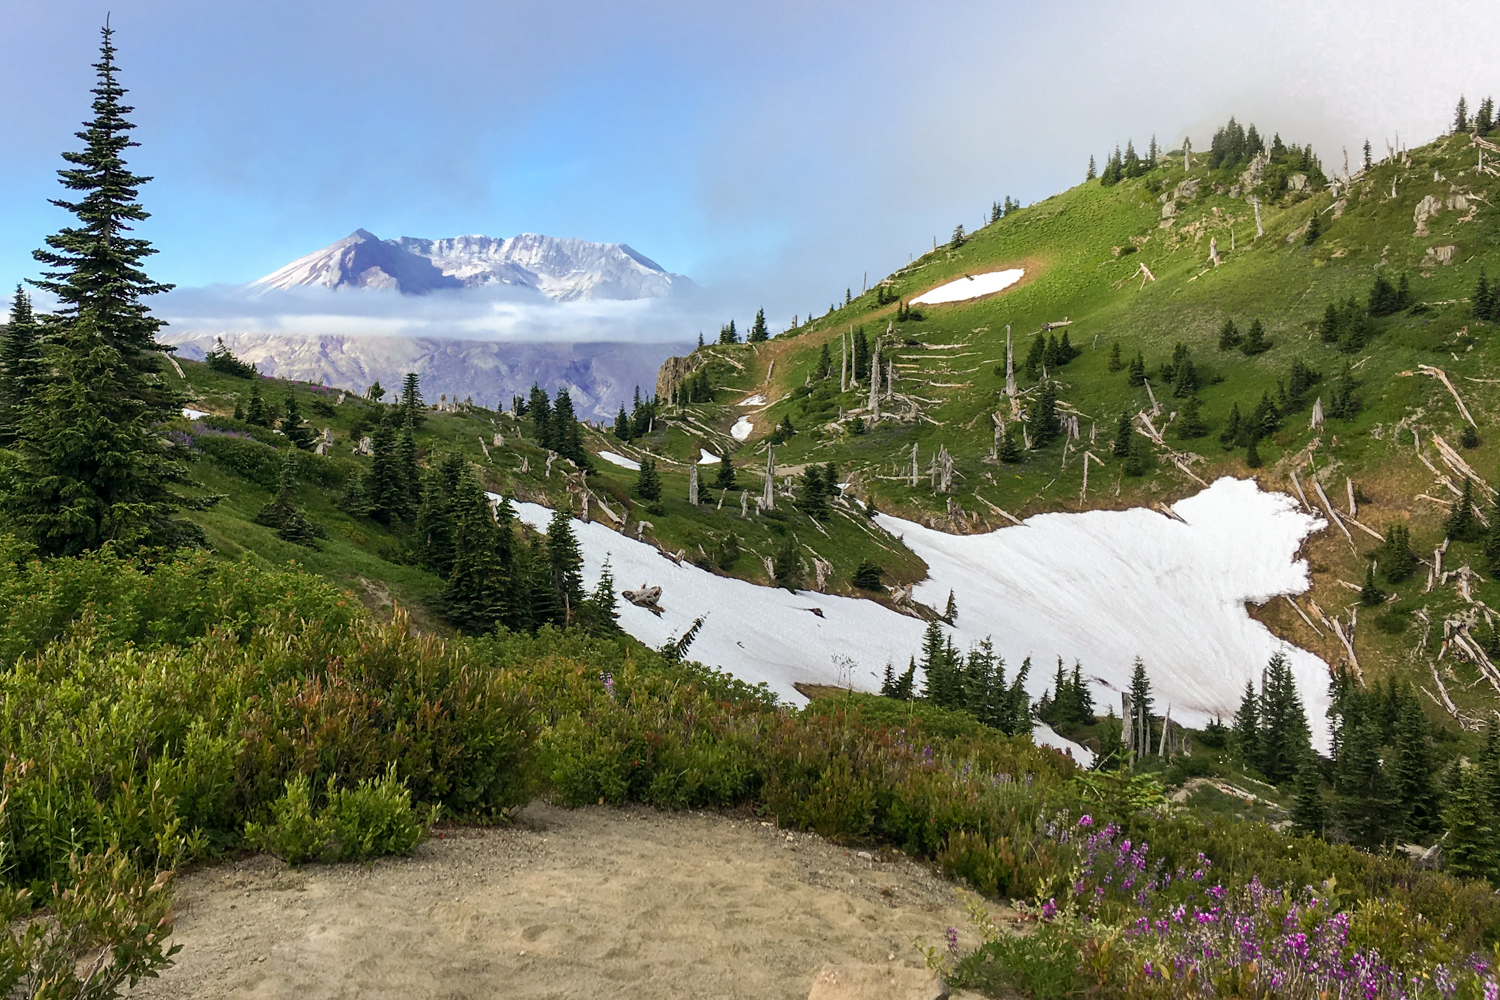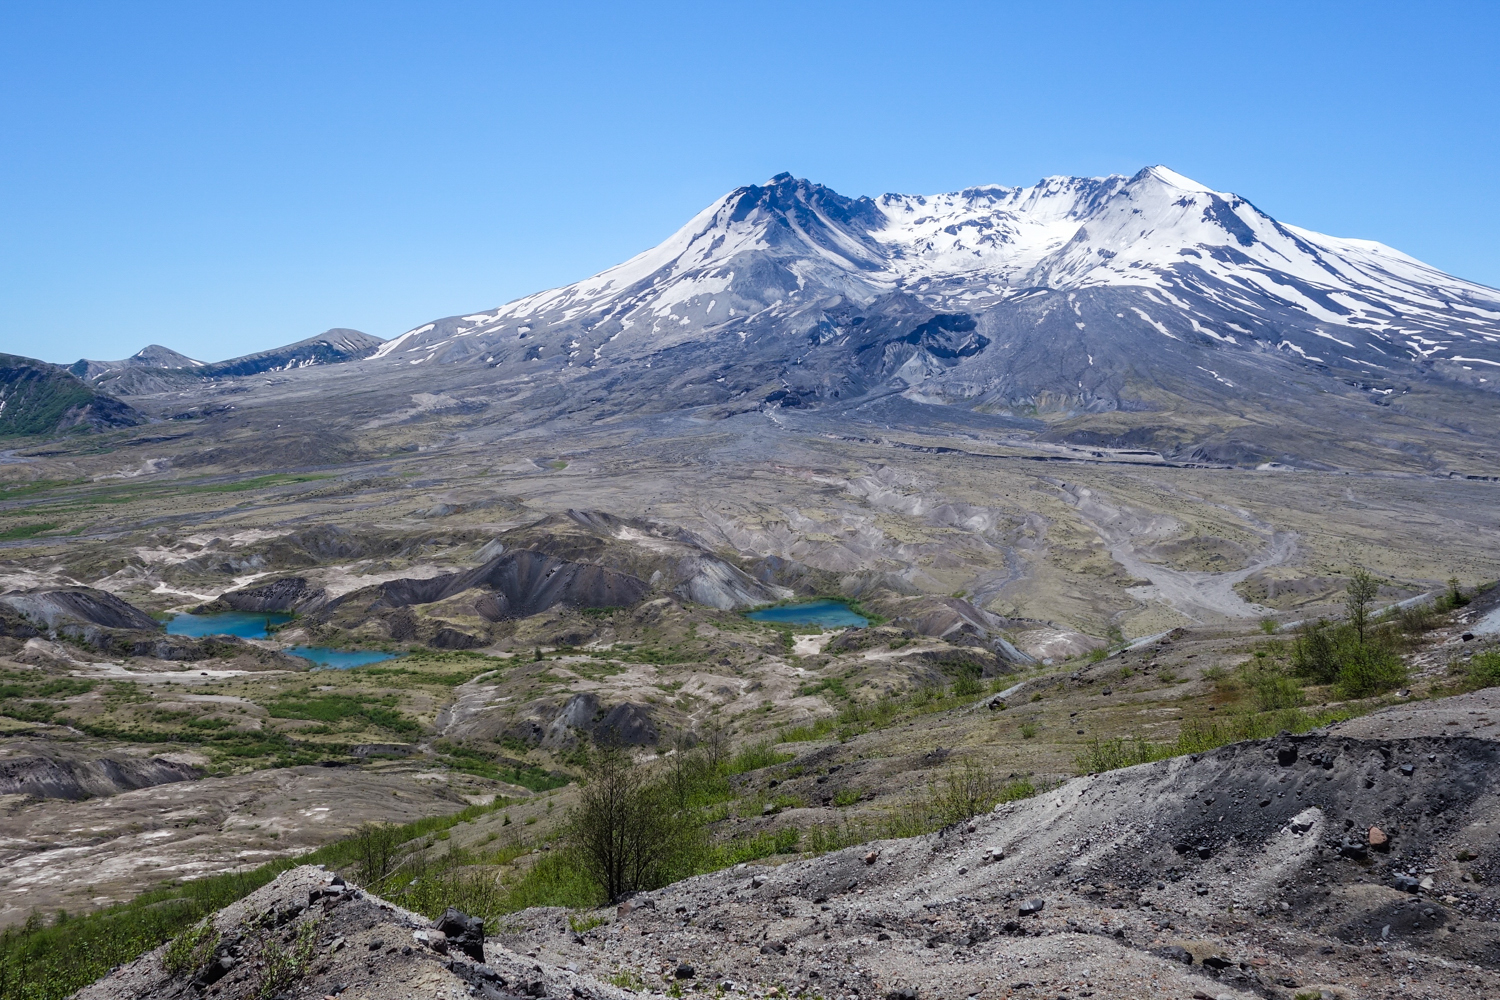
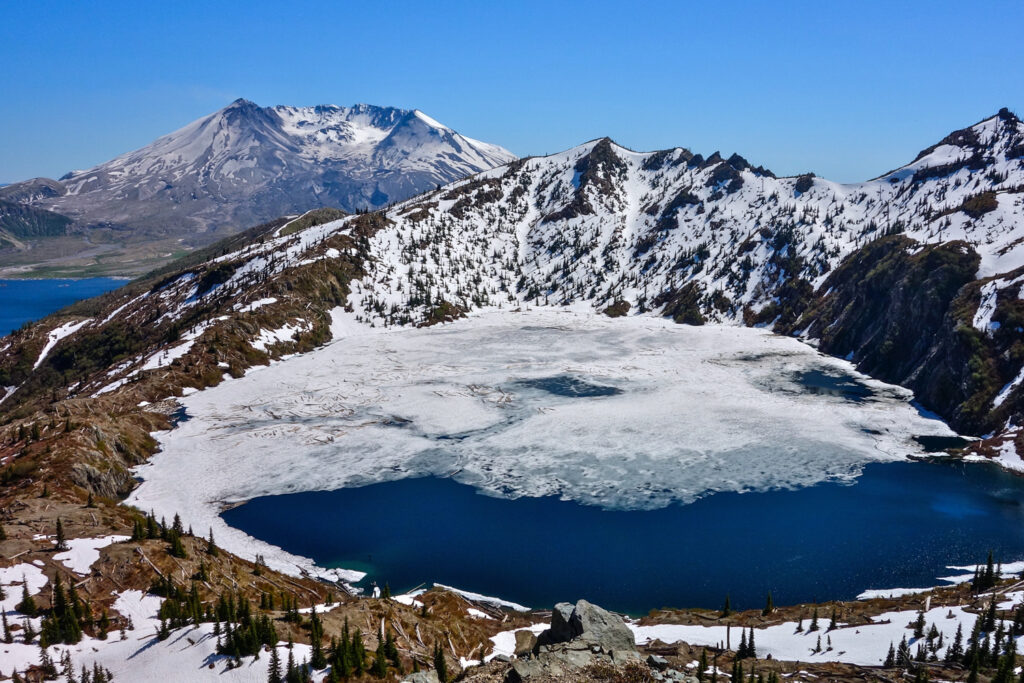
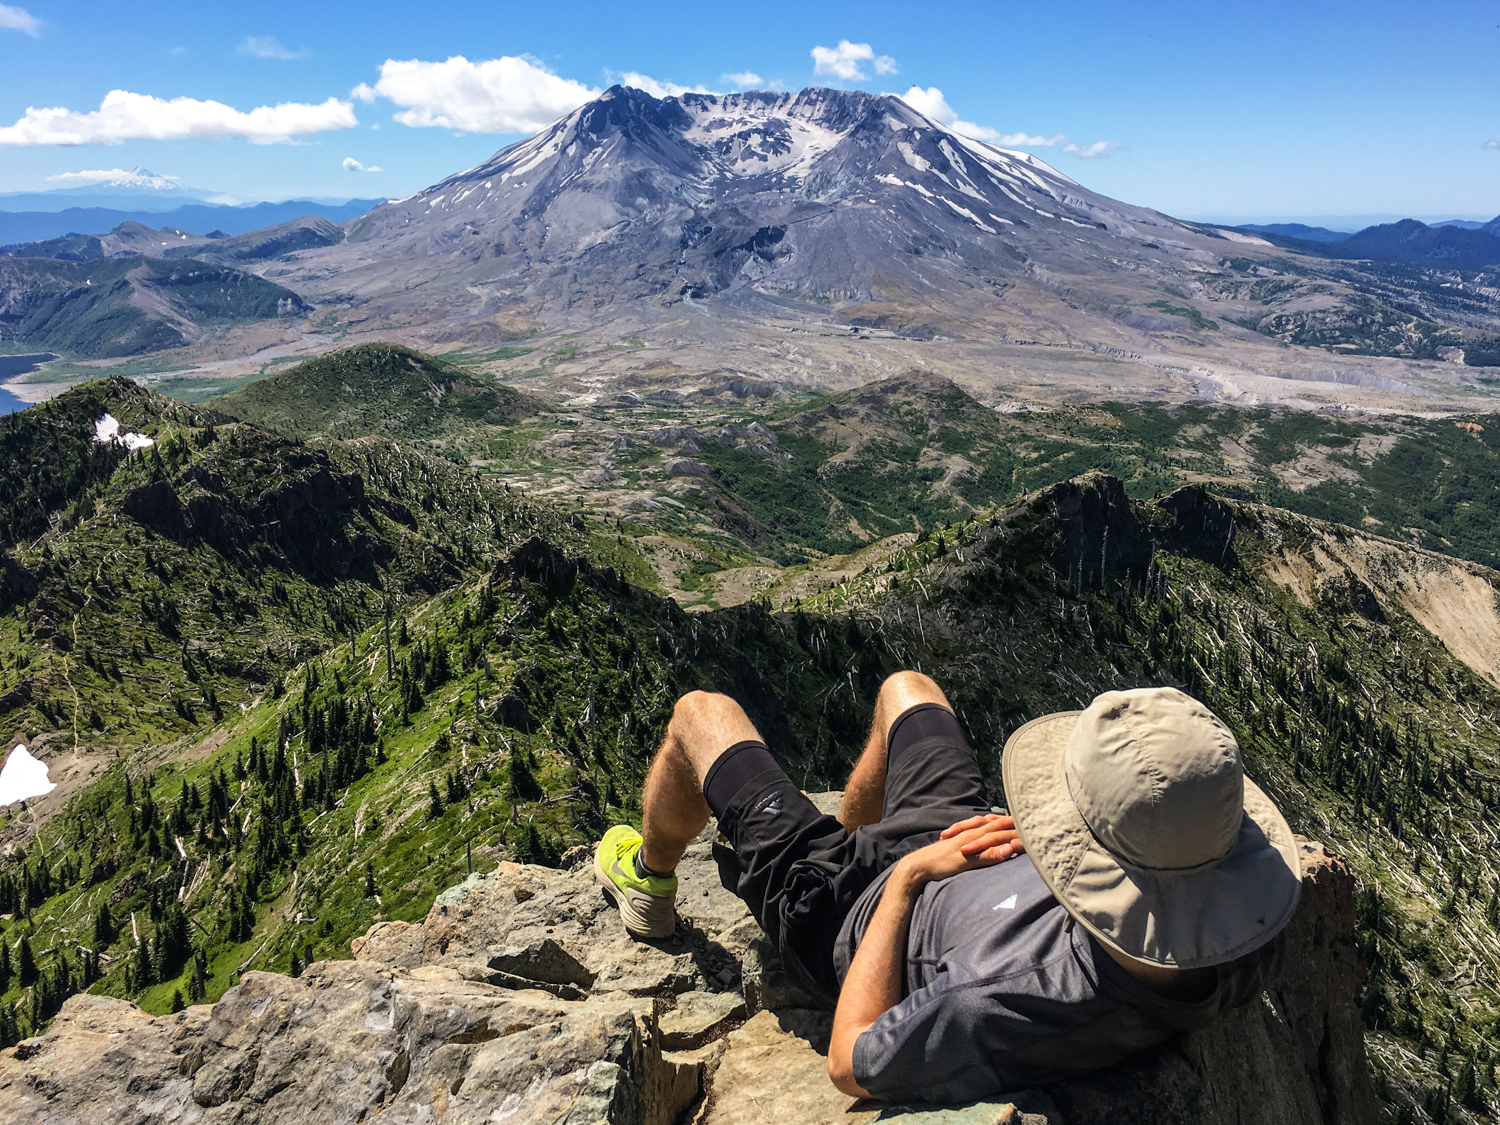
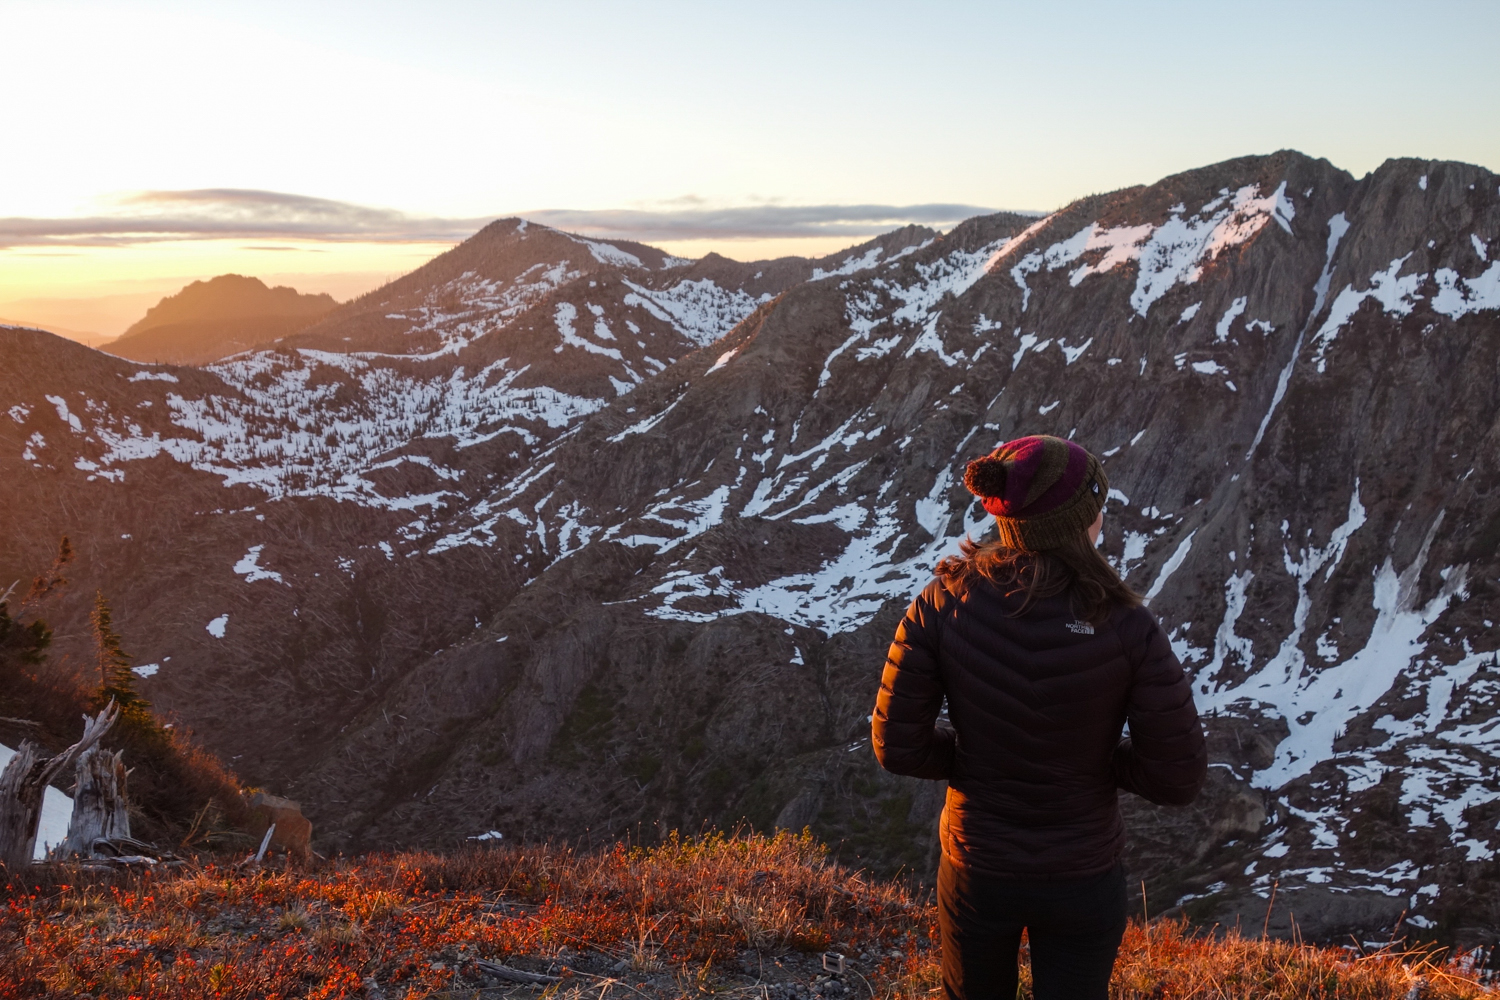
Lying just north of the Mount St. Helen’s National Volcanic Monument, the Mount Margaret Backcountry provides sweeping views of the blast zone caused by the 1980’s eruption and the surrounding peaks of Mt. Hood, Mt. Adams and Mt. Rainier. It remains one of the more geologically interesting places to hike, as more than 30 years after the explosion you can witness signs of the devastation and the resilient ecological comeback.
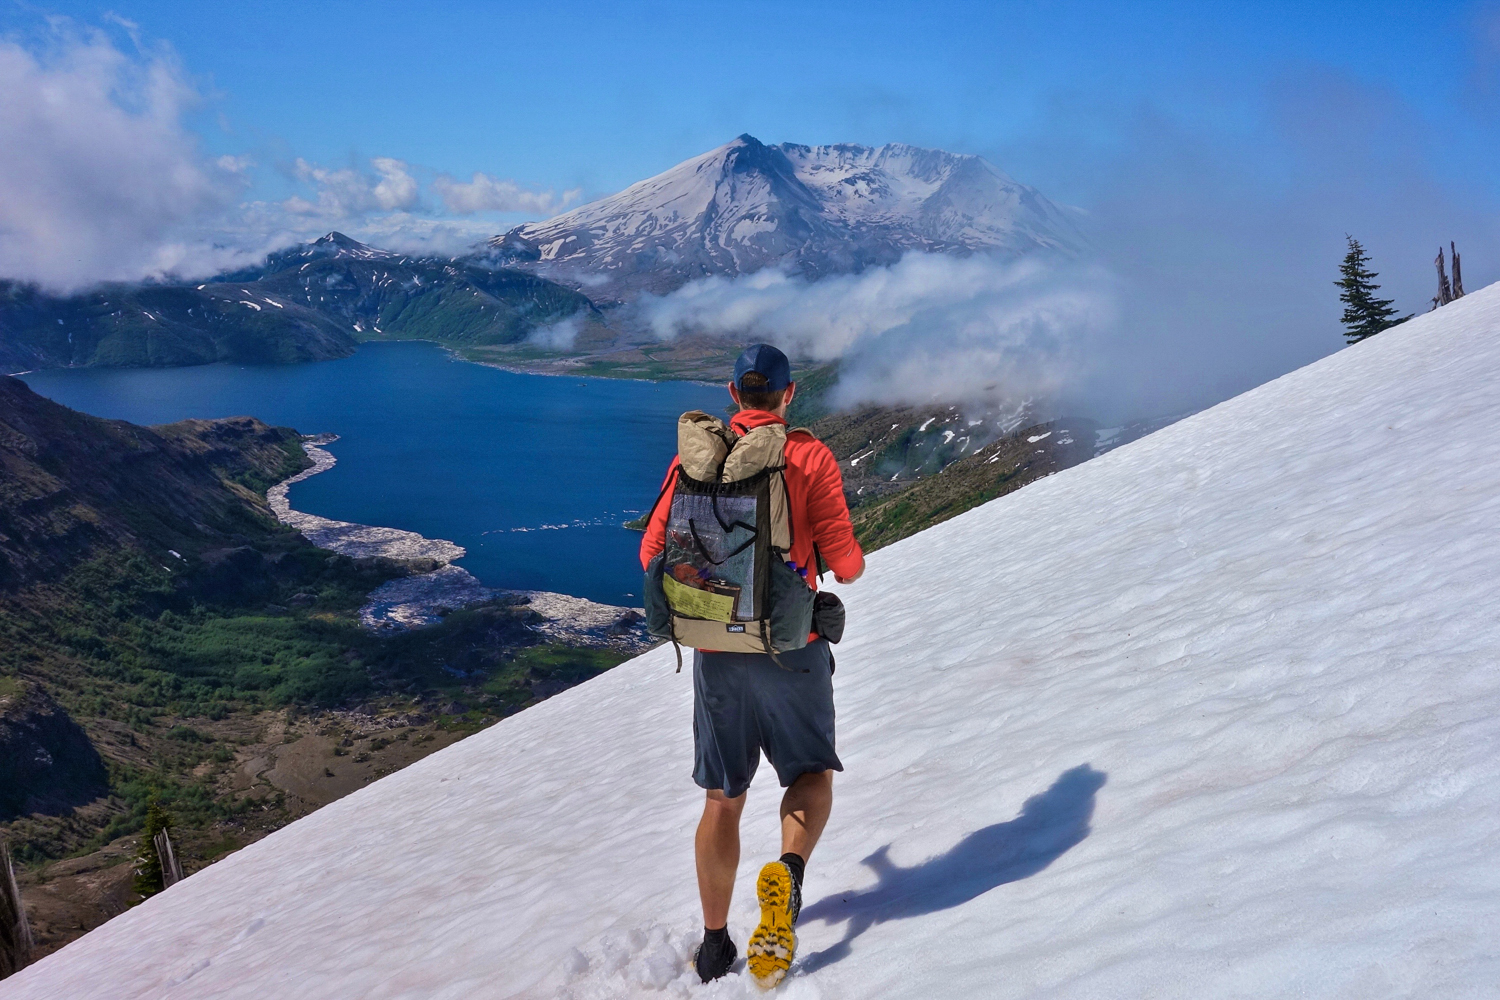
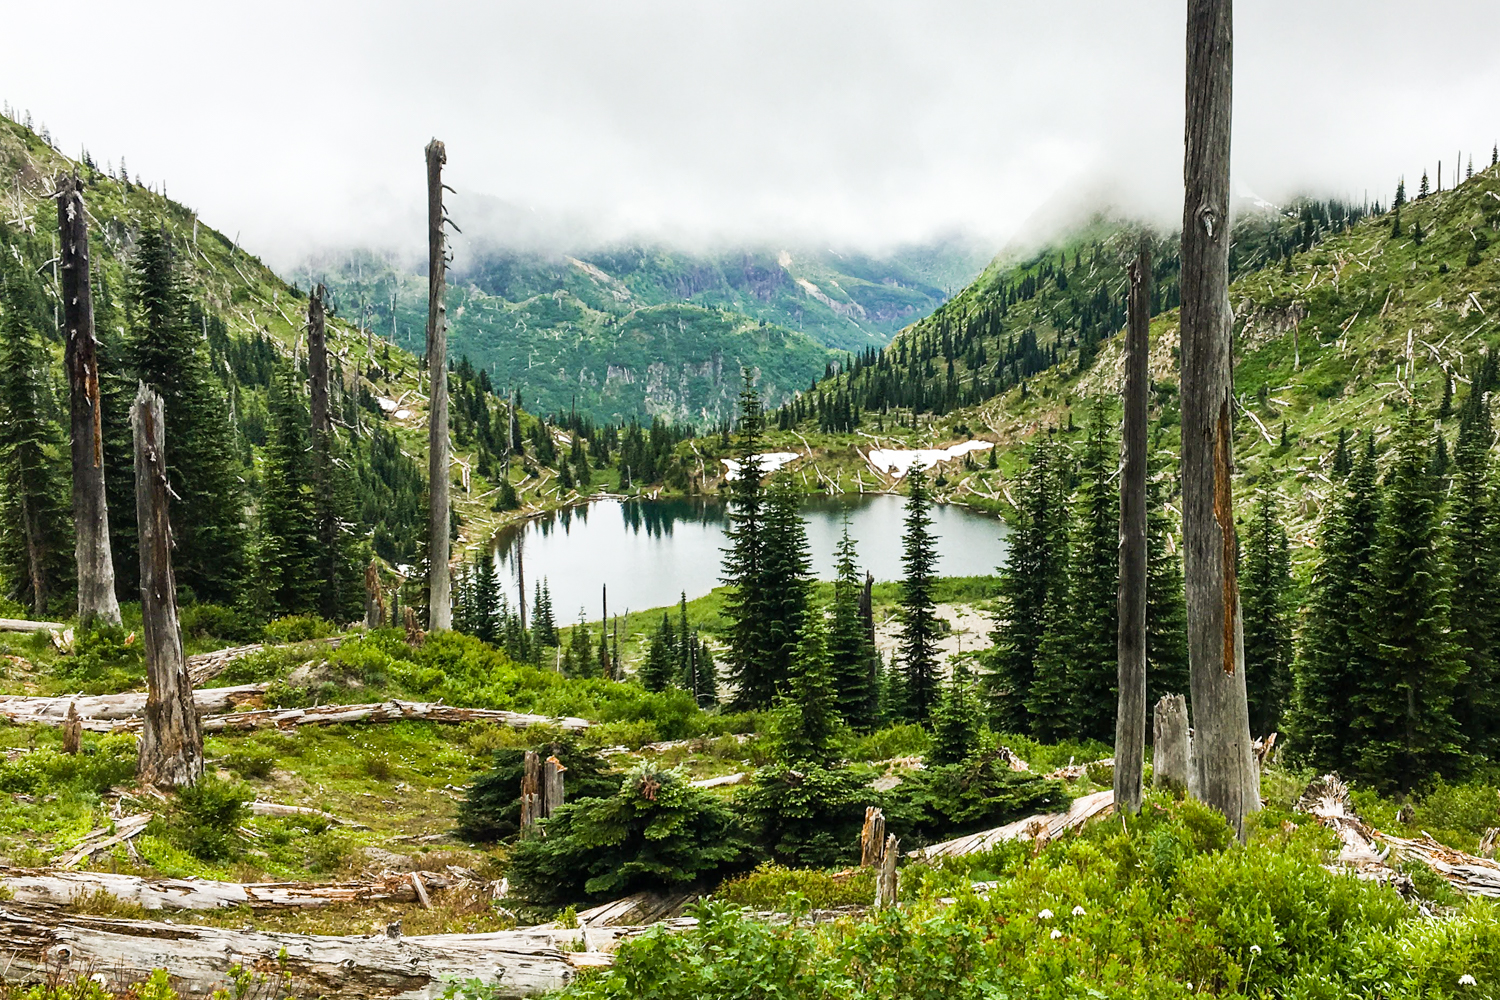
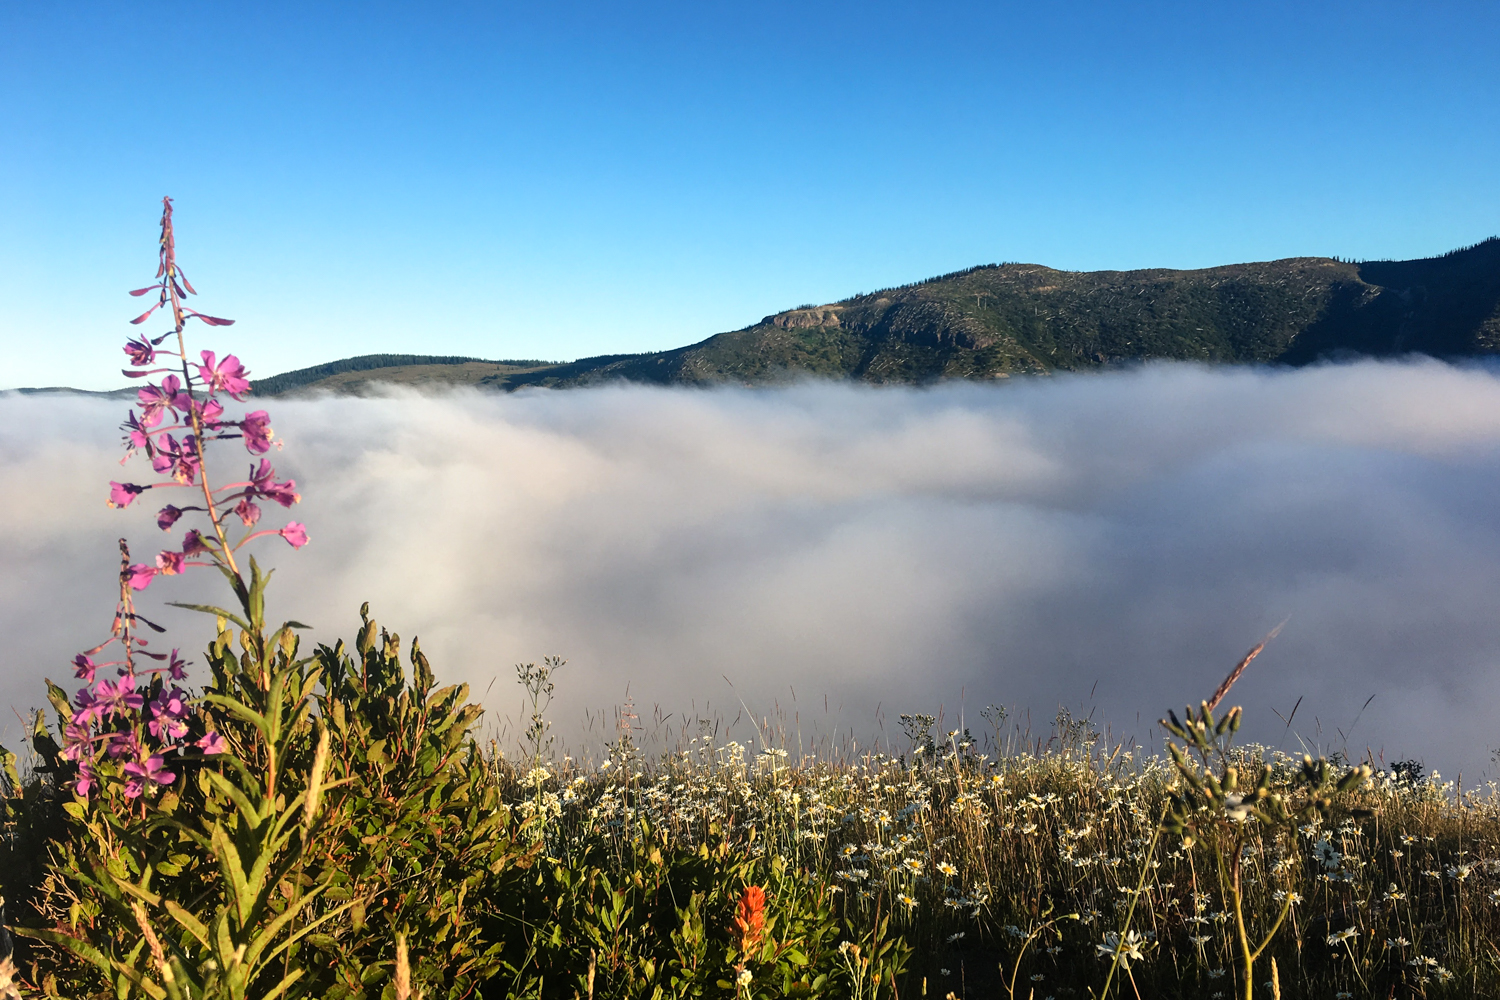
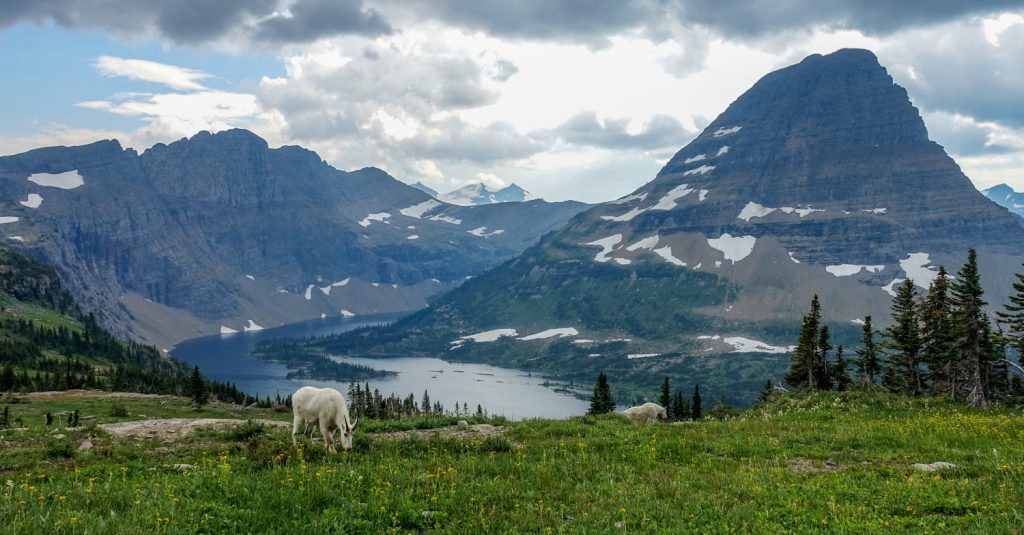
With spectacular views, abundant lakes and wildflowers that persist into early August, the Mount Margaret Backcountry provides an incredible chance to get away without having to travel far from either Portland or Seattle. Elk and mountain goats are not uncommon sights along the Lakes Trail and well-maintained and permit-controlled campsites make this area delightful to explore.
Quick Facts
Distance: Varies, 25-35 miles depending on trip
Days Needed: 2-4 days
Elevation Gain/Loss: varies, 3-6k depending on trip
Best Time to Travel: Late July – October
Permits: Yes, overnight permits for each campsite available
Difficulty: Moderate – Strenuous, depending on itinerary
Highlights
- Views of Mount St. Helens blast zone and surrounding peaks
- Numerous alpine lakes
- Beautiful wildflowers
- Fairly ample water sources
- Ecosystem and wildlife diversity
- Trails are well-marked and easy to navigate
- Easy permit process
- Good campsites
- Well-maintained composting toilets at all campsites
- Close proximity to Portland and Seattle
Lowlights
- Seasonal bugs (biting flies & mosquitoes)
- Snowpack can linger late into hiking season
- Busy on summer weekends
- Limited shade and potentially hot summer weather
- Steep ascents and descents
- Lesser used trails can be overgrown and washed out
Best Time to Travel
Late July to early October will provide the best trail conditions and weather. Snowpack is a key factor for trip planning in this region. Some years a heavy winter snowpack and early season storms will keep trails covered into July. On warmer years with lighter snowpack, June backcountry trips are quite feasible. The same is true for autumn hiking, some years early snowstorms make this area inaccessible and other years it’s stable into October.
In the Mount Margaret area, especially during shoulder seasons, there are often large, steep snow fields found on north and east exposures above 5,000 feet. Taking these sections slowly and moving cautiously is recommended. When snow travel is expected, we recommend packing microspikes and an ice axe for stability and safety (more info: ice axe self arrest video). Always contact a local ranger station prior to your trip to obtain current information on trail conditions and snow level.
July and August are usually great for wildflowers, but that’s also the time when mosquitoes will be at their peak. Use a combination of permethrin on your clothing and a small amount of 30% DEET on exposed skin for full protection. Mid-August through September can also be a good time to visit this area because there will be fewer crowds and bugs.
Difficulty
- Total Distance: varies, 20-50 miles
- Total Elevation Gain: varies, 3-6k (fairly steep ascents and descents)
- Overall Difficulty: Moderate to Strenuous
As always, difficulty ratings depend on your experience, physical fitness, pack weight, & weather conditions. There is one primary trail system in the Mount Margaret Backcountry, and regardless of the route you pick, you’ll encounter some elevation changes. It’s also possible that you’ll encounter snowy slopes, so make sure you are adequately prepared for this type of travel.
Know your limitations, brush up on your skills, and dial in your lightweight gear. Doing so will make for a safe and enjoyable adventure.
Permits
According to the USDA Forest Service, wilderness permits are required for overnight trips in the Mount Margaret Backcountry. There are eight designated camps available, each with two permits available nightly (up to four people per permit). Permits can be reserved online and are $10 per night. Also, many trailheads that access Mount Margaret Backcountry require a valid Recreation Pass.
Fires, dogs, and stock are not allowed in the Mount Margaret Backcountry.
Solitude
There are many day hikers along the Lakes, South Coldwater, and Boundary Trails, however there’s solitude to be found as you hike farther from trailheads. The limited backcountry permits keep the campsites from getting overrun and ensure you’ll have a quiet place to set up camp.
Getting There
The west edge of the Mount Margaret Backcountry is 100 miles north of Portland, Oregon and 150 miles south of Seattle, Washington. Whether you’re coming from the north or the south, you’ll take I-5 to the Spirit Lake Memorial Highway 504. Once your itinerary is set, get specific directions to your trailhead and ensure you have an appropriate vehicle for road conditions.
Backcountry Campsites
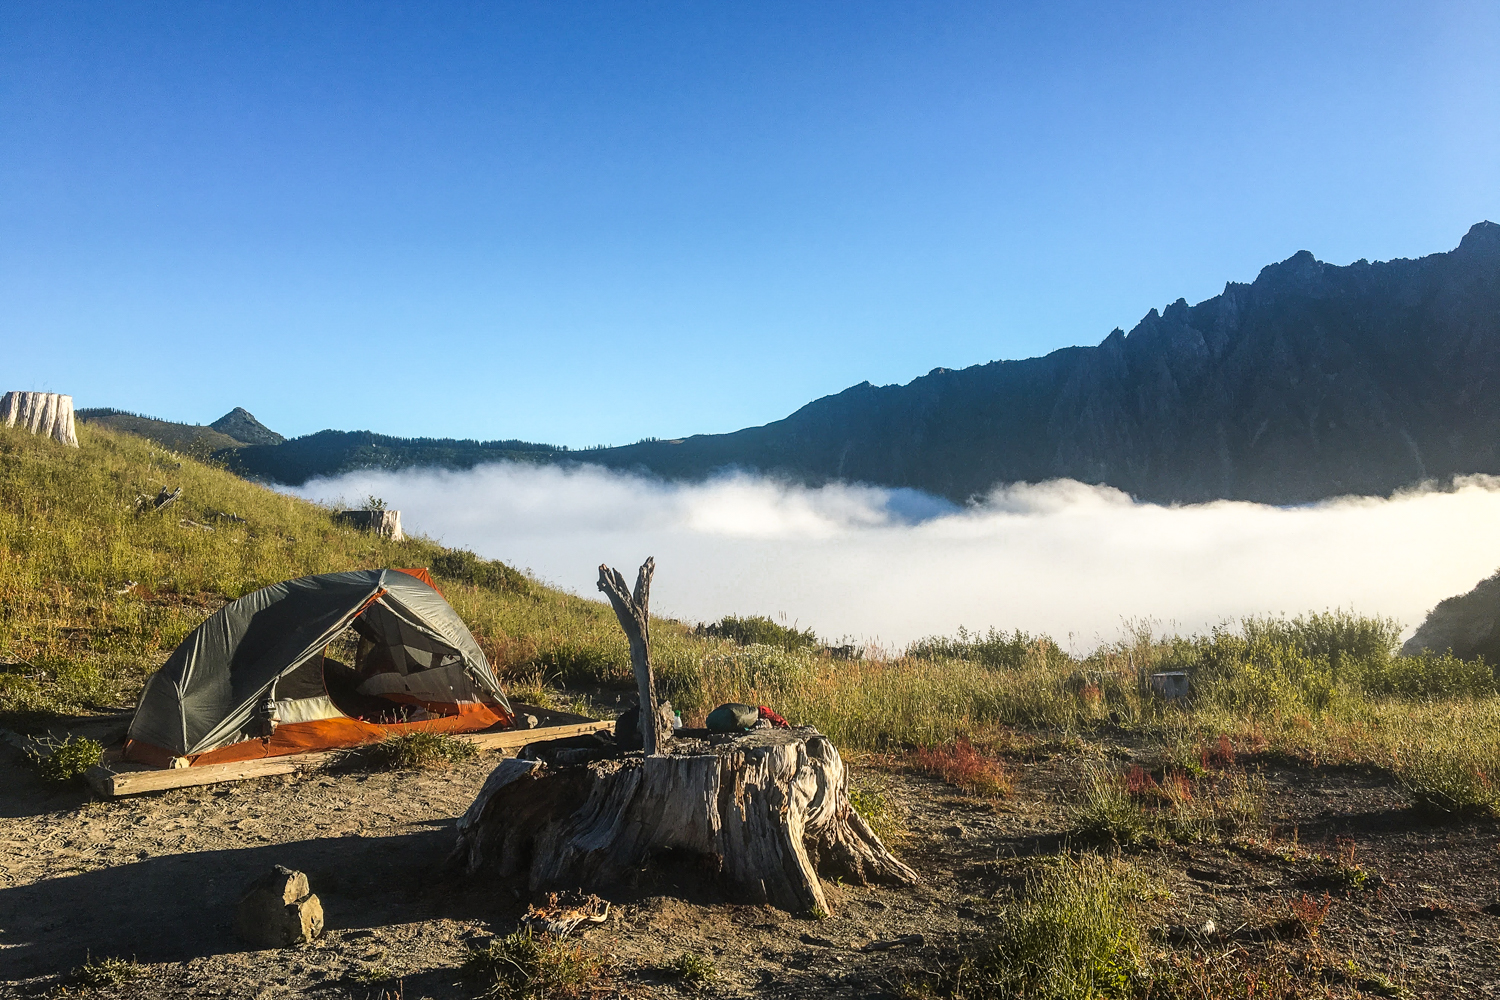
The Mount Margaret Backcountry has eight backcountry camps available, each offering two permits per night. All campsites have level wood-framed tent pads and solar composting toilets.
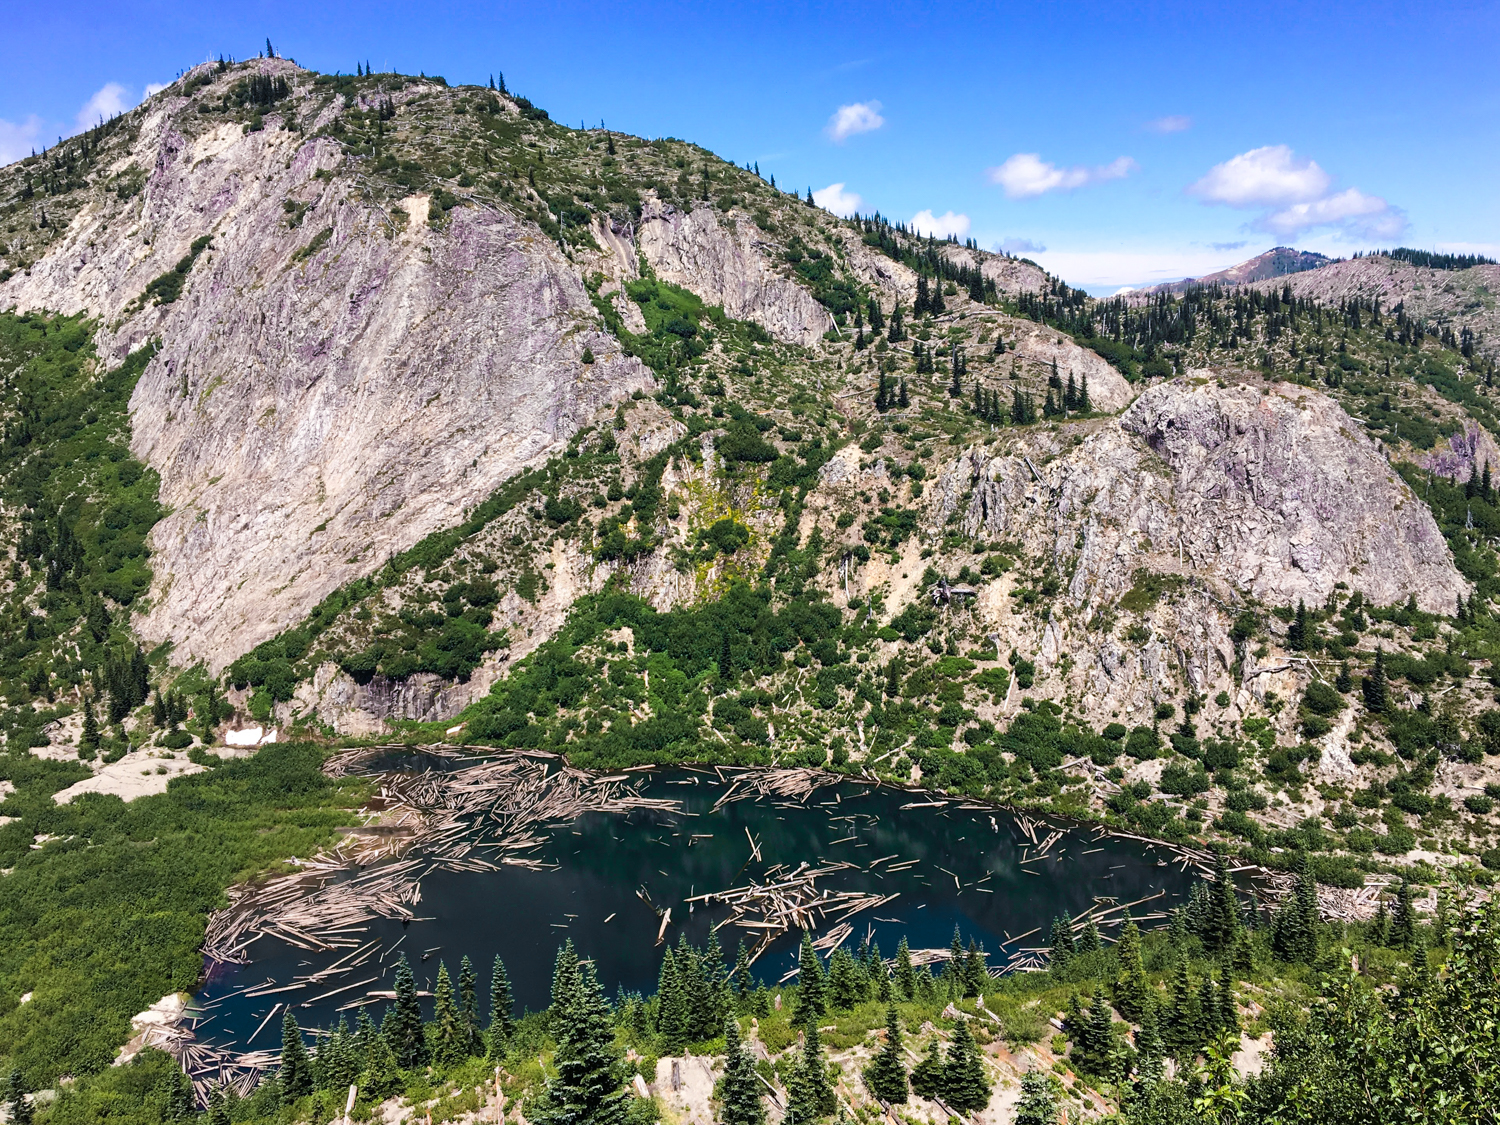
Along the Lakes Trail (211) there are campsites at Snow Lake, Shovel Lake, Panhandle Lake and Obscurity Lake. Along the Boundary Trail (1) camping is available at Bear Camp, Margaret Camp, and Dome Camp. Along the Coldwater Trail (230) camping is available at Ridge Camp. This is the only camp in the Mount Margaret Backcountry without reliable water access, with the nearest water approximately ½ mile away.
Trailheads
There are four primary trailheads with access to the Mount Margaret Backcountry: Lakes Trail, South Coldwater Trail, and Boundary Trail to the west and the Norway Pass Trail to the east.Well-maintained and paved, highway 504 provides easy access to the western trailheads. Forest Roads 99 and 26 provide access to the Norway Pass trailhead, and may be sesonally closed. The Gifford Pinchot Forest Service site is your best resource for road and weather information.
The Whittier Ridge Trail (214) provides a connector between the Lakes Trail (211) to the north and the Boundary Trail (1) to the south. This trail is very narrow and requires scrambling across steep terrain with sheer dropoffs. None of the suggested trips include the Whittier Ridge Trail, and it should be approached with caution and considered only by very experienced hikers comfortable with heights.
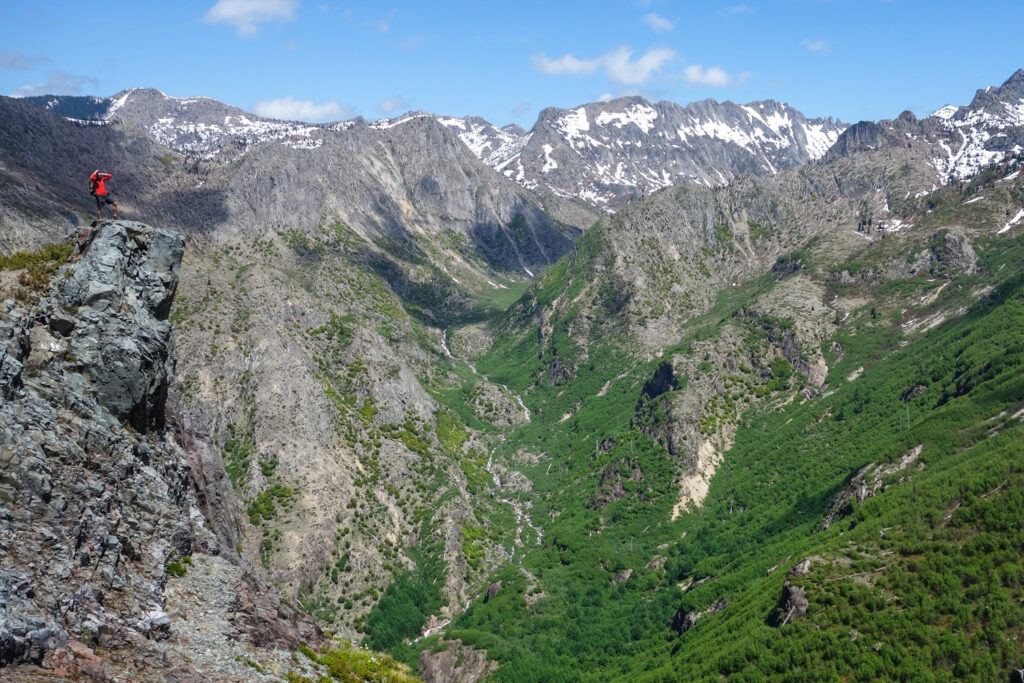
There are some worthwhile side trips to the summits of Coldwater Peak, Mount Margaret and Harry’s Ridge which provide great opportunities for additional mileage and breathtaking views.

Backpacking Trip Itineraries
Mount Margaret Lakes Loop
- Trailhead: Coldwater Lake Boat Launch
- Miles: about 30
- Days Needed: 3-5
Quick Summary: This loop covers a wide section of the Mount Margaret Backcountry, and includes some serious climbing as it takes you to to numerous lakes and to the highest points for breathtaking 360 views. The campsite at Shovel Lake is often overlooked because accessing it requires a steep 400 foot descent (and then ascent) in ½ a mile, but the lower traffic means greater solitude. This trip includes the ability to climb to the top of Mount Margaret and Coldwater Peak, each offering spectacular views of the blast zone and the surrounding mountains.
Route: From the Coldwater Lake Boat Launch, take the Lakes Trail (211) past campsites at Snow, Shovel, Panhandle and Obscurity Lake. At the Boundary Trail (1) junction, turn right and continue past Margaret and Dome Camps, passing Mount Margaret on your way. Follow the Boundary Trail until turning right at the Coldwater Trail (230) junction and continue past Ridge Camp to the Coldwater Trail before turning right at the South Coldwater Trail (230A) junction, which connects back to the Lakes Trail.
Norway Pass Lakes Loop
- Trailhead: Norway Pass
- Miles: about 25
- Days Needed: 2-3
Quick Summary: Approaching the Mount Margaret Backcountry from the east, this loop is a slightly shorter option with more gradual climbs than the Lakes Loop. The trailhead at Norway Pass may be inaccessible depending on road conditions, so call ahead to the Ranger Station before selecting this route. This loop passes through Norway and Bear Passes, both providing incredible views.
Route: From the Norway Pass Trailhead, follow the Boundary Trail (1) until the junction with the Lakes Trail (211), turning left and continuing along the Boundary trail, passing three possible campsites at Bear, Margaret and Dome Camps, before reaching the Coldwater Trail (230) junction. Turn right and continue to the South Coldwater Trail (230A), passing Ridge Camp, and continuing to the Lakes Trail (211) and turning right. The Lakes Trail passes camps at Snow, Shovel, Panhandle and Obscurity Lakes before reaching Bear Pass and the junction with the Boundary Trail.
Johnston Ridge to Coldwater Lake
- Trailhead: Johnston Ridge Observatory
- Miles: about 25
- Days Needed: 2-3
Quick Summary: This trip requires a shuttle or second car, but provides a great way to see the best of the Mount Margaret Backcountry with a more net downhill profile and a chance to bone up on your Mt. St. Helen’s knowledge before hitting the trail. Starting at the Johnston Ridge Observatory, this trip provides the option of side trips to Harry’s Ridge, Coldwater Peak and Mount Margaret, while approaching the lakes section from above, avoiding the strenuous climb up.
Route: From the Johnston Ridge Observatory, follow the Boundary Trail (1) heading east and passing possible campsites at Dome, Margaret and Bear Camps until it connects with the Lakes Trail (211) at Bear Pass and turning left. Continue along the Lakes Trail past Obscurity, Panhandle, Shovel and Snow Lake Camps until reaching the Coldwater Lake Boat Launch.
Maps & Guidebooks
- Backpacking Washington Book – This book has several hikes in the Mount St. Helens area, offering comprehensive and detailed information. We highly recommend picking this book up if you like backpacking in the PNW.
- We used Caltopo to research, plan trips, and print maps for the Mount Margaret Backcountry. It takes a little time to learn the tool, but Caltopo is an excellent resource for backpackers, and provides excellent elevation profiles and terrain information.
- Though trails are well-marked through the Mount Margaret Backcountry, the Gaia GPS Phone App is a very helpful tool in the backcountry. We always bring printed topo maps and a good compass, but Gaia is one of our favorite navigation tools.
- Basic USDA Forest Service Information – Mount Margaret Backcountry
Water
Water is fairly accessible throughout the Mount Margaret Backcountry, with a few exceptions. The lakes and streams along the Lakes Trail and portions of the Boundary Trail (from Dome Camp east to Bear Pass) provide ample opportunities to fill up with clear, moving water. The Coldwater Trail (230) provides few reliable water sources with small streams likely to dry up late in the season. Carry plenty of water between on the Coldwater Trail and Boundary Trail south of Dome Camp. Always carry a lightweight water purification method, such as the SteriPEN Ultra, Sawyer Squeeze, or Aquamira drops.
Bugs
Biting flies and mosquitoes are seasonally present and can be aggressive in the Mount Margaret Backcountry. Be sure to prepare for this annoyance with permethrin on your clothing and by carrying and applying DEET on exposed skin for full protection.
Navigation
The trails in the Mount Margaret Backcountry are well defined and easy to follow. Signage at some trail junctions may be weathered or confusing, and some less traveled trails may be overgrown. Some sections are overgrown to the point that your legs will quickly get scratched up, so long pants may be beneficial.
As always when backpacking, make sure to carry a physical map, a good compass, and know how to use them.
Backpacking Gear
We prefer lightweight backpacking because it’s more comfortable and it allows us to cover more ground with less effort. For recommendations on our favorite lightweight backpacking equipment, check out the CleverHiker Gear Guide and Top Picks page.
Gear List
Make sure to check out our Ultimate Backpacking Checklist, so you don’t forget something important.
Below you’ll find our current favorite backpacking gear. If you want to see additional options, our curated gear guides are the result of many years of extensive research and hands-on testing by our team of outdoor experts.
BACKPACK
- Best Backpacking Pack Overall: Gregory Paragon 58 – Men’s / Gregory Maven 58 – Women’s
- Best Ultralight Backpacking Backpack: Hyperlite Mountain Gear Unbound 40
- More: Check out our best backpacking backpacks guide for ultralight and trekking options
TENT
- Best Backpacking Tent Overall: Big Agnes Copper Spur HV UL2
- Best Ultralight Tent: Zpacks Duplex
- Best Budget Tent: REI Half Dome 2
- Best Tent Stakes Overall: All One Tech Aluminum Stakes
- More: Check out our best backpacking tents guide for more options
SLEEPING BAG/QUILT
- Best Sleeping Bag Overall: Men’s Feathered Friends Swallow YF 20 / Women’s Feathered Friends Egret YF 20
- Best Quilt Overall: Enlightened Equipment Revelation 20
- More: Check out our best backpacking sleeping bags guide and best backpacking quilts guide for more options
SLEEPING PAD
- Best Sleeping Pad Overall: NEMO Tensor All-Season
- Best Foam Sleeping Pad: NEMO Switchback
- More: Check out our best backpacking sleeping pads guide for ultralight and trekking options
CAMP KITCHEN
- Best Backpacking Stove Overall: MSR PocketRocket 2
- Best Backpacking Cookware Overall: TOAKS Titanium 750ml
- Best Backpacking Coffee Overall: Starbucks VIA
- More: Check out our best backpacking stoves guide and best backpacking cookware guide for ultralight and large group options
WATER & FILTRATION
- Best Water Filter Overall: Sawyer Squeeze
- Best Hydration Bladder Overall: Gregory 3D Hydro
- Best Backpacking Water Bottles: Smartwater Bottles
- More: Check out our best backpacking water filters guide and best backpacking water bottles guide for ultralight and large group options
CLOTHING
- Best Hiking Pants Overall: Men’s Outdoor Research Ferrosi / Women’s The North Face Aphrodite 2.0
- Best Hiking Shorts Overall: Men’s Patagonia Quandary / Women’s Outdoor Research Ferrosi
- Best Women’s Hiking Leggings: Fjallraven Abisko Trekking Tights HD
- Best Rain Jacket Overall: Men’s Patagonia Torrentshell 3L / Women’s Patagonia Torrentshell 3L
- Best Rain Pants: Men’s Patagonia Torrentshell 3L / Women’s Patagonia Torrentshell 3L
- Best Down Jacket Overall: Men’s Patagonia Down Sweater Hoodie / Women’s Patagonia Down Sweater Hoodie
- Best Fleece Jacket Overall: Men’s Patagonia Better Sweater / Women’s Patagonia Better Sweater
- Best Sunshirt Overall: Men’s Outdoor Research Echo / Women’s Outdoor Research Echo
- Best Socks Overall: Men’s Darn Tough Light Hiker Micro Crew / Women’s Darn Tough Light Hiker Micro Crew
- Beste Ultralight Liner Glove: Patagonia Capilene Midweight Liner
- More: Check out our best backpacking apparel lists for more options
FOOTWEAR & TRACTION
- Best Hiking Shoes Overall: Men’s HOKA Speedgoat 6 / Women’s HOKA Speedgoat 6
- Best Hiking Boots Overall: Men’s Salomon X Ultra 5 GTX / Women’s Lowa Renegade Evo GTX
- Best Hiking Sandals Overall: Men’s Chaco Z/1 Classic / Women’s Chaco Z/1 Classic
- Best Camp Shoes Overall: Crocs Classic Clogs
- Best Traction Device for Hiking Overall: Kahtoola MICROspikes
- More: Check out our best backpacking footwear lists for more options
NAVIGATION
- Best GPS Watch Overall: Garmin Instinct 2 Solar
- Best Personal Locator Beacon (PLB): Garmin inReach Mini 2
- More: Check out our article How to Use Your Phone as a GPS Device for Backpacking & Hiking to learn more
FOOD
FIRST-AID & TOOLS
- Best First-Aid Kit Overall: Adventure Medical Kits Ultralight/Watertight .7
- Best Pocket Knife Overall: Kershaw Leek
- Best Multitool Overall: Leatherman Wave+
- Best Headlamp Overall: Black Diamond Spot 400-R
- Best Power Bank Overall: Nitecore NB 10000 Gen 3
- More: Check out our best first-aid kit guide, best pocket knife guide, best multitool guide, best backpacking headlamps guide, and best power banks guide for more options
MISCELLANEOUS
- Best Trekking Poles Overall: Black Diamond Pursuit
- Best Backpacking Chair Overall: REI Flexlite Air
- Best Backpacking Stuff Sack Overall: Hyperlite Mountain Gear Drawstring
- More: Check out our best trekking poles guide, best backpacking chairs guide, and best stuff sacks guide for more options
Bears & Food Storage
The Mount Margaret Backcountry lists no specific food storage requirements, however bear and cougar sightings are not uncommon in this area. Marmots, chipmunks and other small critters are prevalent and food storage should be taken seriously.
For trips in the Mount Margaret Backcountry, we recommend using an Ursack for food storage. Bear canisters are also a good choice as a foolproof food storage method, but they’re a bit heavier and bulkier than Ursacks.
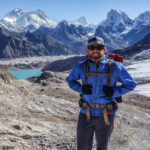
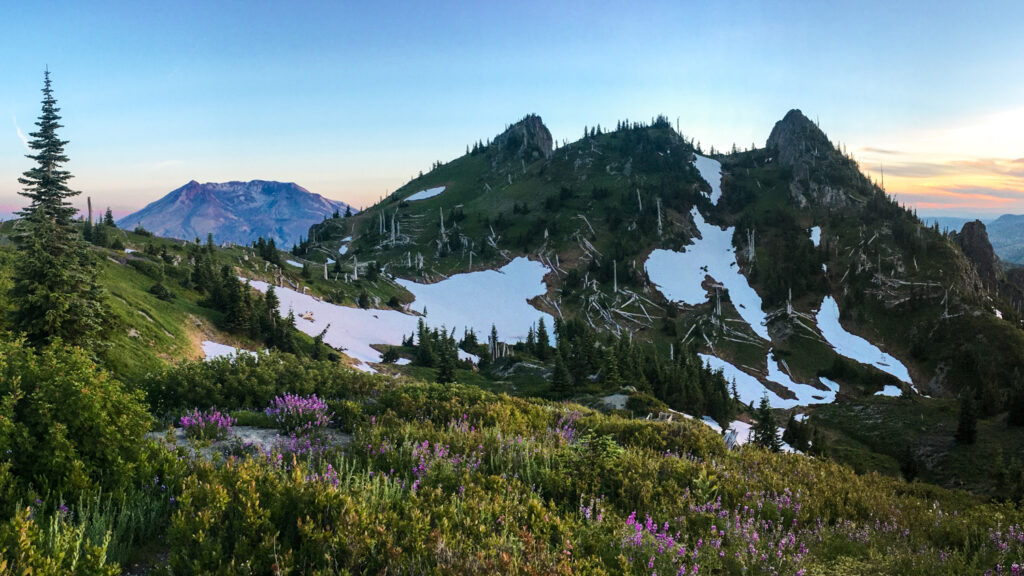
Mount Margaret Photo Gallery